Whatever they say about the increased reliability of Windows 2000 / XP, sometimes it still fails. True, compared to its predecessors, Windows 9x / Me, this happens much less often. And since with the OS you lose full access to the files native to Windows 2000 / XP file system NTFS, then you need to do something to return the system to working condition without a complete reinstallation of the OS, programs and settings.
Which recovery tool is right for you?
It will be painfully slow, though, but in an emergency it may be exactly what you need to get the job done, even when your entire system crashed. You can also run file recovery and data recovery software deleted files. While most modern backup and image processing programs allow you to back up your system even when it starts up, they often require a reboot to the rescue disk for recovery system disk. They will not work in such conditions.
The possibility of a successful recovery depends on how prepared you are for the failure. To do this, it doesn’t hurt to install, while your system is still viable, special programs.
It is also important to understand the origin of possible system failures during boot before they occur and to outline what actions should be taken to resolve the failure. The following are the causes of the most common boot failures in Windows 2000 / XP: damage or removal of important system files (for example, system registry files, ntoskrnl.exe, ntdetect.com, hal.dll, boot.ini);
Before you begin, you will need the following things. There is no need to download other things listed there. Save the file somewhere on your system. I assume that you have already received this file in the following steps. The disk that you create in this guide is also only a rudimentary disk with specific software. Create another folder somewhere on your hard drive and name it “save” or another name if you want. Please note that if you do not agree with this, you will not be able to continue the following steps. Not all the programs listed here are really available - some of them require that you buy the software yourself and manually enable it here. You will see that the Yes flag changes to No. Similarly, do the same for the following elements: it is used for stress testing hard drives. Disk Snapshot - Disable it. This is a useful commercial backup and recovery program.
- Download it now and save the file somewhere on your hard drive.
- The following steps assume that you have already uploaded the file.
- Get the latest version.
- installing incompatible or faulty services or drivers damage or removal of services or drivers necessary for the system;
- physical damage or disk failure;
- damage to the file system, including a violation of the directory structure, the main boot record (MBR) and boot sector;
- the appearance of incorrect data in the system registry (if the registry is physically intact, the records contain logically incorrect data, for example, beyond the permissible values \u200b\u200bfor services or drivers);
- incorrectly set or too limited permissions on the \\% systemroot% folder.
OS recovery tools can be divided into regular, included in windows distribution 2000 / XP, and third-party utilities. Today we will focus on regular means that do not need to be downloaded or bought additionally. Let's start with the utilities included with both Windows 2000 and Windows XP, and then consider the new tools that appeared in the latest version.
Commands Used in ERC
If you receive error messages when the process stops, you can use the buttons at the bottom of the window to execute the errors. Similarly, downloading and running programs with emergency disk also takes longer. This article is part of our archive and is most likely out of date. You will notice the “Plugins” button, which will enable or disable functions on the bootable CD.
There are many really useful utilities, for example, which you can use to create full backups of your hard drive. The good news is that it probably doesn't matter. Of course, as with many recipes, acquiring the ingredients is often the hardest part.
Windows 2000
To create a disk disaster recovery, or Emergency Recovery Disc (ERD) in Windows 2000, you must go through the chain " Start -\u003e Programs -\u003e Accessories -\u003e Utilities -\u003e Data Archiving", Press the button" Disaster Recovery Disk". In the window that appears, you will be prompted to insert a formatted diskette. Do not forget to check the box next to " Archive the registry to the recovery folder". As a result, we get a diskette where three files will be located: setup.log, autoexec.nt, config.nt, and in the% systemroot% directory the Repair folder will be created with backup copies of the registry files.
Go ahead and read another story. Of course, a 25-digit key may be useful to you if you have a software license. From the Start menu, select Run. If all goes well, the process will take a minute or two, and then complete with a simple “Completed” field. Otherwise, if you see an error, that’s what it means.
Delete the file and try downloading again. If you have a computer from one of the following manufacturers, read this guide. Some older models had only a recovery disk or only a recovery partition. The boot disk or boot disk is not an installation disk!
Windows XP
Here, instead of creating an ERD, a similar but more powerful Automated tool is proposed. System recovery (ASR). which allows you to back up the entire system using modern and common high-capacity media such as CD-R / RW or hard disks (also tapes if someone has a streamer).
Recovery Using Rescue Disk
Windows 2000
You can use the following formats to create a disc. 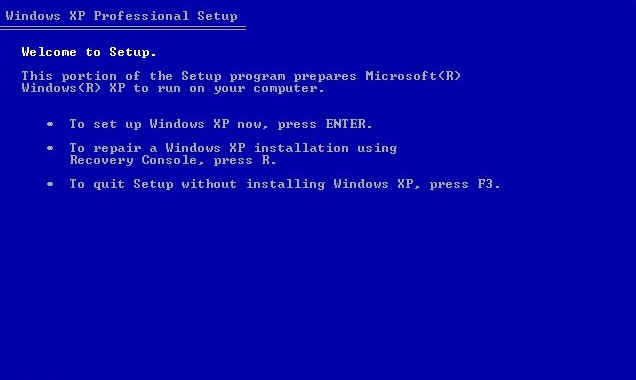
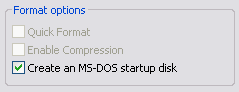
After creating your floppy disk, follow these instructions to use it when you need it. To create these discs, you must provide 6 blank, formatted, and high-density discs. Please specify the floppy drive for copying images: Insert the first blank disk into the floppy drive when you receive this message: Insert one of these drives into the drive letter. 
- Make sure the disc is in write-protect mode.
- Insert the disk into the floppy disk.
- Reboot the computer.
- Following the instructions on the screen when booting the system from a floppy disk.
- Press any key when ready.
- Continue the process until all 6 discs are created.
- Boot from the first diskette you created.
To restore the registry using the ERD disk and the Repair directory, you need to run the setup program, which installs Windows 2000. When this program starts, it will find all the installed Windows 2000 operating systems and the corresponding Repair directories, after which it will provide you with three options:
- start installation;
- fix a damaged configuration;
- exit unchanged.
First of all, try to fix the system. To do this, you have to choose how the recovery will occur:
If you want to create a boot disk, follow the instructions and instructions. To verify this, follow these steps: 
Please read above before continuing with these instructions. 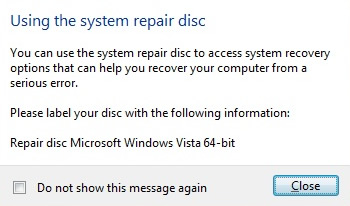
If you want to repair your computer and install the installation disk at hand, follow these steps to download the system recovery options on your computer.
- through the recovery console
- using the disaster recovery operation.
We will consider the work of the first paragraph in the next section, and now we will go straight to the second. We are again offered a choice of two points: manual mode; fast, auto mode.
We choose the first point, because it’s somehow calmer when everything is under genuine control, and not someone determines the expediency of certain actions for us. Now you should select the program mode, setting the desired combination of items. There are only three of them:
If you do not have an installation disk, but your system has preinstalled system recovery options, follow these steps: 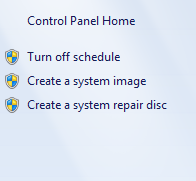
These three actions have different results. Reset will delete all your personal files and delete all settings or settings that you have made on your computer. If you have not disabled System Restore, restoring your computer using this utility should work.
- The update will not affect your files.
- Nonetheless, backup data before updating.
- analysis of the environment (boot.ini, ntdetect.com and some other important system files are checked and, if necessary, fixed);
- checking system files (all files located in the root folder and folders% systemroot% and% systemroot / system% are checked and, if necessary, corrected; this can help if one or several system files are damaged due to disk errors, especially if they happen on the NTFS partition, but this will lose the weight of the updates made by installing the Service Pack, and they will have to be reinstalled);
- boot sector analysis (the boot sector is checked and, if necessary, corrected).
The arrows move through the items, to select or cancel the item, press "Enter". By default, all items are selected. Then we select “Continue” (separate, fourth menu item), and the Setup program will perform the same check as during a normal installation, and will try to make corrections.
It comes with a program that formatted a boot diskette, complete with diagnostics and repair utilities. Good to know a little about them. And creating a repair disk takes only a few minutes. These files will not be available if you did not find the time to create an emergency boot disk.
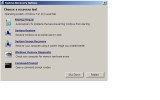
Even if you diligently did backups system image, you may need a rescue disk to restore the most recent image. This disk, created using the Backup and Recovery Center, can be used to perform recovery without a metal element, as well as for other diagnostic tasks.
- You forgot to provide an address email.
- This email address is not displayed.
- You have exceeded the maximum character limit.
- Enter your corporate email address.
If you have several Windows 2000 installed (for example, Russian and English), correctly specify the location of the Repair directory and use the appropriate disaster recovery disk. Nothing is more offensive than fixing an intact copy of windows 2000. Instead of Continue, you can press F3 to exit or Esc to go to the selection menu between the recovery console and the disaster recovery operation.
Figure 1: Backup and Restore Center. 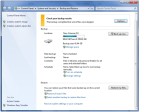
If you look at Figure 2 below, you will notice that there is a checkbox at the bottom of the screen that you can use to include the system image as part of your backup. Figure 2: Including a system image in a regular backup.
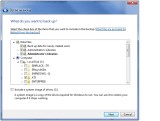
But having a system image is not suitable for you if you cannot restore it. The reason that the ability to create a system recovery disk is just below the option to create a system image is because you can use the system recovery disk to restore your system image. There are actually a few other things that you can use to restore your system drive. Ideally, they have both a system image and a regular backup.
Windows XP
To restore the XP system using ASR disks, boot from the bootable CD (distribution) and press F2 when the system prompts you to do this, and follow the system instructions.
Naturally, if you are restoring a system from ASR disks. then all changes made to it after creating ASR disks are lost.
Emergency recovery console
Another system recovery tool is the Emergency Recovery Console (abbreviated as ERC), which is included in the Windows 2000 / XP distribution. You can install ERC on a computer only after installing Windows 2000 / XP, for which you need to perform the following steps:
You can use a normal backup to restore individual files and folders, while a system image is used to restore pure metal. Figure 3: Creating a system recovery disk. 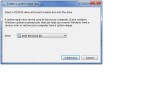
You cannot restore this system image without a repair disk. When you do this, you will be taken to the “System Restore Options” screen, as shown in Figure 4 below. Figure 4: The System Restore Settings screen.
Obviously, on this screen, which, as a rule, attracts the most attention, is the option “Restore the system image”. This is the option you would use if you want to restore a system image. However, in a corporate environment, you are much more likely to benefit from other options because corporations rarely have to back up individual workstations. Most of the time, if a failure occurs, the workstation is simply re-displayed, not restored.
- click the start button;
- select the option "Run ..." in the expanded menu;
- in the window that opens, enter the following command: M: \\ i386 \\ winnt32.exe / cmdcons, where M is the drive letter corresponding to the CD-ROM drive;
- click the "OK" button;
- follow the instructions that appear on the screen;
- reboot when installation is complete.
Installation will require about 6 MB in the system partition. If you have two physically in the system hard drive, on the first disk there are two sections C and E, and Windows 2000 / XP is installed on E, then the directory with the ERC files - cmdcons - will be on partition C. Now in the OS selection menu that appears when the system starts, there will be a new item - “Windows 2000 Recovery Console ”or“ Windows XP Recovery Console ”. Selecting this item will begin the download of ERC.
ERC, looked at the sections of your hard drives, lists all the Windows 2000 / XP installed on them, and prompts you to make a choice. You just need to enter the Windows 2000 / XP number with which you want to work. Then you will need to specify a password for the built-in system administrator account. When entering wrong password three times in a row will be forced to exit the ERC. Also, if the SAM database is missing or damaged, ERC cannot be used, since user authentication cannot be performed. After completing the authentication procedure, you will have at your disposal a command line interface and a limited set of commands.
The first option available to you is the Startup Recovery option. The second option on the list is the “System Restore” option. Snapshots are also automatically created before performing some tasks that make significant changes to the operating system, such as installing a service pack.
The idea is that if problems arise, you can flip the system to an earlier point in time before the problem occurs. For these three parameters, none of these disks need to be created in advance. A system recovery disk simply helps you get to those recovery points if the system does not boot. My experience is that if users suddenly start to receive blue screen death, and there have not been any changes in the operating system recently, the problem almost always occurs due to memory errors.
In order to access folders other than the system folder in ERC, you must perform the following steps in advance in Windows 2000 / XP. Under the administrator account, launch the local security policy applet: " Start-\u003e Programs -\u003e Administration -\u003e", or " Start -\u003e Settings -\u003e Control Panel -\u003e Administrative Tools -\u003e Local Security Policy". In the window that opens, in the policy tree, go further: " Security Settings -\u003e Local Policies -\u003e Security Settings -\u003e Recovery Console: Allow disk copying and access to all drives and folders", Set the value to" Enable". Then in ERC we execute the SET Allow All Paths \u003d TRUE command.
ERC can be used to solve problems caused by file system corruption. ERC includes several teams specifically designed for this. One of them is CHKDSK, which works similarly to the corresponding command from Windows 9x / Me. Another - FIXMBR - replaces the MBR (Master Boot Record) of the main partition of the system drive with a working copy. No less useful is the FIXBOOT command, with the help of which you can restore the boot sector that was damaged when installing another OS (when the ability to boot the Windows 2000 / XP operating system is lost). ERC has another command, DISKPART, which can be used to add and remove disk partitions.
ERC includes some more useful commands. Using the LISTSVC, DISABLE, and ENABLE commands, you can view a list of existing services, disable and start (respectively) these services and drivers. The importance of these commands can hardly be overestimated, especially if the boot failure is due to a defect in services or drivers. In ERC, simply disabling the start of a failed service or driver and rebooting the system is enough. In this case, you do not even need to edit or restore system registry.
If troubles happened even before the installation of ERC, you can start it from the Windows 2000 / XP installation diskettes or from the Windows 2000 / XP installation CD-ROM, as described in the previous section.
Unfortunately, with the help of ERC, not all problems that occur when loading the operating system can be solved. In some cases, ERC may not be enough to restore the system. ERC does not, for example, have tools to edit access rights to files or folders on a disk. They will have to be redefined manually. Finally, ERC may be unavailable in the event that damage that made it impossible to boot the OS also affected the ERC installed in the system. In this case, you will have to use either parallel installing windows 2000 / XP, or some third-party program.
New Windows XP Tools
Rollback driver
Very often, a system crash occurs when updating a device driver. Since the driver is essentially the same program, it sometimes contains errors that, in some configurations, lead to incorrect operation and, as a result, a system failure. Probably, remembering the proverb “the best is the enemy of the good,” the new Windows when updating the device driver does not delete the old one, but carefully preserves it in case problems arise. And when the new driver causes problems, the new Rollback Driver tool allows you to return the old one, that is, how to roll back system changes. Moreover, the built-in mechanism for checking driver compatibility may not allow installing a driver, which, according to Windows XP, is not suitable for it.
Remote assistance
Probably, often your friends and acquaintances asked you to help set up your computer by phone. Now available in Windows XP, the Remote Assistance service allows you to connect to remote computer and use it as local. Although this service, of course, also adds security problems.
System restore
Finally, the most useful system recovery tool is System Restore, which allows you to return it to a healthy state based on the concept of Restore Points. The idea is simple, like all ingenious: make the system itself track and record all changes that occur with system files. Such a mechanism will make it possible to roll back to a workable version of the system if the system files are damaged by illiterate user actions or installing incorrect drivers or programs. The System Restore mechanism automatically saves a set of system files before installing drivers or programs, and a system restore point is also created once a day.
When you start this service, you will be asked to choose whether to restore the system in accordance with the previously saved restore point or create a new restore point. Choose what you need, and then simply follow the instructions that appear on the screen. If the computer does not boot, try opening the Last Known Good Configuration, as described at the beginning of the article. Windows XP will restore the system using the last recovery point. Since each recovery point takes up space on your hard drive, it makes sense to delete unnecessary ones. To do this, do the following: “ Start -\u003e Programs -\u003e Accessories -\u003e Utilities -\u003e Disk Cleanup", Tab" Additionally". All points except the last are deleted. Also in the registry, you can set the life expectancy of recovery points by adjusting the RP Life Interval parameter in the section: HKEY_LOCAL_MACHINE \\ SOFTWARE \\ Microsoft \\ WindowsNT \\ CurrentVersion \\ System Restore. The type of the parameter is dword. The default value in seconds is 0076-700, which corresponds to 90 days.
Failures in the system can be caused by a variety of reasons, so giving any universal tips for system recovery can be quite difficult, but nothing prevents you, while Windows still continues to boot and work properly, to protect your computer and your data from all kinds of troubles.
Commands Used in ERC
- attrib - Display file and directory attributes
- cd, chdir - Change the current directory
- chkdsk - Check disk integrity
- cis - Screen cleaning
- copy - Copy a file
- delete, del - Delete a file
- dir - View directory contents
- diskpart - Add or remove disk partitions
- enable, disable - Enable or disable drivers and services
- extract - Unpacking SAV- windows files 2000
- fixboot - Boot sector recovery
- fixmbr - Master Boot Record Recovery
- format - Disk formatting
- listsvc - View services and their descriptors
- logon - Register to the selected NT / Windows 2000 installation
- map - Display drive letter
- mkdir - Create a directory
- type, more - Display file contents
- rmdir - Delete a directory
- repair - Updating a file-based installation from a Windows 2000 CD
- rename, ren - Rename a file or directory
- systemroot - Change directory to system (\\ winnt)
Compulsorily containing an antivirus tool on board and intended primarily to combat malware, professional resuscitation live disks have a different purpose and, accordingly, a little wider scope. Such disaster recovery boot disks are designed for use, if not by professionals, then at least by experienced users who have the basic skills to work with command line and console programs (with text user interface), and knowledge of English leaves much to be desired.
Professional rescue boot disks are used for software and hardware failures in the computer. Such disks are not intended primarily to combat Winlockers and other malware that prevents launch windows. Some of them, of course, can be understaffed with anti-virus bootable media from developers of protective software, but the essence of the existence of professional resuscitation disks in the software market is to identify and solve problems with booting windows, with the performance of the hardware of the computer and in extreme cases, the extraction of important data before reinstalling the operating system or before replacing the hard drive. Disaster recovery disks are an indispensable tool in the process of testing computer devices when they are purchased, especially in the secondary market. They can be used to bypass the password set as the input to accounts Windows and BIOS level.
Below we’ll look at the top five free emergency disks. recovery windowscontaining on board various functionality for almost all occasions.
Review participants:
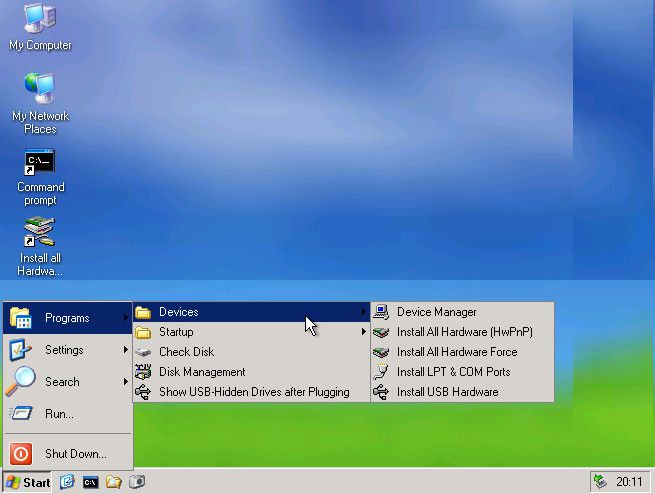
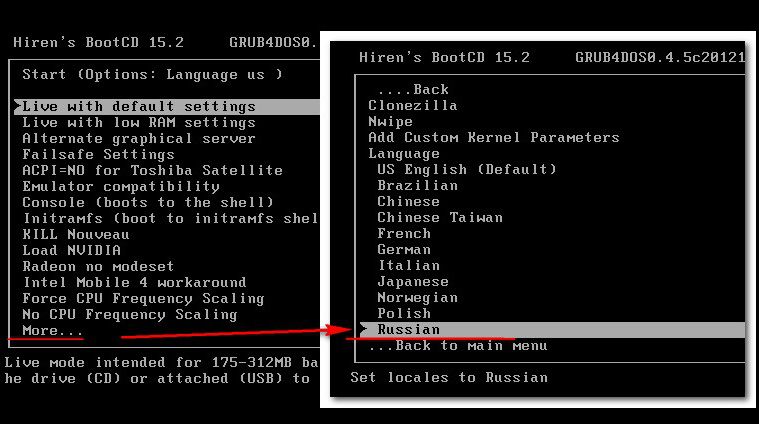
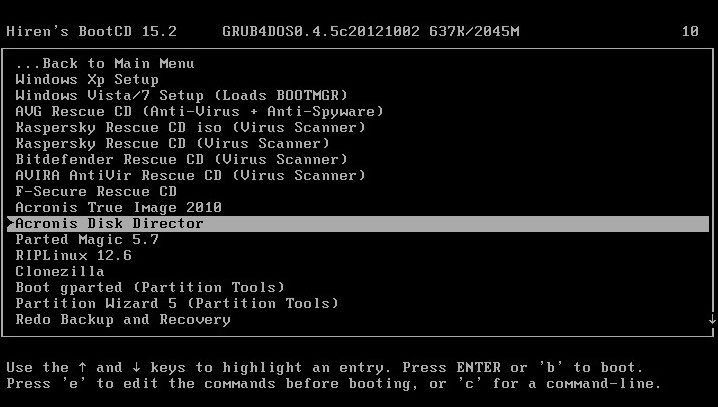
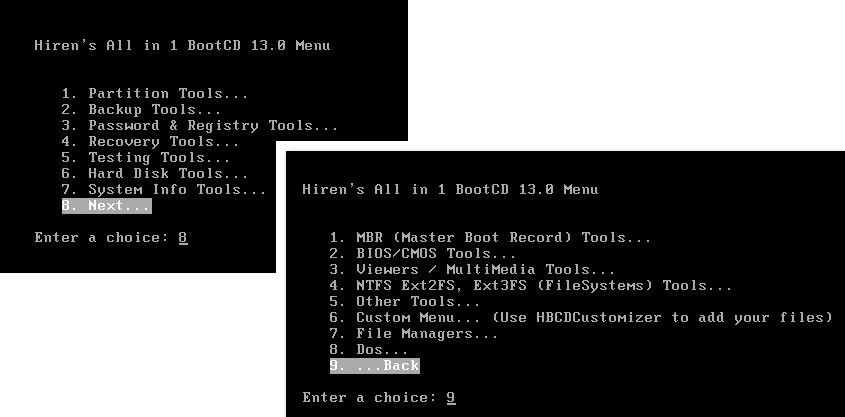
Hiren’s BootCD is a disk that contains portable operating systems Windows XP (stripped-down build) and Linux, as well as many different programs, including those running in DOS mode. The Hiren’s BootCD package includes not only the ISO image of the boot disk itself, but also a utility for burning it to the optical disc, as well as the HBCDCustomizer utility for creating boot disk images with user-defined content. Having loaded with Hiren’s BootCD, we will see the boot menu, where in the first three positions access to the further launch of the mentioned windows systems XP and Linux, as well as a selection of DOS-programs.
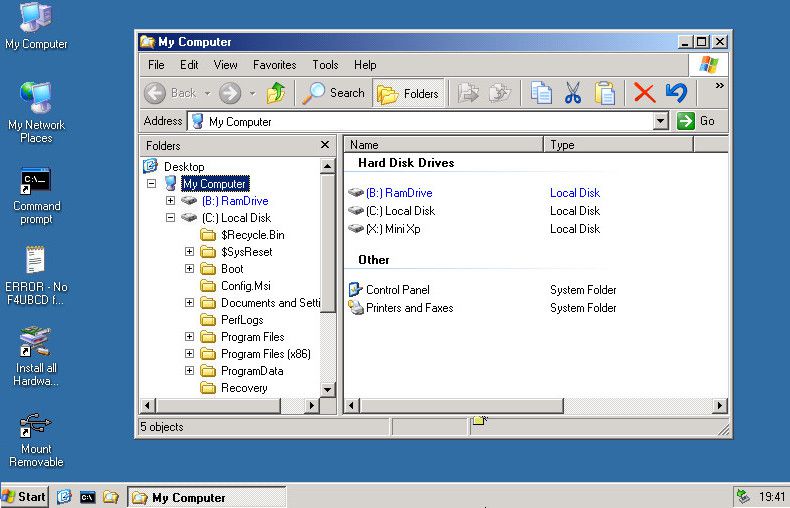
Portable mini Windows XP is a Live-disk environment for Microsoft operating systems used to working with instrumentation. Here you can configure the network to access the Internet, if the computer is not connected to the router, work with Windows Explorer, the command line, device manager, management and disk verification utilities, etc.
Portable Linux has additional startup options for specific cases: settings for a low rate random access memory, fault-tolerant settings, choice of system interface language.
In the arsenal of the Linux Kernel distribution, we find more software tools for testing and resuscitating a computer, as well as saving data.

Utilities for distributing disk space, backing up and restoring the system, obtaining system data, testing computer components, changing the password, setting the boot sector, BIOS, network, console file managers, etc.
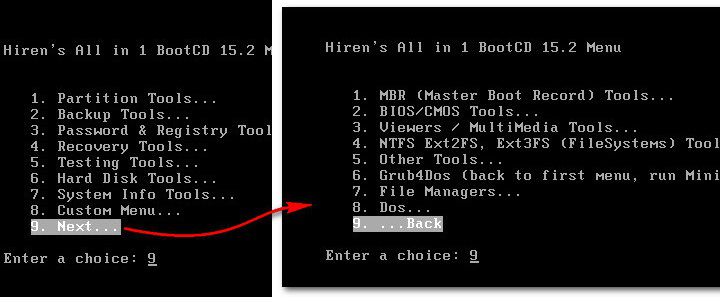
Below the top three positions in a separate list, access to such utilities as:
- Windows Memory Diagnostic and MemTest86 + for testing RAM;
- Offline Password Changer for password reset in Windows systems;
- Kon-Boot - A Workaround windows password;
- Seagate Disc Wizard - free edition Acronis True Image for computers with Seagate hard drives;
- Plop Boot Manager for booting from USB devices computers that do not support this feature in the BIOS;
- Alternative bootloader Smart Boot Manager;
- Tool to solve problems with the NTLDR file;
- Darik "s Boot and Nuke to completely erase data from disk.
More options when working with Hiren’s BootCD can be found in the “Custom Menu” section. Here will be available those programs and bootable mediathat have been previously added to the live disk using the HBCDCustomizer utility.
An alternative to customization using the HBCDCustomizer utility is the use of ready-made Hiren’s BootCD assemblies with additional software from customizers. The fruitful products of the latter can be found on the Internet. There are customized builds of Hiren’s BootCD with support for the Russian language.
Download Hiren’s BootCD from the official website:
http://www.hirensbootcd.org/download
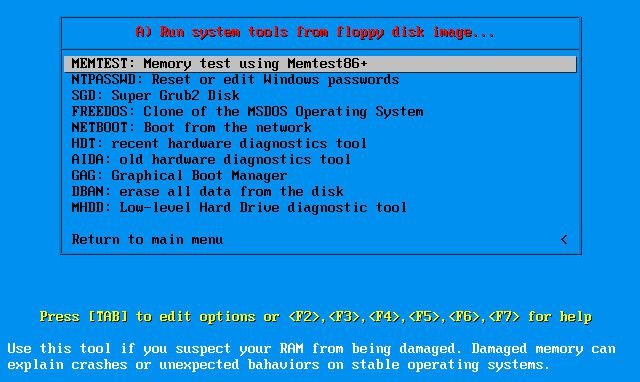
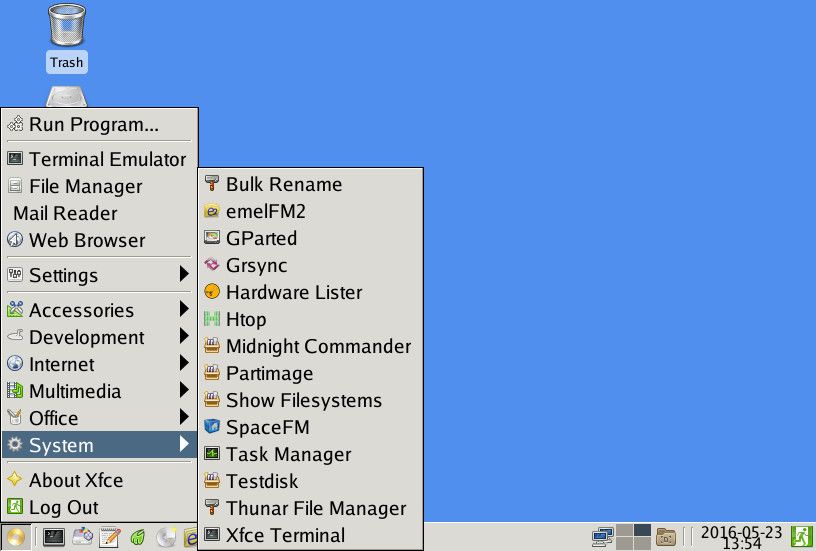
The emergency disk Ultimate Boot CD is mainly focused on working with the computer hardware and peripherals. It has collected many different utilities for testing, optimizing and restoring computer components. Utilities are grouped into separate types of components.
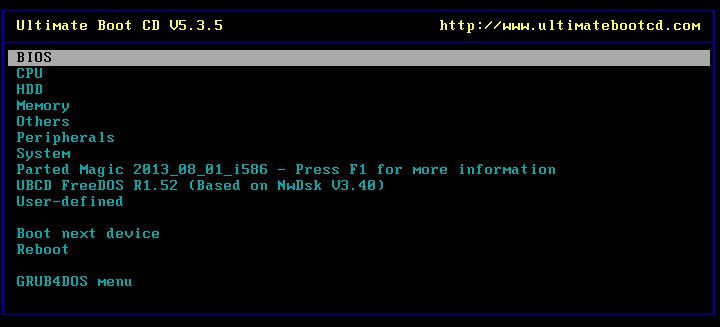
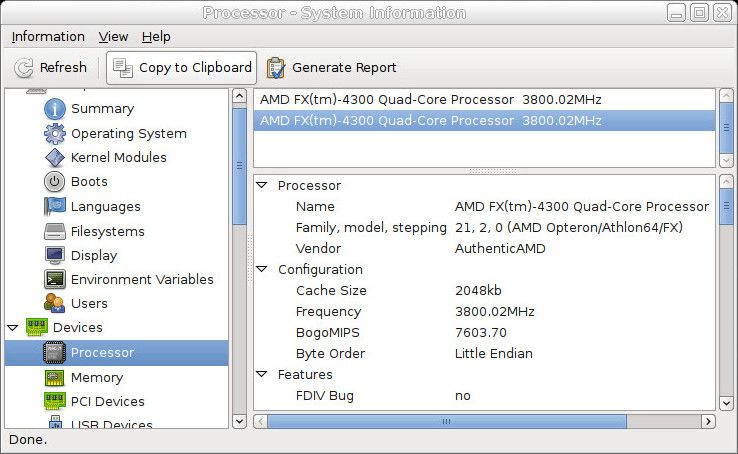
The "BIOS" section contains utilities, respectively, for working with the BIOS, offering such features as: saving and restoring settings, resetting the password for entry, returning the settings to default ones, etc. The “CPU” section contains utilities for displaying data about the processor and conducting its tests, in particular, under stress testing when the maximum temperature is reached. In the “HDD” section we find a selection of utilities for diagnosing, cloning, partitioning hard drives, as well as for data recovery and their complete erasure. Among other tools - utilities for testing RAM, drive, video card, monitor, as well as other hardware and peripherals.

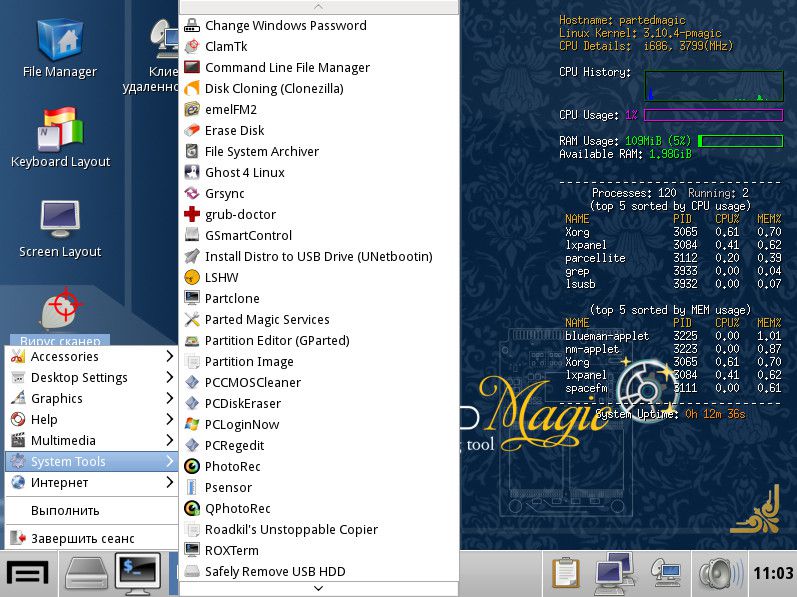
Ultimate Boot CD comes with Parted Magic - a Linux Kernel portable live CD operating system with the ability to configure the network, equipped with a mass of tools with a graphical interface as an alternative to console utilities. Parted Magic features include access to the Internet through mozilla Browser Firefox remote access, programs for determining the health of a hard disk, its cleaning, cloning, distribution of disk space, as well as a large list of other system utilities.
Download Ultimate Boot CD from the official website:
http://www.ultimatebootcd.com/download.html
The next Windows rescue boot disk is SystemRescueCd, built on the Linux Gentoo distribution. The first boot window from this Live-disk offers various launch options. Among the first seven points, we find, in particular, the ability to run Linux with caching files in RAM, with a choice of various graphical shells, without a graphical shell and with a high resolution console, etc. In addition, information on the proposed download tools can be obtained by pressing the F2-F7 keys in accordance with the serial number of the launch option. The first point is “SystemRescueCd: default boot options” - an option for most cases is to start Linux with standard parameters.
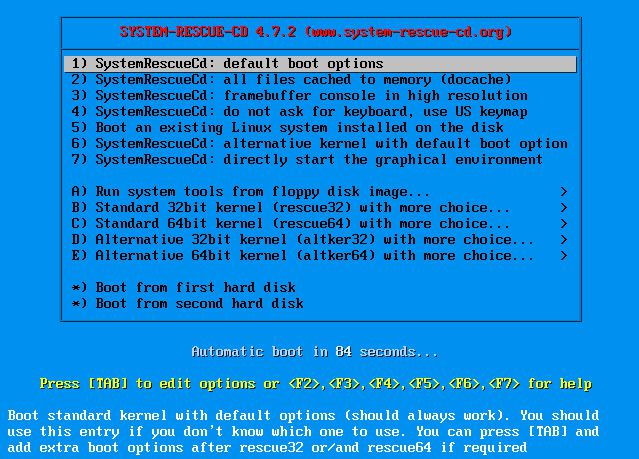
Startup options marked paragraphs B-E - This is the ability to run Linux using 32- and 64-bit system cores. Rescue32 is the default kernel, the altker kernel is an alternative if there are problems loading rescue32. Point A is the launch of console utilities to determine and test the hardware of the computer, reset the Windows password, delete data, low-level diagnostics of hard drives, etc.
Inside running Linux, we get access to the Internet, file managers, programs for allocating disk space, testing hardware stuffing, backing up and restoring data, etc. Portable Linux as part of SystemRescueCd also includes rootkit search and anti-virus tools.
Download SystemRescueCd from the official website:
http://www.system-rescue-cd.org/SystemRescueCd_Homepage
Knoppix is \u200b\u200ba Linux distribution built on Debian with its own set of programs. Among the masses of other Linux distributions, it differs in that it is used more often as a rescue disk for resuscitation than it can be found on Linux computers installed on computer devices. Knoppix in the portable version supports many computer components, automatically detects them and configures them. And most importantly - all this happens quickly: in less than a minute, the portable operating system will be ready for use. Another plus of this Linux distribution is that it can save changes to files, system and software settings, using RAM to store data, hDD or USB stick.

Knoppix is \u200b\u200bnot only an operating system for solving computer problems, like other Linux distributions included in the delivery kit of resuscitation and antivirus LiveCDs. In addition to administrative software packages, server software, a development environment and Internet access, on board Knoppix we will also find the Wine application for installing Windows programs on Linux, the OpenOffice office suite, and an impressive selection of multimedia software, and even a game. There is an anti-virus scanner ClamAV Virus Scanner and a local firewall Knoppix Firewall.
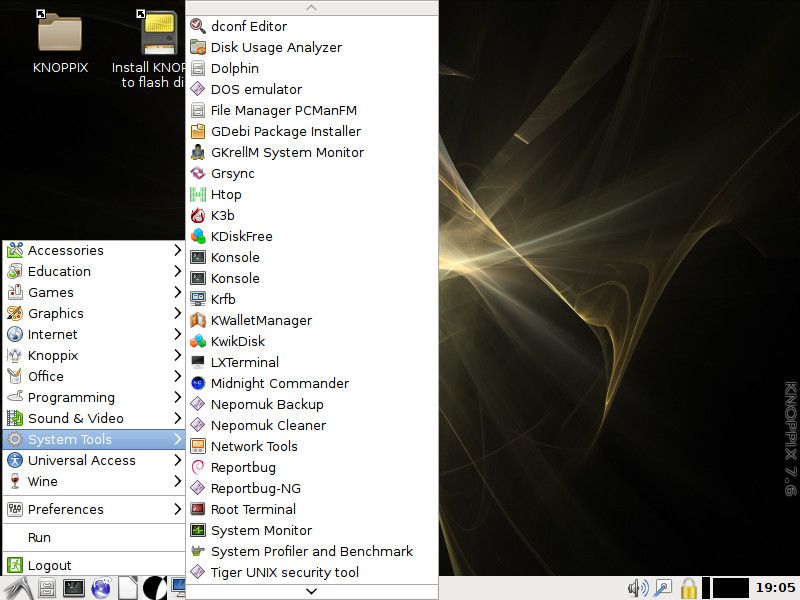
Among the system utilities of the Knoppix distribution kit are: network setup, disk space analyzer, DOS emulator, monitoring system resources, backing up and restoring information, obtaining data about computer components, testing them and other features.
Download Knoppix from the official website:
http://knoppix.net/get.php
Finally, the latest LiveCD disaster recovery distribution is FalconFour’s Ultimate Boot CD.
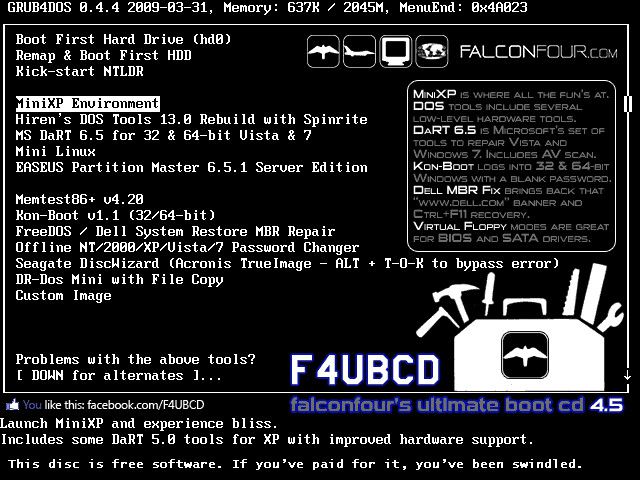
It is not just similar in functionality to the first member of the review - the Hiren’s BootCD Live-disk, it contains Hiren’s DOS-programs.
As part of the FalconFour’s Ultimate Boot CD, we also find portable stripped-down assemblies of Windows XP and Linux,
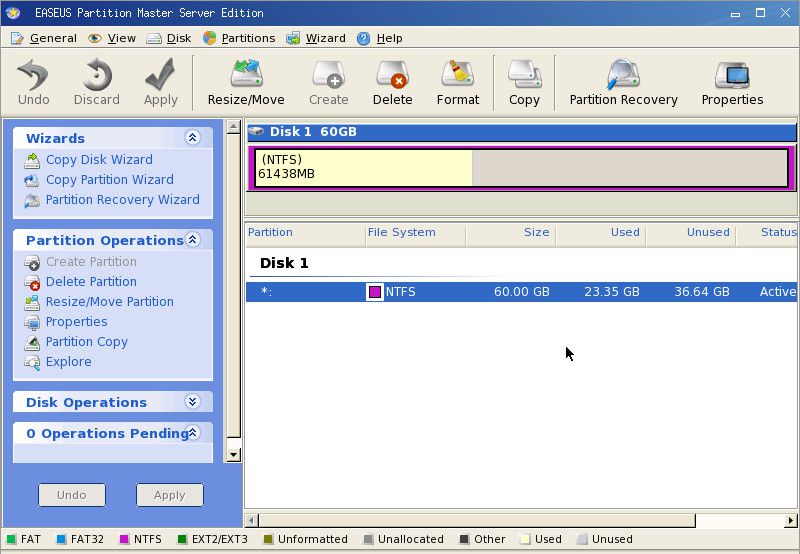
bootable media with a work manager disk space Easeus Partition Master,
utilities for checking Mentest86 + RAM, Windows Kon-Boot password bypass, Offline NT / 2000 / XP / Vista / 7 Password Changer password reset, FreeDOS / Dell System Restore MBR Repair boot recovery and others.


