Creation is useful in case of damage. system files as a result of a virus attack and inability to boot operating system. Using Disk disaster recovery in Kaspersky Anti-Virus 2014, you can boot the computer and restore the system to the state preceding the malicious exposure.
1. What is a Rescue Disk
Disaster recovery disk is formed on the basis of the operating system kernel Linux and is a file. isowhich includes:
- System and configuration files Linux.
- A set of utilities for diagnosing the operating system.
- A set of auxiliary utilities (file manager and others).
- Files Kaspersky Rescue Disk.
- Files containing anti-virus databases.
Creature Disaster recovery disk consists in forming a disk image (file. iso) with current anti-virus databases and configuration files. The original disk image, on the basis of which a new file is formed, can be downloaded from the server Kaspersky Labs or copied from a local source.
If you purchased a boxed version Kaspersky Anti-Virus 2014, you can use the program distribution disk as Disaster recovery disk (he is ready to go).
2. Preparing to Burn Disaster Recovery Disk
To prepare for recording Disaster recovery disk do the following:
- At the bottom of the main program window, click on the button up arrow.
- In the list of components, click on the button Instruments.
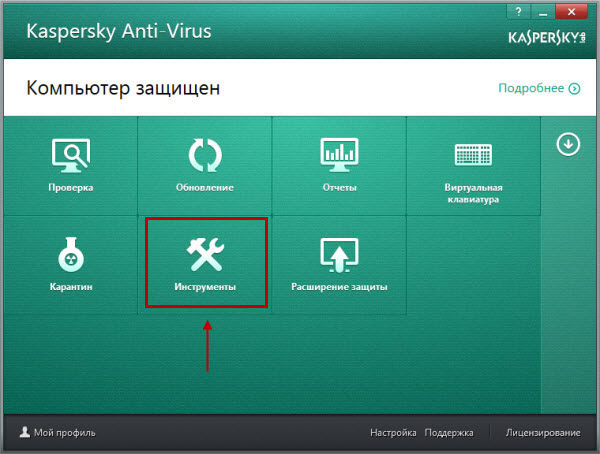
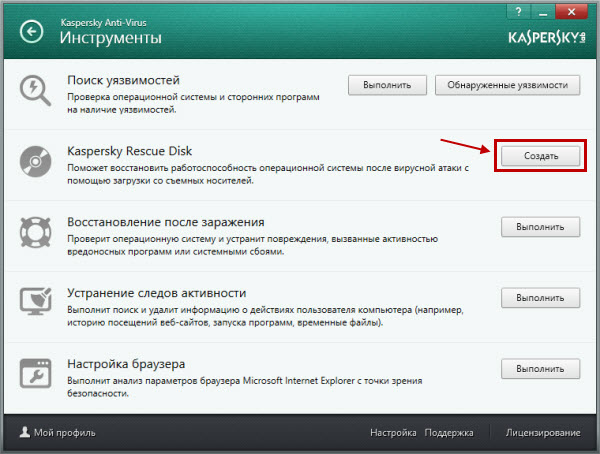
- In the window Instruments opposite the block Kaspersky Rescue Disk press the button Create.
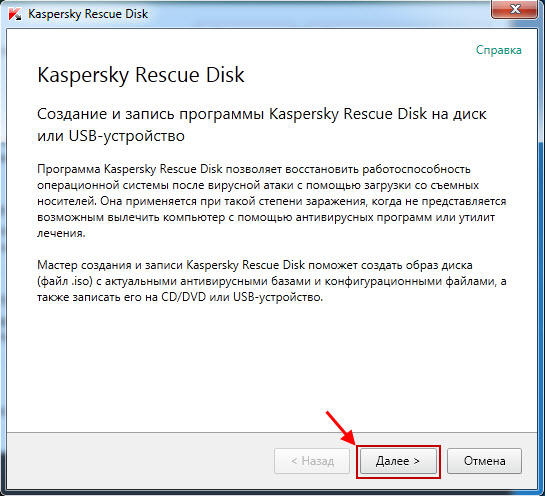
- In the welcome window, click on the button Further.
- Select the source of the disk image:
- Download image from Kaspersky Lab server - when you select this option, the image of the emergency recovery disk will start to boot from the server Kaspersky Labs provided that at this moment you are connected to the Internet. When downloading an image from the server Kaspersky Labs always the most downloaded latest version disaster recovery disk image.
- Copy image from local or network drive - if you have already saved the rescue disk image on your computer or you can download it from a network folder.
- Use existing image (the option is available if the wizard has detected a previously created image file on the computer). By default, the image file is saved to the folder:
- For OS Windows XP folder Documents and Settings \\ All Users \\ Application Data \\ Kaspersky Lab \\ AVP14.0.0 \\ Data \\ Rdisk \\
- For OS Windows Vista / 7/8 folder ProgramData \\ Kaspersky Lab \\ AVP14.0.0 \\ Data \\ Rdisk \\
- Press the button Further.
It makes sense to use the Windows 7 recovery disc when a serious failure occurs in the OS, as a result of which neither the OS itself nor the troubleshooting menu will be loaded when you press F8 during startup. Therefore, you need to make a recovery disk in advance, using standard Windows 7 tools or offers from third-party developers. The latter may have even more extensive functionality, so the record emergency disk attention should also be paid.
How to create a Windows 7 Rescue Disk
In the OS under consideration, there is already a way to create a rescue disk that has sufficient functionality to solve most of the problems associated with booting or abnormal system operation. Consider the process in stages:
After a few minutes, the recording will end and you will have the media with which you can solve most problems with Windows 7.
How to use a rescue disk
To boot using installation or use boot disk You must first configure the BIOS accordingly. In general, the procedure is as follows:
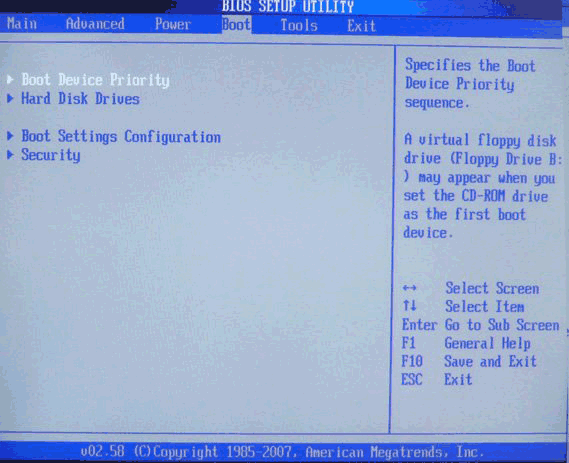
Keep in mind that modern computers and laptops come with a more secure UEFI BIOS. To log in from the rescue disk, you must disable Secure Boot for this system. The ways to do this in stationary PCs and laptops vary, so for help it is better to contact the manufacturers of a particular device.
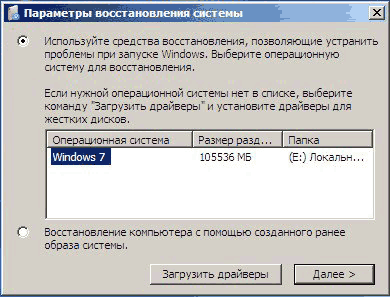
Restore Windows 7 from disk
After restarting, the recovery application opens, where the first step is to select the language for working with the program and click "Next". When logging in with installation disk To switch to this mode in the installation window, click on the "System Restore" link. After that, you can start working directly with the program:
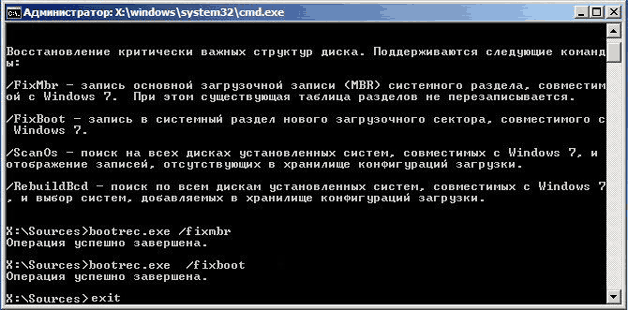
Using the installation disk, you can usually get rid of many problems, for example, restore windows bootloader 7. If it does not recover automatically, you can use the command line:
Use breakpoints
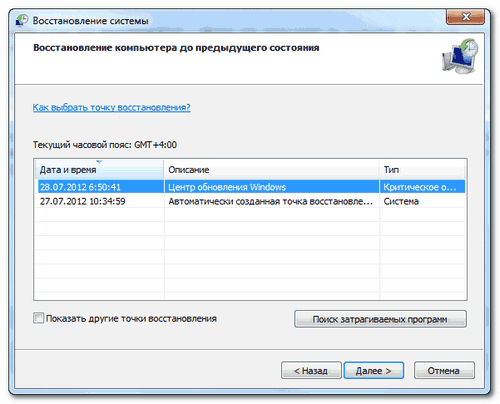
The second paragraph will make the program try to return Windows 7 to the previous one stable condition. Windows 7 provides for saving critical settings using recovery points. They are trying to create their OS before any important changes - installing large applications, drivers, etc. To roll back the OS, do the following:
You need to be prepared for the fact that previously installed applications after a rollback to an early configuration will disappear and they will have to be reinstalled. See which installed programs You can lose after the rollback by clicking on the search button for the affected programs.
System Restore from Image
Not always using the installation disk can again make the system operational. In this case, standard recovery disk tools suggest using the Windows 7 image, the creation of which is the task of the user himself:
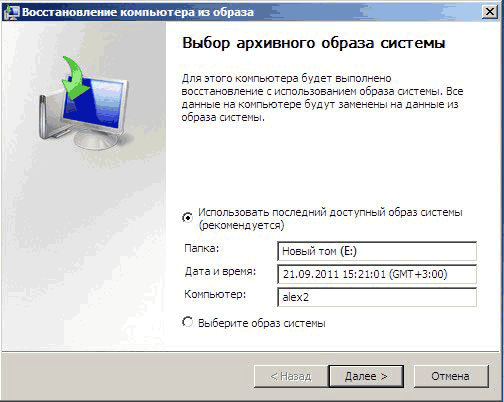
You can also select an image yourself, for which select the very last item in the selection window.
If you are not happy with the set of recovery tools that the standard Windows 7 boot disk provides, you can run other utilities.
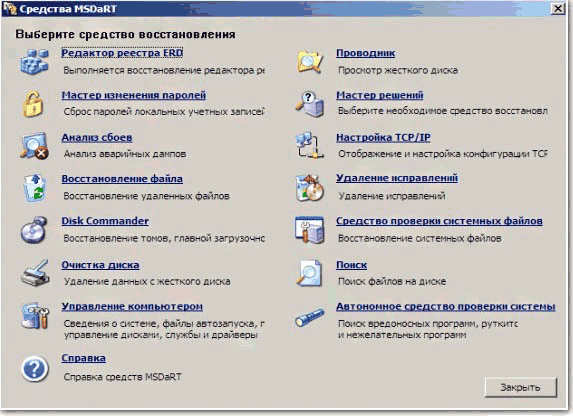 For instance, good set recovery tools for this OS offers the program MSDaRT 6.5.
The regular ability to create a rescue Windows 10 recovery disk was inherited from the Seven. Create such a disk in case the OS encounters difficulties that prevent it from loading and contains such tools as:
- Automatically troubleshoot problems booting the system;
- Restore from a previously created image (backup);
- Return the OS to the rollback point.
How to create a regular emergency disk windows tools 10 and how to apply it in practice in case of problems with loading the system? We will deal with these issues in detail below.
When is a recovery disc necessary?
A recovery disc can only be created for computer devices that have a CD / DVD drive in their assembly. Unlike bootable media with resuscitation software from third-party developers, most of which provide for recording on a USB flash drive, the emergency disk can only be written to a CD / DVD disc. But this is by no means an infringement on the capabilities of device owners without a CD / DVD drive. The fact is that the recovery disc is not the only means of accessing the standard features of Windows resuscitation. You can get into the system recovery environment by using the installation disk with Windows 10, which can also be created using a flash drive.
To reanimate the current OS through its installation disk does not require any financial costs. The distribution kit with Windows 10 on the Microsoft website is available for free. It comes with the Media Creation Tool, and you need to download and run it.
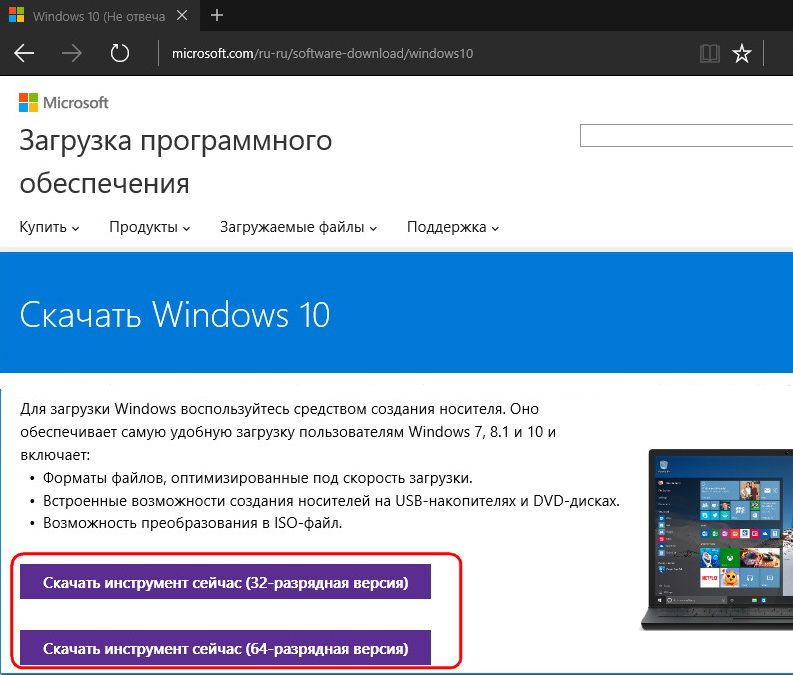
Utility in a single process and windows distribution 10 download, and then create a bootable USB flash drive. If you encounter problems loading the system, you must boot from the USB flash drive and select the item shown in the screenshot below at the start of the installation of the new OS. Access to the toolkit does not require a product key.

As you can see, the emergency disk is hardly a necessary tool. However, its presence is welcome if there is no other computer in the house with which you could quickly create a bootable USB flash drive with installation files system.
Preparing for Windows Recovery
A recovery recovery disk is created for a specific bit capacity of Windows 10. In this case, a universal rule applies, as for programs installed inside the system - 32-bit capacity is suitable for both 32-bit and 64-bit Windows 10. Then, as 64-bit emergency disk is useful only in the case of, respectively, 64-bit version.
There will be little use from the emergency disk if the rollback point is not created in advance inside the OS itself or if the system image is not prepared ( backup copy).
Create a recovery disk
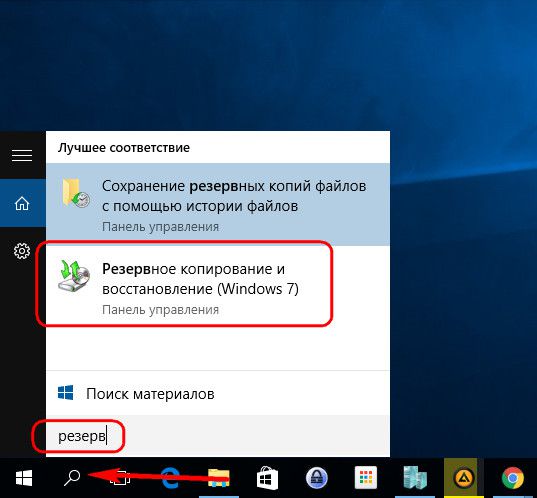
The emergency recovery disk is part of the standard tools for backing up OS files. This functionality is located in one of the sections of the control panel. To section reserve copy You can get not by wandering around the control panel, but by in a simple way - using intrasystem search. In Windows 10, the search button is located directly in the taskbar, so it’s a sin not to use this convenience.
We register in the search field the key request of the desired section and directly get to the system backup settings.
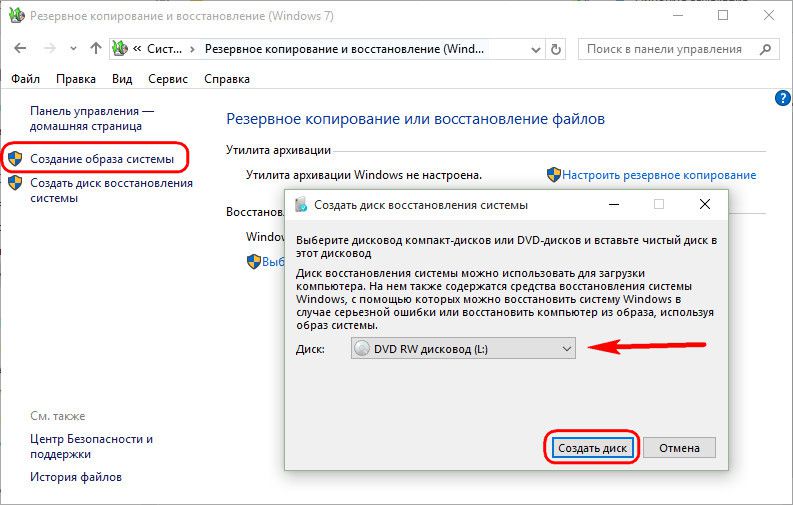
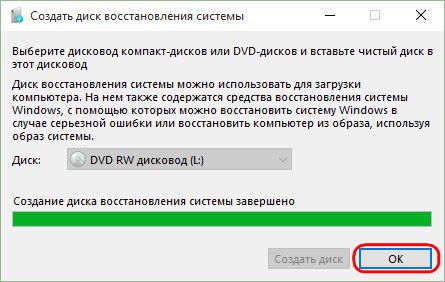
Click the button "Create a system image." Select a CD / DVD drive in the drop-down list, if there are several. Next, click the "Create Disk" button.
We’ll see a notification, where, in particular, it says OS bit depth.
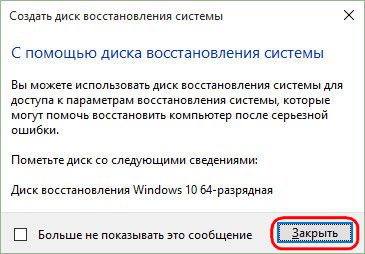
Creation completed.
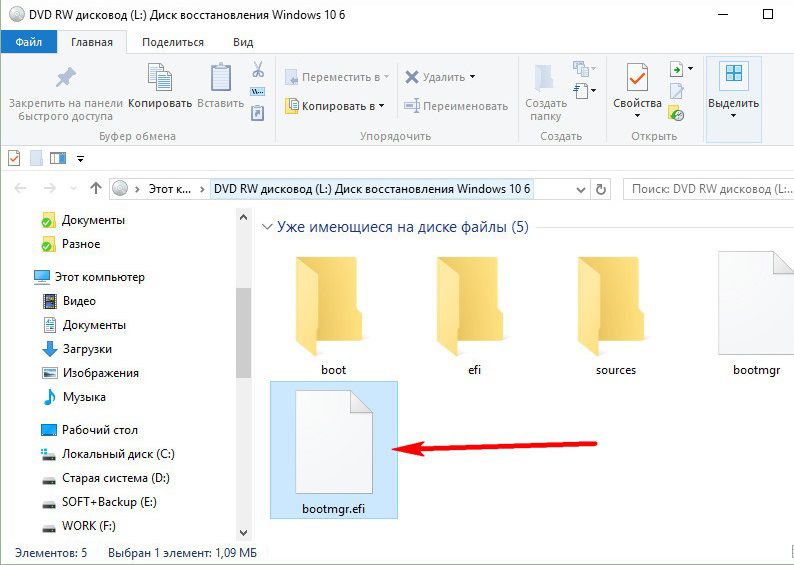
The Windows 10 recovery disc is suitable for computer devices based on either a regular BIOS firmware or a UEFI BIOS.
Now the emergency disk can be put somewhere in a secluded place. His further fate is to wait for a critical malfunction of the system.
Boot from Rescue Disk
Suppose Windows 10 does not boot. The time has come to use emergency facilities. We take out the recovery disc and set the BIOS to boot from the CD / DVD drive. Confirm by pressing any key to boot the device from CD / DVD.

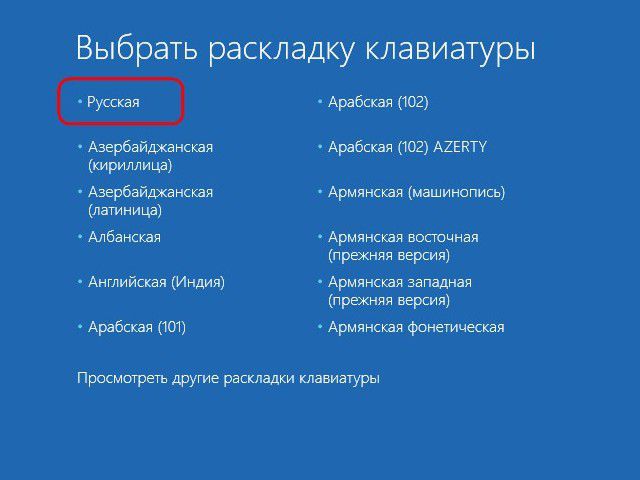
The interface is Russian-language, but you can choose any other keyboard layout. In our case, we just confirm the Russian one.
The choice of action is the Diagnostics section.
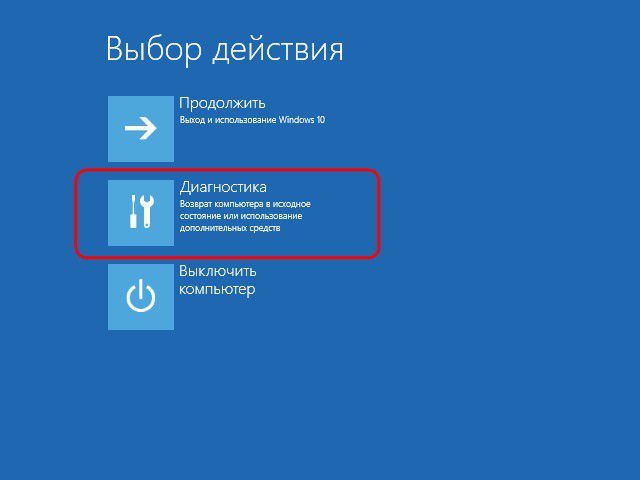
In the next window, we will see all the available Windows 10 resuscitation tools.
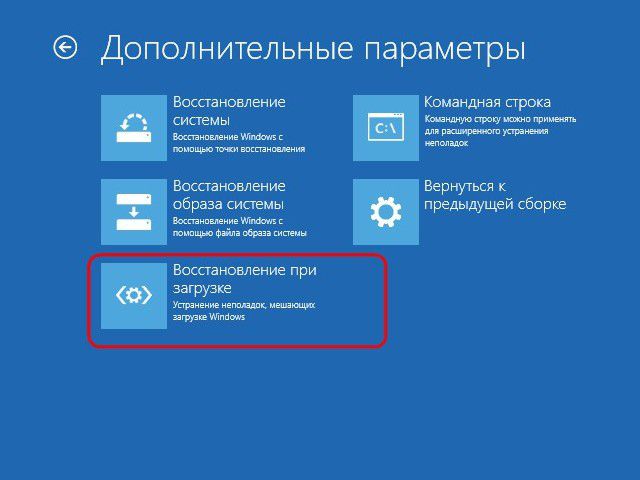
Boot Recovery
You can try to solve the problem with unbootable Windows 10 first by troubleshooting the boot problems. This is an automatic troubleshooting mode that prevents the OS from starting.
You should not pin much hope on this tool. As with the in-system tools for automatic troubleshooting, there will not be much use from the troubleshooting tool at boot. After a short diagnosis of the computer, in most cases, an inability to solve the problem will be declared.

Rollback to recovery point
The rollback point is the most convenient toolkit that allows you to return the system to the most acceptable state for the user, with minimal loss data. Naturally, it is necessary that the rollback points are periodically created - either manually by the user, or automatically (using the task scheduler). The process of creating a rollback point takes much less time than the process of creating a system image (backup). And the place on the PC saves the rollback point. However, the rollback point is more vulnerable than the backup copy, which can be stored on an alternative hard drive and will be very useful if the main drive fails.
To roll back to an earlier state of the OS in the face of serious problems with the system, we boot from the emergency disk, go through the path to additional parameters and select the first option.
![]()
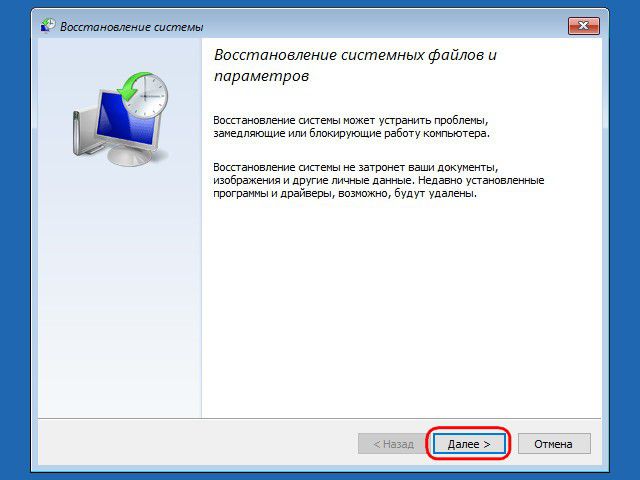
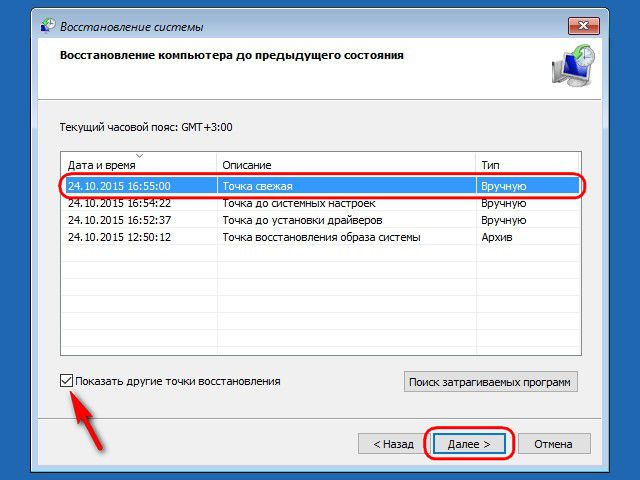
Choose the current rollback point from among the existing ones. The most complete list of them will be available after setting the option to display other points. Click "Next."
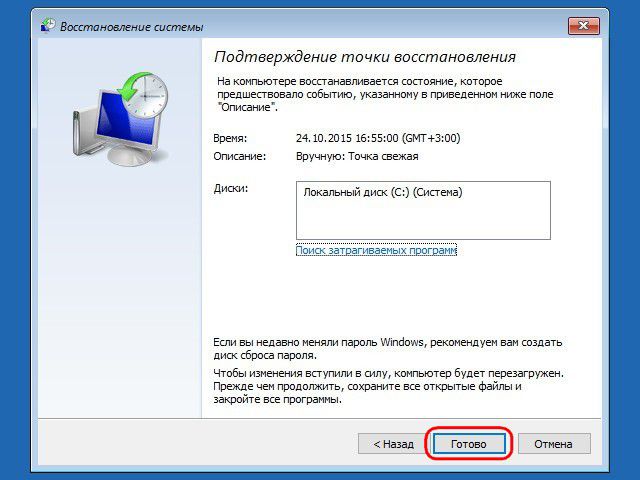
Click "Finish" in the rollback confirmation window.
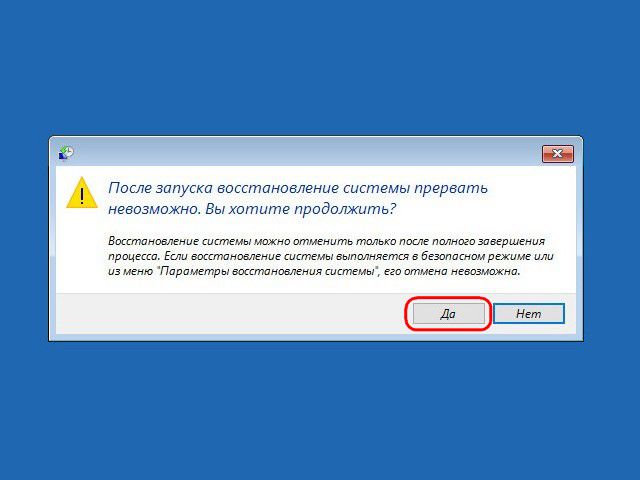
We additionally confirm the launch of this process.
When the system rollback is complete, the computer must be restarted. After the reboot, we find the system exactly in the state in which it was at the time the rollback point was created.
System Image Recovery
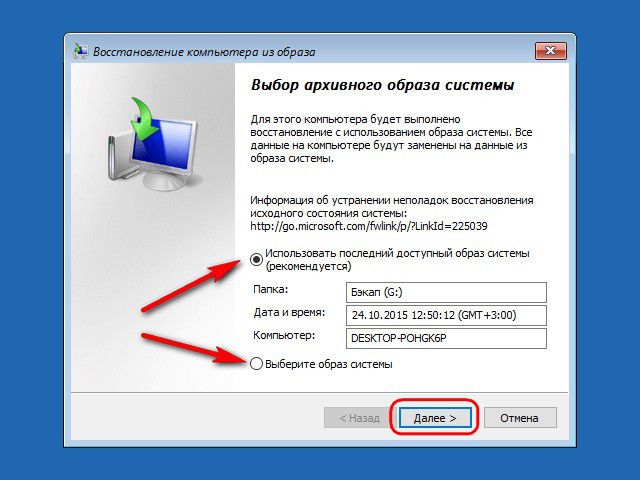
If it was previously created using the standard backup functionality, and the OS suddenly stopped loading, then it's time to use this image by booting from the recovery disk. Having reached, as indicated above, the menu of additional parameters, respectively, we select the second option.

We leave the default image found by the system or select another using the appropriate option in the first window. Click "Next."
Click Finish.

Confirm the decision with the "Yes" button.
As with the rollback point, the system will be returned to the state it was in at the time the image was created.
To eliminate arising in windows operation For problems, it is usually enough to roll back to the previous recovery point by going to the Control Panel section "Recovery." Worse, if the system is so damaged that it refuses to start. In such cases, it can be great to help out a recovery recovery disk. Its use is usually limited to three scenarios: recovery of boot information, full windows recovery from a previously created image and return to the system rollback point. You can create such a disk using the tools of Windows itself, which is exactly what we will do.
In Windows 10, the easiest way to access the tool is by searching the taskbar by driving a query into the search field "backup".
In the left part of the backup utility window you will see two links - "Creating a system image" and "Create a system recovery disk."
We strongly recommend that you create a full backup of your Windows, because otherwise there will be little use for the emergency disk. Also make sure that the system automatically creates recovery points. There is nothing complicated in creating a complete image of the system; the procedure is performed using the wizard and consists of three steps with default settings.
It is just as easy to create a recovery recovery disk. Unfortunately, writing files is only possible directly on a CD / DVD media, so creating a universal ISO image will fail. The plus is that the created emergency disk is equally well suited for recovering computers as based.
Practical use of emergency disk
Now imagine that our Windows suddenly stopped loading. The first thing you can do is try to perform a recovery at boot. Boot from the created emergency disk, choose the interface language
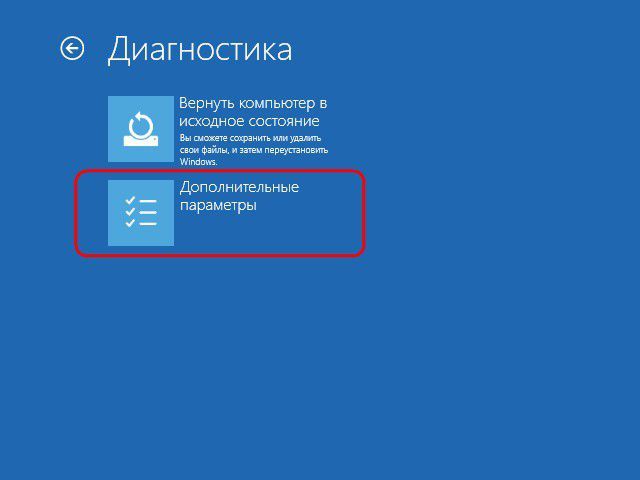
Extra options
Recovery at boot.
True, you should not really rely on this automated tool - most likely, after its development you will receive a message about the impossibility to solve the problem.
Systemic rollback points are a more effective means, but they are not without drawbacks. They allow you to restore only part of the data, in addition, the rollback points themselves may not be available if the partition or disk on which they are stored is damaged. To access the recovery utility from the rollback points using the emergency disk, go along the path Diagnostics → Advanced options → System Restore
and in the wizard window that opens, select the desired point.
If this does not help bring Windows back to life, there is nothing left to do but to resort to full recovery from an image, unless, of course, you created it in advance.
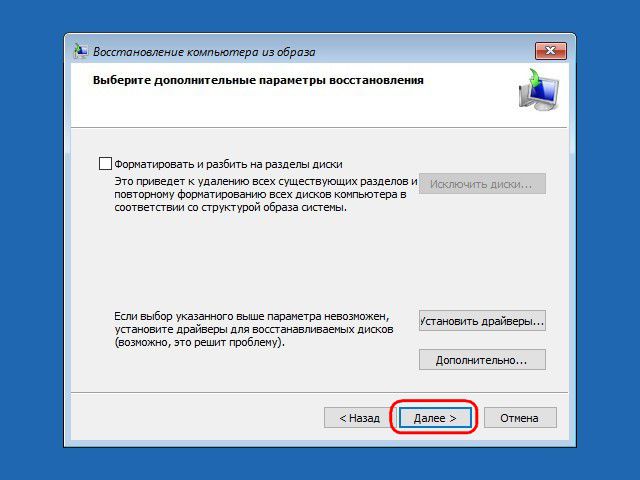
Follow the path Diagnostics → Advanced options → System image recovery and in the wizard window we leave the default backup archive (the latest) or specify the path to the image manually.
Restore default settings, click "Next"
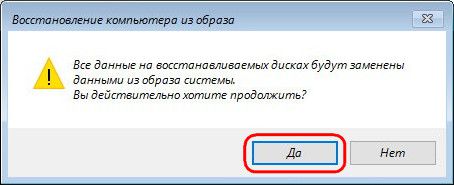
and confirm the replacement of the files with data from the image.
As a result, the system partition will be completely overwritten, and the system will be safely restored to the state in which it was at the time of the image creation.
That's all. Thanks for reading the article. I hope she was useful to you.


