Instruction manual
Map of memory, like a flash drive, is arranged quite simply:
Run the file with the official firmware, after unpacking the data, run the flasher. Extract the file temp.dat from the * .exe file of the official firmware (“Start” -\u003e “Control Panel” -\u003e “ Accounts Users ”), go to C: Documents and SettingsUser NameLocal SettingsTemp.
Pay attention to status messages. . Now wait a few minutes, and the tablet should be updated and ready to go. In the most beautiful moments of life, everyone remembers with joy and joy. Regardless of whether it will be an unforgettable holiday, a unique concert or a fast family holiday. Over time, during these events, countless photographs and videos are collected with which you can relive this moment. All the more important to have safe place for your digital treasures that will preserve your memories for life.
Check for successful flashing when booting windows. Reboot the computer. Note! Unofficial firmware utilities are usually downloaded with a simple archive, which you need to unzip and copy the * .bin file to a formatted one a map of memory. Rename it is not necessary, because he is already in the right format - * .bin.
Which memory card fits your needs?
To make it easier for you to decide which memory card to choose, we will provide you with useful information at this stage. It is compatible with almost all smartphones and tablets. On such a map you can find up to 820 photos in 20-megapixel quality. However, if you are ready to record high-resolution video, you can find a memory card with higher read and write speeds, as well as significantly more memory. They provide bandwidth for large amounts of data transfer. On the other hand, they convince with a very high class 10 speed - the best choice for professional users.
And one more tip. To flash a map of memory it is possible only when the computer somehow sees and determines it. If he doesn’t react at all a map of memory, and the card is warming, this means that it has burned out and cannot be restored as a device. Have to buy a new one.
Great snapshot protection for your life
Do you use your smartphone, tablet or action camera. Therefore, before deciding on a specific memory card, consider the purposes for which you want to use the card. It is compatible with devices from different manufacturers. The most powerful memory card is of little use if your data is not sufficiently protected on the card. Often, however, the most impressive images are created under rather hostile conditions that put a person and material to the test. They easily skip the bath in salt water, which can last up to 72 hours.
Tip 2: How to recover a formatted memory card
Often, deleting files from media occurs due to a misunderstanding. The camera fell into the hands of a child. Or you cleaned yourself a map of memory, being one hundred percent sure that you will no longer need photographs, and in a few days you need these very ones, already deleted from of memory. For such cases, programmers have developed special programsthat can recover information from formatted media.
Even extreme temperatures can slightly affect our memory cards. They work from -25 to 85 degrees without impression and are reliable. In addition, they are resistant to magnetic radiation up to 000 gauss. In addition, x-rays cannot affect the security of the airport at the airport.
Step: Download the correct version of Android to your computer
Shock and shockproof they withstand even high pressure. Our series of memory cards offers the right card for all needs. Specially designed for recording high-definition video, memory cards are ideal for demanding individuals who regularly have to deal with large amounts of data. We will show you this step-by-step instruction.
You will need
- - a computer;
- - the Internet;
- - CardRecovery program.
Instruction manual
Open a browser and enter in the search bar the name of the program - CardRecovery. If you have problems with the search, you can download on the portal www.softportal.com. Follow one of the suggested links and download the program to your computer. Install CardRecovery by double-clicking on installation file left click. As a rule, such programs should always be installed only in the system directory. local disk on the computer’s hard drive, since all the logs are stored in those directories.
Since the wait is not the end, we wanted to avoid this. Manual update launch - using the media creation tool - was unsuccessful. This error message has always been. You can read the relevant blog contribution for this tool here.
Selects “Download and install updates” and click “Next.” You must accept the license terms. Flash is too small to install. Here last opportunity Store files, settings and applications. A few more settings are needed. Is your smartphone overtaking access to videos, photos or other types of files? It is not easy to find this type of fraud in the market, and usually they have some features that you can observe to protect yourself.
Run the program. Select the media, camera model, and location on the hard drive where the program will save the recovered data. Specify card size of memory and click OK. Carefully enter all the data, as this is a very important process when recovering information from portable media.
Start the map scanning process of memory. You can use the Pause and Stop buttons if you need to stop or interrupt the process for a while. However, this usually does not take more than a few minutes. The program will display a success message, click OK. The interface of this program in a foreign language, however, will not cause difficulties during work, since everything is simple.
These parallel products are often of poor quality and never provide the required storage capacity. However, your smartphone or tablet is likely to identify a card with the same advertised capacity as these pirated products, their firmware has changed to trick consumers into performing these checks. At the same time, your device is also deceived.
When the actual space is full, the card starts erasing the old data to save the new ones that the device is trying to write, or an error may occur and prevent the save. In addition, the recording and playback speeds are usually very slow and may cause the application to crash or be too slow on your device. At the same time, if you already have a very simple smartphone and you decide to use a fake card, ease of use is almost impossible.
The program will display a list of photos that can be noted for further recovery. Wait for the save to go to the previously selected area on the hard drive. View the result. If CardRecovery was unable to recover most of your data, try using a different program. On the Internet you can find many similar programs, including free. There are also programs for restoring other data - audio files, documents, videos and others.
Preparing a smartphone for firmware
Keep in mind when buying cards in stores. If the packaging looks a little suspicious, with more printed images, poorly readable letters, etc. Do not take this product home, even if it is very cheap. Speaking of price, a card with a very low price also has a good chance of being fake. Before you go to buy a card of a certain capacity, search the Internet for products with the same capacity and brand so that they are not fooled with very low values.
The place where you buy the card can also be determined. P. Maybe not a good idea. Therefore, it is worth making purchases in national and reliable stores in which you will be sure that you can contact to make a possible return in case of problems. The letters in the pirated product are thicker and less readable, and in the original everything looks neat.
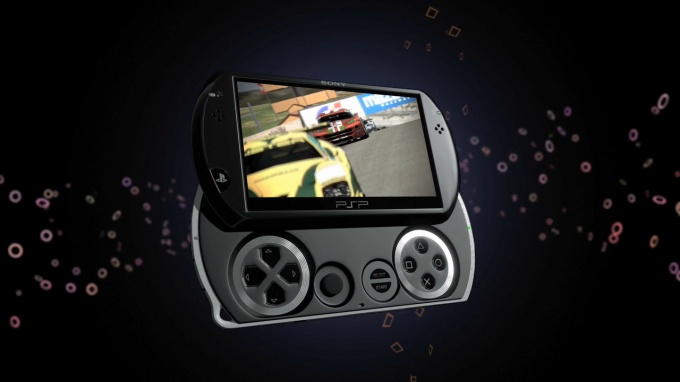
Playstation Portable is a popular game console from Sony. The console appeared in 2004, during its existence has undergone a large number of changes. To update the game console, you need to flash it by installing latest version software.
It was also sold at a much lower market value. Another example of a bad experience. Please note that the packaging has very low print quality and does not give you any information about the capacity of the device. Only in the map itself does the detail appear. Now on the fake Kingston card. The device on the left is false, and you can see some differences right out of the box. The packaging does not contain data on storage capacity or specifications, only on the card itself, which still has different parts from the original.
The top is the original and the bottom is fake. Pay attention to the difference in colors, but understand that without a standard of comparison, you are unlikely to understand this. If you have an earlier camera model, visit the software update page. Earlier camera models cannot be updated this way. . Just download it as is, no need to use other tools besides your phone.
You will need
- Computer, Playstation Portable, Hellcat Pandora Installer
Instruction manual
The firmware process does not present any particular difficulties when following the instructions clearly. The most relevant way to flashing the Playstation Portable game console is to use the Pandora Kit.
Pandora is a special kit consisting of a memory card and a battery that will allow you to install a modified or official firmware for any version of Psp. Also, using the kit, you can restore the console damaged by incorrect firmware.
A smartphone or tablet is 100%. So far, there has been a simple solution. It should be noted that although the three menus seem different, the installation procedures are identical, the contents of the menu are very close, with several options ready. After all this is in place, you will need to reboot in recovery mode.
You have moved to the general menu. Return to the Start menu, then Install. Very attractive terminal, but with some defects. All links are available on the forum of origin, and the credits of this textbook belong exclusively to its author. Just the size of the partitions. In 3 3 you will have 3 GB of space for system applications and 3 GB for user data.
To get the kit, purchase a Memory Stick Duo Pro. The memory card must be original, with a memory capacity of 64 MB to 16 GB. If you use a fake card, you risk the performance of the console.
You will also need an original Sony battery.
To prepare the battery for firmware, download the Hellcat Pandora Installer program.
Connect the game console to the computer. Unzip the pan3xx folder from the downloaded program archive to the / PSP / GAME / directory of your memory card. Then run the program using the console and select Battery Options from the menu that appears. A separate window will open, in it activate the item Make battery Pandora. After the operation, exit the program.
First of all, keep in mind that the following operation may damage your device if it is not performed correctly. Neither I, nor the author of the original textbook will be responsible in case of breaking, brick or nuclear explosion of your tablet. Please note that the first run may be longer than usual. . Here you only need to have fun with the root.
How to put into recovery mode
To save time, take a step by step how to do it. First, to return to the initial stateif something fails. There are two ways for the advanced user and the beginner.
What to do if everything bites
This will bring you into recovery mode, even if you cannot log into the system and call it from the settings. Well, if you can’t continue, keep reading.Now you can enter the Pandora installation menu. Turn off the Psp and remove the battery from it. Then insert the memory card with the installed program and hold down the "Up" button. While holding the button down, insert the battery, and the console will turn on. After switching on, the installation program will start.
In the program menu you will see many options, for firmware you need the Install M33 item. Click on it, the firmware installation process will begin. When finished, press the cross (X). Psp will restart, after which the firmware of the game console will be updated.
There is simply something wrong with playing the firmware. Sometimes this happens, but the advice “what to do when everything bites” suddenly does not work, and you are already desperate. You press the power button, disconnect and connect the cable, fight for 2-4 hours with the tablet and want to throw it out of the window.
Set tablet to developer mode
Getting started with a tablet that is not connected to a computer. On the tablet, go to “Settings”, scroll down to “System” and select “Tablet Information”. Find the build number and touch it 4-5 times in a row. You will be informed that you are a developer.
note
When using the Hellcat Pandora Installer, only change the settings that you know. Ill-conceived changes may cause the game console to malfunction.
To change the firmware in a mobile phone, you must have a special cable. If for some reason you can’t get it, find out about alternative options for performing this operation regarding your model mobile device.
Set the tablet to bootloader mode
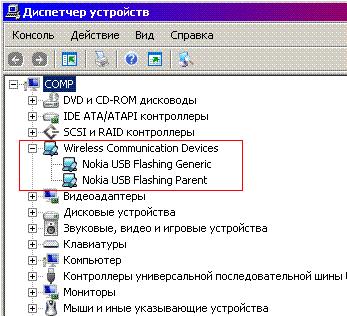
Now connect the tablet to the computer on which you have the finished files from the step. You must show the device in the form, as in the picture, it can only have a different code. If you do not see the device, it will not continue. There will probably be a driver problem that you will need to manually install in this case. Another option is to turn off the tablet and turn it on while holding both power buttons. Thanks to the design of the tablet, command line much easier. If you see something like this, you skipped step 5 and the tablet does not see the tablet or it is not in bootloader mode.
You will need
- - access to the Internet.
Instruction manual
If you want to flash your mobile phone without a cable, make sure first that the firmware of your model of mobile device is supported from a memory card. This is typical of most modern models that support microSD memory cards.
So you need to back off again. Install, run, wait a minute, and it is. Once you're done, you can remove the application with a quiet conscience that no longer requires. Free version This application allows you to create 3 symbolic lines, an unlimited number for the paid version.
If you are happy with the tutorial, I will like comments, sharing friends, and you can also play the game on. Devices like smartphones and tablets have become integral partners in our daily lives. We will process information about our work and personal life so that you know how to provide all this valuable information in the event of the loss or theft of our favorite equipment.
Read the materials on this topic in various forums on the process of flashing mobile devices and reviews of users who are familiar with reinstalling the software in this way.
Prepare a flash card for flashing. A formatted drive of the volume supported by the mobile device is suitable here, you can also use your regular memory card in the process, after making a copy of the files on the computer’s hard drive and formatting it windows tools in the properties menu of the connected drive.
It is worth noting that while the loss of your favorite device involves the purchase of a new - perhaps even colder and "upper" top model, the loss of information collected in it becomes a big problem. Minimizing the consequences of this event is not easy. This requires a lot of commitment and should not be successful.
It will not be good if we have not made a backup yet, or the one who took our data has bad intentions and is not shy about using it as soon as possible. Setting up your device to improve and optimize its security, also known as simplifying your configuration, can enhance our sense of security and help control the information processed on your smartphone or tablet. To achieve this state, several rules must be observed.
Prepare your mobile phone for the flashing procedure, making a backup copy of the contacts in the memory of the SIM card and files on hDD a computer. Find out the combination for your device model that starts the flashing process. Remove the SIM card and turn off the phone.
Search the Internet for the latest version of the original firmware for your phone model. It’s best to choose software that has positive reviews from other users. Download the firmware, unzip the files to a directory of a removable drive connected to your computer. After that, check the memory card; also make sure that there are no extraneous files on it.
Go to the flashing procedure of the mobile device. Insert the memory card into the appropriate slot on your mobile device, and then use the special combination to launch the software update menu. Depending on the model of mobile device this procedure may take 2 to 10 minutes.
Wait until the phone restarts, then turn it on normal mode and check the correct operation. After that, the firmware from the card can be removed and used at its discretion.
Related videos
Useful advice
Always create backups files and contacts before flashing.
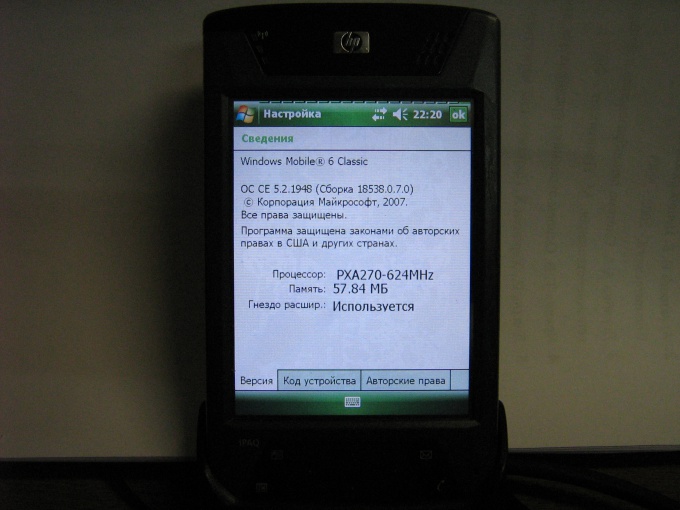
The firmware (flashing) of the PDA must be done for various reasons, for example, to return the device to life after incorrect established program or system failure. Also, firmware is done for the Russification of devices.
You will need
- - a computer;
- - CCP.
Instruction manual
Go to the HP website under Software and Drivers ( http: //h20180.www2.hp.com/apps/Nav? h_pagetype \u003d s-002 & h_lang \u003d ru & h_cc \u003d ru & h _...), download the latest firmware for your PDA model from there. Connect the PDA to the computer, connect it to mains power. Download and install the Boot Loader program to upgrade the PDA ( https://www.boot-loader.com/rus) Unzip the firmware archive into the folder with the Boot Loader program, disable all anti-virus programs and firewalls, disconnect the Internet. Press the key combination Ctrl + Alt + Del, the task manager will open. Go to the “Processes” tab, right-click on the ActiveSync process (wcescomm.exe) and select “End Process”.
Run your PDA in bootloader mode, for this, simultaneously press the Contacts + Itask + Reset buttons, wait a few seconds, the HP logo should appear on the screen, and the inscription Serial may also appear at the top. Insert the device into the USB cradle connected to the computer, the text instead of Serial will change to USB. Next, to reflash the PDA, start the Bootloader.exe file from the computer, then a window will appear, in this window open the file with the extension .nbf, (from the folder with the firmware). Next, the program will independently perform a flashing of the HP PDA, wait 20-30 minutes for operations to complete, after completion, close all windows manually. Disconnect the PDA, press the combination of Contacts + Itask + Reset buttons simultaneously several times until the OS loading appears on the screen.
Sew the PDA through the memory card, for this, insert the card into the card reader, run the WinHex program, open the firmware file, click "Next", execute the following commands: Edit - Select All; Edit - Copy Block - Hex values; Tools - Disk Editor - Physical Media - select a memory card. Next, go to the beginning, set the following settings: Edit - Clipboard Data - Write - Ok - Internal; File - Save Sectors - Yes - Ok. Recording to the card will begin, then connect the power to the PDA, install the card, enter bootloader mode. The PDA will ask for confirmation on the firmware, click Action. Wait for the process to complete and restart the PDA.
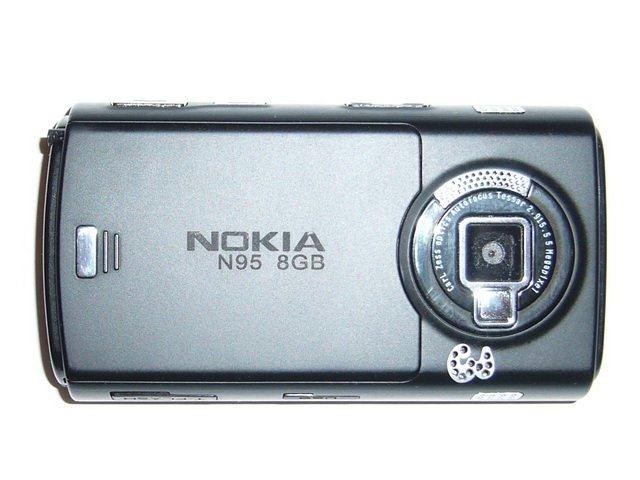
Chinese telephone Nokia N95 is a fake smartphone of the Finnish corporation Nokia with the same name. It has poor-quality firmware and poor Russification, so many users may encounter a number of difficulties. You can solve the problem of the Chinese version of the model by flashing the device.
Instruction manual
Sources:
- how to reflash a Chinese phone in 2017
Sometimes unsuccessful firmware phone or desire to roll back to old versionends in trouble - the phone generally refuses to work. Do not rush to throw the phone - out dead mode You can also upgrade it to a normally working version.
You will need
- Mobile phone, charger, Windows PC, Phoenix.
Instruction manual
Download the Phoenix program from file-sharing sites on the Internet.
Launch the “Device Manager” on the computer. To do this, right-click on the "My Computer" icon, activate the "Properties" tab, then "Equipment" and select "Device Manager".
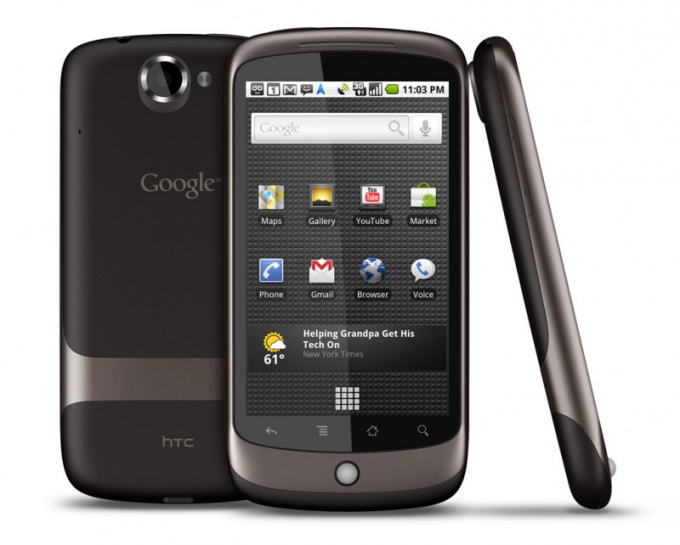
Finally, I had some free time to flash my android smartphone. The manufacturer released a maximum of Android 4.4.2 for my Lenovo A328, it did not suit me and, in the first days after the purchase, I put a custom with a fifth android on it. But I'm tired of this firmware too! Today I updated the android firmware to version 6.01, installing the appropriate custom. And now I’ll tell you how I did it.
Firmware selection
On the Internet you can find a huge number of firmware for android, some of them are official, and some are “customized”, that is, assembled by amateurs. I might have used the official one, but alas, the developer scored on firmware updates. Not every firmware is suitable for your smartphone! You need to find special firmware. Enter the following phrase “Lenovo a328 w3bsit3-dns.com” into your favorite search engine, replacing the specified phone model with your own. On w3bsit3-dns.com there are a lot of different firmware, for almost any phone. I like it .
Preparing a smartphone for firmware
If you are going to flash your device through an sd memory card, then you already have custom recovery installed.
I wrote an article on how to install custom recovery. (The link will open in a new contribution).
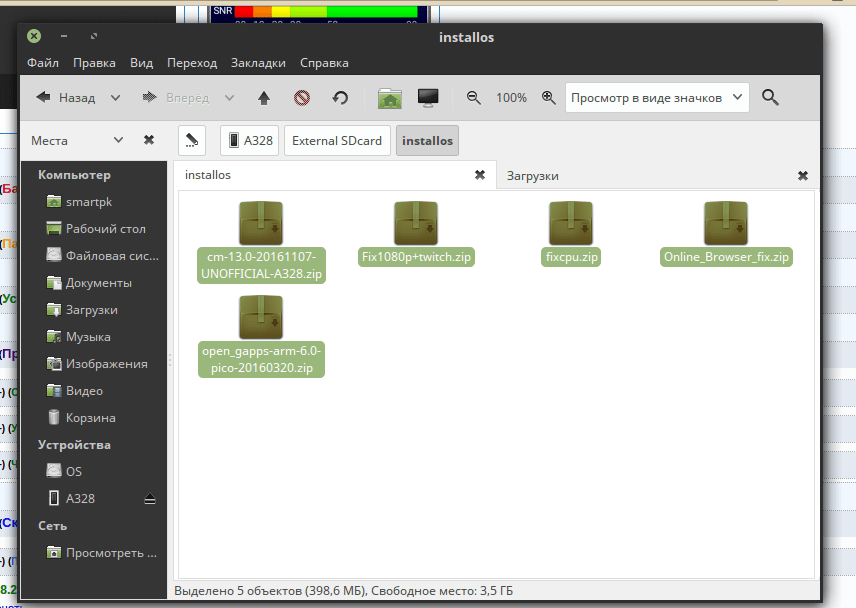
First of all, we’ll get acquainted with the instructions from the romodel. You can see it in the screenshot below. 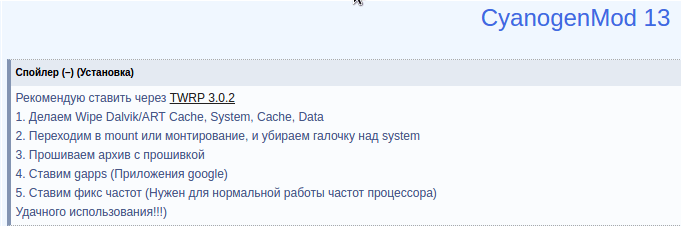 Nothing complicated! I took enough screenshots to show you how simple it is. By the way, I wrote in an article about how to take a screenshot. Be sure to check out the bugs found in the firmware, screenshots, patches and other factors accompanying the post. Transfer everything to the computer needed files, both from the device and from the flash drive (just in case), now create a folder on the memory card, for example, “installos” and copy the firmware and necessary patches into it.
Do not forget to charge your smartphone! Will it be a shame if the battery sits down during the android firmware? And the consequences, I think, will be rather deplorable.
Firmware through recovery
Getting into recovery is easy! To start, I turned off the smartphone, then held down the power button, and as soon as the phone emitted a vibration signal, I also pressed both volume buttons. Those. I held down three buttons at the same time. As the author of the firmware advises, the first thing we do is wipe. Follow the appropriate menu item.
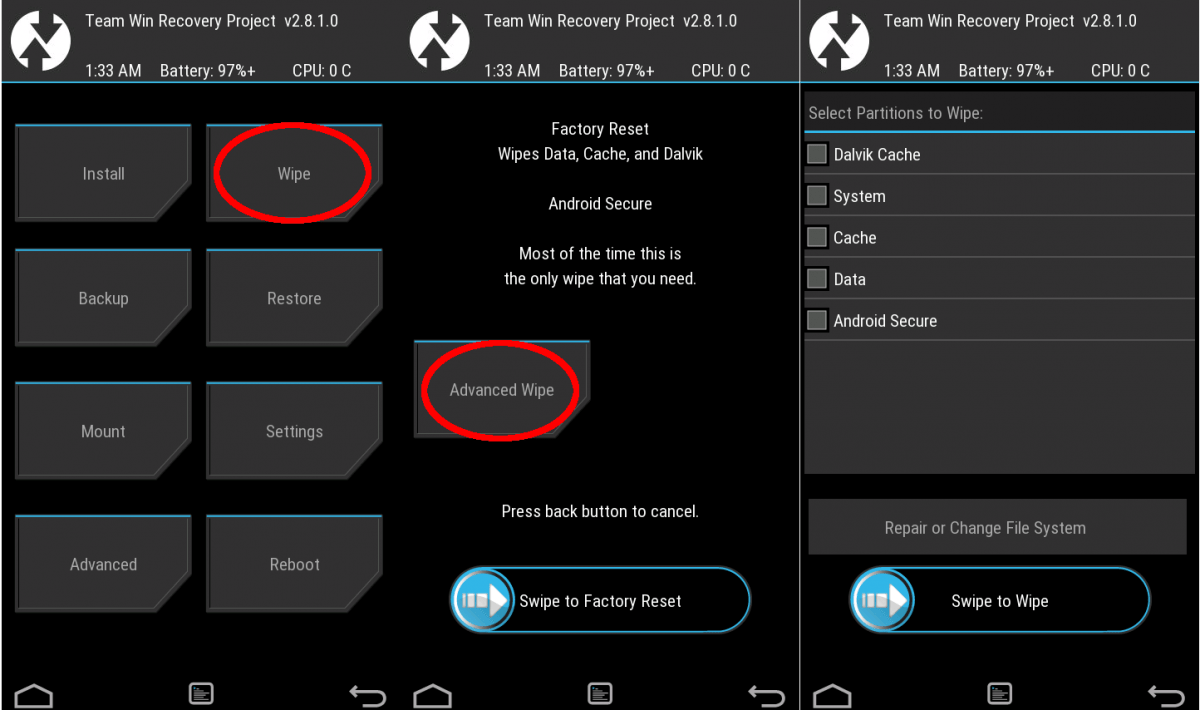
Check the necessary sections with checkmarks, which ones - you need to look in the instructions from the author, but basically they coincide. Once checked, move the slider labeled “Swipe to Wipe” to the right. Wipe process is not fast, it will take 10 -15 minutes. In no case do not interrupt the wipe, be patient.
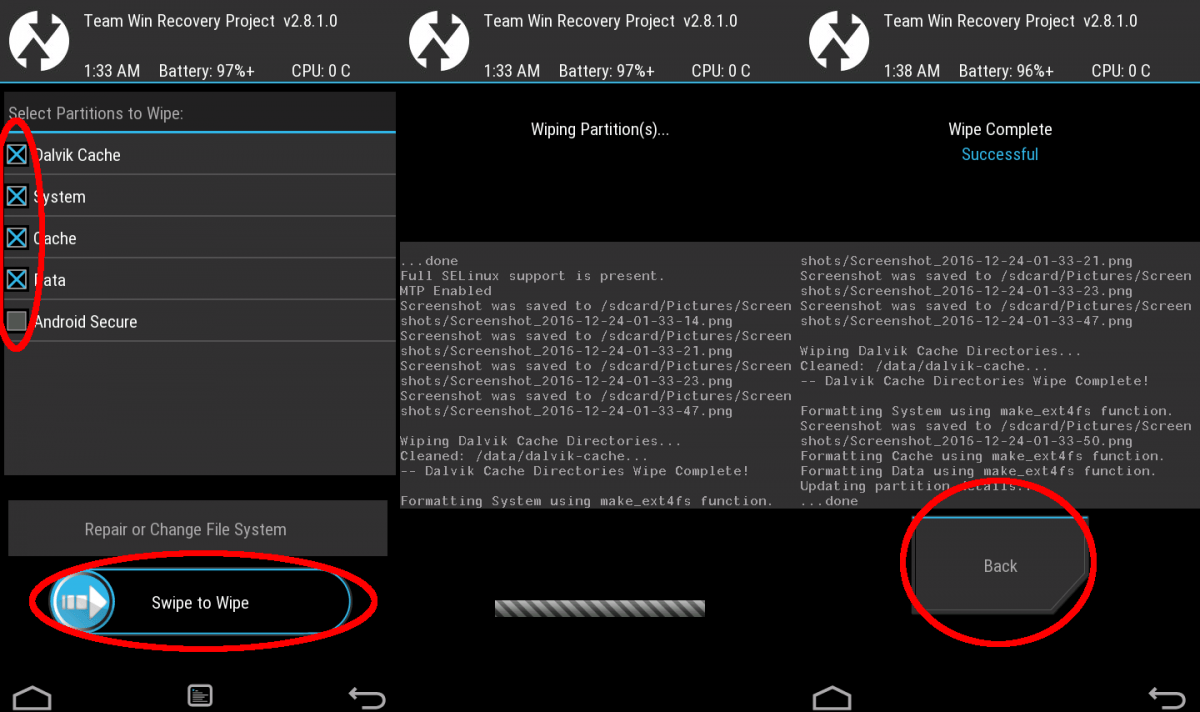
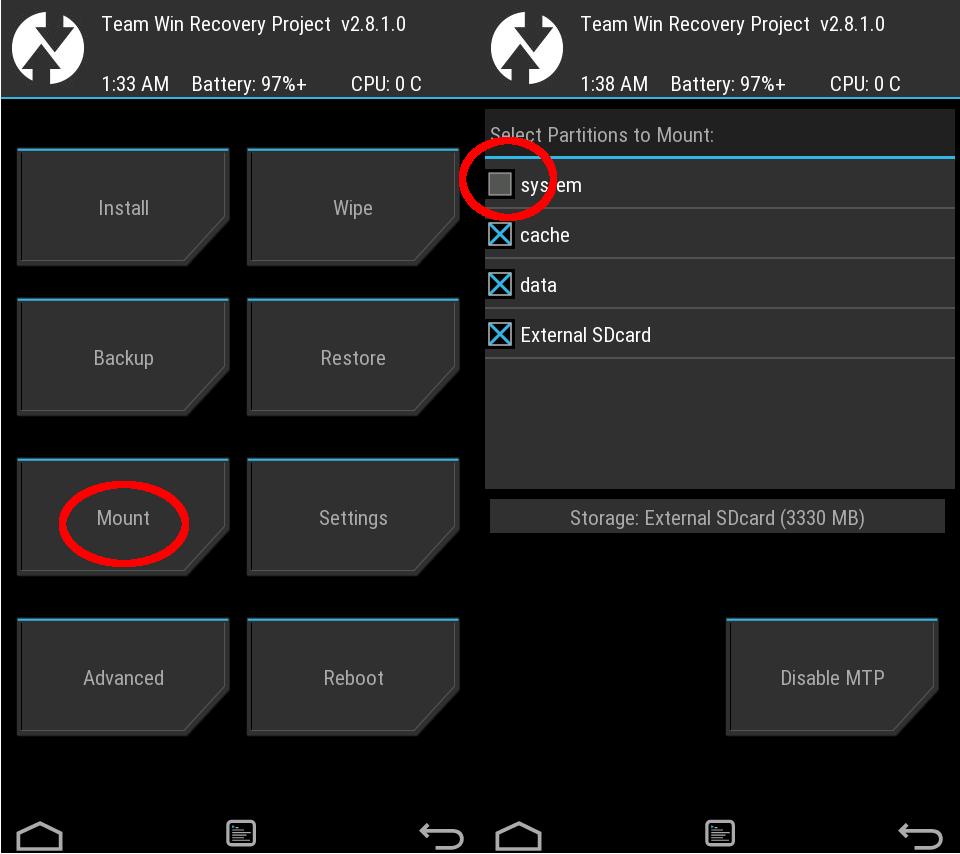
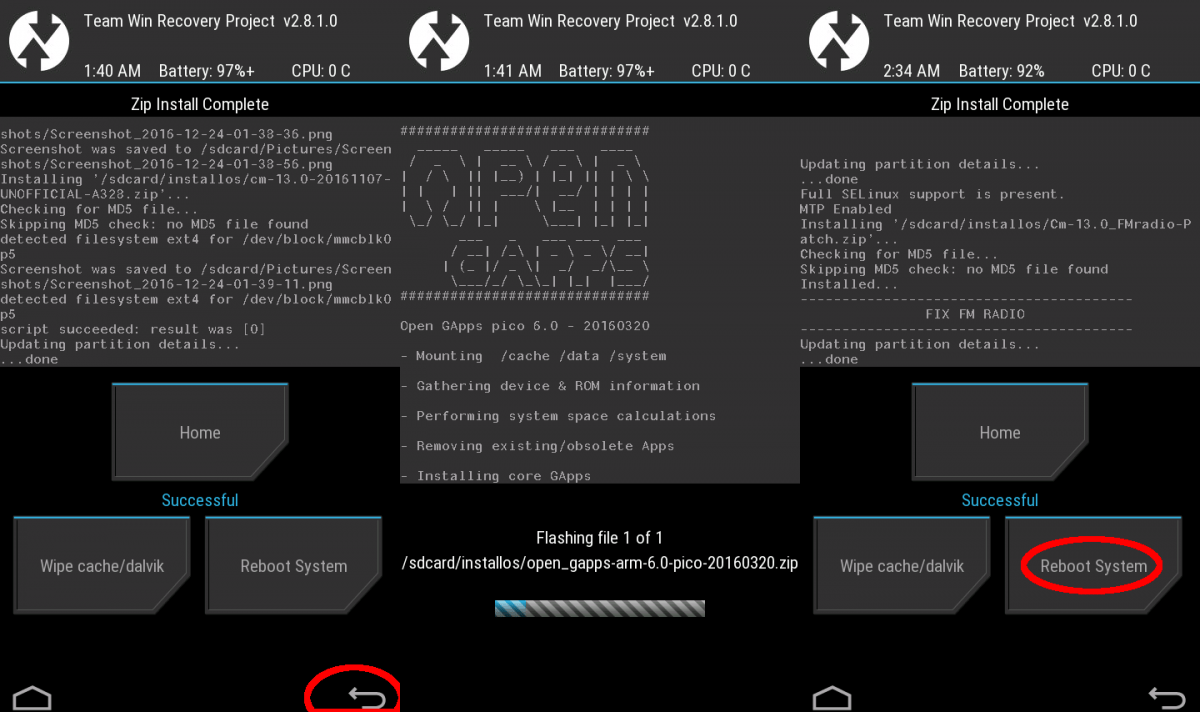
Now the fun part! We put the archive with the firmware, which we previously threw onto the USB flash drive. Back to main screen, go to the “Install” item, look for the desired archive in the manager, and boldly move “Swipe”. The firmware will take several minutes.
Wait until the firmware is installed, then use the back button to return to the file selection screen and flash the gaps (Google application package). After the gaps, I rolled all the necessary patches in the same way, with the exception of changing the memory and radio. I remembered about them later and installed later. I will not describe the installation process, since it is no different from installing gaps. After installing the patches, feel free to click on the “Reboot System”.
Initial setup Android
The launch will seem long to you. The first start after the firmware may take longer than the firmware itself. Do not be alarmed, this is normal. In the custom described in the process of the first launch, you could see what the system is doing at the moment, and how much is left for it. Unfortunately, I could not take screenshots of the launch, apparently the corresponding service starts later. After starting, you will need to select the language, time zone, connect to the network, as well as set up your Google account.

Of all the checkmarks suggested by Google, I left only one. It’s convenient for me when Google stores my contacts. I wrote more about this in more detail. In the settings of the card, I indicated “Portable media”, because after the final installation and configuration I rolled up a patch for a memory change, which worked more correctly than the built-in ROM interface.
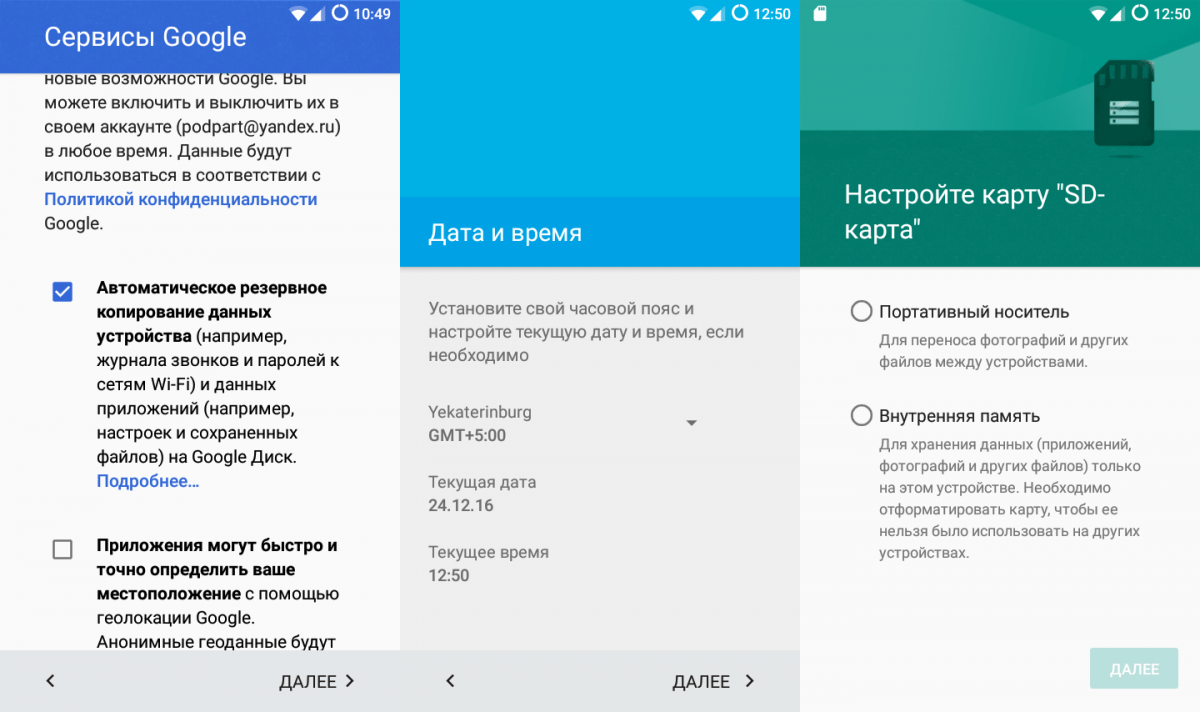
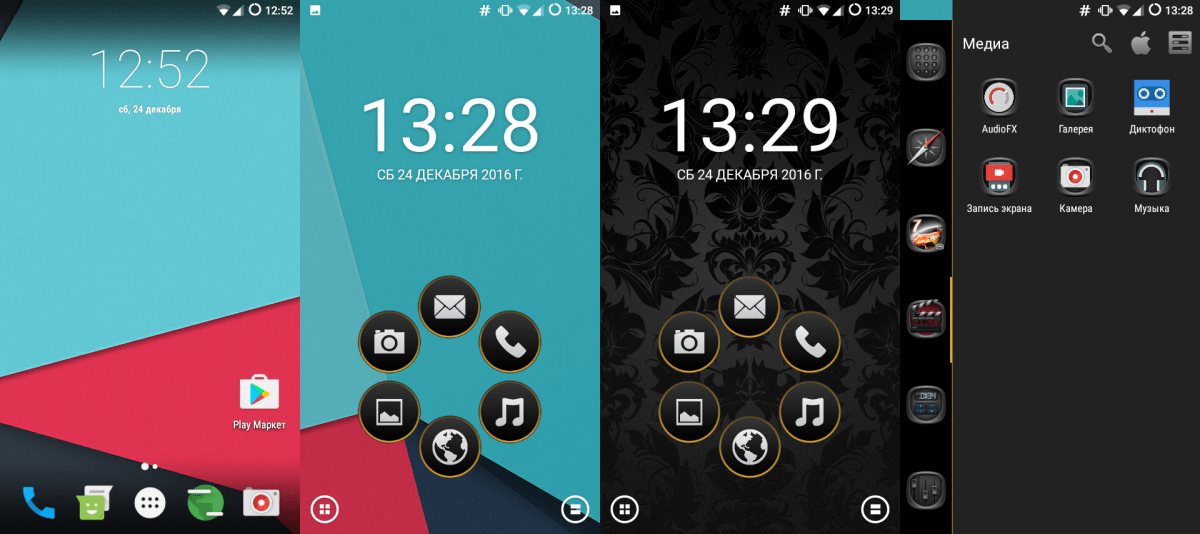
The system started, and now I am the happy owner of cyan on Android 6.01, which I requested from a memory card, after spending about 30 minutes.

Finish Android setup
Before the firmware, I made backup of my applications using the program " Titanium backup". Read how to do this in the following articles. I’ll tell you about restoring programs from backup. “Titanium Backup” saved the applications I specified, along with the settings and data from these applications to archives. I transferred the daddy with these archives to the computer before starting to flash the smartphone. (The fact is that I formatted the memory card, although this is not necessary.) Now, after the firmware, I reinstall “Titanium Backup”, for example, with, although version c is also suitable. I drop the folder with the application backup onto the USB flash drive, turn on the root in the developer's menu and indicate the path to this folder in the Titanium Backup program. Read how to get root this way. Then, in batch mode, I restore these applications. 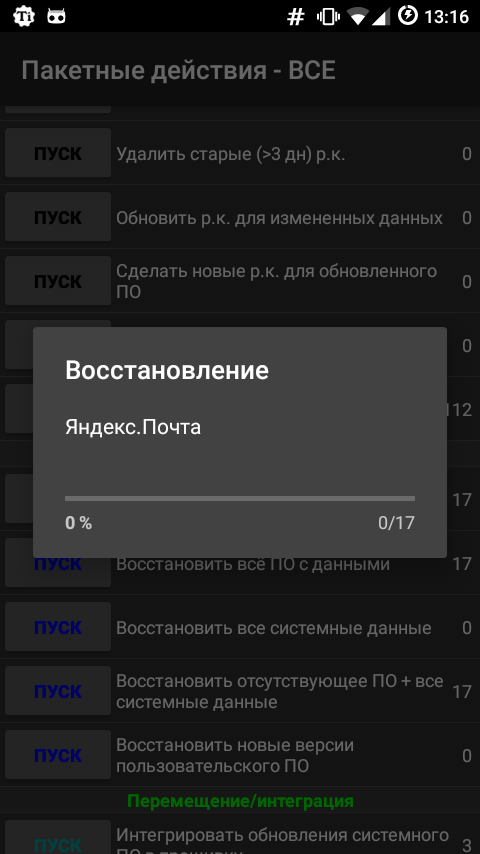
Applications restored in this way remember all my passwords, moreover, I am already authorized in them. I didn’t even have to enter a password or passphrase in order to enter my Bitcoin wallet, it was enough just to launch it.
There is the last touch, replace the launcher with your favorite “Smart Launcher Pro” and change the wallpaper. The rest of the launcher settings remained the same as I did on the previous system, “Titanium Backup” carefully saved them.
Android operating system is ready to use! If you liked the article, subscribe to blog updates. The subscription blog is on the right if you are from a computer, or below if you are in mobile version site.


