How to reset and restore settings on Android?
There are several main reasons why we may need to reset the settings. For example, if we are going to sell the device with our hands, you must first have installed it by us, and all personal information. In a similar situation, their restoration in the future does not interest us. However, it also happens that we plan to reset the settings with the possibility of their subsequent restoration. For example, we can’t get into the Google account in any way, and we are going to delete it in this way. In this case, we need to pre-backup the information.
For standard rollback settings to the factory state, just go to the "Device memory" menu through the settings and select "Reset factory settings". The name and location of this item may vary depending on which device in front of us. It should be borne in mind that in this case all personal information will be deleted.
In some cases standard reset does not help, and may require a hard reset of the device (also known as hard reset). It will be the only way out of the situation if the equipment does not turn on, or if it does not work correctly.
If the device is turned on, turn it off (after making sure that it is charged). After that, we enter recovery mode. The specific key combination to enter this mode depends on the model and brand of the device. For example, we may need to hold down the volume down (or up) button and the Power button; in some cases, you need to click "Home".
After switching to the above mode, select "wipe data / factory reset" and the item "Yes - delete all user data", as a result of which all personal data will be deleted. Next, click "reboot system now". The device should reboot instantly. But again and in general, you can start using the mobile phone, as before, only after restoring the settings.
Today, there are many instructions on how to restore settings on Android. In this case, a backup copy, as well as special software, can help us. There are both paid and free applications.
Restore settings on Android using special software
If we need to back up information, it is recommended to use a program called Titanium backup. We’ll clarify that only those who have root-rights to the device will be able to use it, because without this they will not be able to gain system access.
Today, there are two versions of the Titanium Backup application. Naturally, the paid version has much more features. It costs a little over $ 5.
Work with any version of the program should begin with its installation, as well as with creating a backup copy android devices. More detailed instructions by back up can be found on the net.
When we need to restore information, we can go to the "Processes"\u003e "Recovery" menu and select the recovery item for all the software along with the data. This will completely restore all information. In addition, we are entitled to recover only some data. To do this, go to " Backups"And choose what we need. Click "Restore."
Today, the network configuration on Android in most cases occurs automatically, but sometimes user connection may still be required to connect or select network parameters.
Recording Navigation:
To gain access to the network, it is often enough to insert a SIM card into the device. You need to make sure that the SIM card is activated and has connected services cellular communications. By default, the settings include automatic operator selection, the smartphone itself will find the network and connect to it. If not, enable this option or select your operator from the list available on your own.
How to configure network type on Android
Modern smartphones have the ability to work in several types (generations) of network: 2G, 3G and 4G (LTE). By default, the radio module will try to connect to a higher generation network, if it does not work out, it will try to connect to a network a generation lower. Such a constant search better network negatively affects the battery charge. If you know that a 3G network is predominantly distributed in your region, you can select the appropriate option in the settings, thereby saving the device from unnecessary load when searching for 4G. If you do not use the Internet to watch videos or download large files, you can generally choose a 2G network. The speed of the Internet in this network leaves much to be desired, but such a network setup on Android will help the battery to hold a charge longer.
Internet setup on Android also happens automatically, as does network setup on Android. However, there may be exceptions:
- If you purchased a smartphone from some little-known manufacturer, for the devices of which there are no automatic settings, you will have to enter the settings manually.
- If the smartphone is released for another country. In this case, connecting to the network may not be possible at all, as different frequencies may be used for cellular communications in different countries.
In order to enter the Internet settings manually, you need to specify the necessary parameters for the access point (APN) in the technical support of your operator and create a new access point.
Why does the network disappear on Android
From time to time, smartphones on Android, like everyone cell phones, there may be problems with the quality of the network connection. There are many factors that affect the signal level, it may not be at all in the device or operator. Here are some of the reasons why the quality of communication and Internet speed are falling:
- The long distance to the nearest ATS tower (automatic telephone exchange) is especially noticeable outside large settlements.
- The load on the cell tower - if many subscribers are simultaneously connected to the same tower and use the Internet, then its speed for each subscriber drops.
- Weather conditions - during rain radio-relay communication channels sharply lose their bandwidth.
- Building density and other obstacles to the signal path. It happens that due to obstacles the device cannot catch the signal from the nearest PBX and connects to a more distant one.
- The quality of your smartphone - when acquiring a budget device, you must understand that not the best components are installed in it.
- Some cases also negatively affect the quality of the received signal.
How to amplify the signal on Android
To amplify the signal in settlements and beyond, the so-called GSM / 3G repeaters are used. The device is a reinforced antenna, which is able to pick up a weak signal and amplify it for use by subscribers. There are also applications designed to improve the quality of communication. They do not improve the signal itself, but they scan the nearest cell towers and connect to the one whose signal is better. If you are having communication problems, you can try the application
Sometimes after full reset settings on Android, there is a need to restore files, folders or data that have been deleted. Sometimes information recovery may be necessary if the user deleted it from his smartphone accidentally. Especially offensive for rare photos and music.
Therefore, if you are in search of a simple and effective way recover lost or deleted files Android, then after reading this article, you will become a real expert in this matter.
Take your time to get upset and despair, fortunately for eating special programsthat will solve the problem of deleted files in a couple of clicks. We will take a closer look at one of them - 7-Data Android Recovery is one of the clear leaders.
How to recover deleted data on Android system
As we mentioned above, information will be restored using 7-data programs Android Recovery, at the time of writing, it was completely free, perhaps in the future, the developer will introduce a certain fee, but for now, let's not talk about sad things 🙂
7-Data allows you to easily recover most deleted files as in internal memory and on an external SD card.
You can download the program from our server on this one.
Then we follow the standard procedure. Unpack the archive and run the application file 7data-recovery-suite. Following the prompts of the installer, we complete the installation of the program on our personal Computer or laptop.
After successful completion, open 7-Data Android Recovery:
Before starting the recovery, you need to enable debugging of the USB device and connect the smartphone to the computer with using USB cable for this:
1. Go to the settings of your smartphone - Developer options - USB debugging (check);
2. Connect USB cable to the smartphone then to the computer;
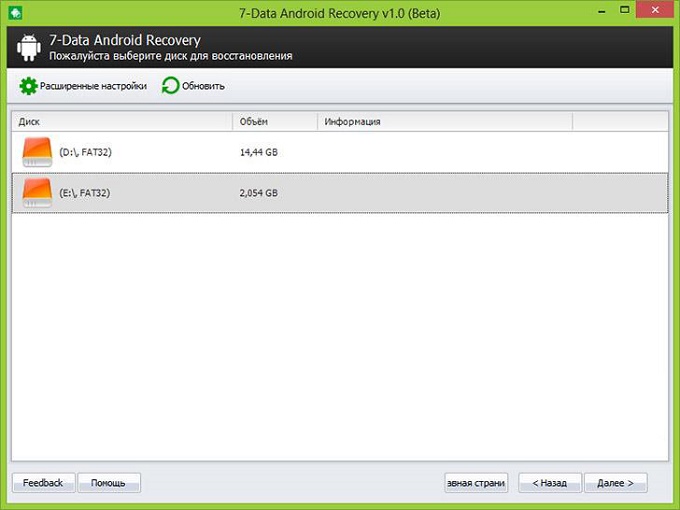
3. In the window 7-data recovery click on the green "Next" button. A window with a list of memory cards should open in front of you, you need to select the one you need and click the "Next" button.
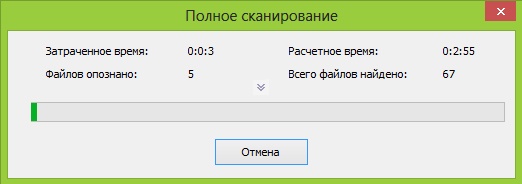
4. A device scan window will appear. Here you just need to wait a while until the program completely scans the device and displays a list of files that can be returned.
5. Upon completion of the scan, a structured “tree” of device folders and files is displayed.
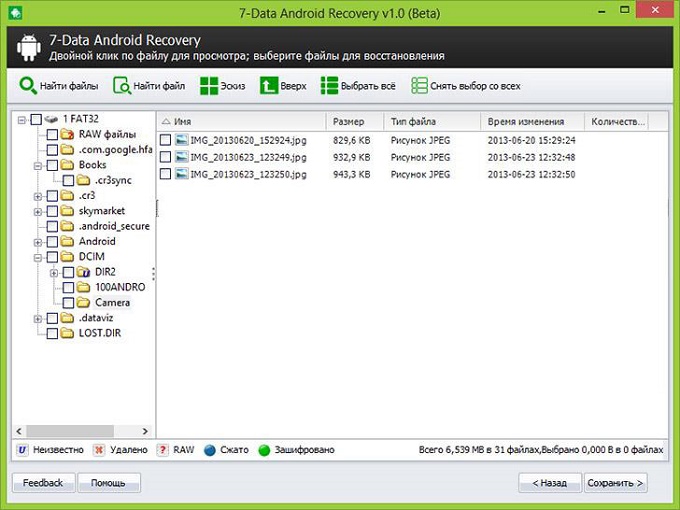
6. We go through the list and mark those that are subject to recovery. Click the “Save” button.
Important! The data that you restore must be saved in a separate folder on your PC, do not save it to the memory card again. You use the program at your own peril and risk, it does not give a full guarantee that everything will be qualitatively restored.
As you can see, the procedure does not require deep knowledge, and even the initial user will be able to restore most of the seemingly irrevocably lost files and the data of your Android.


