Is stored on a computer various information. For example, photographs, films, and the like. When information becomes unnecessary to us, we simply delete it. There are times when a person mistakenly deletes files. Many people begin to panic. They wonder how to recover files deleted from the recycle bin.
Is there a possibility of file recovery?
Operating systems of the Windows XP family and older are quite serious operating systems that are protected against accidental deletion of files.
When deleting a file, the operating system wonders whether to actually delete the file. After the user has agreed to delete, the document is moved to the trash. But there are times when the basket functions are disabled and the files bypass the basket. In addition, when deleting documentation through command line, files go past the trash.
In addition to cases when the user intentionally or accidentally deleted a file, the documentation can be deleted by viruses that get to the PC. Do not despair, in most cases deleted files from the basket can be restored.
An exception is the recovery of documents after low-level formatting. Such formatting is carried out so that secret information does not fall into the wrong hands. This type of formatting is possible only on special devices that the average user does not have.
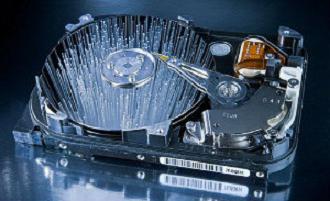
The specifics of data storage on a hard drive
Information is the area occupied on the hard drive. When files are destroyed, only data about this information is eliminated. This is necessary so that information is excluded from the list of directories. Before restoring files deleted from the recycle bin, you need to make sure that in place of these documents, other information was not saved. Utilities scans each of hard sectors drive looking for lost data. Difficulties arise if the sector on which the information was stored was damaged on the hard disk. Then you have to use the services of professionals.
Rules for recovering heterogeneous files
Before you start restoring previously deleted information, you need to remember a few simple rules:
- First of all, you need to stop working on your PC and close extraneous programs that will not help us recover deleted files from the recycle bin. Also, do not install and download programs to a disk that needs to be restored. This is due to the fact that new documents and programs are recorded in place of the destroyed files.
- Recovery can only be started if low-level formatting has not been done. When the information is deleted from the basket, the table of contents is deleted, that is, the system cannot read them, therefore, it simply writes new files in their place. With low-level formatting, information is completely destroyed, since zeros are written in its place. After recording zeros, it is almost impossible to recover information.
- For recovery, it is better to take care of installing specialized utilities in advance, or purchase a Live CD. This disk contains all the necessary utilities for operation.

Recovery of deleted files with utilities
So, how to recover files deleted from the recycle bin? To do this, you need to download specialized utilities from the network that will return information deleted from your personal computer in a minute.
One of such wonderful utilities is Magic Uneraser. After installing the program, you must enable the scanning of disks or removable storage devices. When the scan is completed, the user will be able to see files that were previously deleted, and files that currently exist.
Before restoring a file, you can see the information that it contains. In order for recovery of deleted files from the recycle bin to be successful, select the necessary documents and restore them to any folder.
The only minus of the restoration of documentation is the purchase of the above program. The cost of a license ranges from 1,000 to 6,000 rubles. The type of license depends on its functional set.
Additional programs and utilities for file recovery
If on your personal computer Windows is installed (starting with the XP series and ending with the 8 series), then you will have to work with the NTFS and FAT32 file systems. These systems are ideally handled by Mun Soft Easy File Undelete. It will easily recover deleted files. In file nTFS system scanning sectors will be a little faster.
If you work with photos and mistakenly deleted the wrong photos, you can use the utility Mun Soft Easy Digital Photo Recovery. The program detects on your computer all previously deleted photos. Before restoring a photo, you can look at it to make sure that it is the photo that needs to be restored.
Another utility worthy of attention is Recuva. This program can recover pictures, music, videos, documents and email. The cost of the utility is about 3,000 rubles. Of course, this is a low price for data recovery, especially if it is information used to work or conduct business.
For those who do not want to pay money, you can search the Internet for free analogues of paid recovery programs.
Conclusion
Files deleted from the computer can be restored, but first you need to decide on the recovery method. Everyone chooses for themselves which utility is right for him. In the event that, nevertheless, the above-mentioned programs did not help to return the necessary information, and you still care about the question of how to recover files deleted from the trash, it is worth using the services of specialists. These masters are likely to be able to help recover information.
In order not to encounter a similar problem, it is best to do backup all important files. This will be especially convenient for those who store working information on a PC. You can back up once a month. Otherwise, you will have to bother with recovering lost data.
Files deleted by users are first placed in the Recycle Bin, from which information can be restored with the click of a button. Another thing is if the user himself cleared this folder: the necessary data is erased from the system. The question arises, how to recover deleted files from the recycle bin and can it be done at all?
Recovery programs
Data recovery after cleaning is possible using a special software. There are several utilities that return information from a newly emptied Recycle Bin.
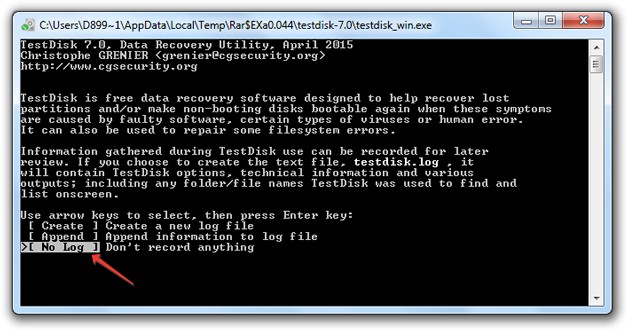
- TestDisk.
- GetDataBack etc.
All utilities work on the same principle, scanning the drive in search of traces of deleted data. However, the result of their work can be different, so if one program did not cope with the task, then you need to move to another, since the chances of restoring information always remain.
Data recovery
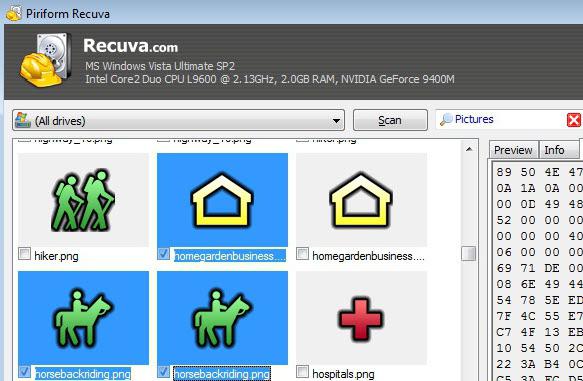
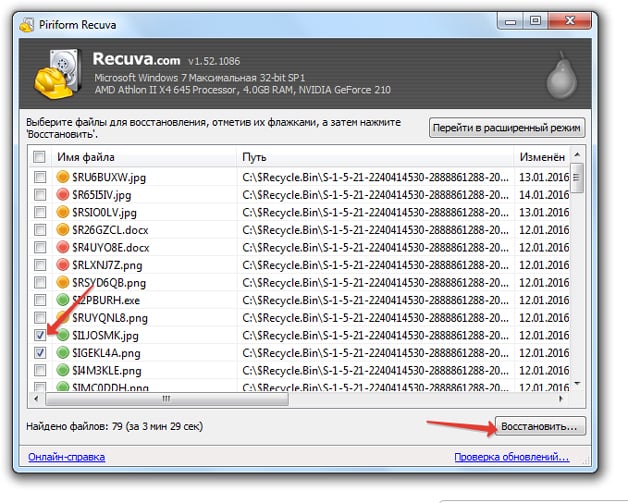
Recuva is one of the most famous programs for data recovery after cleaning the Recycle Bin, so we use it as an example of how you can return lost information.
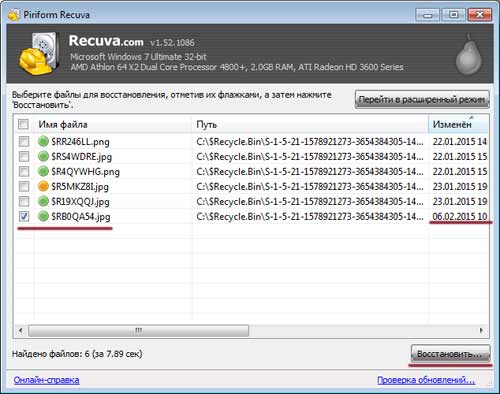
After the scan is completed, a list of detected files appears. Perhaps some of them will become unreadable - such data butu marked in red. If the file is damaged, but it can be opened, then the circle next to it will be yellow. Information marked with green circles is completely restored and ready to be saved on the computer.
After the recovery process is completed, the data erased from the Recycle Bin will again be on the computer.
Using other recovery programs
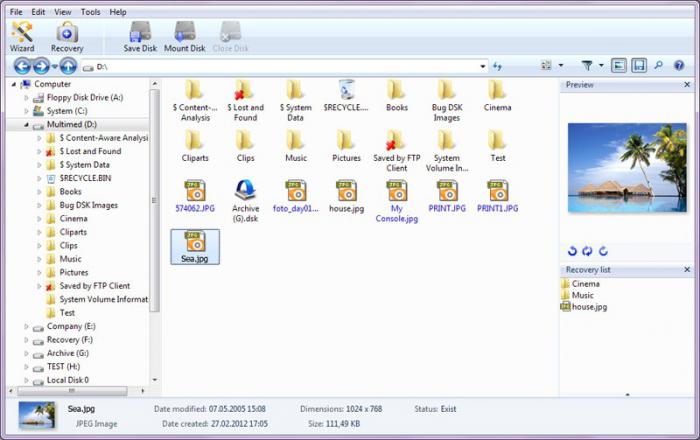
If the Recuva program was unable to find the necessary files after cleaning the Recycle Bin, then you can try more powerful utilities - GetDataBack and TestDisk. Let's see the GetDataBack algorithm:
After the scan is completed, the program will show another file system - select it to see the array of data that appeared after recovery.
The only drawback of this utility is that it is not possible to save recovered files to a folder on your computer in free mode. Can buy full version programs, but there is another option: use the TestDisk utility.
TestDisk
If neither Recuva nor GDB could find and return files after deletion, then this task can be handled using the TestDisk utility, which should be well known to Linux users. Perhaps for 2016 this program looks out of date due to the lack of an attractive graphical interface, but it copes with data recovery perfectly.
The program window displays the data that could be found. To restore a file, select it and press the “C” key in the English layout. To select all files, press "A". 
In the next window you need to select a directory to save the information found. Use the arrows to find the folder that you created and placed in the root of the disk, and press the “C” key again. 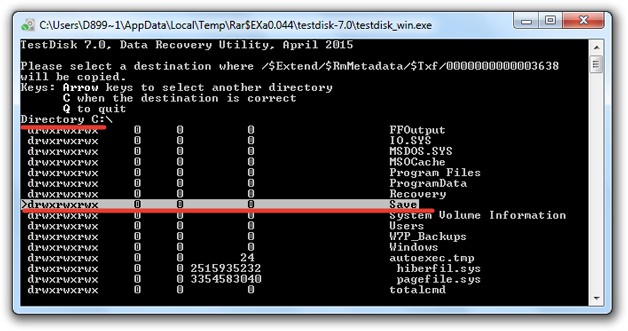
After the copy is successfully completed, you will see the message “Copy Done”. The recovered data will be in the folder you specified; their names will change, but the files should open without errors.
If you still have questions, we strongly recommend watching the following video:
As you know, small files deleted from the hard drive are first moved to the trash, and only then, after cleaning it, disappear from sight forever. In this article, we will consider the situation when you deleted a file from the trash inadvertently and now want to return it. First, consider the process of deleting such a file.
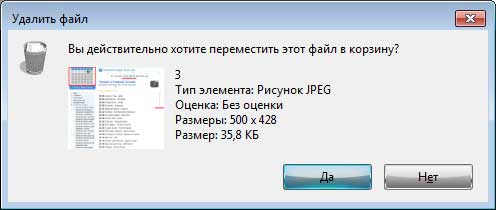
Right-click on the file and select "Delete".
They ask us if we really want to move this file, we agree, and it ends up in the trash.
In order to recover deleted file from recycle binwe go into it, find desired file, click on it with the right mouse button and select the “Restore” item from the drop-down menu.
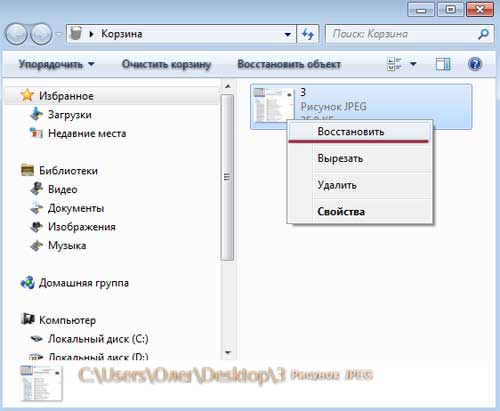
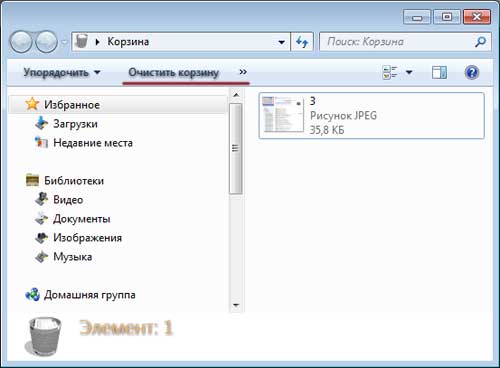
The file is restored to the place from which it was placed in the trash. If you click on the button "Empty trash", then the file will disappear from the trash forever. If after some time you want to restore such a file, you will have to rely on luck and perform some actions.
If System Restore () is running on your Windows OS, then you can try the following: Right-click on the folder in which the remote file was located and select Restore Previous Version.
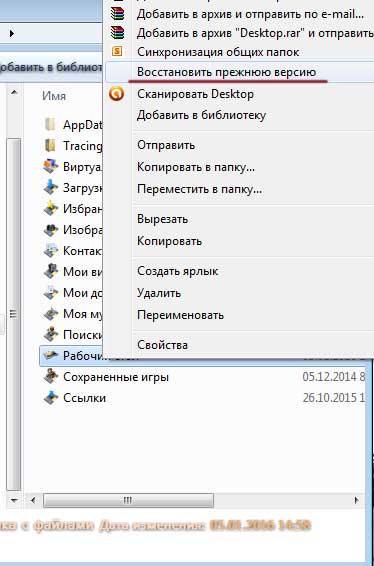
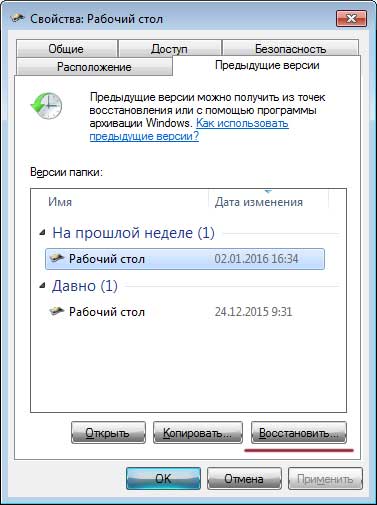
I clicked on the “Desktop” folder and, as you can see, I had earlier versions of this folder open. If you open these folders, you can easily find and copy a previously deleted file or click on the “Restore” button and completely restore the previous contents of the entire folder.
Attention! This method works only on those system disks on which the function is enabled.
Let's consider the following method, which provides using backup () if you have one.
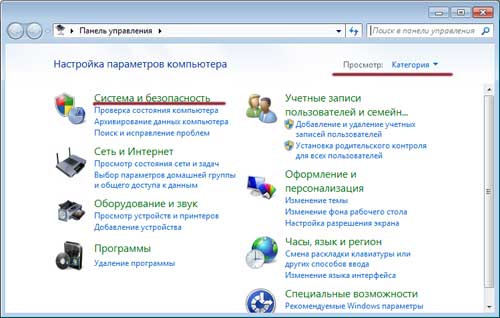
We go in "Start - Control Panel"put Browse: Category. Click on item "System and safety".
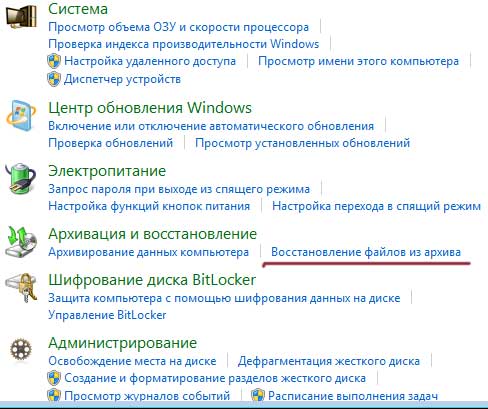
We find the backup and restore section and click on the link "Restore files from the archive". I remind you that you will succeed in the file only with the configured archiving and with the archive itself:
Another way to recover files deleted from the recycle bin is to using recuva programs (). We download it from the official site: http://www.piriform.com/recuva, or we ourselves look for it on the Internet.
Here I will give you some tips. If you want to restore the file in this way, then:
1. Do not install or delete anything from the partition from which the desired file was deleted.
2. Disable all processes associated with using the hard drive directly, for example, defragmentation.
3. If possible, disconnect hDD from a computer and search for the lost file on it already from another computer.
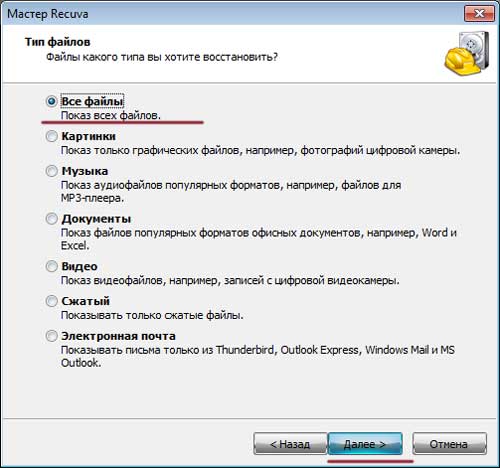
And so, run the program, select the file type - “All Files” and click the “Next” button.
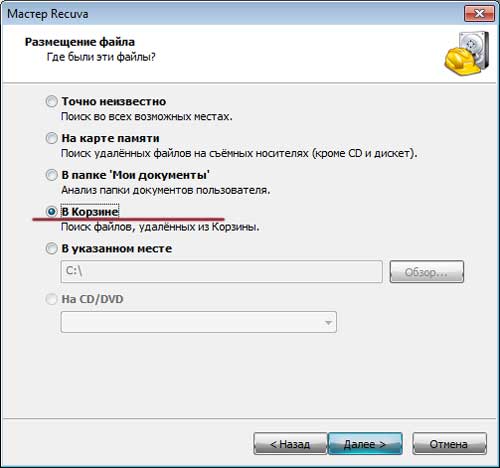
Place the file, select “In the basket” and click on the “Next” button.
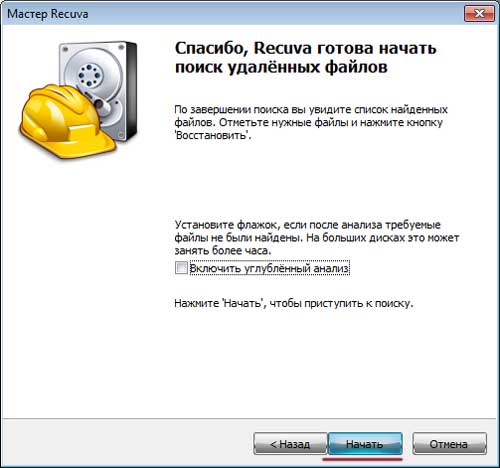
You can enable in-depth search and click on the “Start” button
The program finds the files, we look for the date and file size we need, select it with a bird and click on the “Restore” button
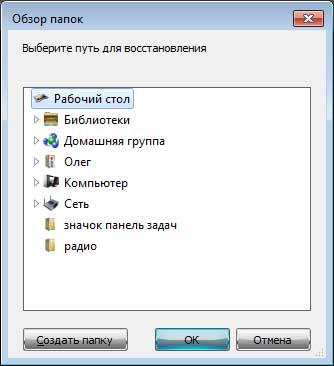
Choose the place where you want to recover the deleted file.
Advice! Do not choose the same place in which he was, otherwise you risk losing him. It’s better to create a separate folder for it and restore it, while creating a folder on another hard section drive.
We indicate the place and click the "OK" button.
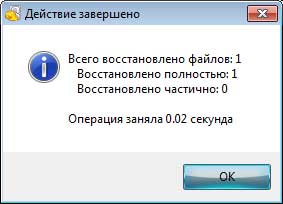
File recovered:
All friends. In this article, we have looked at several ways that you can recover files deleted from recycle bin.
In this article you will learn:
- how to recover deleted files using the EaseUS resuscitation utility Data recovery Wizard
- how to return the basket back to the desktop;
- how to recover a deleted folder to your hard drive;
- how to recover all deleted files from recycle bin to a computer.
When you delete a file through Explorer or another file manager, it is placed in a special intermediate area of \u200b\u200bWindows - the Recycle Bin. However, this area on the disk is present in any normal operating system with a graphical interface: Windows, Mac OS or Linux. The cart (or recycle bin, as it is called) can even be installed on mobile phone under running Android or iOS.
In this guide, you will learn about 2 ways to return data to your hard drive using popular resuscitators. Easeus data Recovery wizard and Handy recovery.
Anyway, deleted files are stored in the Recycle Bin certain timeuntil one of two situations occurs:
- You empty the system Trash because there is no free space on your hard drive
- The recycle bin uses limited space to store erased data. When there is not enough space, old files are simply overwritten by newer ones on top of existing information without the knowledge of the user
Thus, " Trash bin”Windows plays the role of an intermediate clipboard, backup space on the HDD. If you decide that you still need some valuable files, you can “rummage around” in the System Trash, dig out directories, folders, erased items from there, and quickly restore them. As a result, you get a file that seemed to be lost forever.
Sometimes you look into the Windows Recycle Bin - and there is nothing useful there: in fact, only useless "garbage"! Most likely, you just emptied the Windows System Trash, and the valuable files actually disappeared.
Well, we will look at ways to restore the Recycle Bin, hereinafter.
How to recover files placed in the Recycle Bin
Before the worst thing happened, you still have a chance to restore, reanimate files from the destroyed directory, from the cleared Recycle Bin. The process of returning erased data is quite simple.
- To get started, you find a file or folder by going to the Trash
- Then find the desired remote file or folder
- Right-click on an item, select the “Restore" option through the context menu.
Can I recover files deleted from the Recycle Bin?
From time to time, you can empty the Trash to free up disk space. But do you think that files cleaned this way will be difficult to recover? For this you will need special programs to restore files, not two clicks of the mouse. Therefore, I advise you to always think what actions you are doing, especially when it comes to cleaning up the Trash.
When a file is deleted from the Recycle Bin, many users think that it is sent to / dev / null and in the future it is impossible to recover deleted files even with the help of resuscitators. Even the Windows operating system displays a message saying, “Deleting a file from the Recycle Bin will delete the file / folder permanently from your computer.” However, in reality this is far from the case. I think that my article is also read by experienced users who do not believe what the operating system tells them and that what ordinary mortals can do is incomprehensible. So listen to me carefully.
"Windows" (or another OS) changes one character in the file table, after which the file and folders simply do not appear in Explorer, My Computer, or another file manager. However, now we can get any program to restore files using the functionality as intended. In principle, any resuscitation program in this category will be able to scan the hard drive and perform effective recovery of deleted files from the Recycle Bin. I will advise you on time-tested effective tools. First of all, we are talking about such a well-known utility as EaseUS Data Recovery Wizard.
How to recover a recycle bin or deleted folder using the EaseUS Data Recovery Wizard
Data Recovery Wizard is a great effective program that has helped me more than once in finding files from the Recycle Bin. I used it under Windows, and in fact, it restored everything that I cleared from my stupidity. One of the key features of this program is that you can quickly look at the files, that is, make a preview of them, before actually recovering. This can save you a lot of time, especially if there were a lot of files in the Recycle Bin and all of them fell into the distribution, as they say. Next, read my guide on how to return deleted files from the Recycle Bin using the EaseUS Data Recovery Wizard.
Step 1. Download the Data Recovery Wizard
You can download a program in the catalog on this site, on torrents, or, of course, on the manufacturer’s website Recovery Wizard. Only there it is paid; but if there’s a little denies, then why not support the guys who did good program recovery? The free version is also suitable, so feel free to download it.
Step 2. Launch the program
Run the EaseUS Data Recovery recovery wizard, select the types of deleted files you want to recover from the recycle bin. Then click “Next” to continue the process of restoring files and folders in the next step.
Step 3. Select a disk
Select the drive, the hard drive partition where you lost the file, click the “Scan” button. The program will quickly scan the selected source in search of files deleted from the Recycle Bin (it all depends on the size of the source; please be patient). By the way, if you have erased a whole disk partition, you can use the software option “Search for lost disks”. Then click “Scan” and wait.
Selecting a disc with erased files and folders
Step 4. Recover deleted files and save received data to disk
After scanning, you can preview the desired deleted files in the Recycle Bin for recovery and then select one or many items to save to disk.
Tip of the day. I strongly advise you to save files and directories NOT on the disk where the files for resurrection from the Recycle Bin are located. Copy them to another section: this will avoid overwriting the data, which, in fact, is still at the recovery stage (and not the fact that it will turn out well - although we will not talk about sad things). It is very easy to mistakenly erase the information needed for reconstruction.
application EaseUS Data Recovery Wizard: who seeks will always find
I hope this lesson helped some of the readers answer the internal question: “How to recover deleted files or folders from the recycle bin”: photos of kittens, favorite love films or an essay on the topic of finding deleted files in the Recycle Bin.
I must tell you that there are a bunch of other ways to return deleted files from the Recycle Bin. In extreme cases, if the EaseUS Data Recovery Wizard utility did not help you, try any recovery program from that I made specifically for visitors to the Softdroid.net website. Take a look at other sections of the site: I have already repeatedly told how to restore the Cart.
How to recover files deleted from the Recycle Bin using Handy Recovery
If you empty the Trash or delete several files from it, then you still have the opportunity to return these “thrown into the trash” files. To do this, you need to follow some simple steps in the Handy Recovery application.
Handy Recovery will help you learn how to return deleted folders and files from the Recycle Bin to Windows
When selecting a drive, specify the one that contained the files before they were moved to the Windows Recycle Bin. Explorer will display only the System Trash, however, in fact, files that were moved from another drive are stored in various system directories. This is why it is so important to indicate correct disk to recover data from the Recycle Bin.
After you choose desired drive, click the "Analyze" button. Upon its completion, select the "Recycle Bin" folder in the appeared Handy Recovery program window. It contains files and folders that you can recover deleted files in the usual way, using the "Recover" button on the toolbar or a similar reconstruction command from the context menu. You can recover a deleted folder on the same principle as a file.
If you do not see the files in the specified directory, you can go to Handy Recovery for advanced analysis file system hard drive.
We go further. If you still can’t find the items you are looking for after an advanced analysis, try searching for files in the system folder in the Recycle Bin. The folder name depends on the OS and the theme of the disk file system. Say for Windows 2000 and XP, the folder will have the name "$ RECYCLE.BIN".
Tip: even if the deleted file is located inside these folders, not matching its original name, try to identify it by extension (it always remains), size, or its insides (which can be found out in the preview).
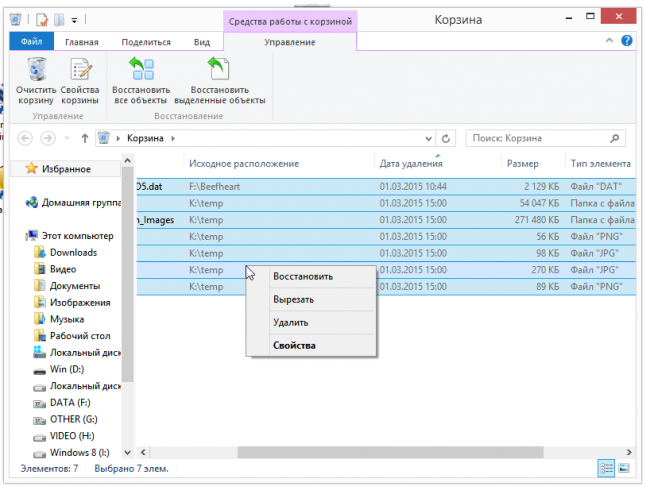
Deleted files in the operating room windows system placed in a special system folder - the basket. There they are stored until the basket is cleaned or these documents are restored. This function is implemented to avoid accidental deletion of user information. To restore data from the recycle bin, select the necessary files, right-click on any of them, and click "Restore" in the context menu. Deleted documents will be returned to their original directories.
In the case when you want to recover deleted information and place it in another folder, select and drag the documents into the necessary directory. They will be moved (copies will not remain in the basket).
Note! Documents that were deleted using the “Shift + Del” combination do not fall into the trash. Their recovery is carried out only using specialized programs.
Recover files deleted from the recycle bin
If, after deleting data in Windows, the recycle bin has already been emptied, you will not be able to use the direct recovery method. But this does not mean that the data has been permanently deleted. When deleting files, they are not instantly erased with hard drive a computer. The place where information was stored is marked as free by the system. In the future, new data can be recorded on it, and only then deleted documents are erased.
Therefore, from the moment of removal, it is important to perform the minimum number of write operations to disk. It is also advisable to use during recovery external drive or a USB flash drive to record received information. When saving to the same drive, new information may damage the original. To recover data, use one of special utilitiese.g. Handy Recovery or EraseUs Data Recovery Wizard.
Handy Recovery Program
Installing the application is carried out in several stages, using the wizard. Run "setup.exe" and follow the prompts of the installer. At the first step, it is recommended to close all currently used applications. If the computer is small random access memory, use this advice and click the "Next" button. On modern computers, closing other applications is optional.
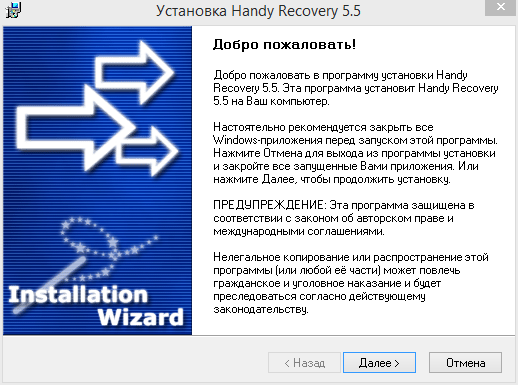
After that, information about the utility will be displayed, including a description of its functions and a list of changes to latest version. Proceed to the next step. A license agreement will open, the reading of which will need to be confirmed by checking the box "Yes, I agree with all conditions."
Click "Next" again and select the application installation directory. Logical structure folders in Windows is arranged so that the recycle bin is located in the system partition. In most cases, this local disk C. So that these programs do not overwrite the files that you want to recover from the recycle bin, it is recommended to install it in another partition (for example, on drive D). An even better solution is to install it on an external medium.
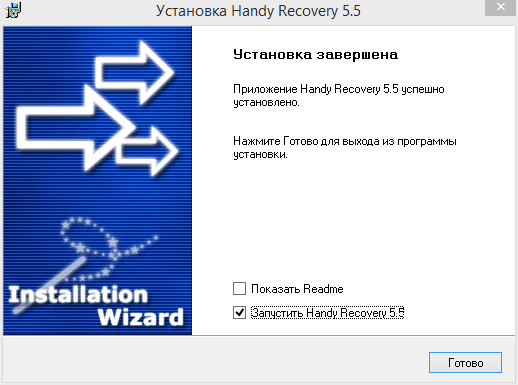
In the next step, the installer will ask about the need to create a shortcut on the desktop. After that, proceed to unpacking and copying the utility to the computer directly. When the process is completed, the application will offer to show information from the developers and make the first launch. Mark the required options and click Finish.
The first window that appears after starting the program - restrictions free version. The trial version of the utility works for 30 days. In addition, only one deleted file can be recovered per day. But if you recover a small number of deleted images or text documents, licensing restrictions will not affect the work. The application interface has a preview of information from where you can copy the necessary data.
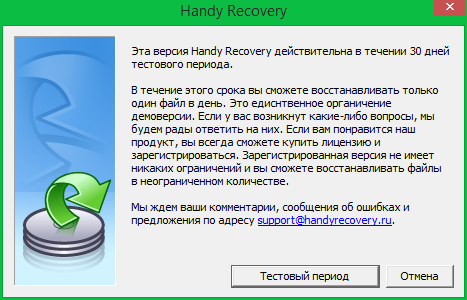
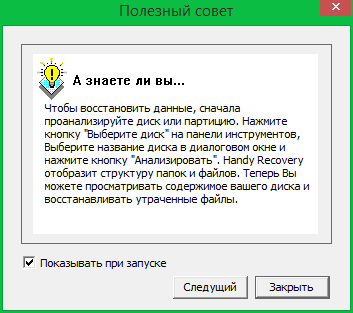
When you turn it on for the first time, helpful tips are also displayed. Their switching is done using the "Next" button. To disable the display of tips at program startup, uncheck the box “Show at startup” and click “Close”.
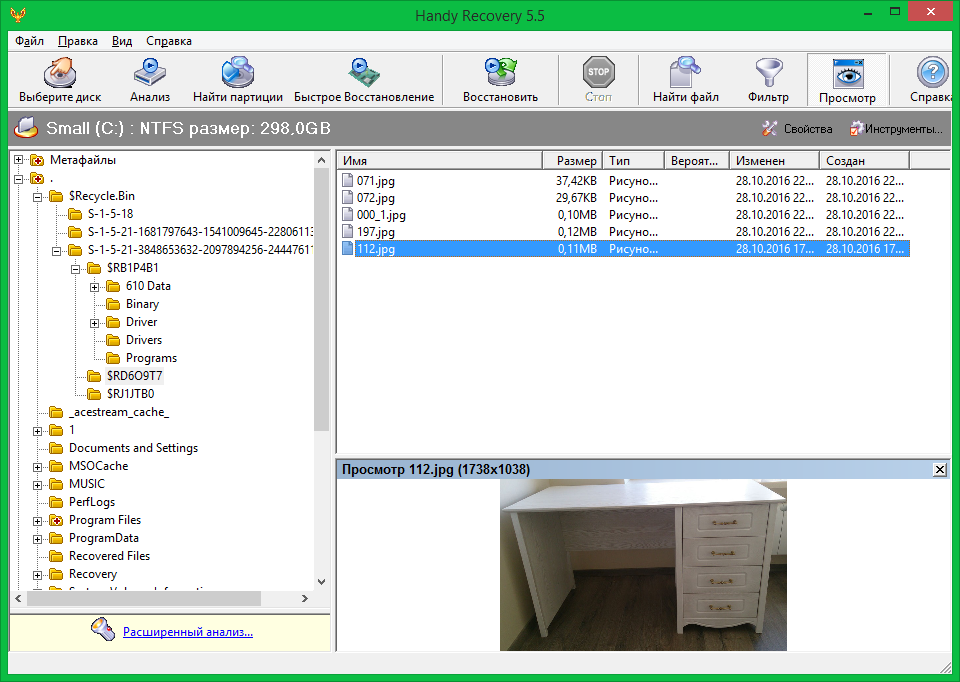
After that, you can select the disk or partition on which deleted information. Since the data has been removed from the trash, select system disk. Click “Analysis” to search for deleted information.
![]()
Important! If you want to speed up your search, click Cancel. In the program interface you can mark only the basket without scanning the whole disk for this.
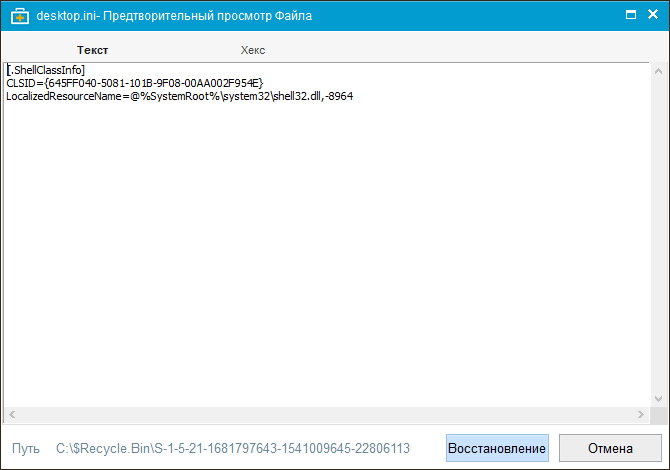
The main application window will open, in which the current scan progress will be displayed. When it is complete, you can view the directory tree on the selected drive. Among them will be remote. To access the basket, go to the $ Recycle.Bin folder. In the case in the screenshot, you can see that there are three in the basket remote folders, one of them has subdirectories.
Find deleted documents that you want to recover. Below under their list is a preview section from which you can copy text and graphic information.
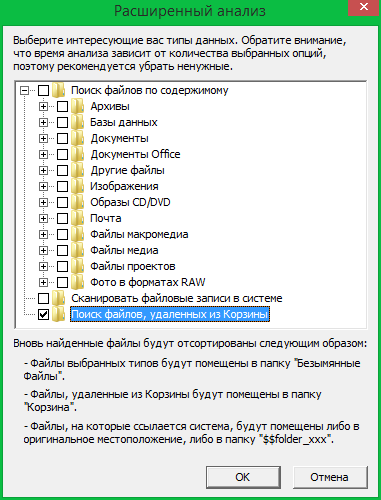
If there is no information in the $ Recycle.Bin folder that you want to recover from the recycle bin, use the advanced analysis. To do this, follow the link in the lower left corner of the application. When choosing the advanced analysis options, check the box “Search for files deleted from the Recycle Bin” and click “OK”.
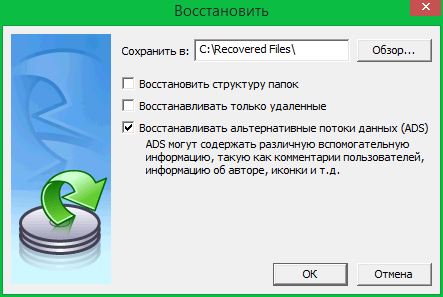
To restore the found deleted documents, right-click on them and select "Restore". A window will appear in which you can mark the recovery options. Among the additional options are offered:
- Restore folder structure - creates directories similar to the source.
- Restore only deleted ones - if only some documents were deleted from the restored directory, only this option will be saved when this option is selected.
- Restore alternative data streams (ADS) - is responsible for the presence of meta-information in files.
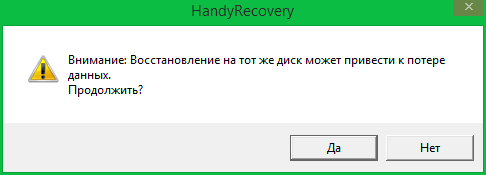
If you save information to the same section from which it was read, additional confirmation will be required before proceeding to the next step. It is recommended to click “No” and set another partition to save data.
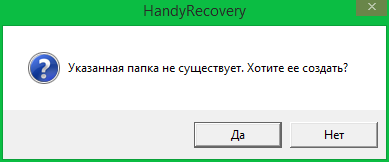
If there is no specified folder in the specified path, the utility will offer to create it. Click “Yes” to create a directory and save the restored information to it.
EraseUs Data Recovery Wizard
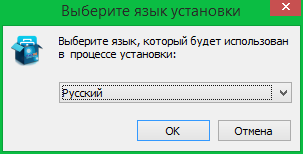
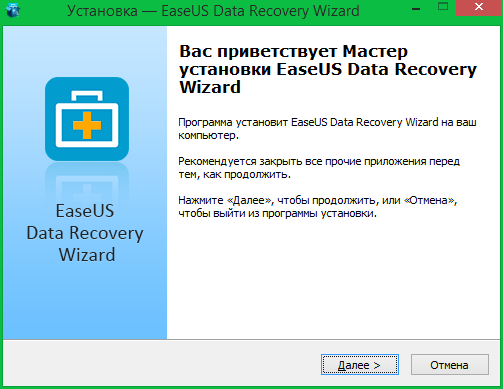
Unlike Handy Recovery, this application has a modern interface and allows you to quickly filter deleted data by its type. At the first stage of installation, select the language in which the following stages of installation will be displayed.
Select the folder in which the program will be written. As with Handy Recovery, it is not recommended to use the disk from which you will recover data.

If necessary, select the necessary items for creating icons on the desktop and in the panel quick start. In the next window, specify the name of the folder in the Start menu. It will contain the shortcuts of the installed application.
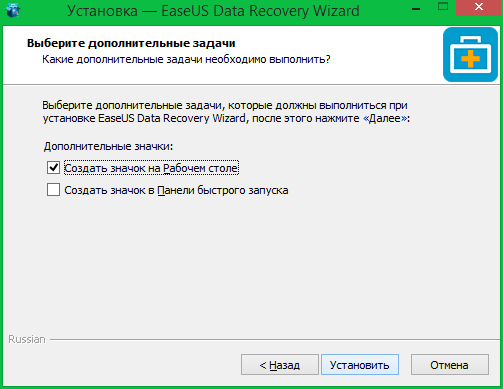
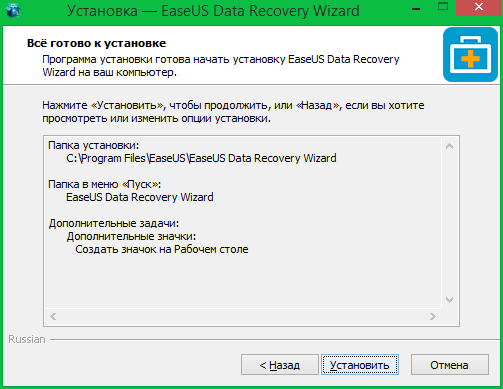
Before installation, all selected options will be shown. Check their correctness and click “Install”. If you need to make changes, you can return to the previous steps by clicking the "Back" button.
At the final stage, choose whether you want to run installed application. The utility will also offer to participate in a program to improve user support.
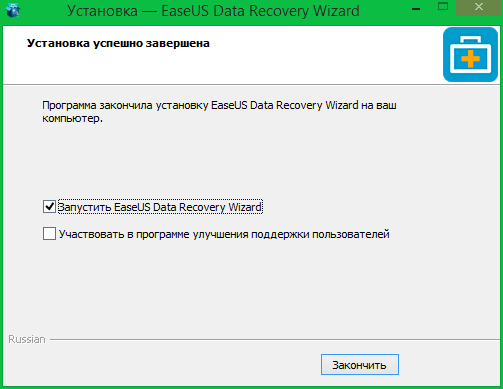
Important! After activating the second option, the program will send the developer usage statistics.
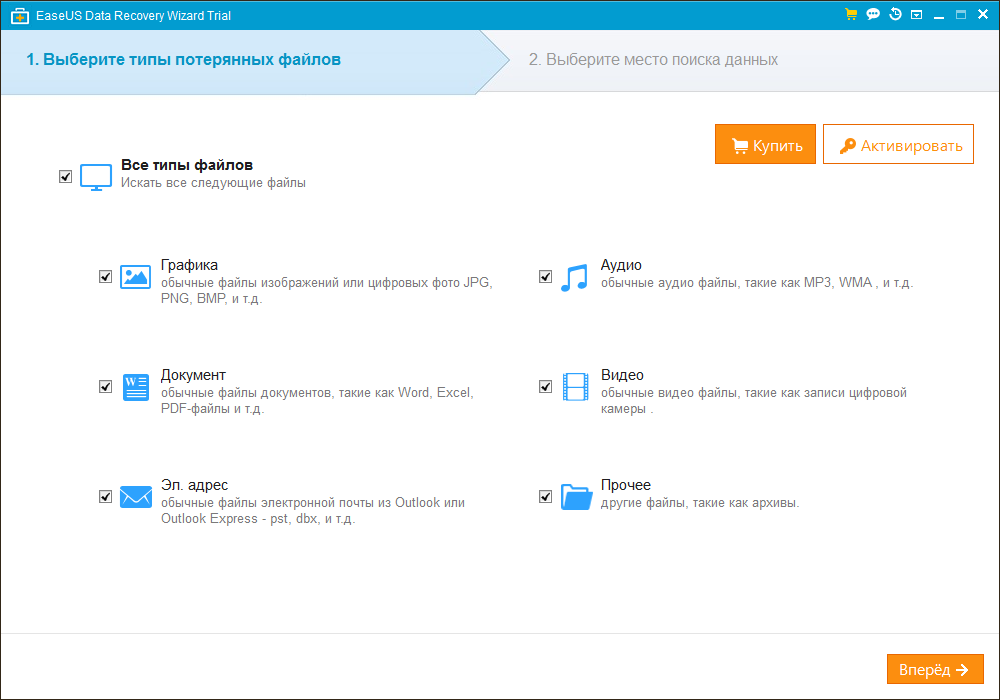
EraseUs Data Recovery Wizard has just two steps. The first indicates the type of electronic documents that need to be restored. Suggested options:
- Graphics (JPG, PNG, BMP);
- Audio (MP3, WMA);
- Document (Word, Excel, PDF);
- Video (AVI, MP4);
- Files email (PST, DBX);
- Other files.
Select the type of deleted documents that need to be restored, and click Next.
In the second step, the EraseUs wizard prompts you to select the location of the deleted files. Check “Shared Folders -\u003e Desktop”. Then click “Scan” to go to the search for deleted files.
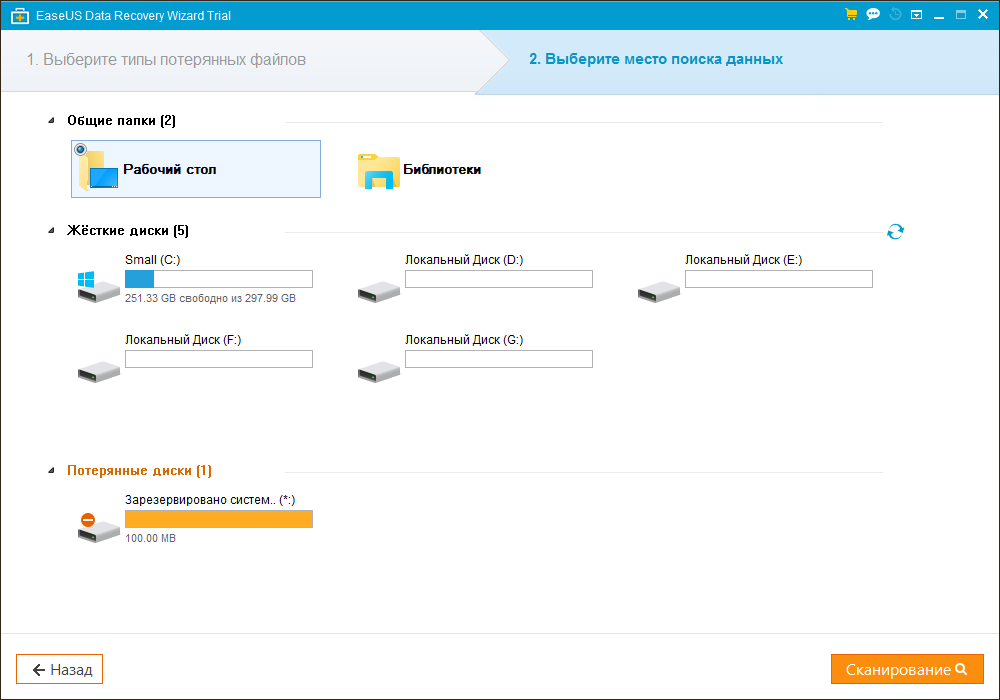
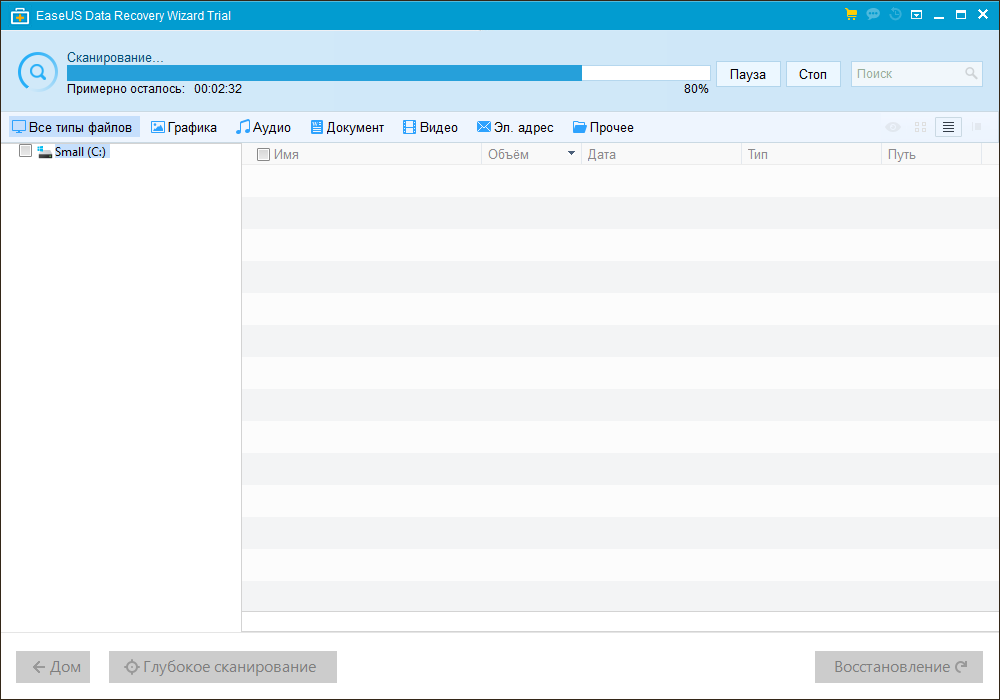
Compared to other similar utilities, scanning of deleted files is quite fast. The current status is displayed in the upper left corner of the program. Among the convenient functions is the ability to pause the process or completely interrupt it. The pause and stop buttons to the right of the progress bar are responsible for these actions.
Upon completion of the scan, EraseUs Data Recovery Wizard displays a list of found files and folders. The table will also indicate the volume, creation date, file type and system path. Go to the $ Recycle.Bin directory, which will contain files deleted from the recycle bin. The current scan can also be saved using the link “Export scan status”. If this function is used, the next scan will check only the changed sectors of the disk. The speed of the operation will increase significantly.
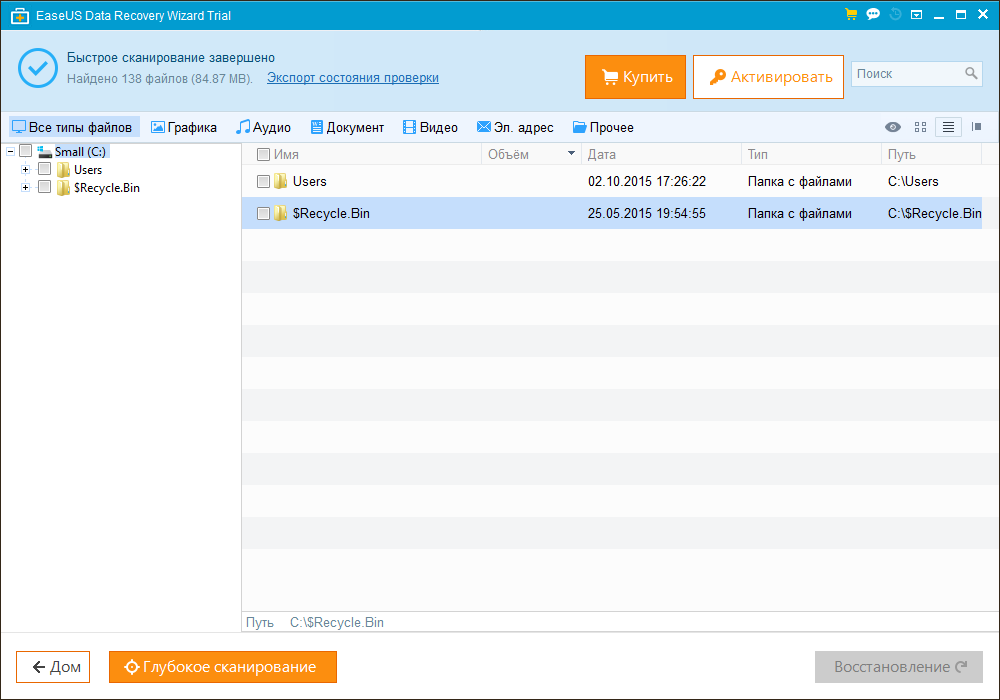
Note! To display only data of a certain type in the search results, use the filter menu at the top of the application window.
Find the data you want to recover. If among the found files there are not those that you need, use a different analysis method. To do this, click the " Deep scan», Which is located in the lower left corner of the program screen. This method requires more time, but allows you to identify the maximum amount of deleted information.
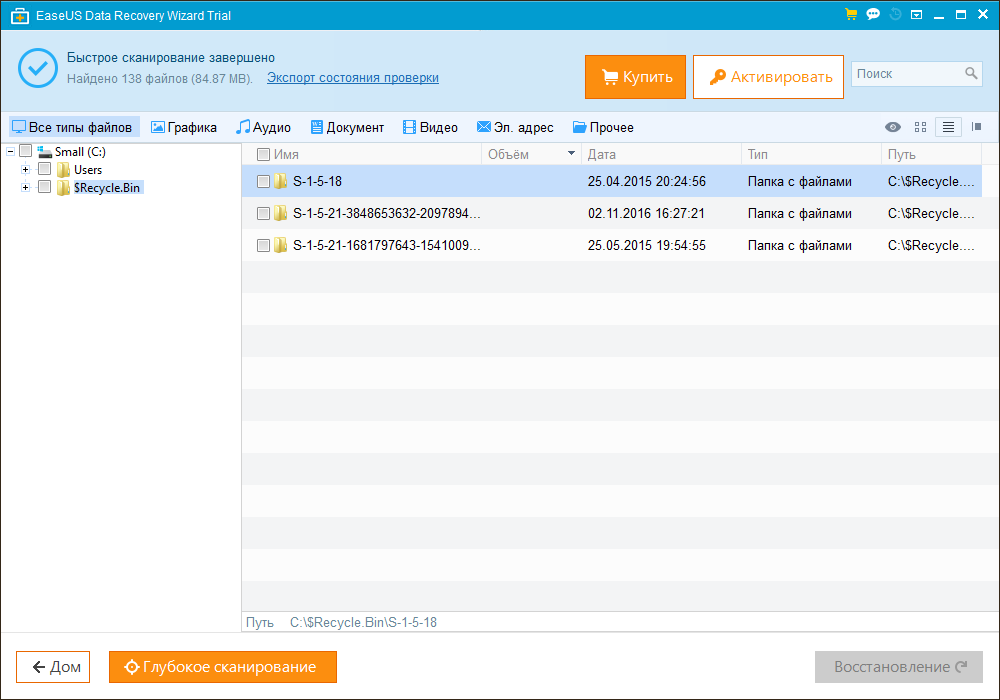
Select the required data and click "Recovery". If one deleted file is marked, it will be opened in the preview window. When restoring textual information, you can copy it directly from this window. If the type of source data is different, select the folder in which the received documents will be saved.