Malfunctioning operating system Apple products are much less common than other devices. But still, arise. In such situations, to return the device to work, you need DFU mode. It’s difficult for many owners to transfer a gadget to dFU mode. This is due to the fact that when it is activated, there are no images on the display, just a black screen. If the first time you didn’t get the iPad into DFU mode, you can always try again.
DFU mode on iPad
DFU mode (the abbreviation stands for Device Firmware Update) is an emergency mode, designed to enable you to restore the operating system in cases where other methods have not yielded results.
IPhone and iPad owners often confuse DFU mode with mode Recovery mode. This mode is also intended for recovery, it is more “soft” and has significant distinguishing features. Let's clarify the difference. When entering into DFU mode, the display remains simply black, without images. Same this mode does not start without iTunes support. At startup, it bypasses the operating system, starting at the device level.
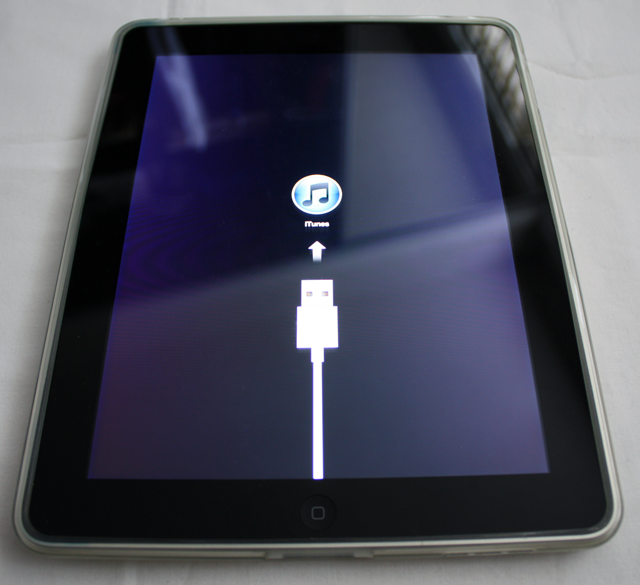
If Recovery Mode is activated, the plug and the icon of the iTunes program are displayed on the screen. Using iTunes program to activate this mode is optional. The launch is carried out at the operating system level. If using Recovery Mode didn’t bring any results, it’s better to transfer the gadget to DFU, and try to bring him back to life.
When is DFU needed?
Mode disaster recovery will help in cases where the gadget does not turn on, the usual ways to restore the tablet were unsuccessful, the battery is not charging. It is important to know that during a flashing all the user's personal data will be erased. Before resorting to such a tough method, try to troubleshoot using recovery through Recovery Mode.
DFU iPad mode, how to enter?
Translate to DFU iPad You can use two methods. The first time it may not work, but you do not panic, having tried a couple more times, you will succeed. What do we have to do?
Method 1
Before iPad 2 enter recovery mode, you need to update iTunes before latest version. Open it on a PC and connect the tablet via a USB cable. After that, you can activate recovery. You need to hold and hold the “power” and “home” buttons simultaneously for 10 seconds. You can count up to ten in your mind.
After ten seconds, press the "power" button without stopping pressing the "home" key. Do this for a few more seconds. If the actions are performed correctly, the display will remain black, and iTunes will notify that the tablet is found in emergency mode. Such indicators will confirm that the user put the tablet in disaster recovery mode.
Method 2

Turn off your gadget first. Wait a couple of minutes and get started. Press the power key and hold for 3 seconds. Now hold the home button as well. Count to 10 or spot ten seconds. When the time runs out, press “power”, without stopping pressing “home” for a couple of seconds.
Confirmation that the device is in disaster recovery will be a message in iTunes with the corresponding inscription and a black display on the tablet. When we enter the gadget in this mode and do a flashing, all user data is deleted. Therefore, it is important to periodically make backups so that in which case you can recover data on the iPad.
If you enter this mode in order to familiarize yourself with the capabilities of the device, it is easy to exit it (this information can be found below). But just disconnecting the cord from the computer will not be enough.
IPad Recovery
To start this process, you need to click on the "restore the gadget" button in the workspace of the iTunes program. After you click on it, the recovery procedure will start. There are times when it takes about three hours in time. It all depends on the original problem and the amount of data. new firmware. Be patient and see that the tablet does not disconnect from the computer.
When the recovery process is completed, use backup user data and upload it to your tablet. After that, you can, as before, use the gadget. If you do not have backup data, you will have to use the device from scratch.
How to exit DFU mode
How to get out of disaster recovery if you just wanted to get acquainted with this opportunity? For further work of the tablet, it is necessary that it works in normal mode, and it won’t work out by simply disconnecting it from the PC.
To display the gadget we use reboot. For its implementation, you must simultaneously press and hold the keys "home" and "power" for ten seconds. Then just release the keys and turn on the gadget. If you performed the reboot correctly, the standard apple screensaver of the installed iOS will appear on the display. That's all you need to know to get your tablet out of disaster recovery.
If you find an error, please select a piece of text and press Ctrl + Enter.
This article will be useful for those who are professionally engaged in the repair of devices such as the iPhone or iPad because today we will talk about the DFU mode to update the device firmware (Device Firmware Update). As a rule, to an ordinary user this information will not be helpful.
What is DFU and what is it for?
As we mentioned earlier, this mode is needed by service engineers, and it is not a mode iPhone recovery. We will carry out all the actions on the iPhone, but note that on the iPad the procedure itself is not radically different.
For the curious, we give a few facts about the difference between the modes, so that unnecessary questions do not arise for the future:
1. When loading DFU mode, you will not see the iTunes cable icon, the screen will simply be black;
2. In DFU use iTunes is mandatory, without this program, you simply cannot get into it;
3. DFU is launched in addition to the iOS operating system itself, i.e. at the hardware level, while Recovery Mode using iOS;
4. Device Firmware Update is mainly designed to restore “dead” smartphones that do not show any signs.
How to enter iPhone or iPad in DFU mode
Two methods are available for this, we will consider both of them. But before you start you need to prepare:
1. Cook standard USB cablethat comes with the kit;
2. Install and run on the connected iTunes computer;
3. Do not use any USB adapters;
4. Connect your iPhone or iPad to your computer.
First method
Probably the fastest and easiest method. First, simultaneously press two Home and power buttons and hold for 10-12 seconds, then release the power button while continuing to hold Home.
Second method

It is more correct, but for some reason newcomers do not get it right away. First, turn off the gadget, then press the power button and hold it for three seconds, without releasing the power, press HOME, count to 10 and release the power, continue to hold HOME.
It’s pointless to look at a smartphone or tablet, because you will not see anything. The only way to determine if the device is in DFU mode is to look at the iTunes window, where such a tablet should be.

If you saw this window, and the screen is black - congratulations you are in DFU mode, if the tuna logo with a cable is visible it means in recovery mode, and the procedure must be done first.
How to exit DFU mode
Everything is very simple, for this, make sure that no process is running (flashing, recovery, etc.) or they are completed. Then press the HOME + power button for 10 seconds. The smartphone reboots and starts in the usual mode.
DFU mode or DFU Mode is an abbreviation for Device Firmware Update, which in translation to the great and mighty means the device firmware update mode. Many novice iPhone and iPad users confuse the “DFU mode” with the “Recovery Mode”. The differences between them are that in the mode recovery on the phone screen there is a picture with the image of the cable and the iTunes logo. In DFU mode, the device generally looks dead - the screen is off, does not respond to buttons.
From the name it is clear that the DFU mode on iPhone and iPad is used to flash the device, or restore the firmware if it fails.
In general, iTunes is responsible for updating the firmware of apple devices by default. But in the case when it cannot update or flash the device, or it does not start or load at all, you have to resort to DFU mode.
How to put iPhone and iPad in DFU mode
There are two ways to enter DFU mode. They can be used for any mobile device from Apple - iPhone 4,5,6 or iPad and iPad mini. Let's look at both options.
Method 1
Synchronously press the power button of the iPhone (Power) and the button "Home" (Home):

Keep them pressed for 10 seconds. After this time, release only the power button. We continue to hold the Home button while mobile device will not go into DFU Mode.
Method 2
We connect our iPhone or iPad using a cable to a computer or laptop, preferably not via a USB hub, but directly to the port motherboard. We start the iTunes program, after which we completely turn off the device. Make sure it really shuts down.
Now you need to press the Home button and at the same time the Power button. We count 10 seconds, after which we release the power button and continue to keep “Home” pressed. After about 10-15 seconds, iTunes should give a signal that a new device has been detected. Now you can release the Home button.
The screen of the device will be black - do not worry, this is normal.
Now you can reflash the device.
How to exit DFU mode
In order to withdraw your iPhone or iPad from DFU mode, you need to hold down two buttons again - Home and Power and hold until the device turns off. After that, it will turn on again and boot in normal mode.
Video instruction - How to enter DFU mode:
Apple is famous for its high quality products. The iPad is especially famous. This is a tablet that just blew up the market due to its functionality and performance. But, like any technique, it is characterized by software failures. A vivid example of this is when it just does not load, and the gadget turns into a useless thing that can only be used as a stand under the table leg. What to do in such situations? There is a way out, it consists in putting the device in a state - DFU mode on the iPad. Let's take a closer look at what it is and how to use this mode correctly.
In addition to DFU itself, there is another mode in Apple's tablets - Recovery Mode. Many people think that this is one and the same thing. But this is an erroneous opinion. Let's consider :
- When the gadget enters Recovery Mode, the iTunes logo is displayed on the display, next to which is the image of the USB cable. If the device is in recovery mode, the screen is completely black, without pictures and inscriptions.
- To enter in DFU iPad mode definitely needed. In the case of Recovery Mode, this is not necessary.
- Recovery Mode is launched directly from the OS itself, and recovery is bypassed at the hardware level.
DFU is designed specifically to restore all factory settings on the gadget. It is also possible to lower or increase the firmware level. In general, with its help it is possible to restore the OS, and at the same time, it does not start itself.
The correct login methods

Be sure to make sure that the tablet has a black screen on which nothing is displayed. As you can see, switching iPad to DFU mode is not so difficult - it takes only a little skill. Now let's look at how to correctly derive a gadget from this state.
Withdraw iPad from DFU
After restoring the gadget, we need to restart it correctly. But how to get iPad out of DFU? Everything is very simple here. It is enough to repeat everything before this. That is, just hold the two buttons for ten seconds and then release them. If the tablet is still connected to the PC, then after holding, press the power key. If everything is done correctly, then the gadget will shine with a new, restored OS.
Video on how to enable DFU-mode on iPad:
It is worth knowing if you decide to put the iPad in DFU mode, then in some cases a general failure may occur, and the tablet enters the constant recovery mode. To solve this problem, it is recommended that you also prepare the TinyUmbrella program. With its help, you can solve the problem with failures during recovery. You can also iReb. It is almost the same as the previous one, and performs the same functions.


