To eliminate arising in windows operation For problems, it is usually enough to roll back to the previous recovery point by going to the Control Panel section "Recovery." Worse, if the system is so damaged that it refuses to start. In such cases, it can be great to help out a recovery recovery disk. Its use is usually limited to three scenarios: recovery of boot information, full windows recovery from a previously created image and return to the system rollback point. You can create such a disk using the tools of Windows itself, which is exactly what we will do.
Among the benefits of creating partitions are: increased speed, security, better organization, and backup. If you start moving rarely used data to a separate partition, you will immediately notice that the work on your disk becomes faster. An advantage is that it is possible to encrypt individual, especially sensitive partition data.
Separate partitions may appear to be separate disks, but this is not the case. If the disk is damaged, all partitions will be damaged! Therefore, if there is no practical reason why you should create partitions, it is better not to do this. Is partitioning useful for the process of recovering data from a partition? This can help if you are trying to recover the data yourself, but for a professional company it only complicates the whole operation. If a partition is damaged, there are many free tools that can be useful.
In Windows 10, the easiest way to access the tool is by searching the taskbar by driving a query into the search field « backup».
In the left part of the backup utility window you will see two links - "Creating a system image" and "Create a system recovery disk."
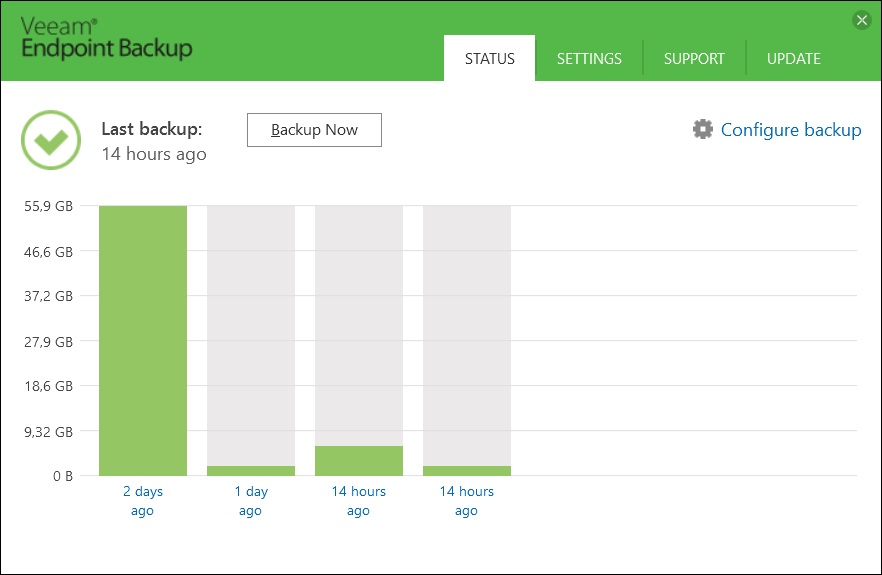
We strongly recommend creating a full backup of your Windows, because otherwise, the sense of emergency disk will be few. Also make sure that the system automatically creates recovery points. There is nothing complicated in creating a complete image of the system; the procedure is performed using the wizard and consists of three steps with default settings.
But if you structure your partitions differently using different operating systems or different levels of encryption, data recovery can be a difficult process. Have you ever been a victim of a cyclic redundancy error? If your hDD does not work, please back up the data. A better solution would be to create a clone.
What is cyclic redundancy error? Heads cannot read sectors that usually indicate damage. hard drive. In a stressful situation, a significant number of users try to copy data to safe place. This is an error that can lead to drive failure. Trying to copy all the data seriously burdens the hard drive. If it is damaged, our actions can lead to disaster.
It is just as easy to create a recovery recovery disk. Unfortunately, writing files is only possible directly on a CD / DVD media, so creating a universal ISO image will fail. The plus is that the created emergency disk is equally well suited for recovering computers as based.
Practical use of emergency disk
Now imagine that our Windows suddenly stopped loading. The first thing you can do is try to perform a recovery at boot. Boot from the created emergency disk, choose the interface language
So what should you do to save your data? First of all, do not panic. There are other backup methods that do not burden your hard drive. It's about cloning data or creating an image. Regardless of the choice of method, the disk heads will slowly and systematically bypass the damaged sectors, creating an raw image of the data. In such a situation, data reconstruction is already simple.
System crash and bad sectors on disk
There are many programs that can help us safely copy data. Many of them are available for free. Be sure to clone the hard drive into a formatted replacement file or a blank partition that has the appropriate capacity. What causes the corruption sectors?
Extra options
Recovery at boot.
True, you should not really rely on this automated tool - most likely after its development you will receive a message about the impossibility to solve the problem.
Systemic rollback points are a more effective means, but they are not without drawbacks. They allow you to restore only part of the data, in addition, the rollback points themselves may not be available if the partition or disk on which they are stored is damaged. To access the recovery utility from the rollback points using the emergency disk, go along the path Diagnostics → Advanced options → System Restore
When a sector is damaged on the hard drive, it means that it will not be able to read and write anything on it. Bad sectors cannot be repaired. There is no software that will fix the bad sector on your hard drive. You can believe it or not, but on most hard drives there are already bad sectors at the disk production stage. The difference is that there are sufficient resources for this.
When a hard disk detects the presence of a corrupt sector, it usually processes the address of this block and immediately switches to another, correctly functioning sector on the disk. The hard drive additionally adds a bad sector to the so-called.
and in the wizard window that opens, select the desired point.
If this does not help bring Windows back to life, there is nothing left to do but to resort to full recovery from an image, unless, of course, you created it in advance.
Follow the path Diagnostics → Advanced options → System image recovery and in the wizard window we leave the default backup archive (the latest) or specify the path to the image manually.
Why do you need data recovery when there are drives on your hard drive? Several defective blocks on your hard drive can cause problems. A drive that does not want to start. - Damaged sections. - Corrupted files and directories. - Damaged factory software disk. - Consumption of excessive environment. When a hard drive has bad sectors, it can still be recognized by a computer. For a long time, the drive does not start and cannot access files.
Several damaged sectors on the disk should not create problems, but when there are more or not, this is a sign that it is time to back up to avoid the need for professional recovery services in the future.
Restore default settings, click "Next"
and confirm the replacement of the files with data from the image.
As a result, the system partition will be completely overwritten, and the system will be safely restored to the state in which it was at the time of the image creation.
That's all. Thanks for reading the article. I hope she was useful to you.
How to recover data from a hard drive with bad sectors? After crossing a certain point is impossible without special equipment. All they can do is run software and offer to repair damaged hard sectors drive, which will lead to another problem.
When you run the software on a hard drive that crashes due to bad sectors, the software will tend to crash in the fail-safe sector and try to read it again so that you cannot move to large quantity sectors.
If the operating system is damaged so seriously that the computer stops loading (this, alas, happens often), but you don’t have installation disk Windows, not a disk with a system image, you can still return it to one of the recovery points using q lawsuit disaster recovery .
Such an operation can even further damage the drive and even bring it into a state in which repair will not be possible even with professional services. Is required hard recovery a disk with damaged sectors of a high level of professionalism in data recovery?
However, data recovery companies have special firmware that can cope with bad sectors. This is because the reading time, which will force the reader to read one sector before the jump, can be fixed.
Therefore, it is useful to create this disk and always keep it handy so that you can quickly restore your computer at any time.
How to make a recovery disk
A simple procedure is described below. create a rescue disk.
1. Open the Control Panel and in the System and Security category click the Archiving computer data link.
Devices that can do this are called “hardware level images”. These are very advanced data recovery tools with a high degree of versatility. Their operation does not cause additional damage to the drive. This makes it easier to read other sectors and makes binary copies for later playback.
Restoring an operating system from a backup - advanced example
Thanks to the right equipment and experience, we can easily cope with hard drivewhose sectors are damaged and succeeded in recovering data. This article describes how to restore the operating system and everything. installed programs. The first part shows how to prepare a system partition on a new hard drive. The second part describes what needs to be done to reboot the operating system without having to reinstall and configure.
2. On the page that appears, click the Create link system recovery disk.
A window with the same name will appear, in which you should select the drive for burning the disc.
This is how the window looks - choosing a device for recording
3. Insert a blank CD / DVD-R / RW into the drive and press the button Create disk. The process of preparing files for copying will begin, the progress of which will be displayed as a progress bar.
Step 1 - Connect the new hard drive to the working computer
This article is a continuation of the two previous articles that describe how to back up the operating system and restore the operating system from backup.
Create a new system partition and boot partition
However, backing up and restoring a hidden system partition is not required to restore the operating system. Step 2 - Connect the hard drive to the destination computer. Start the computer from the installation disk for a specific version of the operating system.After the computer restarts, it will boot and operating systemwhich we restored from the backup.
- Wait for the installer to load.
- Select the Computer Repair option.
- Select the recovery option.
- Select a command line option.
4. The process will take several minutes, and upon completion, a window will appear with a message about the successful creation of the disk.
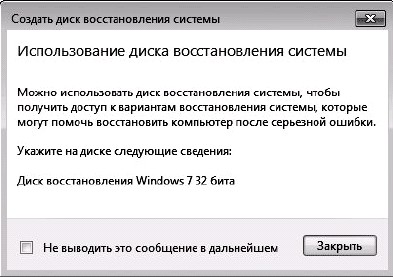
The system displays the message: The recovery disk was created successfully.
5. Click the Close button.
6. In the window Create System Recovery Disk Click OK.
After logging in, you can use all the programs that were installed before the crash. Backing up data is very important, especially these days, when dangers are becoming more and more. No one is safe from losing valuable data, and everyone should be well prepared for this.
Data Recovery on a Virtual Machine
This allows you to easily back up your computer to network attached storage. In the next step, we decide where to back up.
After creating the virtual machine, click the "Start" button. The next step is to connect to the console of the virtual machine, click on the console button, and then immediately launch a new tab in the console browser, which will display the image from our virtual machine.System Recovery Wizard
In the future, if the computer refuses to boot, you can use the created disk to return the system to one of the recovery points.
Here's how to do it.
1. Insert the newly created disk into the drive.
2. Restart the computer using the Reset button.
3. When prompted, press any key to start the computer from the system recovery disk.
Note!
If your computer is not configured to start from a CD or DVD, read its documentation. You may need to change the BIOS settings.
4. After downloading the files, the System Recovery Options window will appear asking you to select a language and
keyboard input method.
Select your language options and click Next.
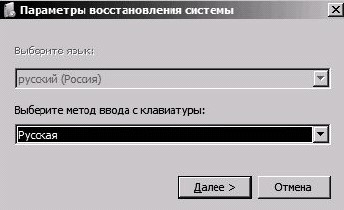
A selection of language options appears.
5. The following window will appear asking you to select a system recovery option.
Leave the top switch installed and click Next.

Choosing a system recovery option .. next step.
6. In the next window, select the System Restore option.

A dialog box appears - tool selection system recovery.
Options and recovery tools windows systems.
7. The System Restore wizard window appears, offering restore system files to previously saved parameters.
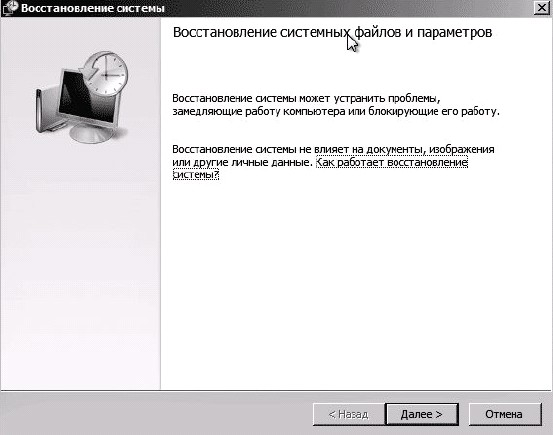
You will see the first dialog of the system recovery wizard.
8. A second recovery wizard window will appear. In it, you can select one of the available system restore points.
Choose the appropriate one, preferably on the day when there were no problems with the computer, and then click Next.
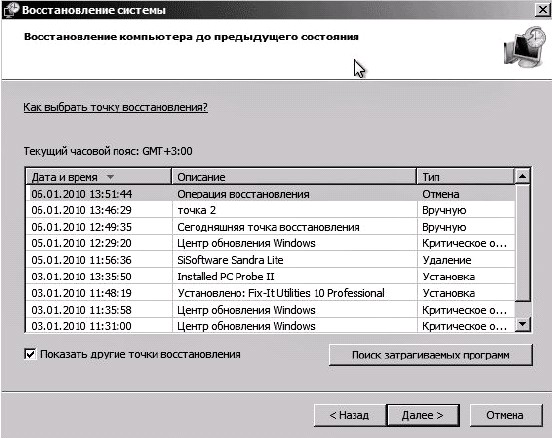
We will see the second dialog of the System Restore Wizard.
9. A third wizard window will open asking you to confirm the selection of the recovery point. Click Finish.
10. A final window will appear with a warning that the recovery process cannot be canceled. Click Yes.
11. The recovery process will begin, which will take some time. His progress will be displayed as a progress bar in a small window.
12. Upon completion of the process, a window appears with a message about successful system recovery and a proposal to restart the computer).

System recovery completed successfully.
13. Remove the recovery disk from the drive and click Reboot.
If you have successfully selected a recovery point, after rebooting, log into the system without any problems, and your data files will remain in place and a message about this will appear on the screen.
This is a simple procedure for "revitalizing" the system using the recovery disk.
I advise create such a disk and keep it handy all the time - it’s great to help you deal with minor troubles.
If your system is significantly damaged, for example infected with a virus, you can use a more radical means - restore from a backup.
This article used materials from a book just released -


