Hello. Today we have a very dangerous topic. We will work with sharp objects - cut files. For what? Of course, as for small files, why touch them - let them live, but let's say you have a 10 GB file (a game, for example - they are now gigantic in size) and you need to transfer it to a friend, and the flash drive is only 4-8 GB — how to be?
Or you are the leader of a secret, espionage group and you need to deliver a super-file to the headquarters, so much so that no one can use the file if one of your spies is captured. Divide your file by the number of agents or by different sizes and distribute it to everyone - that's it, the world is saved. Enemies will not be able to use one piece.

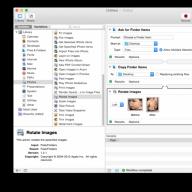
Fans of perversion, of course, can use archivers (there is this function), but this is not our method - we love quickly, easily and without problems, right? Here comes the little one to help us, free program File Splitter & Joiner, which by the way can work directly from context menu and with absolutely any files.
This program does not have an author and an official website - or rather, there is an author, for sure, but he is unknown. And it was released already in 2006, but this does not prevent it from working wonderfully on any versions of systems. It works excellently - I myself checked it on music, text (PDF) files, and also cut and glued the film, but let's take it in order ...
Download File Splitter & Joiner

The archive size is 1 Mb. Viruses are absent. The program works in all versions operating system Windows.


Here is such a beautiful installation label we find in unpacked archive and take it...
Installing and using File Splitter & Joiner


The top checkmark makes a shortcut on the desktop, the middle one embeds the item in the context menu, and the bottom one, which must be set, makes us associate the pieces of the file with our program.


That's the whole installation of the program for cutting and subsequent gluing files.


For experienced comrades, everything is already clear - for beginner hackers I explain step by step and in pictures. In order to cut the file, we indicate the file itself in the first line, and where to put the pieces in the second line. You can create a folder first for example color.


Pay attention - for cutting we use the first tab, from above.


It is clear, I hope that to indicate the size of the piece, you need to put a dot in the second line? I do not recommend checking the checkboxes - delete the source file after the operation, although someone may need to do this. Everything - we press ...


The cutting process has begun...


Ready! Let's look at the result...


From the film received 8 pieces of 174 MB. Amazing. As you can see, the first piece does not look like the rest (remember, did you set the association?) - you need to click it to merge the file into a bunch. The only condition is that all pieces must be in the same folder.
The first attempt was slightly crooked for me - I did not specify the file permission. The fact is that I glued the film into the same folder where the original lay. As a result, they wrote to me, they say, a fool - such a file already exists and offered to rename the result. This is where I made a fool of myself - I didn’t indicate .avi . You don't need it, just glue it to another folder or computer. Here's what they wrote to me...


You will not be written like that if you do everything correctly and logically. I first received...

Corrected with pens, as you can see and received ...


You can also glue through the program. To do this, go to the second tab, specify the first of the pieces and where to save the result ...

We are already familiar with the checkmarks in the boxes - they will remove the pieces after the operation. That's the whole difficulty. Tried File Splitter & Joiner on magazine to PDF...


Which is held by the Russian division of Microsoft together with our website, the status of "application of the week" for the second week in a row receives a program related to video processing. This is not surprising - with the reduction in the cost of camcorders and the advent of the possibility of recording amateur video of acceptable quality, even with a conventional camera, tools for processing video files have become much more in demand.
SolveigMM Video Splitter is a program that allows you to solve one of the most necessary tasks in video processing - it is designed to cut a video clip into parts. Along with this, SolveigMM Video Splitter allows you to perform other related operations: cutting a separate fragment from a video, merging several files into one. The main feature of the program, which distinguishes it from dozens of others, is the ability in most cases to do without re-transcoding the video, which allows you to maintain the quality of the original video. In addition, SolveigMM Video Splitter uses the most modern technologies, including DirectX and Windows Media Format 9 Series libraries.
The "heart" of the application is the SolveigMM Video Editing Engine, which, as you can guess from the name, is a proprietary development of Solveig Multimedia. The engine provides, in particular, editing MPEG-2 files with frame accuracy, AVI, ASF and WMV files with key frame accuracy, extracting audio or video streams from AVI, WMV, ASF, MPEG-2 files, as well as restoration, indexing damaged or unindexed Windows files Media (WMV, WMA, ASF) by remultiplexing.
However, for an end user who wants to cut a fragment from a video clip or perform another operation, the convenience of the interface is no less important than the "stuffing" of the application. SolveigMM Video Splitter has a fairly standard appearance for such applications.

The main part of the window is occupied by the preview area. Below it is a scale with which you can navigate to any fragment of the loaded video, as well as set markers that mark the place of cutting. The display scale of the scale can be controlled. In addition, there are buttons for playback, moving between keyframes and for controlling the volume level. There is also a button for calculating the approximate output file size.
The markers that define the fragment to be cut can be moved and additional ones added. Thus, if you need to remove several fragments from one video (for example, advertising), then this can be easily done in one pass. It is possible to quickly invert the selection, as well as using special buttons to mark which fragments should be deleted and which ones should be processed. Data about the selected fragments is displayed on the information panel.

Despite the fact that the most important commands for working with the application are placed directly in the main window, the list of functions is not limited to them. All other commands can be found in the main menu. For example, there are commands for removing all markers at the same time, for quickly moving along the navigation scale, for controlling the scale. For each of the commands placed in the main menu, hot keys are provided, which, by the way, are fully customizable. It is possible to save different keyboard shortcut profiles and load them as needed.

The navigation is also well thought out. Using menu commands and keyboard shortcuts, you can not only move between frames and keyframes, but also jump to the end or beginning of a clip, move two minutes or one-twentieth of a clip forward or backward. Navigation tools make it easy to highlight the previous and next markers.
Another interesting tool of the program is the time calculator. With it, you can determine how long the video will be after trimming.

SolveigMM Video Splitter supports all major digital video formats and containers: MPEG-2 (.mpg, .mpeg, .vob, .ts), DVD VOB, Windows Media (.asf, .wma, .wmv, .wm), AVI. As for the latter, it is worth noting support for files larger than 4 GB, a VBR MPEG audio track with synchronization, as well as work with all popular codecs for video compression (DivX; XviD; 3ivX) and audio (MPEG-1.2 Layer I, II , III; AC3; OGG). When working with Windows Media, it is possible to fix corrupted video files that do not have an index.
As mentioned above, the operation of trimming (cutting the clip) occurs without re-encoding. In addition to the fact that the quality of the video does not suffer, there is another positive point - speed. Since there is no need to re-encode the clip, the result can be obtained in just a few seconds.
SolveigMM Video Splitter supports batch processing of files. Prepared clips are added to the job list with the click of a button. Once the list has been generated, you can open the Batch Manager window, view detailed information about each task, and edit them if necessary. Before the program starts batch processing, the job list can be saved. At the request of the user, the utility processes all the files included in the list, or only the selected ones.

Another SolveigMM Video Splitter module allows you to merge several files into one. The merging works for AVI, WMA/WMV/ASF, MP3 and MPEG-1/MPEG-2 files. However, it is worth considering: in order for the operation to be successful, it is necessary that the files have the same audio and video compression settings.
For convenience, when adding files to the list of Join Manager tasks, the program allows you to view their main parameters. If there are files with different properties in the list, SolveigMM Video Splitter will warn about this with a message in the status bar.

Unsuitable files can be quickly removed from the list, and merge lists can be saved for future use. For more convenient operation With the merge manager, a special floating panel is provided, with which you can add files, load previously saved lists and start batch processing.
Perhaps the only serious drawback of SolveigMM Video Splitter is that the program belongs to commercial products. On the other hand, the capabilities of the SolveigMM Video Editing Engine are really interesting - it is not for nothing that it is sold not only as part of Solveig Multimedia products, but also separately, for developers who, using the SolveigMM Video Editing SDK, can create their own applications for editing audio and video data.
transcript
1 SolveigMM Video Splitter User Manual: Version 3.7 First Edition: August 18, 2005 Modified Date: February 27, Solveig Multimedia, Ex. Development 3, Tomsk, Russian Federation
2 Solveig Multimedia Video Splitter Contents... 4 Document Information... 4 Getting Started... 5 Basic Terms... 5 Editing Process... 5 Merging Process... 5 Source and Destination Files... 6 Markers... 6 Clips... 6 Supported file formats... 6 System requirements... 7 Hot Keys... 8 Interface Main Menu File Menu Edit Menu View Menu View Menu -> Zoom Menu View Menu -> Time Format View Menu -> " Panels View Menu -> Maps Manage Menu Tools Menu Tools Menu -> Batch Manager Tools Menu -> Fusion Manager Help Menu Navigation Bar Information Panel Editing Panel Preview Window Video Splitter Status Window in Notification Area Filter Information Window Batch Manager Window Menu Description File Menu Edit Menu Solveig Multimedia 2
3 Log menu Batch manager field Fragment list Fusion manager window Menu description "File" menu "Edit" menu Settings window "Hot keys" tab "Codecs and settings" tab "Audio plot" tab "Output files mask" tab "View" tab Manage Tab Using Solveig Multimedia Video Splitter Opening a Source File Using the Editing Panel Starting an Editing Process Working with the Batch Queue Working with MPEG-2 Files Instructions How to Register Solveig Multimedia Video Splitter How to Open a Media File How to View a Clip How to Navigate a Clip How to assign and remove markers How to mark a fragment for saving or deleting How to select video and audio streams How to correct audio/video synchronization How to start merging How to start editing Technical information Batch File Structure Timeline Element Group Element Track Element Clip Element Batch File Example SolveigMM Batch Splitter Console Utility Solveig Multimedia 3
4 Solveig Multimedia Video Splitter This manual is a reference guide for working with Solveig Multimedia Video Splitter. It contains information about basic and advanced editing functions, descriptions of interface elements and hot keys. The manual is divided into the following parts: Before you start: This section contains introductory information about the SolveigMM Video Splitter program supported by file formats, system requirements, basic terms and hotkeys Solveig Multimedia Video Splitter interface: This section provides information about the controls of the Solveig Multimedia Video Splitter program interface Using Solveig Multimedia Video Splitter: This section provides information about performing common Solveig Multimedia Video Splitter tasks Instructions: provides information on the main stages of the video editing process Technical information: The section presents technical description underlying components Document Information SolveigMM Video Splitter User Manual Version 3.7 First Edition: August 18, 2005 Modified Date: February 15, For more information contact Solveig Multimedia Phone: ext. 2049; Fax: +1 (801) More information is available on the website: For technical support, please contact the service technical support Solveig Multimedia: Solveig Multimedia provides this publication "as is" without warranty of any kind, express or implied. This publication may contain technical inaccuracies or typographical errors. Despite all care taken in the preparation of this document, the publisher and author assume no responsibility for errors or omissions. Nor shall they be held liable for any damage resulting from the use of the information contained in this document. Periodically, the information contained in this document, changes are made. These changes are reflected in new editions of this publication. Solveig Multimedia reserves the right to make improvements and/or changes to the product(s) and/or program(s) described in this publication at any time. The names of other companies, products and services are registered trademarks of other companies or corporations. Solveig Multimedia 4
5 Getting Started SolveigMM Video Splitter is a fast and powerful tool for editing video files of various formats (see Supported file formats). You can split a video file into parts in just a few clicks without any quality loss. It is also possible to cut several clip fragments at the same time. In just a couple of simple steps, you can get rid of all the commercials in the file. Starting from version 1.2, the program supports batch processing files! You can add all editing tasks to the queue and process them all at once. In version 2.2, a gluing manager appeared. The manager allows you to combine several audio / video fragments into one. During the merging process, no transcoding occurs, so all files must have the same parameters such as frame height/width, audio/video compression type, etc. Topics in this section: Basic terms: Explanation of concepts and terms used in this document Supported file formats: List of file formats that SolveigMM Video Splitter can work with System requirements: Minimum and recommended system requirements for SolveigMM Video Splitter Hotkeys: List of hotkeys Basic terms This section explains the key terms used in this document. Understanding these terms will make working with Solveig Multimedia Movie Splitter more convenient. Editing process Splicing process Source and target files Markers Fragments Editing process Editing is the process of dividing a video file into parts. You can cut out part of the video with unnecessary scenes (for example: advertising, damaged areas). The editing process does not affect the source files, the result is saved in the final, different from the source file. Gluing process Gluing is the process of joining several audio/video fragments into one file. Gluing does not use transcoding, so it does not affect the quality of the output audio / video. Solveig Multimedia 5
6 Source and destination files Source and destination files are video files of a supported format. The source file contains a video that can be divided into fragments. The final file contains a movie that is the result of processing. During editing, the original file remains in its original form. It is not changed or removed. Markers A marker is an integral part of a fragment. Each fragment has two markers: start and end. The marker is set to the current cursor position. The selected marker is marked in yellow: Actions such as deleting and moving are performed only on the selected markers. Fragments A fragment is a part of a video or audio file, delimited by two markers, and intended to be cut out or left in the final video, for example, an advertisement that needs to be cut out. Below are examples of snippets: See detailed description color values in the Using the Editing Panel section. Supported file formats SolveigMM Video Splitter supports the following media file formats: - AVI Solveig Multimedia 6
7 any video content (DivX, DV, MJPEG, XVID, MPEG-4, etc.) any audio content (MPEG-1/2 Layer 1/2/3, Dolby AC3, PCM, OGG, WMA, etc.) AVI DV type 1 and type 2 files of any size (greater than 2 GB) AVI extension OpenDML - WMV any Windows Media video content (WM Video 7/9, MPEG-4 v 1/3 etc.) any Windows Media audio content (WM audio 2/9, etc.) unindexed or corrupted .wmv files- ASF any video content (DivX, MJPEG, XVID, MPEG-4, WM Video 7/9, etc.) any audio content MPEG-1/2 Layer 1/2/3, Dolby AC3, PCM, OGG, WMA, etc. .) unindexed or damaged ASF files - MPEG audio (*.mp1, *.mp2, *.mp3, *.mpa) MPEG-1 Layer I, II, II MPEG-2 Layer I, II, III - MPEG-1 video (*.mpg, *.mpeg, *.m1v, *.mpv) - MPEG-2 video (*.mpg, *.mpeg, *.mpv, *.m2v, *.vob) - MOV (*.mov) - MP4 (*.mp4) - MKV (*.mkv) - AVCHD (*.m2ts, *mts) - WEBM (*.webm) - FLV (*.flv) - Indexing is supported by the following file formats: - MPEG-1 video (*.mpg, *.mpeg, *.m1v, *.mpv) - MPEG-2 video (*.mpg, *.mpeg, *.mpv, *.m2v, *.vob, *.ts, *.m2ts , *.vob) System requirements Software requirements Operating Windows system 2000 / XP / 2003 / Vista / Windows 7 / Windows 8 DirectX 8.0 library or higher Solveig Multimedia 7
8 Availability of suitable audio and video decoders for the preview function of Windows Media Format 9 Series library, which is distributed with Windows Media Player 9 or higher. Hardware Requirements Intel processor Pentium II, Celeron, AMD Athlon, Opteron, etc. 128 MB RAM Any VGA video card Approximately 100 MB free disk space Hotkeys Almost all actions in SolveigMM Video Splitter can be performed using hotkeys. Hotkeys will allow you to perform some actions faster. The table below lists the actions that can be performed using hotkeys. Keyboard shortcuts (main window): Action Next keyframe Previous keyframe Next frame Previous frame 2 minutes forward 2 minutes backward 1/20 clip forward 1/20 clip backward End To Start Hotkey Right Arrow Left Arrow Ctrl + Right Arrow Ctrl + Left Arrow Shift + Right Arrow Shift + Left Arrow Page Up Page Down Solveig Multimedia 8 End Home Zoom In More. + Decrease Add. - Max Zoom NumPad / Default Zoom NumPad * Nudge Zoom Area Right Nudge Zoom Area Left Start/Pause New Marker Delete Marker(s) Remove All Markers Select Next Marker Select Previous Marker Select Clip under Cursor Mark Selected Clip for Save Mark Selected Clip for cut Invert fragments on the timeline Calculate the size of the final file Alt + Right arrow Alt + Left arrow Space M Delete Ctrl + C Tab Shift + Tab Ctrl + Tab S D I Ctrl + F
9 Start editing Open help Ctrl + T F1 Batch manager shortcuts: Action Load task list Save task list Add task to batch queue Update task in batch queue Delete selected task or fragment Start batch processing Start batch processing for selected tasks Edit task in main window or show the selected fragment in the main window Select all tasks Hotkey Ctrl + O Ctrl + S A U Delete Ctrl + T Shift + T Enter Ctrl + A Hotkeys for the join manager: Action Add media file(s) Delete selected items Move selected item down Move selected item up Hotkey Ins Del PgDown PgUp Solveig Multimedia 9
10 Solveig Multimedia Video Splitter Interface Solveig Multimedia Video Splitter's user interface consists of five main parts: menu bar, navigation bar, information bar, edit bar and preview window. Main window of SolveigMM Video Splitter: Batch manager window: Solveig Multimedia 10
11 Splice Manager Window: In this section: Menu Navigation Pane Information Panel Editing Pane Preview Window Splitter Status Window in Notification Area Filter Information Window Batch Manager Splice Manager Main Menu The menu is used to access Solveig Multimedia Video Splitter's commands. The menu items are described below. Solveig Multimedia 11
12 File menu Menu item Open Media File... Save File As... Save All Clips As... Close Load Project... Save Project As... Load Batch List... Save Batch List As ... Load splice list Save splice list Last file Description Select a supported media file to open and edit (*) Set the name of the target file and save it immediately (start editing)(*) Specify a common name for the output files and save all selected fragments. The sequence number of the fragment being processed will be added to this name. Close source and target files Open project file Save project file Load batch list into Batch Manager Save current list of Batch Manager Load splice list into Splice Manager Save current splice list for Splice Manager List of recently edited files (*) - These actions are also available from the information panel. (**) - To add a task to the package queue, you must set "Do not run. Add to package queue" in the "Save as" field in the dialog, as shown below. Solveig Multimedia 12
13 Edit menu Menu item Description Hot key Undo Undoes the previous action Ctrl + Z Redo Repeats the action Ctrl + Y Stop Stops playing the file Play Starts playing the file Space Pause Pauses playback Space Add marker Adds a new marker (*) M Delete markers Deletes selected markers (*) Delete Mark fragment for saving Marks fragment for saving (*) S Mark fragment for deletion Marks the selected fragment for deletion (*) D Delete all markers Deletes all markers from the timeline Ctrl + C Invert fragments on the timeline Inverts the selected fragments on timeline (*) I Calculate output file size Calculates output file size (supported for AVI, MP3) Ctrl + F Solveig Multimedia 13
14 Start Starts the editing process (*) Ctrl + T (*) - These operations are available from the menu and from the context menu. For details, see Navigation bar, Information panel, Editing panel Navigation menu Menu item Description Hot key Next keyframe Go to next keyframe Right arrow Previous keyframe Go to previous keyframe Left arrow Next frame Go to next frame Ctrl + Right Arrow Previous Frame Go to the previous frame Ctrl + Left Arrow Go forward 2 minutes Go forward 2 minutes from the cursor position Shift + Right Arrow Go back 2 minutes Go back 2 minutes from the cursor position Shift + Left Arrow Go forward 1/ 20 Jump forward 1/20 of the length of the media file Page Up Jump back 1/20 Jump back 1/20 of the duration Page Down Solveig Multimedia 14
15 media file Go to the end of the movie Go to the end of the opened media file Home Go to the beginning of the movie Go to the beginning of the open media file End Select next marker Select next marker on timeline Tab Select previous marker Select previous marker on timeline Shift + Tab Make cursor active Set Timeline Cursor Active Ctrl + Tab View Menu Menu Item Scale Time Format Show Time Format Switching Warnings Show Storyboard Map Panel Language Show Audio Plot Description Opens a submenu Opens a submenu Enables or disables the display of warnings when switching time format Enables or disables the display of a storyboard Opens a submenu with a choice of interface language Opens a submenu Opens a submenu Activates or deactivates the display of the audio diagram Solveig Multimedia 15

16 Menu "View" -> "Zoom" Menu item Description Hotkey Move Timeline Right Move Timeline Zoom Cursor Right Alt + Right Arrow Move Timeline Left Move Timeline Zoom Cursor Left Alt + Right Arrow Zoom In Zoom In Timeline NumPad + Zoom Out Zoom Out Timeline NumPad - Maximum Zoom Select Maximum Zoom NumPad * Reset Zoom Select Default Zoom Settings NumPad / View Menu -> Time Format Menu Item Description Time and Frames (h:min:s;frames) Allows you to display the timeline in Solveig Multimedia 16

17 format (h:min:s;frames) Time (h:min:s;ms) Allows you to show the timeline in the format (h:min:s;ms) Menu "View" -> "Panels" Menu item Dashboard GPS navigation Sensors in the GPS navigation bar Description Shows information about the source and destination file Shows GPS information, if any is contained in the file Shows the GPS navigation sensors: speedometer, compass, accelerometer "View" menu -> "Maps" Menu item Description google maps Displays Google maps if open file contains Solveig Multimedia 17
18 GPS information Yandex maps Displays Yandex maps if the open file contains GPS information "Control" menu Menu item Description Frame-accurate editing (Smart mode) Enable frame-accurate editing mode Trust sample timestamps Video and Audio streams The function uses an alternative synchronization algorithm. By default, this mode is disabled. If the resulting file has audio/video out of sync, enabling this option should improve the audio/video sync. Selection of audio and/or video streams that will be present in the resulting file. See Using SolveigMM Video Splitter for details. Ignore Editing Errors Ignore Editing Errors Note: It is recommended that you leave this option disabled by default. Snap cursor to previous keyframe Snap marker to previous keyframe If this option is enabled, the cursor can be moved to the nearest previous keyframe after positioning the cursor. This mode provides the implementation of the feature of getting in the output file what you see in the viewport. If the option is disabled, you can jump through all frames of the video file. If this option is enabled, the marker can be moved to the nearest previous keyframe after positioning the cursor. This mode provides the implementation of the feature of getting in the output file what you see in the viewport. If the option is disabled, you can put a marker on any frame in Solveig Multimedia 18

19 film. Note: If the start marker is not set in the fragment, the fragment in the resulting movie will start at the key frame anyway. Note: If the fragment end marker is not set, the fragment in the resulting movie will end at the frame of the marker position. "Tools" menu Menu item Batch Manager Merge Manager Time Calculator Operation History Index Files in Folder Description Opens the Batch Manager submenu Opens the Merge Manager window Shows the time calculator Opens a list of operations Create an index for MPEG files in the selected folder Indexing an MPEG file Create an index for MPEG2 video file (*) Open folder Logging Show viewing filters Settings... Open folder with source or received file Opens a submenu for log actions Shows a list of filters used for viewing Opens a settings window (*) - This operation is available for MPEG2 video file, if it has not been indexed before. Solveig Multimedia 19

20 "Tools -> Batch Manager" menu Menu item Description Hot key Load batch list Load list to edit in batch manager Ctrl + O Show batch manager Opens batch manager Ctrl + B Save batch list as... Save task list containing tasks to edit as .xtl file. See task list syntax in section Batch Job File Structure Ctrl + S Add task to batch queue Add current task to batch queue A Update task Update the selected job in the batch manager list Set output file name automatically If enabled, allows automatic setting name for output file Start batch processing Start batch processing tasks Solveig Multimedia 20
21 Menu Tools -> Splice Manager Menu item Load Splice List Save Splice List Show Splice Manager Splice Manager Panel Description Load Splice List from File Save Splice Task List Show Splice Manager Show/Hide Splice Manager Panel Help Menu Solveig Multimedia 21
22 Menu Item Description Hotkey Help... Open Help File F1 Video Splitter Hotkeys on the Internet Register... Compare Products Check Updates About Shows the Hotkeys section in the help file Opens pages on the Solveig Multimedia website and forum. Opens the registration window for SolveigMM Video Splitter Opens the Solveig Multimedia product comparison table Activates checking if the latest version is installed Opens a window with information about the program Navigation bar The navigation bar is for navigating through an open media file. Using this panel, you can start and stop playing a file, press pause or search for a desired scene. It also shows the current position and total length of the media file. Menu item Description Hot key Previous keyframe Next keyframe Left Arrow Right Arrow Play/Pause Spacebar Next Keyframe Previous Keyframe Right Arrow + Cntrl Left Arrow + Cntrl Cursor position. You can set this value manually Solveig Multimedia 22
23 File Duration Dashboard The Dashboard Source File section shows the following information about the open file: File Duration Video Audio Size Description Source File Name File Duration in HH:MM:SS File Size Video Encoding Type Audio Encoding Type The Dashboard Destination File section shows the following Information: Solveig Multimedia 23
24 Field File Size Fragment Description Destination file name Destination file size Information about the selected fragment: Start position End position Type (cut/keep) Note: All information values are shortened. To see the full value (for example, the full pathname of a file), simply move the mouse over the value and full information will appear in the tooltip and in the status bar as shown below: Note: All values can be copied to the clipboard via the context menu. Solveig Multimedia 24
25 The information bar also contains the following buttons: Button Description Open Media File... Save File As... These actions are also available from the File menu Editing Panel The Editing Panel is the main part of Solveig Multimedia Video Splitter. Using this panel, you can select the fragments that will or will not be saved in the final video. You can mark clips for keeping or deletion, reverse the timeline, or remove clips from your movie entirely. Finally, the main button that starts the editing process is on this panel. Element Description Hotkey Add marker: Adds a marker to the current position of the slider M Deletes markers: Deletes the current marker or fragment Delete Mark fragment for saving: assign fragment type S Mark fragment for deletion: assign fragment type D Invert: Invert fragments on the timeline I Size: Calculate final file size (available for AVI, Ctrl + F Solveig Multimedia 25
26 MP3) Set audio silence/unmute for the selected fragment Start: Starts editing or batch processing (if there are any tasks in the job queue) Ctrl + T Temporal position of the left marker. You can edit this value manually. The time position of the right marker. You can edit this value manually Increase: Increases the resolution of the timeline slider to make editing adjacent markers more comfortable (*) Decrease: Decreases the resolution of the timeline slider (*) NumPad + NumPad - Storyboard on: disable storyboard Storyboard off: enable storyboard Audio plot enabled: disable audio plot Audio plot disabled: enable audio plot Ctrl + F Save selected fragment Save selected fragments Add batch job queue A Take a screenshot of the video frame Open the folder with the created screenshot (*) you can use the scroll cursor (under the timeline slider) and hot Alt keys+ Left Arrow and Alt + Right Arrow Slice Samples: Slice Color Description The slice is marked for deletion. It will not be included in the final video. Solveig Multimedia 26
27 The fragment is marked for saving. It will be included in the final video. The fragment is marked for deletion. It will not be included in the final video. Yellow color means that you can edit it (delete, mark for saving). The fragment is marked for saving. It will be included in the final video. Yellow color means that you can edit it (delete, mark for saving). Slider context menu Menu item Description Hot key Save selected fragments as... Allows you to specify the name of the target file and immediately save the selected fragment (start editing process) or add the selected fragment to the batch processing queue (*) Add new marker Adds a new marker to the current position slider M Delete markers Deletes the current marker or fragment Delete Mark fragment for saving Assigns fragment type for preservation S Mark fragment for deletion Assigns fragment type for deletion D Invert fragments on the timeline Inverts fragments on the timeline I Solveig Multimedia 27
28 Set audio silence Allows you to turn off the sound in the selected fragment D Delete all markers Deletes all markers Ctrl + C (*) - To add a job to the batch task processing queue, you need to check the box "Do not start. Add to batch processing queue in the Save current fragment window as" as shown below: Preview Window The Preview Window is designed for easy navigation through fragments and allows you to set markers as accurately as possible. Solveig Multimedia 28

29 Status window The progress window indicates the current progress as a percentage. You can cancel the splitter by clicking the Cancel button or hide the Splitter in the system tray by clicking the Hide button. The batch manager progress window is shown below: Solveig Multimedia 29

30 The upper status bar shows the progress of the current task. The lower one shows the progress of all tasks in the task batch queue. The Hide button hides the Splitter in the system tray. When editing is completed, the Splitter window appears. See also Splitter in the system tray Video Splitter in the notification area When you click the Hide button, Video Splitter is minimized to the system tray. The following context menu is available when Video Splitter is in the system tray: Menu item Show Program Show progress Exit the program Description Maximize Video Splitter from the system tray Show the current task progress Cancel the editing process and exit the program The following editing status information will be shown if you click on the system menu icon: Solveig Multimedia 30

31 Task Batch Processing: Filter Information Window This window contains information about the components required for correct operation video splitter. 1. Click on the top left corner of the window (You can use the keyboard shortcut Alt + Space) 2. Click on Information... Solveig Multimedia 31

32 Batch Manager Window The Batch Manager is used to edit the batch task queue. Menu description: File menu Menu item Description Hot key Load task list... Load saved task queue from file (*) Ctrl + O Save task list as... Save task queue to file Ctrl + S Open task list in notepad Open list tasks in notepad (*) Hide Hide this window (*) - See the syntax of the task batch queue in Solveig Multimedia 32 Task Batch File Structure
33 Edit menu Menu item Description Hot key Add task to batch queue Add current task to batch queue A Update task Update task in batch queue according to changes made in Video Splitter U Edit clip in Video Splitter Edit selected task in Video Splitter main window Enter Delete selected tasks Delete selected tasks Delete Delete selection Delete selection Delete Change folder for selected tasks Change the save folder for selected tasks. The program will not change file names Start batch processing Start batch processing of tasks Ctrl + T Start batch processing for selected tasks Start batch processing for selected tasks Shift + T Settings Show settings window Ctrl + T Solveig Multimedia 33

34 Log menu Menu item Show log Create log file... Save log file... Description Show or close the log window Specify the name of the log file that will record all actions and operations during batch processing of jobs Save log as... Clear log Clear all log entries Batch manager field: The list shows all tasks in the batch queue: Description of columns: Menu item Task # Source file Destination file Number of fragments Total time Description Task number Source file name Destination file name Number of fragments to be saved Total file length Audio stream Number of audio streams (*) Video stream Number of video streams (*) Solveig Multimedia 34
35 Audio and video synchronous Uses an alternative synchronization algorithm. It is disabled by default. If the resulting video has problems with the audio and video out of sync after re-editing, enabling this option should improve the audio-video sync. (*) (*) - These fields can be edited in the Batch Manager window. Just click on the cell with the left mouse button or click on the mouse wheel. You can choose desired value from the dropdown list shown below. Changing values in the batch manager field Description of the context menu: Menu item Description Hot key Save task list as... Save the task queue to a file. Ctrl + S Load task list... Load task list from file See batch job queue syntax in Job batch file structure Ctrl + O Start batch processing Start task batch processing Ctrl + T Start batch processing for selected tasks Start batch processing tasks for selected tasks Ctrl + T Delete selected Delete selected tasks Delete Solveig Multimedia 35

36 tasks Edit a clip in Video Splitter Edit a selected task in the main program window Enter Select All Select all tasks Ctrl + A Change Selected Tasks Folder Change the save folder for selected files. The program will not change file names Disable audio on selected tasks Allows you to disable audio track on selected batch manager tasks Ctrl + A Disable video on selected tasks Allows you to disable the video track on selected batch manager tasks Change source file name... Change destination file name... Change the name of the source or destination file. This is only available for the Source File and Destination File columns Copy Source File Name... Copy Destination File Name... Copy Source or Destination File Name. This is only available for the Source file and Target file columns. List of fragments All fragments that will be cut in the selected task are presented here. Fragment context menu list Menu item Description Hot key Delete selected fragment Allows you to delete the selected fragment Delete Show fragment in Show and select fragment in the main Video Splitter window Enter Solveig Multimedia 36

37 Video Splitter Split Manager Window The Split Manager is used to join files with similar parameters such as width, frame height, video/audio compressor, etc. Supported formats are listed here. The list contains all the files that will be combined into one. Description of the columns: Menu item Description # File number source file Total time Source file name Duration of the current file to be added to the destination file Start time Start time of the current section of the current file (*) End time End time of the current section of the current file (*) Audio Samples /sec Mode Bitrate Video Audio Encoding Audio Sample Rate Audio Mode Audit Bitrate Video Compressor Solveig Multimedia 37

38 Width Height Type Video frame width Video frame height File type (*) - only whole files can be connected, so start time is the beginning of the file and end time is the length of the file. Menu description: Menu "File" Menu item Description Hot key Add multimedia files Add files to the join list(*) Ins Save join list Save current join list to file Load join list Load current job from file Start join process Start join process of current job Set output file name Sets the output file name (*) - if you try to add files with different parameters, you will be warned with a corresponding message in the fusion manager status line. Solveig Multimedia 38

39 Edit menu Menu item Description Hot key Move up Move selected item up in the list Page Up Move down Move selected item down in the list Page Down Delete selected items Delete all selected items from the list Del Clear list Delete all items from the list Open folder Opens folder with source or destination file Select All Selects all files in the list Context menu: The context menu commands repeat the menu commands for convenience, and its "Add" and "Move" commands are applied to the selected file from the list. The rest are generic. Solveig Multimedia 39
40 Fusion manager panel: The panel also repeats some commands that allow you to perform fusion without opening the main window of the fusion manager. Panel object (from left to right) Description Start splicing Show / Hide Add files Load list Starts the current splicing task Shows / Hides the main splicing manager window Add files to the list Loads splicing list from file Solveig Multimedia 40

41 Settings window The "Hot Keys" tab of Video Splitter allows you to select certain settings your hotkey profile. Just enter the hotkey for the selected operation (right column), click on the Yes button in the information window that appears and then enter a name for the new profile, and then click the OK button. The new profile will appear in the "Current Profile" drop-down menu. Solveig Multimedia 41

42 You can delete a profile by selecting the required one in the drop-down menu "Current profile" and clicking on the Delete button. Codecs and Settings tab The Codecs and Settings tab allows you to select the decoder and encoder that will be used in the process of transcoding the first and last group of frames when frame-accurate editing (Smart Mode) is enabled. To select the required codec, select one or more from the Compressors/Decompressors list and click the Force button. The selected codec will appear in the list of preferred codecs. You can select multiple codecs from the Compressors/Decompressors list. All of them will appear in the "Preferred codecs" list. Note that a decoder cannot be assigned to WMV and MP4 formats only (with MP4 Visual video). Video Splitter uses a codec that will be suitable for the open file format. Solveig Multimedia 42
43 You can use the Move Up and Move Down buttons to change the priority of the selected codec. Audio Plot Tab The Audio Plot File Path parameter defines the path to save the audio plot data file used by Video Splitter. "Follow sliders while building" determines how the audio plot is built. When the option is enabled, the audio plot will be built with the slider position selected by the user. Check this box if you want the audio plotting to be linked to the slider movement. If you want you can change the path to this file to save free place on the system drive. Solveig Multimedia 43

44 "Output file mask" tab The output file mask is designed to generate output file names using built-in macros. A mask is a template that consists of macros. Using the special buttons located under the "Mask of the names of saved files" field, you can add macros to the current position of the slider. the macro defines the name of the source file. [n] macro of the current fragment number, which can be used in the output file name template. macro of the current fragment number with a certain minimum number of printed characters. Zeros will be added to the left side of the value. the macro is intended to determine the current creation time of the output file name. Solveig Multimedia 44
45 To add the desired macro, simply click the button with the macro name and, if necessary, change it in the Save file name mask field. You can change the order of these macros to get the file name you want. To restore the mask values, simply click on the Default button. Below are examples of mask patterns and their corresponding output file names. Let's say we have a video.avi source file and we would like to save three fragments from the file. We will perform this operation on September 25, 2012 at 18:50:30. Mask Pattern Target File Name [n] 1.avi 2.avi 3.avi _[n] video_1.avi video_2.avi video_3.avi _ video_01.avi video_02.avi video_03.avi _[n]_ video_1_2012_09_25_18_50_30.avi video_2_2012_09_25_18_50_30. avi video_3_2012_09_25_18_50_30.avi Solveig Multimedia 45

46 View tab Setting Description Show Infobar Shows information about the source and destination file Show GPS Navigation Bar Shows GPS information if the file contains one Show sensors in GPS Navigation Bar Shows GPS navigation sensors: speedometer, compass, accelerometer Show splash screen Allows you to disable the splash screen Solveig Multimedia 46
47 Display information in the system menu Allows you to display information in the system menu Display logo on background image video window Allows you to display the logo on the background image of the video window Control tab Option Close application after cutting Description Allows you to automatically close the application after editing is complete Solveig Multimedia 47
48 Ask for output file name after cutting Close application after incorrect activation If selected, application asks for output file name after cutting Allows application to close if activated incorrectly Position on AVC interlaced video fields Allows to position on AVC interlaced video fields Alignment on MPEG TS files MPEG TS files Solveig Multimedia 48
49 Using Solveig Multimedia Video Splitter In this section: Opening a Source File Using the Editing Panel Starting an Editing Process Working with the Batch Queue Working with MPEG-2 Files Opening a Source File File operations can be performed through the Solveig Multimedia Video Splitter menu. To open the source file, go to the menu, select File > Open Media File. Select your video file in the Open dialog box. This file will not be modified, deleted or moved during the editing process. See also: File menu, Information panel Using the editing panel Before you start the editing process, you must select the fragments that you want to cut or save for the final file. To add a new fragment on the timeline: 1. Go to the beginning of the future fragment 2. Press the Add Marker button (M) or select Edit -> Add Marker from the menu 3. Go to the end of the future fragment 4. Repeat step 2 5. Mark the fragment on deletion by selecting Edit -> Mark fragment for deletion (D) or for saving by selecting Edit -> Mark fragment for saving (S) 6. If you need to change the start and end time of the fragment, simply move the markers to their new positions Sample Fragments Solveig Multimedia 49
50 Fragment color Description This fragment is marked for deletion. It will not be included in the received media file. This fragment is marked for saving. It will be contained in the final media file. This fragment is marked for deletion. It will not be included in the resulting media file. Yellow color means that you can edit it (delete, save) This fragment is marked for saving. It will be contained in the final media file. Yellow color means that you can edit it (delete, save) Element Description Hot key Add marker: Adds a marker to the current position of the slider M Deletes markers: Deletes the current marker or fragment Delete Mark fragment for saving: assign fragment type S Mark fragment on delete: assign fragment type D Invert: Invert fragments in the timeline I Size: Calculate the size of the final file (available for AVI, MP3) Ctrl + F Set audio silence/unmute for the selected fragment Start: Starts editing or batch processing (if any tasks in the job queue) Ctrl + T Temporal position of the left marker. You can edit this value manually. The time position of the right marker. You can edit this value manually Increase: Increases the resolution of the timeline slider to make editing adjacent markers more comfortable (*) Decrease: Decreases the resolution of the timeline slider (*) NumPad + NumPad - Solveig Multimedia 50
51 Storyboard enabled: Disable storyboard Storyboard disabled: Enable storyboard Audio plot enabled: Disable storyboard Audio plot disabled: Enable storyboard Ctrl + F Save selected fragment Save selected fragments Add batch job queue A Take a screenshot of the video frame Open the folder with the created screenshot (*) - To see the timeline after zooming in, you can use the scroll cursor (under the timeline slider) and hotkeys Alt + Left Arrow and Alt + Right Arrow Starting the Editing Process To start the editing process after you have set all the slices you want cut or save, go to File -> Save file as... (for details, see the File menu) or click the Save file as... button (for details, see the Information panel section or click the Start button (for details, see the Editing tools section) Note: You can save (cut) any selected fragment by clicking on Save selected fragment as... from the context menu of the slider (for details, see the Editing Tools section) Working with the batch job queue To create a new batch job queue (task list): 1. Open the media file you want to edit and select the sections you want to keep or cut. See Opening a Source File and Solveig Multimedia Video Splitter Interface for details 2. Add a job to the queue by selecting Tools -> Batch Manager -> Add Job to Batch Queue 3. Repeat step 1 and step 2 for all files you want to edit . See also the menu sections Tools, Hotkeys You can also add a task to the job queue by selecting from the menu File -> Save file as... or by clicking on the button from the Information panel or by selecting Save selected Solveig Multimedia 51
52 snippets as.. from the context menu of the slider (for details, see the Editing Tools section). You need to check Do not run. Add to Batch Queue as shown in the figure below: To open the Batch Manager window, select Tools -> Batch Manager -> Show Batch Manager from the menu, or select Tools -> Batch Manager -> Load Batch List.. to open the task list file. The batch manager window allows you to change audio/video streams, the Sound and video attribute synchronously, delete any fragment, etc. See the Task queue field section for details. To edit a task, you need to open it in Video Splitter, change selected fragments or settings and update it: 1. Select the task you need to save. Go to Edit -> Edit Clip in Video Splitter or select Edit Clip in Video Splitter from the context menu or press Enter hotkey. For details, see Task Queue Field, Hot Keys 2. Edit the task in the main Video Splitter window. To view the selected fragments in in Video Splitter, you can use the Stored intervals field. To do this, select Show fragment in Video Splitter from the context menu of this field or press Enter. For details, see Hot Keys 3. After you edit the settings for processing the file in Video Splitter, update the task in the batch job queue by selecting from the menu Tools -> Batch Manager -> Solveig Multimedia 52
53 Updating a Task or from the Batch Manager window, menu Edit -> Update Task. Working with MPEG-2 files This section describes how to use SolveigMM Video Splitter to work with MPEG-2 video files. Open the MPEG-2 video file you want to edit: From the menu choose File -> Open Media File... A standard dialog box will appear. Windows window Open. Solveig Multimedia 53

54 The Do not index setting is used to prevent automatic indexing of SolveigMM Video Splitter's MPEG-2 file. Select a video file and click Open. Note. Indexing MPEG files is recommended but not required. Without an index, you won't be able to use keyframes and the result of editing may not be entirely accurate. If you cancel the indexing process or choose not to index the file, you can index it later as follows: select Tools -> MPEG File Indexing from the menu. If the source file is out of date, the following message will appear: Solveig Multimedia 54

56 Instructions how to register Solveig Multimedia Video Splitter how to open a media file how to view a clip how to navigate through a clip how to assign and remove markers how to mark fragments for deletion or saving how to select video and audio streams how to correct audio/video synchronization how to start splicing how to start editing how to register Solveig Multimedia Video Splitter To register Solveig Multimedia Video Splitter do the following: 1. Open SolveigMM Video Splitter 2. Click "Activate" button to start registration 3. Enter your license key in the window that opens and click the "Activate" button. Solveig Multimedia 56

57 The program is registered! How to open a media file To open a video file you want to edit, do the following: 1. Select File -> Open Media File... from the menu. A standard Windows Open window will appear. 2. Find your video file and click Open. See also sections Supported file formats, File menu How to view a clip 1. Open your video file 2. To start playback, click the Play button. You can also use the Edit -> Play menu item or the Spacebar hotkey. 3. To stop playback, click the Pause button. You can use the Edit -> Pause menu item or the Spacebar hotkey. 4. To stop playback, click the Stop button or select Edit -> Stop from the menu. Solveig Multimedia 57
58 Button Description Hotkey Previous Keyframe Next Keyframe Left Arrow Right Arrow Previous Frame Next Frame Left Arrow + Cntrl Right Arrow + Cntrl Play/Pause Space See Also Navigation Tools, Edit Menu, Keyboard Shortcuts How to Navigate a Clip 1. To navigate to next keyframe, click the Next Keyframe button or choose Edit -> Next Keyframe from the menu. You can also use the Right Arrow hotkey. 2. To move to the previous keyframe, select Previous Keyframe or choose Edit -> Previous Keyframe from the menu. You can also use the Left Arrow hotkey. 3. Left-click on the required position on the timeline. 4. Enter the desired time in the navigation fields in the format HH:MM:SS:MS. The position will automatically adjust to the nearest previous keyframe. Button Description Hotkey Previous Keyframe Next Keyframe Left Arrow Right Arrow Previous Frame Next Frame Right Arrow + Cntrl Left Arrow + Cntrl See also Navigation Tools, Edit Menu, Keyboard Shortcuts, Control Menu : Solveig Multimedia 58
59 1. Go to the position where you want to add it. 2. Press the Add Marker button (M) or select Edit -> Add Marker from the menu To delete a marker: 1. Left-click on the marker you want to delete. 2. Click the Delete Marker/Fragment button or select Edit -> Delete Markers from the menu. To delete all markers on the timeline select from the menu Edit -> Delete all markers or press Ctrl + C Note: markers will be deleted without any confirmation of this action. , Editing tools How to mark a fragment for saving or deleting To select a new fragment: 1. Go to the beginning of the future fragment. 2. Press Add Marker (M) or select Edit -> Add Marker from the menu. 3. Go to the end of the future fragment. 4. Repeat step 2. To adjust the time of the start and end position of the fragment: 1. Select the marker of the start/end position of the fragment 2. Move the marker to the desired position (or use the Next keyframe/previous keyframe buttons) To delete the fragment: 1. Click left-click on the fragment you want to delete 2. Click the Delete marker/fragment button (Delete), or select Edit -> Delete marker or markers from the menu. Note: the fragment will be deleted without any confirmation. To mark a fragment for saving 1. Left-click on the fragment you want to save. 2. Click the Mark Fragment to Save button (S) or select Edit -> Mark Fragment to Save from the menu. Solveig Multimedia 59

60 To mark a fragment for deletion 1. Left-click on the fragment you want to delete. 2. Click Mark Fragment for Deletion (D) or select Edit -> Mark Fragment for Deletion from the menu. Button Description Hotkey Add Marker: Adds a marker to the current position of the slider. Delete markers: Deletes the current marker or fragment M Delete Mark fragment for saving: sets the fragment type Mark fragment for deletion: sets the fragment type S D See also Edit Menu, Hot Keys, Editing Tools How to select video and audio streams Solveig Multimedia Video Splitter allows you to select audio and video streams that will be contained in the final media file. To select streams, open the Manage menu: All video/audio streams contained in the open file are listed at the bottom of this menu. Select the streams to be contained in the final file. Solveig Multimedia 60

61 In the example below, only the audio stream will be saved See also Control menu How to correct audio/video synchronization Solveig Multimedia Video Splitter will develop without losing audio/video synchronization. However, some media files get out of sync after being edited. To prevent loss of sync, you can try the following. 1. Open your video file. 2. Select the fragments you want to keep in the final video. 3. Select Control -> Trust sample timestamps. 4. Continue the editing process. See also the Manage menu, How to mark fragments for deletion or saving How to start splicing To start the process of merging files into one: 1. Add video (audio) files that you want to merge by dragging them into the fusion manager window or by clicking the Add multimedia files button. 2. If the files have different parameters, you will be warned. Solveig Multimedia 61

62 3. Sort the files if necessary. 4. Start merging files by clicking the Start merging process button or by selecting File -> Start merging process from the menu. 5. Enter a name for the destination file and click the Save button. A status bar will appear showing the progress of the file merging process. How to start editing To start editing: 1. Open your video file. 2. Select the fragments you want to save or cut 3. Press the Start button (Ctrl + T) or select Edit -> Start from the menu 4. Enter a name for the future file and click the Save button. A status bar will appear showing the progress of the editing process. Note: selecting File -> Save media file as... from the menu will also start the editing process. Solveig Multimedia 62
User Manual Version 2.1 License Type: Shareware First Edition: April 24, 2007 Modified: June 23, 2011 Solveig Multimedia Pr. Razvitiya 3, 634055 Tomsk, Russian Federation
Movavi Split Movie for Mac User Manual Table of Contents Quick Start Guide...2 Activating Split Movie...4 How to Obtain an Activation Key...5 Offline Activation...6 Opening Files...8
Desktop and File Explorer hotkeys Windows Key Ctrl + Escape Win Display the start menu. Ctrl + Shift + Escape Calling the task manager is much more convenient than any other way. ctrl +
How to use hot keys in 1C and its configurator For the convenience of working in 1C, special key combinations are used hot keys. They are used to speed up the input of information in 1C and to perform
WORK TIME: 2 hours. 1. Extra-curricular preparation Issue a title page. See APPENDIX 1 2. Work in the lab Basics As soon as you start Word, it automatically creates new document
Function keys F1 - Get help (works in most applications). F2 - Rename the selected desktop icon or file in explorer. F3 - Open search window (only available on
2009 CSoft Development Standard Component Library Manager. All Rights Reserved Contents Standard Component Library Manager...2 Security Notice...4 Starting the Library Manager
Table of contents Importing existing media files... 2 Modifying projects.... 3 Process for adding a clip to a project:... 4 Process for clearing the storyboard or timeline:... 4 Creating a new project:... 4
Laboratory work 2 Editing and formatting a document The purpose of the work: to form a skill in performing the basic techniques of editing and formatting text (selection, copying, moving
RVi Smart Player 3.0 User Manual Contents 1 Overview...1 2 Operation...2 2.1 Main Interface...2 2.2 Setting...2 2.2.1 Adding Files...3 2.2.2 Preview...3 2.2 .3 Export files...4
Table of Contents Introduction.... 2 Introduction to windows movie maker.... 2 Windows Movie Maker Interface... 2 Movie Operations Pane.... 3 Collections Pane.... 4 Contents Pane.... 4 Window monitor....
Laboratory work 8 "Technology of work in the Explorer program" The purpose of the work: to study the methods of working with the Explorer program 1. Brief theoretical information As part of the Windows XP operating system, there is
Digital video surveillance system "Integra Video" Operator's manual For versions 5.4.x 1 Launching the program The program is launched using the shortcut on the desktop: You can also launch the program
Movavi Media Player for Mac User Manual Contents Activating Media Player...2 How to Obtain an Activation Key...3 Offline Activation...3 Opening Files...6 Playback...6 List
general information When planning the release of the 2007 Microsoft Office system, the developers were tasked with making the main Microsoft applications Office is more convenient to work with. As a result, a custom
User's Guide for WEB Accelerator Version 1.0 Minsk 2009 Contents Brief overview... 3 1. Installing WEB Accelerator... 3 2. Starting and stopping WEB Accelerator...
BASIC COMMANDS AND OPERATIONS! Check how you remember the studied material Windows 7 operating system and MS Word word processor Basic steps when working in Windows 7. Highlight the icon Click
ENGLISH EOS Video Snapshot Task Ver.2 Operating Instructions Contents of this Operating Instructions This instruction uses window examples for Windows 7. indicates the selection procedure
Quick Guide Main Menu System Settings: Click the FlyView logo in the upper left corner. The ESC key allows you to collapse and expand the application. Management Tree Resources: Management Tree
Brief instructions for working with Microsoft program PowerPoint Action Algorithm Where to start? Starting the program 1. On the taskbar, click the Start button. 2. In the menu that opens, click the Programs command.
Software Forward T TVPrompt Teleprompter software Release date: May 9, 00 Quick guide TELEVIEW Contents Introduction... General information... 4. Prerequisites for use... 4. Main window of the program...
CMS Remote Video Surveillance Software User Manual Contents 1. WELCOME TO CMS...3 1.1 DESCRIPTION...3 1.2 SYMBOLS...3 2. INSTALLING AND REMOVING THE PROGRAM...4
1. Statistics of educational institutions 1.1. Main functions The Statistics of Educational Institutions program is designed to collect reporting forms and generate reports. To the main features of the program
Ribbon Main element user interface Microsoft Word 2007 features a ribbon that runs along the top of every application's window, instead of the traditional menus and toolbars.
WebEx Recording Editor WBS29 User Guide Copyright 1997 2013 Cisco and/or its affiliates. All rights reserved. WEBEX, CISCO, Cisco WebEx, CISCO and Cisco WebEx logos are registered
Using Picasa to work with photos Installing Picasa To work with digital photographs the computer must have the appropriate program. There are enough such programs now
Kemerovo State University Faculty of Mathematics UNESCO Chair in STI Laboratory work 1. SETTING THE DESKTOP Kemerovo 2002 1 Purpose of work: To acquire basic skills for setting up
Practical work 4 Topic: "Hot keys Microsoft office 2010» Purpose of work: to gain professional skills in documents, spreadsheets, presentations. Hot keys - what is it
O.V. Spiridonov WORKING IN MICROSOFT WORD 2010 Lecture 1. Microsoft Word 2010 interface The lecture introduces the user to the Microsoft Word 2010 interface. The main elements of the interface are presented. Special attention
Topic 1.4 * Customizing Desktop Settings After completing the tasks in this topic, you will learn how to: configure various desktop settings: wallpaper, screensaver, etc.; set system date
INSTRUCTIONS Redragon Lavawolf Gaming Mouse User Manual Connecting the Mouse Connect the USB connector of the mouse to the USB port of your computer or laptop. The mouse will be detected automatically. In order to take advantage
Work in the operating system environment Microsoft Windows Basic concepts Desktop (RS) the initial state dialog environment MS Windows. PC is revealed on the screen after starting MS Windows. On a surface"
About Microsoft Office Excel 2007 Files Microsoft Office 2007 introduces a new file format based on the XML language. By default, documents created in Excel 2007 are saved with the new extension file name,
User Manual Contents Introduction... 1 IMPORTANT NOTICES... 1 Legal notices... 2 Installation and setup... 3 System requirements... 3 Installation... 3 Activation... 6 Automatic update...
LinneyCollector is a program designed to extract specific types of styles and their combinations from digital images of handwritten monuments, cataloging these samples, with the ability to search
Your Detecting Connection User Manual [email protected] User Manual 4901-0135-3 ii Table of Contents Table of Contents Setting... 4 Application Terms...4 User Settings...
3. On the left side of the Options window, open the OpenOffice.org list and select Memory. 4. In the right part of the window, if necessary, set: With the Number of steps slider, the number of possible steps to undo editing.
Lesson 2 Software PC. Basics of working with Windows 7 / 8 / 10. The result of the lesson: The student knows the basics of working with Windows 7/8/10. and is ready for further education at the Small Academy. Goals
Dell Canvas Palettes User Guide Notes, Warnings, and Cautions NOTE: A NOTE indicates important information to help you use this product more
Samsung Universal Print Driver User Guide imagine the possibilities Copyright 2009 Samsung Electronics Co., Ltd. All rights reserved. This Administrator's Guide is only for
Contents of this guide Microsoft Appearance Microsoft OneNote 2010 is significantly different from OneNote 2007, and this guide is designed to help you get started quickly. new version programs.
Forward T Software SLSlideShow Slideshow project editor Release date: June 0, 00 SoftLab-NSK User Manual Contents Introduction...3 General information Purpose of the program...4 Slide show project...4.
"Marine Software Packages and Technologies" LLC User manual for DVS DV 1.0 system DVS DV 1.0 digital video recording program http://www.mpkit.ru Gelendzhik, 2007 Table of Contents INTRODUCTION...3
System combinations keyboard shortcuts in Windows F1: Help CTRL+ESC: Open the start menu ALT+TAB: Switch between programs ALT+F4: Close a program SHIFT+DELETE: Unable to delete an item
flash drive manager ver. 2.1 for Windows 95/98/NT Last fixes 09/08/1999 Purpose. Flash Drive Manager (FDM) is a software interface part of the Flash Drive appliance.
Federal State Educational Institution of Higher Professional Education "Southern Federal University" Ostrovskaya I.V. TEST TASKS ON THE TOPIC: WINDOWS OPERATING SYSTEM Methodical
Your Detecting Connection User Manual [email protected] XChange2 User's Guide 4901-0135-1 ii Table of Contents Install... 4 XChange 2 Terms of Use... 4 Settings
THERMEX ACCURACY IS THE BASIS OF STABILITY SETTING CUSTOM MEASUREMENT MODES VIP-2MR User Manual CONTENTS 1.1 Introduction... 3 1.2 Purpose and main features... 3 1.3 Accepted abbreviations
Topic 8 Styles A style is a set of formatting options that has a name. Styles are used: - for the professional design of the document; - to quickly change the parameters of the text; - for uniformity
When a conventional telephone was being developed, no one could have imagined that telephone wires would someday be used to transmit a digital signal. Therefore, for the functioning of the Internet and the telephone on the same line, it was necessary to use a special separating device.
Why you need a splitter
If a high-frequency signal (Internet, ADSL) works simultaneously with a low-frequency one (PSTN), then interference in the form of noise will be constantly heard in the handset (the phone’s electronics will “try” to decipher the high-frequency signal). On the other hand, the low-frequency component of the signal will "slow down" the transfer of information from the server, because the modem will consider low-frequency signals as an error that needs to be corrected.
To protect both signals (analogue telephone and digital computer) from mutual influence, a filter (or splitter) is used, connected between the telephone cable, modem and telephone set. Externally, the separation filter is a small plastic box with one input for a telephone cable and a pair of outputs for a telephone and a modem.
How a splitter works
The filter divides the frequency band received at the input into 2 parts: one for the telephone signal, the other for the ADSL signal. As a result of the division, the device outputs a corresponding frequency for each output jack. Telephone equipment, which includes devices, faxes, answering machines, etc., receives frequencies in the range up to 3400 Hz, and the modem receives all frequencies above 25000 Hz.
If there are several phones on the same cable in the room, then the splitter is placed at one outlet. In this case, you have to pull a separate wire to the modem from the ADSL output. This is not very convenient, because. will have to be crossed telephone line so that both the modem and phones can work at the same time. The problem can be solved by using microfilters. These devices have one output, one input. A similar filter is mounted in front of each telephone set. Sometimes, for convenience, manufacturers produce a telephone wire with a built-in microfilter in the form of a thickening. In some cases, the device is mounted directly into the junction box. The splitter is essentially an "advanced" microfilter. The latter works in exactly the same way as its "colleague": it shares frequency range without passing high-frequency signals into the phone; and prevent penetration low frequencies to the modem.