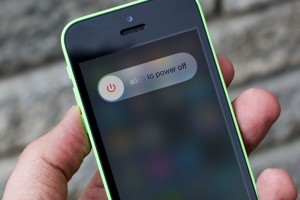
Recovery is also called Recovery Mode for android. It is a special mode through which the android simultaneously boots up and restores the system or updates it.
Recovery starts when a certain key combination is pressed. For each device, it is different. For example, for Samsung it is “Home” + “Power” + “Volume Up”, and for Nexus it is “Volume Down” + “Power”. You can find out the exact combination of your android via the Internet.
Types and possibilities of Recovery
So how is it software, it is written by someone. Depending on the creator, the recovery is divided into two types:
1. Stock Recovery - created by the “native” manufacturer of the device.
2. - An alternative version that is created by individual programmers. It has more features than the official one.
"Basic" features this mode the following:
1) restart android;
2) install updates on android;
3) flash the phone, that is, reset the data to the factory settings;
4) copy and restore the system;
5) delete the cache from the device;
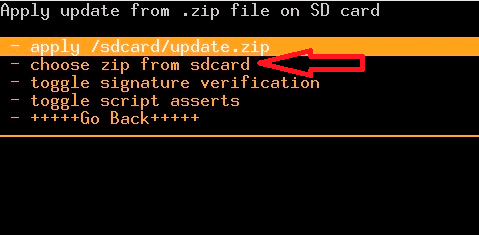
6) install the archive from the memory card;
7) enable USB-MS mode for transferring data to SD.
Custom Recovery, in addition to the above, has many more features. For example, you can, but selectively, saving the necessary files.
There is also Photo Data recovery - a program that we will talk about below.
Navigation and Custom Recovery Menus
You can "move" through the Custom mode using the keys:
“VolDOWN” - down, “VolUP” - up, “POWER” - back, “CAMERA” - select an item.
The main menu items are listed below to make it easier for you to understand the English language:
2) formatting the internal partition - wipe data / factory reset;
3) installing firmware from a memory card - install zip from sdcard;
4) backup and restore - backup and restore;
5) advanced recovery mode - Advanced Restore;
6) formatting the "boot" section - format boot;
7) formatting the "system" section - format system;
8) formatting the "date" section - format data;
9) formatting the "cache" section - format cache;
10) formatting a memory card - format sdcard;
11) formatting the Linux partition - format sd-ext;
12) connect to a computer in the form of a flash drive - mount USB storage;
Install Recovery
Installing recovery on your android is quite simple. Follow the step by step instructions:
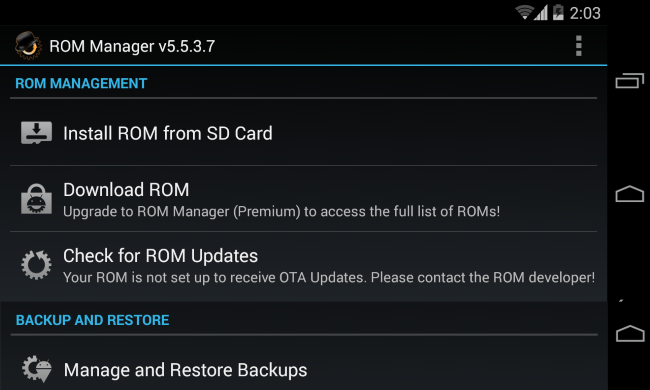
Step 1. Through the Market, you need to install "Rom Manager 4.2" or "Rom Manager 4.0".
Step 2. Run the program and give root privileges.
Step 3. Click on Installing clockworkmod recovery, which is the first item.
Step 4. We are waiting for a message about the successful completion of the installation.
A bit about Photo Data Recovery
Photo Data Recovery is a recovery program deleted files on Android.
The main functions and features of Photo Data are as follows:
1) easy to use and convenient interface;
2) quick installation and a small amount of installer;
3) a filter to search for the desired remote file;
4) the ability to select the time intervals through which the android memory will be cleared;
5) the final removal of unwanted files.
Photo Data Recovery is the right thing for those who like to store important information on their phone. Install this program You can follow the link.
Finally
Recovery is used for problems with the smartphone: it stopped turning on, the operating system “flew”, the android began to fail. Through this mode, it is convenient to manage your device and “treat” it.
You should download and install it absolutely free so that you can be the owner of your device, and not vice versa.
Every tablet or phone based on Android OS is equipped with a recovery environment Recovery mode. It refers to the system part of the mobile OS and allows you to perform specific procedures on the device that are not available in the regular menu. Let's look at what is Android Data Recovery, how to enter this mode and the procedure for working with it.
Destination recovery area assignment
Recovery Mode Recovery Mode is an indispensable tool for developers and engineers dealing with programming or tuning the Android OS. However, it is often resorted to and ordinary users mobile devices.
Considering what the Recovery mode is, it is necessary to note its main features:
- Resetting your gadget to factory settings ( Hard reset), when it cannot be done from the standard menu;
- Installation of custom firmware;
- Activation of Superuser rights;
- Creating a backup of the system with all user data and settings;
- Restoring Android using a previously mounted backup;
- Allocation of system partitions on an external micro sd memory card;
- Connecting the device to a computer for working with the ADB debug bridge, etc.
It should be noted that one cannot do without Recovery on Android if it is impossible to enter the graphical menu of the OS, as well as in the case of turning a smartphone or tablet into a "brick".
How to enter Recovery Environment
Transferring a mobile device to Recovery mode can be done in several ways:
- Using a combination of mechanical keys;
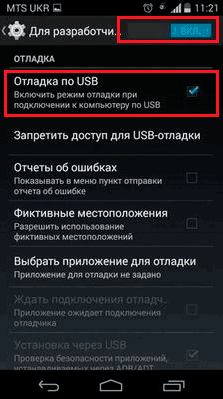
- By means of the ADB debug bridge;
- Through special software, which is installed directly on the phone.
In the first case, to enter Recovery Mode, a certain combination of Power, Home buttons (if available) and a volume control rocker are used. Moreover, at different manufacturers This combination may vary. So, in almost all smartphones of the Nexus series, the resuscitation area is loaded using the Power + Volume Down keys. For Samsung, the actual set is "Power" + "Home" + volume control rocker clamped in the middle. The above actions are performed on the device turned off.
If the required combination could not be selected, you can open Recovery for Android using the ADB debug bridge or its automated version of ADB Run:
You can also enter recovery mode with the help of additional software installed directly on the mobile device. One such application is Quick Boot. It is enough to install it from Play market and after starting, click on the appropriate button. 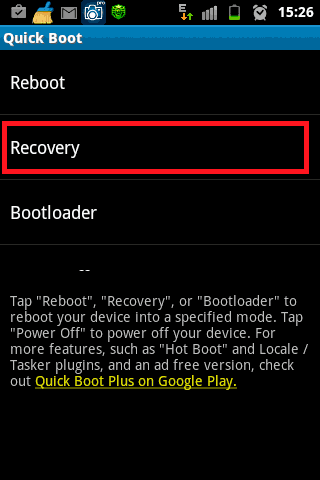
How to work in a recovery mode recovery mode environment
In the Recovery area, there is no graphical interface that all owners of smartphones and tablets running on the Android OS are used to. Yes, and touch control also does not work there. Therefore, it will not be superfluous to consider how to use the Android Data Recovery mode.
The main window of the standard Recovery is a list of functions. Moving between menu items is carried out using the mechanical keys Volume Up / Volume Down, and the choice of an element is performed by the Power button. 
Once in stock Recovery Mode, the following tools will be available to you:
- Reboot system now. Used to reboot the mobile device and enter the Android GUI.
- Wipe data / factory reset. Cleans internal memory device from installed applications, notes, contacts, etc. In this case, personal photos, videos and documents will remain intact. This function allows you to get rid of various failures. operating system.
- Wipe cache partition. Removes all information from the system cache. It is applied at incorrect operation installed software, as well as before flashing the gadget.
- Backup and restore. Creates a backup of the system and restores the phone using previously created points.
- Mounts and storage. Allows you to clear one of the system partitions.
- Advanced It opens additional Recovery options (restarting this mode, deleting the dalvik cache, etc.).
Work in the recovery environment of Recovery should be very careful, since all the actions performed are irreversible and can lead not only to permanent removal all user information, but also to turn Android into a "brick".
Using Custom Recovery
Stock recovery mode has several limited capabilities, which in some cases is simply not enough. So, you can’t reflash a smartphone with it or install the required application from a memory card. Therefore, advanced users replace standard recovery on custom (CWM or TWRP), which is endowed with more advanced functionality.
As an example, consider the installation and subsequent use of ClockWorkMod (CWM) Recovery:
Will begin android installation CWM Data Recovery. This process not take much time. After its completion, it will be possible to enter the custom recovery environment using the same keys that were used to download the stock Recovery. 
In addition to the standard set of tools, the new reanimation area will be replenished with the following functions:
Having figured out how to work with the Recovery environment, you can flash smartphones or tablets, reset settings, create recovery points, and perform other specific actions without outside help.
Users mobile phones often wonder how to exit Recovery mode on Android. Sometimes it happens that the recovery screen appears on the phone and there is no way to start the system normally.
When someone turns on or reboots their device, it automatically goes into android mode System recovery 3e. Before fixing this problem, you need to understand what Recovery is and why this mode may start at the wrong time.
What is recovery mode?
What is the Android system recovery screen for? This feature on the device is used to enable several very useful options, and it can be an effective tool for setting up the phone in the hands of an experienced user.
One of the most useful options of the system recovery screen is the ability to reset the device to factory settings if there is no access to the operating system. This can be extremely useful if the phone does not turn on properly, does not respond to touch on the touch screen or does not allow access to the settings. The fact is that if for some reason the user fails to enter the options of his device, the ability to reset to factory settings will be blocked for him.
Recovery mode helps to solve many problems related to Android system malfunction. If you want to reset your device to factory settings using this function, you must first turn it off, and then press and hold certain buttons.
Depending on the phone model, these can be volume keys, power on, back to main screen etc. This will cause the device to boot in system recovery mode. Then it will be possible to erase all user data on the mobile device if you select the Wipe Data (or Factory reset), and confirm the reset using the Delete All User Data item. As a result, all files will be deleted from the phone.
A simple way to solve the problem.
If the device cannot exit the system recovery mode, then most likely this is due to the breakdown of one or more buttons used to access Recovery. For example, if the phone uses the volume down and power-on keys, a situation may arise when the volume control button is out of order and the device “thinks” that it is pressed. This leads to the fact that during power-up the phone thinks that the user is trying to start Recovery mode. First of all, you need to make sure that the physical buttons on mobile device work correctly, and especially with the volume keys. Sometimes it happens that visually they look serviceable, but they do not function properly.
Before proceeding to the next step, it is strongly recommended that you turn off the phone. It’s not safe to remain in Recovery mode and manipulate buttons, as this can lead to accidental deletion of information on the device. Next, you need to try to press the keys several times. If it turns out that they are stuck, then a few taps can help them return to their original position.
After such manipulations with the buttons, you need to try to turn on the phone and check whether the operating system boots.
If the device starts up normally, you will need to make backup copies of all important information as soon as possible. If the phone turns out to be seriously malfunctioning or physically damaged, then it can lose all important data.
After creating backups You can turn the device off and on again to check if it can start again in normal mode. If the phone no longer gets stuck on the system recovery screen, then the problem has been fixed.
other methods
 If the above steps did not help, the reason for the spontaneous download of Recovery may not be related to the malfunction of the buttons. A failure can occur as a result of installing a third-party firmware (ROM), trying to access the root of the phone or installing a custom recovery module (for example, ClockworkMod or CWM). The installation was probably unsuccessful, so you should try again. Such operations must be performed with extreme caution, as they can cause some serious problems, for example, in the case of an incorrect sequence of actions.
When installing third-party software related to firmware and obtaining additional settings, you should always carefully study the related documentation. It is usually published on the same web resources where users upload the necessary files.
If the failure related to Recovery mode occurred without any apparent reasonThis is most likely a hardware problem related to the physical buttons on the device. To eliminate the small likelihood that it is software independent, you should consider selecting the Wipe Data / Factory Reset option on the recovery screen. This function will eliminate any errors or malfunctions, remove viruses and return the phone to the default settings. As a result, all user information on the device will be irretrievably lost, since the option reserve copy it fails to start, but in some cases such a radical method helps to fix the problem.
You need to carefully check the phone for availability physical damage or liquid penetration. Damage is usually visible to the naked eye. As for moisture penetration, many phones are equipped with built-in LDI indicators (Liquid Damage Indicators), which warn users in case of penetration of liquid that can cause damage. If all of the above tips did not solve the problem, then you should contact an Android device repair specialist.
Want to install custom firmware on Android or, in other words, a third-party OS version such as CyanogenMod? Most likely you will also need to install custom recovery.
For everyone Android devices The recovery tool is already preinstalled. This recovery software can be used to restore the device to factory settings, update the operating system, or perform other tasks.
Stock recovery
Android devices already come with a recovery tool from Google, which is often called "stock recovery." You can boot the recovery system by pressing certain keys on your smartphone or tablet, or using the adb command that will boot your device in recovery mode.
The recovery menu provides functions that will help to restore the device, for example, from here you can restore to the factory settings. Recovery mode can also be used to update OTA files. If you want to install new firmware to your device or restore factory firmware, then you will first need to enter recovery mode.
With stock recovery, the system is limited. It can be used, for example, only to update OTA files and firmware from the manufacturer.
Custom recovery. The basics
Custom recovery is a third-party recovery environment. This is similar to installing custom firmware, for example, CyanogenMod, but instead of replacing the operating system, the recovery environment is replaced.
Custom recovery environment will do the same as the stock one. However, she will also have additional features. Custom recovery can often create and restore device backups. Custom recovery allows you to install custom firmware. ClockworkMod even provides the ROM Manager application, which allows you to access many functions from running system Android - this application requires custom recovery.
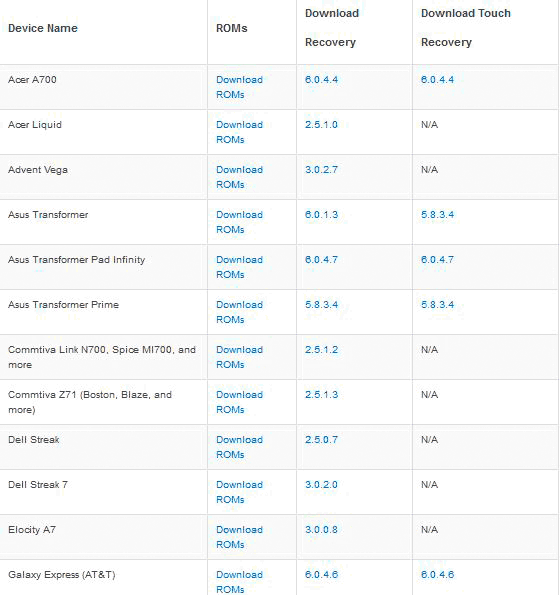
Popular custom recovery
ClockworkMod Recovery (CWM) can create and restore NANDroid backups - backups of the entire file system devices on android based. ClockworkMod provides a ROM manager with a file browser that allows you to view and install custom firmware through ClockworkMod Recovery and manage and restore backups. It also has other additional features that will be useful when installing and working with custom ROMs.

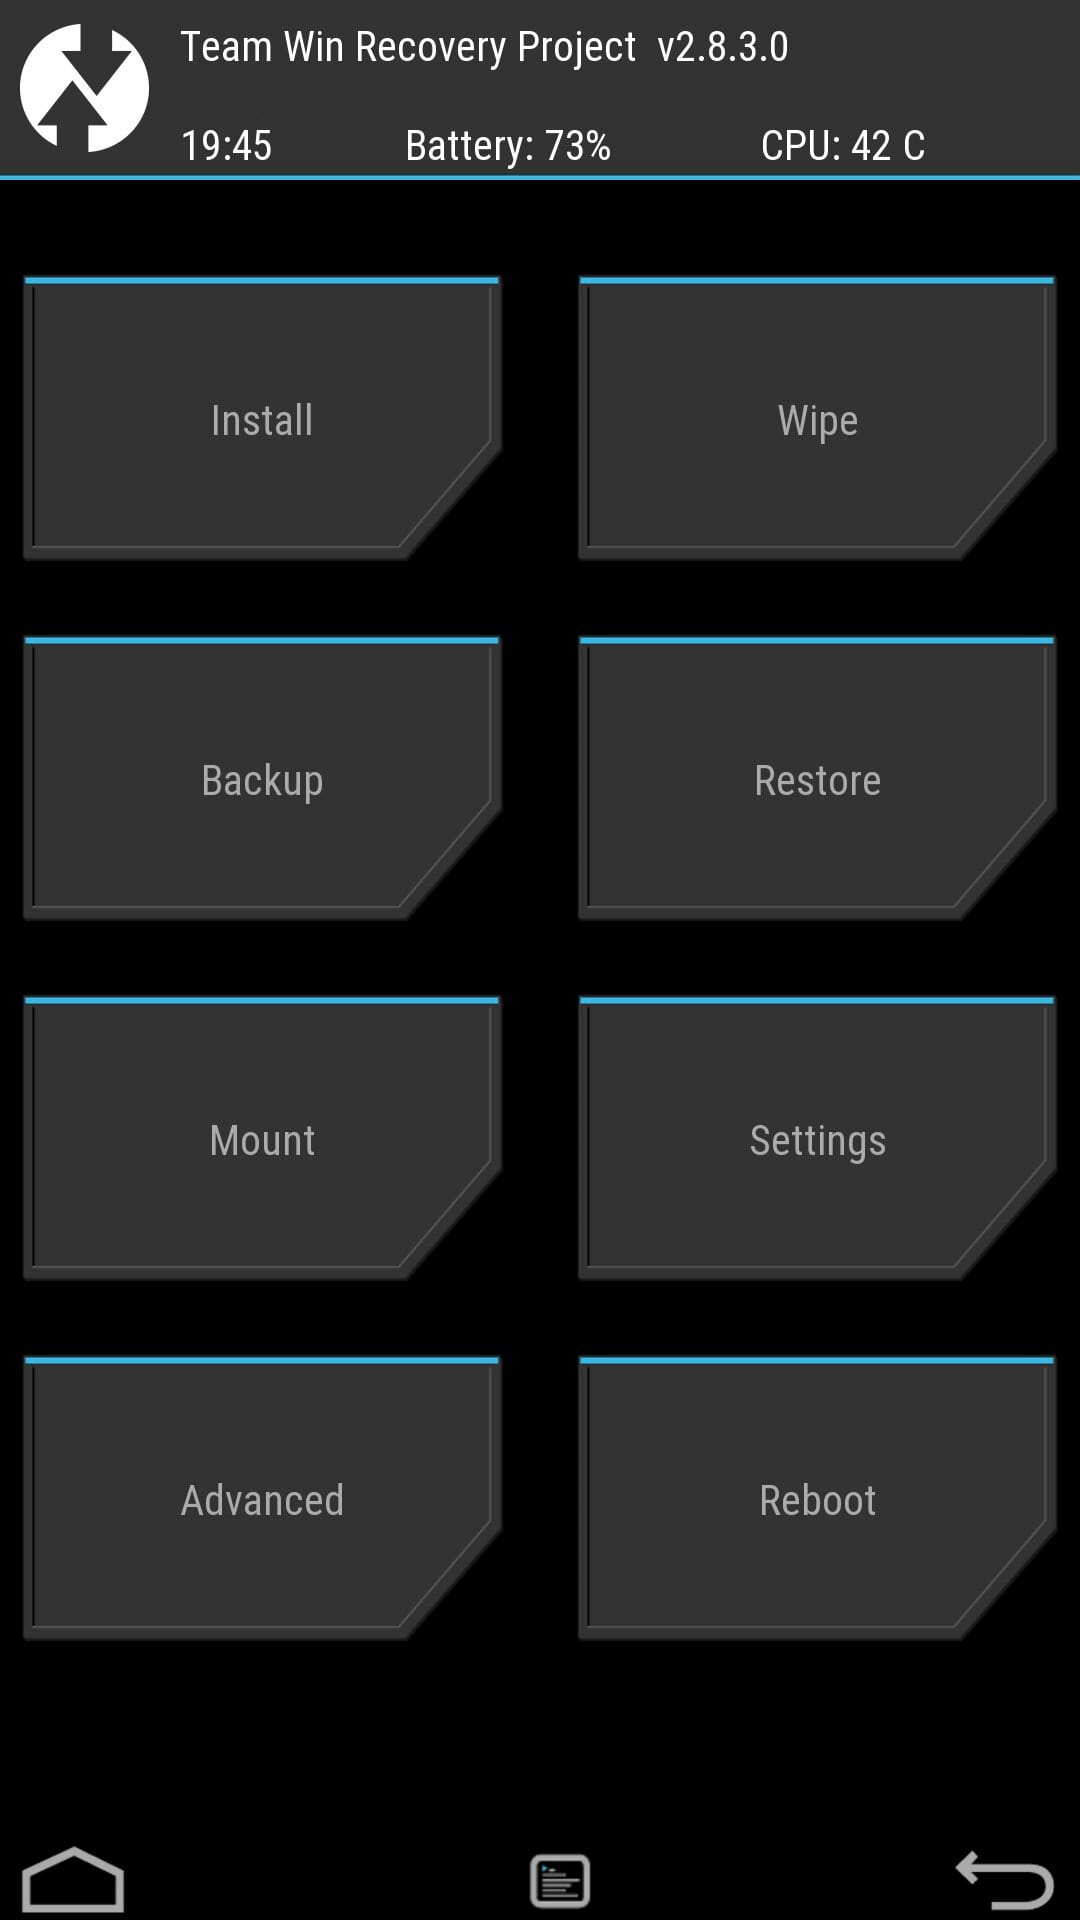
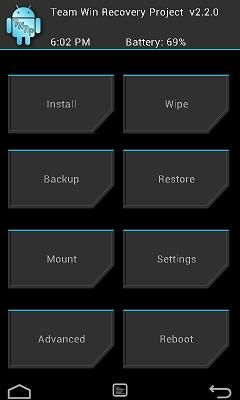
Team Win Recovery Project (TWRP) is a recovery environment that works from clicks. Unlike other recovery environments, including stock, where the volume keys are used for navigation, and the power key is used to select, an interface is used here that can be used by tapping the screen. TWRP even supports themes. Like CWM, TWRP provides the ability to install custom firmware and create and restore system backups, which is not in stock recovery.
CWM and TWRP are the two most popular custom recovery, but other custom recovery tools may be available only for some devices.
When and why you need to install Custom Recovery
Custom recovery environments come in handy if you install custom firmware, as they provide an opportunity to make a backup copy of the data, as well as its restoration, which, of course, will be useful to you. You will need to unlock the bootloader on your device in order to install custom recovery.
Although this function is hidden and requires the use of adb commands. You do not have to unlock the bootloader, install custom firmware, or even get root privileges to create or restore a full backup.
Install custom recovery if you want to install custom firmware or get a powerful backup tool. This action is often considered as a preparatory stage before installing custom firmware, but this is not always necessary. For example, the CyanogenMod installer will also install ClockworkMod Recovery (CWM).
In general, custom recovery is only needed if you plan to install a custom ROM. Most Android users will not even notice the difference between custom and custom recovery.
All devices with Android system have a recovery mode, i.e. Recovery Mode. In this mode, you can restore the default settings, install any update. But there is a problem that only more experienced users know about - the recovery installed by default will not work for a lot. Well, for some it was unbearable and an alternative recovery appeared, which has become a kind of standard - CyanogenMod Recovery (CWM). A lot of time passed and now recovery from CyanogenMod has grown to version 6.0 and has 2 versions - the touch version and the simple one. In a simple recovery, control is available only with the help of hard buttons, and in the second you can carry out operations by tapping the screen. Indeed, today smartphones have touch screens, so why not use this opportunity? In terms of functionality, they have no differences.
So, for what might we need third-party recovery? First of all - to install custom firmware, of course. If you want to consider the expanded functionality in general, then you have the option to “roll back” the device to factory settings, clear (wipe, wipe) the cache and dalvik-cache, restore the system, restore the system, I’m able to restore and much more.
However, not CWM’s one. There is also one more popular and fairly widespread recovery, which, in my opinion, is much more convenient and thought out - Team Win Recovery Project (TWRP). It is fully based on the control of a finger; it has an optimized size of elements for the menu, which is moreover logically structured. While creating backups, you can choose to save something (some sections). Also available is a keyboard (external similar to that of ICS / JB) and a terminal emulator, which allow you to perform various actions without having to restart the device. After flashing the same TWRP, helpfully you will need to clear the cache and dalvik-cache (something in CWM must be done by yourself). The easiest way to get TWRP is the Goo manager program.
It would seem, why then speak about CWM? In the last sixth of its iterations, the algorithm for creating backups was changed - now, instead of a huge 400 MB-1 GB of file, only 25 MB of the image is saved, but it does not change. In addition, the whole process is much faster (in the region of 40-45 seconds), which greatly improves life, given the importance of carrying out this action before the flashing.
How to install Clockworkmod on your device? Depending on the devices, the paths differ - where you can get it by using specialized utilities (ROM Manager in Google play Store or separate programs like the Galaxy Nexus / Galaxy S3 Toolkit), using the command line or changing the kernel. Consider the same installation process through the Galaxy Nexus Toolkit 7.7.
We select your version of the phone and firmware, turn off the smartphone and, holding both the volume and power keys, enter it into the Fastboot mode, after which we connect to the computer. In the Galaxy Nexus Toolkit, press 6: Flash Recovery.
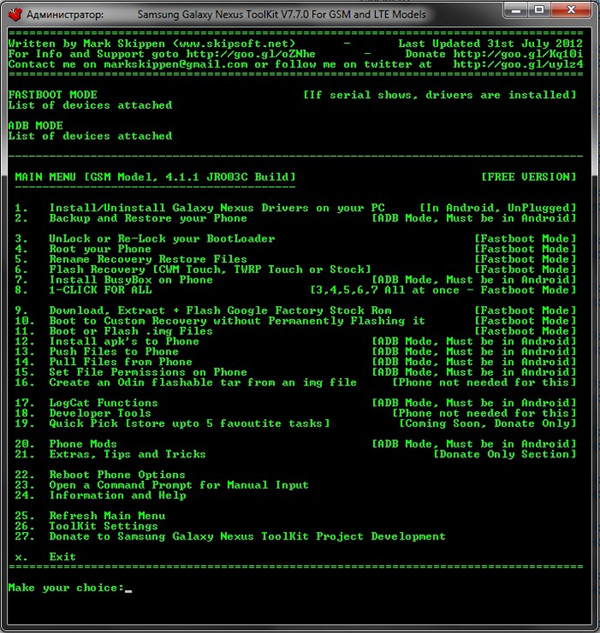
You are asked to select TWRP or CWM. We select item 1. Congratulations on a successful installation!

Download CWM in several ways. The first way is directly from the OS (using the previously mentioned ROM Manager program), the second way is when you select the Recovery item in the Fastboot mode (on the Galaxy family phones, press the + key to do this). If you have done everything correctly, then some of the lines of English text in front of you will appear in front of you. What do they mean? The names are similar to those in TWRP, so that the problem with migration should not be.
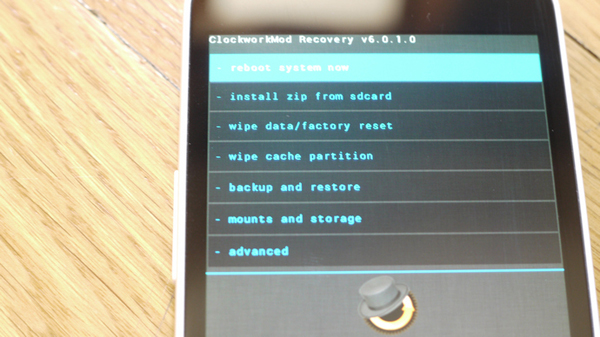
Let's go over the CWP points:
- Reboot system now - reload phone in Android
- Install zip from sdcard - install the zip archive from the memory card / device memory (on phones, where there is both a memory source there is an appropriate subitem)
- Wipe data / factory reset - paint polish sistemnyh data and vosstanovlenie telefona to zavodskim nastroykam (or zhe to "chistomu" mean kastomnoy proshivki; your multimediynye files ostanutsya netronutymi) neobhodimo vypolnyat pered ustanovkoy kastomnoy proshivki, silnoy otlichayuscheysya From nyne ustanovlennoy (All Always reset ukazano in ROM description)
- Wipe cache partition - clearing the cache partition, it is also necessary to perform the installation of another firmware to avoid the problem
- Backup and restore - creation of restoration points and non-immediate restoration from them
- Mounts and storage - allows you to enable / disable that or another partition of memory, as a rule, you don’t need to, because everything happens automatically. It is also possible to format one of these sections (as a rule, you don’t need to, if you just do not intend to return the phone to its original state)
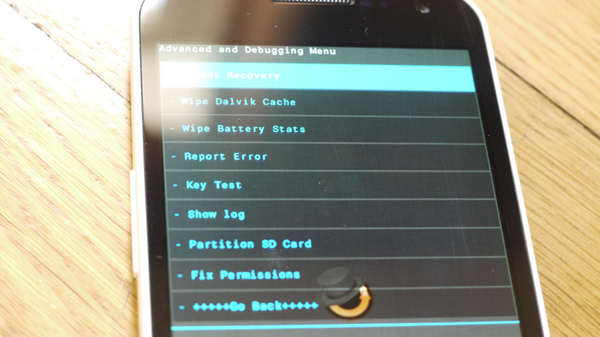
- Advanced - the menu of additional settings, where you can reload CWM, clear the dalvik cache (one more is needed to perform the action when installing the plug-in / delete or delete). Other actions are nonexistent.
Third-party recovery - not only is your first step to changing the firmware or modifying the existing one, but it’s also a convenient way to use it all the time, albeit, by the way, alas. In this article, we consider two of the most famous and popular recoveries, however, for one or another device there are other options, however, they are not “multinational”.


