If the computer's performance has decreased significantly, but the SFC utility could not solve the problem, then you should use the DISM system tool to restore the Windows image.
Windows 10 includes a useful utility command linecalled the Deployment Image Servicing and Management (DISM). This tool appeared in Windows Vista. On Windows 10 and Windows 8.1, the DISM tool is installed by default.
The utility can be used to restore and prepare Windows images, including the environment recovery windowsprogram windows installation and Windows PE. You can also use DISM to fix the system recovery image using the current OS installation, and even to maintain a virtual hard disk.
If errors began to appear on the computer constantly, and you began to notice problems during boot, then you can use the verification tool system files (System File Checker, SFC) for analyzing the integrity of system files and replacing damaged and missing files with a working copy.
If the SFC utility cannot fix the problem, then most likely the tool could not get the necessary files from the Windows image, which could also be damaged. In this situation, you can use DISM to restore the Windows image, and then reuse SFC to fix the damaged files.
In this guide we will introduce step by step instructions on using DISM to return stable and healthy state system.
Warning: before starting work with the DISM utility, it is recommended to make a full backup system or create a system restore point. In case something goes wrong, you can return the initial state system.
How to work with DISM commands in Windows 10
When working with DISM, there are three main options for restoring a Windows image: and Restorehealh. It is important to use them in that order.
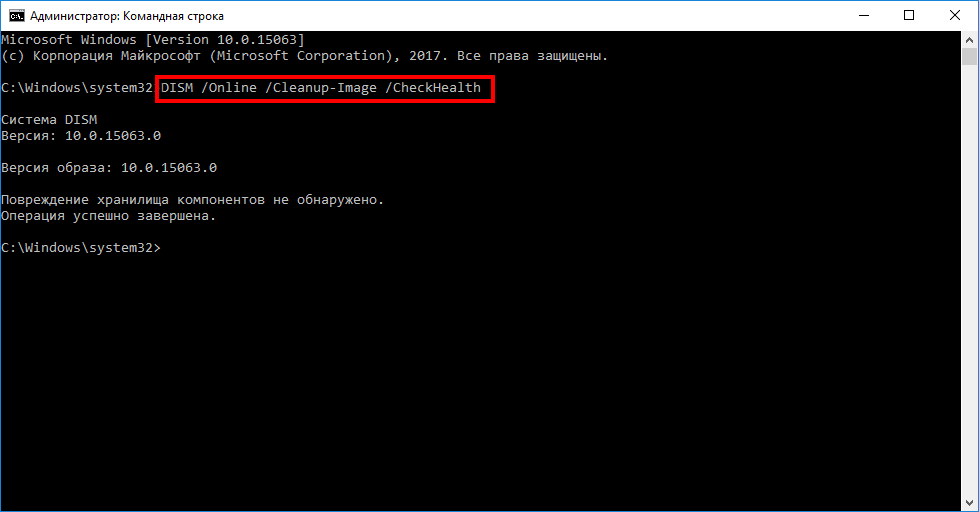
Using the CheckHealth option in DISM
The command in DISM allows you to detect image corruption. This command is used only to search for damage, but does not perform troubleshooting operations.
Command line , because to run DISM, you need administrator privileges for the device.
DISM / Online / Cleanup-Image / CheckHealth
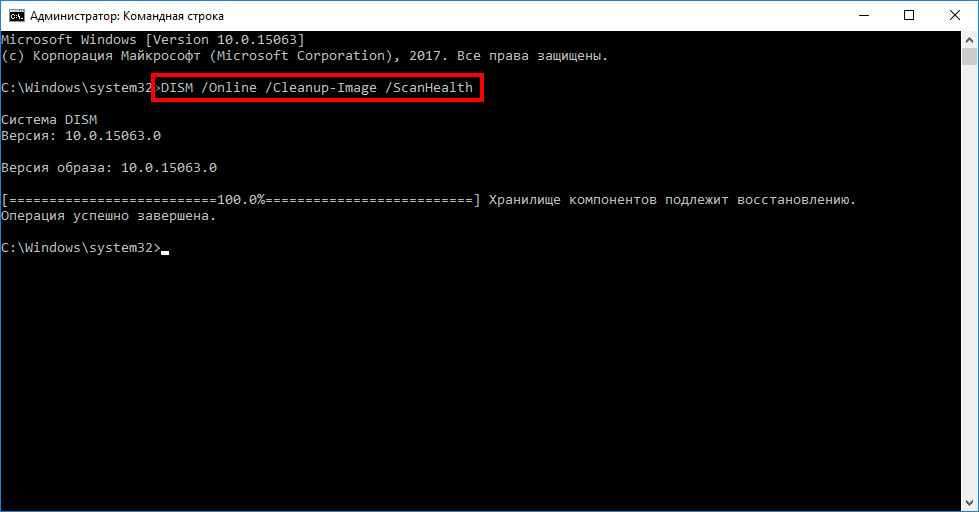
Using the ScanHealth option in DISM
The command in DISM allows you to scan a Windows image for any damage. Unlike / CheckHealth, checking / ScanHealth can take up to 10 minutes.
To run this command, follow these steps:
1. Enter the Start menu in the search Command line, right-click on the link that appears and select Run as administrator.
2. At the Command prompt, enter the following command and press Enter:
DISM / Online / Cleanup-Image / ScanHealth
Using the RestoreHealth option in DISM
The command in DISM allows you to automatically carry out the procedure for recovering damaged Windows images. Unlike / ScanHealth, checking / RestoreHealth can take up to 10 minutes.
To run this command, follow these steps:
1. Enter the Start menu in the search Command line, right-click on the link that appears and select Run as administrator.
2. At the Command prompt, enter the following command and press Enter:
DISM / Online / Cleanup-Image / RestoreHealth

Note: during the launch of / RestoreHealth or / ScanHealth, you may notice that the procedure hangs between 20% or 40% - this is absolutely normal behavior.
When you run the / RestoreHealth DISM command, it will try to use the Center windows updates to replace damaged files. However, if the problem has spread to the components of Windows Update, then you need to specify an alternative source of working versions of the files for image recovery.
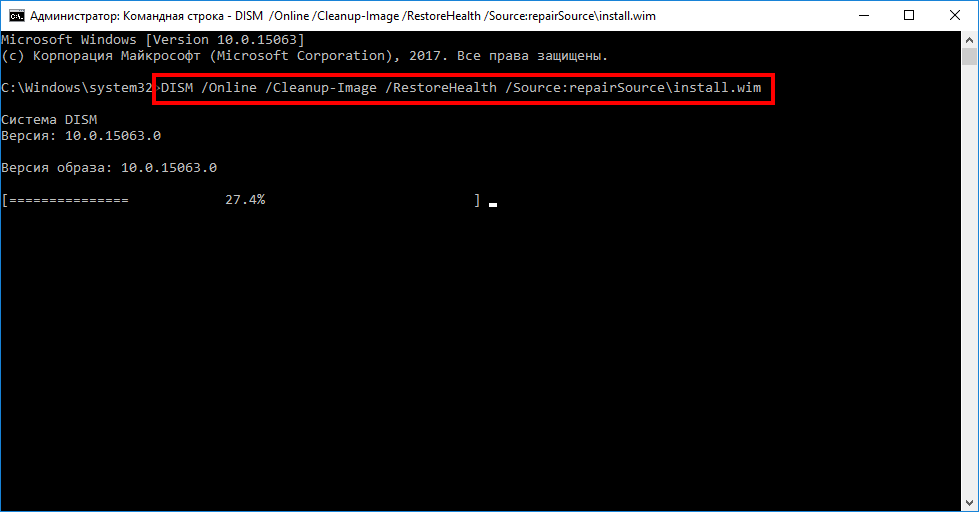
Using the RestoreHealth and Source Options in DISM
You can specify a new location for working versions of files using the operator / Source next to / RestoreHealth.
Before you can use the recovery commands, you need to prepare a copy of the install.wim file from another computer, installation media Windows 10, or a Windows 10 ISO file. It is also very important that the source of the working versions of the files matches the same version, edition and language of the operating system that is used on the computer.
You can download the Windows 10 ISO image below:
Now you can run the command to fix the Windows image:
1. Enter the Start menu in the search Command line, right-click on the link that appears and select Run as administrator.
2. At the Command prompt, enter the following command and press Enter:
DISM / Online / Cleanup-Image / RestoreHealth /Source:repairSource\\install.wim
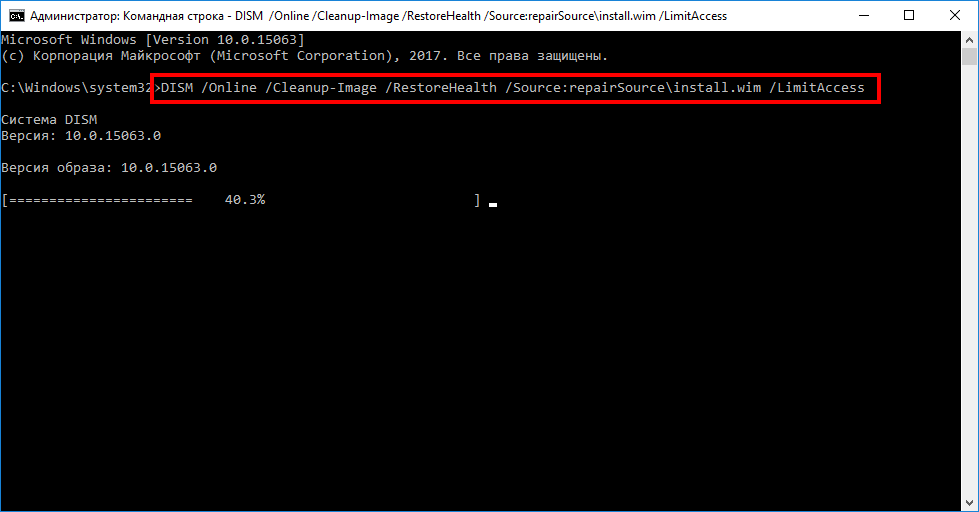
DISM / Online / Cleanup-Image / RestoreHealth /Source:repairSource\\install.wim / LimitAccess
DISM / Online / Cleanup-Image / RestoreHealth /Source:wim:repairSource\\install.wim:1 / LimitAccess
Note: do not forget to replace “repairSource” with the path to the source of working versions of files. For example: D: \\ Sources \\ install.wim.
The command will start the recovery of the Windows image using the working versions of the files included in the install.wim file from the installation windows media 10. When Windows Update will not be used as a source for downloading the necessary files for recovery.
Using DISM with install.ESD
In addition, you can not only specify a path that points to install.wim, but you can also use a file, which is an encrypted version of a Windows image.
If you upgraded to Windows 10 from a previous version of the operating system, setup files may still be stored on drive C: this means that you may have a source of healthy files.
To use the install.esd file to restore a Windows image on your computer, follow these steps:
1. Enter the Start menu in the search Command line, right-click on the link that appears and select Run as administrator.
2. At the Command prompt, enter the following command and press Enter:
DISM / Online / Cleanup-Image / RestoreHealth /Source:C:$Windows.~BT\\Sources\\Install.esd
You can use the following command to limit usage windows services Update:
DISM / Online / Cleanup-Image / RestoreHealth /Source:C:$Windows.~BT\\Sources\\Install.esd / LimitAccess
Alternatively, you can use the following command to accomplish the same task:
DISM / Online / Cleanup-Image / RestoreHealth /Source:esd:C:$Windows.~BT\\Sources\\Install.esd:1 / LimitAccess
If the install.esd file is located on a different drive, use the following command:
DISM / Online / Cleanup-Image / RestoreHealth /Source:repairSource\\Install.esd
Note: do not forget to replace “repairSource” with the path to the source of healthy versions of files. For example: D: \\ Sources \\ install.esd.
The Deployment Image Servicing and Management System utility always creates a log file along the% windir% / Logs / CBS / CBS.log path, which contains all the fixed and detected problems.
How to fix problems with Windows 10
The instructions described above apply only to restoring a system image. To fix problems on Windows, use the SFC system file checker.
1. Enter the Start menu in the search Command line, right-click on the link that appears and select Run as administrator, because SFC requires device administrator privileges to run.
2. At the Command prompt, enter the following command and press Enter:
Note: Up to three SFC launches may be required to resolve the issue.
The SFC utility will scan and repair damaged system files in Windows 10. For detailed familiarization and tool capabilities, read the instructions.
Programs can be reinstalled. And what to do with files that are created by the “overwork” of the user?
Is it possible somehow recover files? In Windows 8, developers have introduced the useful File History tool, which can come in handy if something happens to the important file:
- damage in case of system failure,
- overwrite file or
- unsuccessful editing.
The user has the opportunity
- roll back (return the file to any previous state, to any previous version of this file) or
- recover lost or destroyed file.
Let's look at a specific example of how to roll back a file to its previous (old) version. I recommend that you study the procedure for rolling back a file to its old version on that file, which "is not a pity to spoil." This will come in handy when you really need to roll back or restore a Windows 8 file.
In this article, we will consider an example of rolling back a file to yesterday’s version using an example of a simple file. Suppose on the desktop we have this word file (fig. 1). It contains only one phrase, "Hello, Vasya!" It was created on July 23.
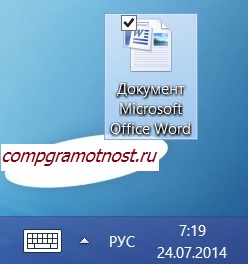
Fig. 1 File on the Desktop, which subsequently needs to be rolled back to the previous (for example, yesterday) version
Here it is, this file (Fig. 2):

Fig. 2 We learn on the training file to roll it back to the previous (yesterday) version
The next day, July 24, we add another phrase “Hello, Masha!” To this file and, thus, make changes (Fig. 3):

Fig. 3 Changes have been made to the “training” file so that a new (today's) version of this file appears
And now we want to return to the previous (for example, yesterday) version of this file, in which there was only the first phrase, and which was dated July 23. To do this, we will use the “Control Panel”, section “System and Security” of Windows 8 (Fig. 4):
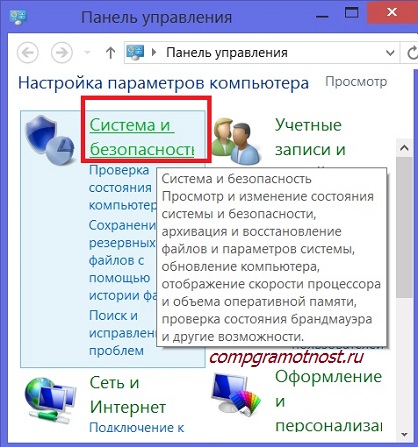
Fig. 4 Getting started windows features 8 personal file recovery
In the "System and Security" section, select the "Restore files using file history" option in the "" tab. It is marked with the number 1 in fig. 5:
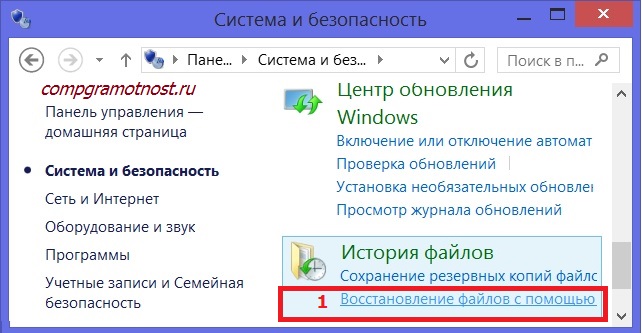
Fig. 5 Find the option we need "Restore files using file history"
In the window that appears, select and mark with the left mouse button the “Desktop” icon (Fig. 6), since our file being rolled back to yesterday’s version is located on the computer’s desktop:

Fig. 6 In the “File History” we find the “Desktop” folder, in which should be our training file, subject to rollback to the earlier (yesterday) version
In the window that opens, we find our file, which is to be restored (restore it to the previous version of yesterday). This is a Word file. We mark it by clicking the left mouse button (Fig. 7):
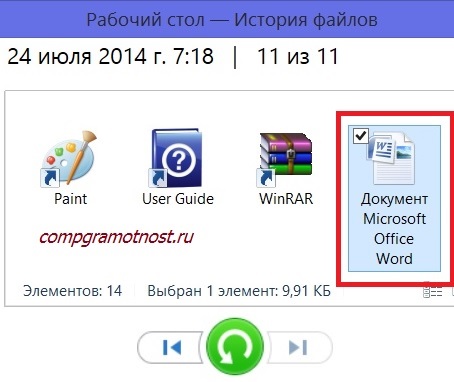
Fig. 7 Finally, we got to the "File History" to the file that we need to restore in an earlier version
Double-click the left mouse button on the Word file icon to open it. We see that this last file dated July 24 with two inscriptions dedicated to both Vasya and Masha. But we need previous version file. Therefore, we click on the button "Previous version" (number 1 in Fig. 8):
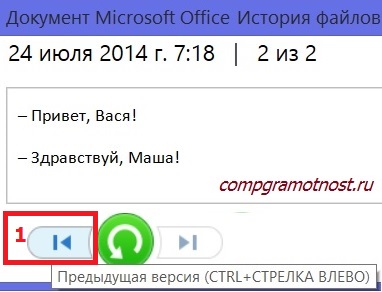
Fig. 8 We are looking for the previous version of the file to roll back (restore)
Now we see in fig. 9, that we have before us the previous version of the file of July 23. It has only a record about Vasya. We will first restore this version of the file, but not on the Desktop, but in the Documents folder (in case we need both versions of the file later, today’s from July 24 and yesterday from July 23). Then one version will be on the desktop, the other in the “Documents”.
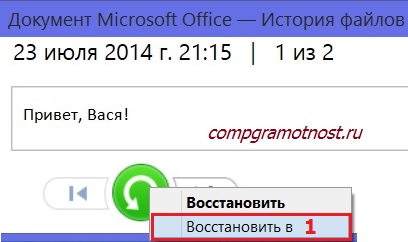
Fig. 9 Search button “Restore to” to restore an earlier version of the file and save latest version file in a new place
To do this, we right-click on the large green button “Restore”, and in the drop-down menu, left-click on the inscription “Restore to” (number 1 in Fig. 9).
Select the “Documents” folder (number 1 in Fig. 10) and click on the “Select folder” button (number 2 in Fig. 10).
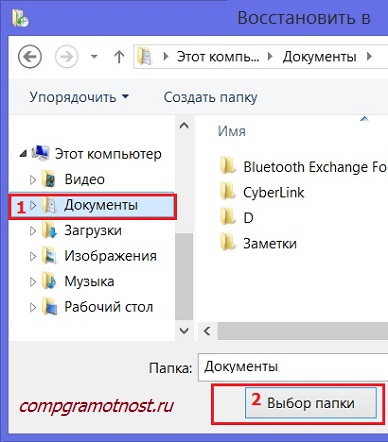
Fig. 10 Select the folder in which it will be restored old version file
All. Now the document in the version of July 23 is restored. It is located in the Documents folder (see. Fig. 11).
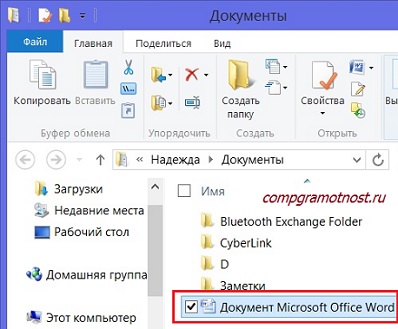
Fig. 11 Here he is word documentrestored using File History in the Documents folder
You can verify this by double-clicking on this icon in the Documents folder. A document will open (see Figure 12). In it we see only an appeal to Vasya. This is an old version of a July 23 document. What we needed to do!
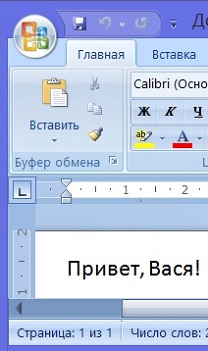
Fig. 12 There he is open file Word restored in the old version
To restore the old version of the document to its original location, that is, on the Desktop, click on the big green “Restore” button with the left mouse button, but not with the right mouse button (Fig. 13).
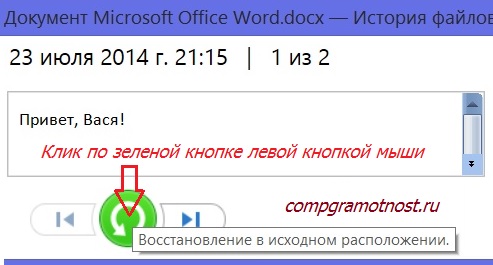
Fig. 13 We give a command to restore the file to its old location (“in the original location”) while deleting the file of the last, “bad” version there
A prompt appears to replace the file in the destination folder. That is, a suggestion will appear instead of a new file of July 24 to write to the same place the old file of July 23. We give this consent - click on the button "Replace file in destination folder" (number 1 in Fig. 14):
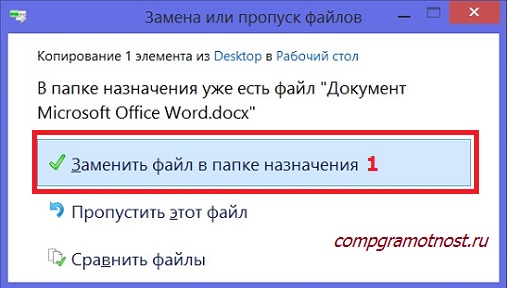
Fig. 14 In place of the "damaged" file, restore the same file, but an earlier version
And here it is, the restored file from the old version, but now it is already on the desktop (Fig. 15):
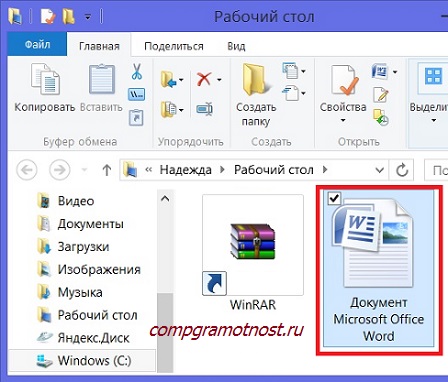
Fig. 15 Here it is, a Word document restored using the History of files on the Desktop, in the original location
Open it with a double click. Yes, this is a version of July 23 with an appeal only to Vasya (Fig. 16).

Fig. 16 Here it is, an open Word file restored in an old version, located on the Desktop in the original location
Close the “File History”, close all the windows. On the desktop is a shortcut to our recovered document. Let's open this document (Fig. 17). We are convinced once again that this is an old version of the file, dated July 23. This can be seen very well in the presented figure. The current date in the lower right is July 24th. And the file is July 23rd. And in it is the text of an appeal only to Vasya. We excluded Masha.
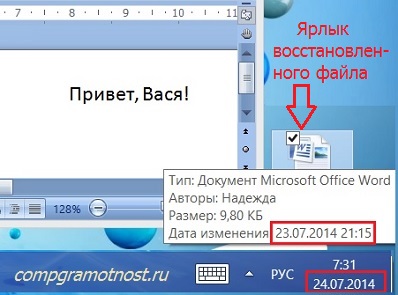
Fig. 17 Make sure that we restored yesterday’s copy of the file on the desktop to its original location
It is clear that the example given with Vasya and Masha is just an example. But the example is clear. Similarly, using File History, you can return to any previous versions any files or even entire folders with all folders and files placed in them.
Of course, this can only be done if File History is enabled on your computer. If the File History is not included, then it will not be created, which means that it will be impossible to restore old versions of files, it is impossible. There will be nowhere to take historical files, if File History is not included, it does not work on your PC.
How to do this, how to enable File History on PC? Read about it.
P.P.S.To subscribe to receive new articlesthat are not yet on the blog:
1) Enter your e-mail address in this form.
System file - a computer file that is necessary for the normal operation of the operating system. If this type of data is corrupted, then Windows may not function properly.
Causes of damage
There are three reasons why Windows system files may be lost or damaged:
- Third party software;
- Human factor;
- Malicious program.
The first factor is third-party software. These can be applications for improving (optimizing) performance and tuning. You can often find that the manufacturer’s software that comes with the computer can damage system files.
The second is elementary human curiosity combined with ignorance. The user can get into where it is not necessary and delete what should not be (in this case, the file can be restored from the recycle bin).
The third includes various viruses picked up by a computer on a network or from a medium.
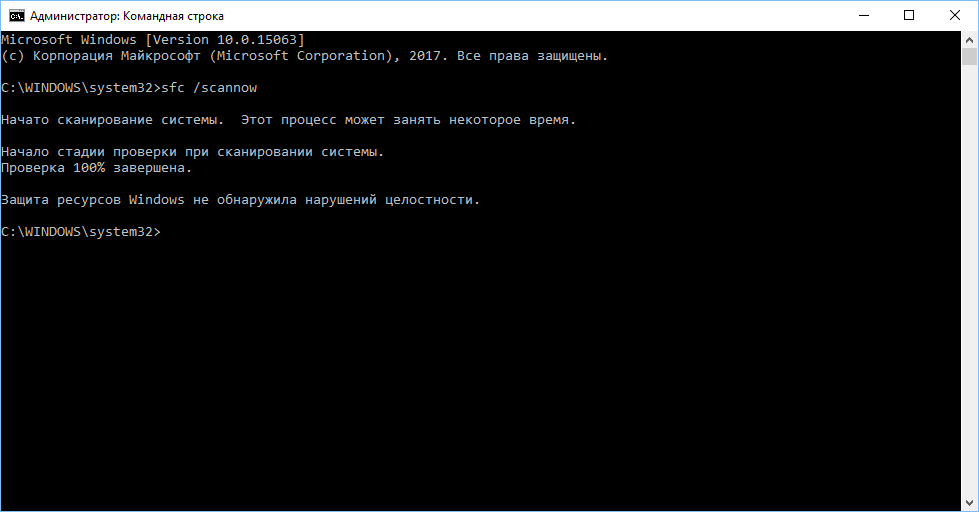
File recovery after OS startup
The method is suitable for those whose device is able to turn on and log into Windows. The algorithm is as follows:
If errors were detected while scanning Windows, then the following picture is observed:
After rebooting the device, deleted system files on Windows will be completely restored. To prevent future losses, we create a point for a rollback. In case of such problems, we simply restore the system.
In this case, it is easier to recover the lost file: examine the contents of the recycle bin, perhaps you or the virus did not completely delete the data.
Comment. It also happens that a team detects lost system data, but after that it cannot recover it. In this situation, you must start the computer in safe mode and repeat the algorithm again.
Recovery environment
The method of recovering deleted system files through a special environment is used if Windows refuses to start at all, thereby blocking access to the recycle data. There are two ways to launch the rollback tool:
- By clicking on the F8 key several times;
- By loading the operating system from third-party media.
The first option is implemented when the system has boot partition. The OS installs it automatically, but many users, after self-reinstalling the system, neglect this section.
The size of the boot space depends on the type of operating system and is:
- 100 mb for the "Seven";
- 350 MB for Windows 8.
When you turn on the PC, many times click on F8. Additional OS boot options should open. Click on the troubleshooting section:
The next step is to choose an action. We click on the command line and act on the above algorithm:
Comment. If a password was set on the device, then you will need to enter it at the entrance. But if security code has not been installed, but the system still requires you to enter it, then just click "OK".
In the absence of a boot partition (F8 key does not work) is necessary windows boot from third-party media.
The button to call the boot menu on each brand of computer is different. So, on Asus it is F8, and on some models F11. We insert the disk or flash drive (after setting up the BIOS for reading), press the necessary keys and see the following picture:
Select Windows setup and wait for the files to load. In the window that appears, click on and instead of reinstalling the operating system, select its recovery:
The search for installed windows files. After that, a characteristic window appears with the system recovery options. There is a very important point here: you need to remember what letter designation the recovery environment has assigned for your system (you can see the folder column).
We drive in the command:
Sfc / scannow / offbootdir \u003d D: \\ / offwindir \u003d D: \\ windows
Instead of D we write the letter of our disk.
The command starts a scan, after which the device will find and recover all lost data.
The method is good, but if the user does not have a third-party media that has Windows, then it is impossible to implement the method. Have to take the computer to a service center.
Manual recovery of system files
When the sfc command cannot find the lost system data, manual recovery is the user's last hope.
To do this, you need a command line, which is driven into:
findstr / c: ""% windir% \\ Logs \\ CBS \\ CBS.log\u003e "% userprofile% \\ Desktop \\ sfcdetails.txt"
After entering the desktop is placed text Document with the report. We are looking for the following lines:
The name of the damaged file is underlined in red. There are four ways to restore it:
- Search for a similar file in the distribution kit (on a Windows disk) and replace it;
- Download from the Internet. Easier, but be careful;
- Make a rollback system. But we realize the option only when there are recovery points;
- Check the contents of the basket (if the system starts) for a file.
Recognize the drive letter with Windows
Basic information, without which it is impossible to carry out the above actions. You can find out the disk on which system data is stored:
- When working with the recovery environment, start the console and drive notepad. Notepad will open. Click on the file and open:
There are disks that you can study and find out on which operating system is installed.
- Using DISKPART software (a method for more advanced users).
In the console, enter the commands:
- Diskpart - launch a program for interacting with disks;
- List disk - shows a list of disks available on the device;
- Select disk - select the required media;
- Detail disk - disk information.
Find out if set to windows drive possible by its size.
Many users have encountered the problem of losing system files or their damage. In some cases, it takes time and a certain amount of knowledge to recover losses. If this is not done, then the operating system installed on the computer may not work correctly. Today we will consider simplest way recovery of damaged system files in Windows 8.1, which is applicable not only to this OS, but also to other representatives of this family, with the exception of Windows XP.
Why is system files damaged or lost? The thing is that many users use various third-party manufacturers. Most often, these are optimization and tuning utilities. These include, for example, the software manufacturer of this equipment that is already bundled with laptops, various discsattached to motherboard, video cards, modems, etc., on which, again, is the software of one or another manufacturer, often not appropriate based operating system. After installing such programs, file corruption occurs. In addition to the above, malicious code (trojans, viruses, network worms, etc., etc.) can cause file integrity violations. The human factor is not excluded - this is curiosity and ignorance. The user, simply, can spoil or remove any element of the system with his own hands, since today there is software that allows you to do this bypassing the protection and resistance of the OS. There are still a lot of options and causes of what is happening, we will not consider them, but we will correct the consequence.
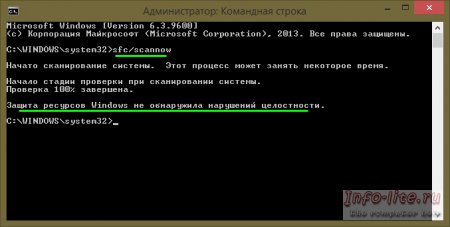
How to identify damaged files or not? To do this, we will use the standard tools of the system itself. Run as administrator. In Windows 8.1, this can be done as follows: right-click on the "Start" menu icon in the lower left corner of the desktop on the "Taskbar". In the window that appears, select "Command Prompt (Administrator)".

A console window will open in which you need to enter the command - sfc / scannow and press the Enter key. The troubleshooting process will take some time, after which the scan results will be displayed. There may be several options, either everything is in order with your system and no further action is required, or the system detected and independently fixed the damage, or you receive a message that reads as follows: “Windows Resource Protection has detected corrupted filesbut it was not possible to restore some of them, ”after which options for further actions will be proposed. The screenshot below shows the command line:
If you still have a malfunction, do not worry. Without closing the command line, enter the following command:
dism / online / cleanup-image / restorehealth
Correct execution of this command requires an Internet connection. Then again, you have to wait a bit.


