Crashes in windows operation occur quite often. The system is clogged unnecessary programsthat interferes with the normal operation of the laptop. You can reinstall Windows with the drivers and necessary programs, but it is much easier to restore the factory settings than reinstalling the drivers.
Most laptops come with an installed OS. There is a department on the hard drive where the image of the OS with drivers and programs is stored, so you do not need a disk to reinstall the system. To free up space on your hard drive, many users delete this section, but someone does not know about it. The folder where all the information is stored is called "Recovery". You can resume the system when you restart the laptop or from the operating system. It should be remembered when recovery in progress factory settings network adapter must be connected to the device. The factory settings for the laptop are located in a hidden section called “Recovery partition”. To enter it, you must go to "Computer Management", then to "Disk Management". In Toshiba laptops, in addition to the section "Recovery", there is a folder " HDD Recovery", Located on drive D. Both of these folders cannot be deleted, otherwise it will be problematic to restore the factory settings.

- Samsung - “F4”;
- MSI - “F3”;
- Acer - “Alt + F10”;
- Fujitsu Siemens - “F8”;
- LG - “F11”;
- Toshiba - “F8”;
- HP Pavilion - “F11”;
- ASUS - “F9”;
- Packard Bell - “F10”;
- Sony VAIO - “F10”;
- Dell inspirion - “Ctrl + F11”;
- Lenovo ThinkPad - “F11”;
- Dell XPS - “F8” or “F10”.

When the laptop is restored to the factory settings, all the information stored on the hard drive will be lost. Therefore, all programs will have to be reinstalled.
Fucked for a long time, rummaged through a bunch of forums but everything turned out to be simple
And so the initial parameters are given acer Aspire V5-551 laptopThe native recovery partitions are corrupted. Target restore on Acer laptop windows system 8 to factory settings.
To restore the factory settings, we need several tools:
1. Recovery Image USB-flash for Acer Aspire V5-551/ Windows 8 (x64) can be taken or weighs ~ 12 GB
2. Program Acronis True Image home we also take (de jure this software product is paid, you can also download it from the official site and use the trial version for 30 days) weighs 216 Mb
3. And the last thing we need is flash drive larger than 13 GB
Please note, if you have any files on this flash drive, copy them to your computer, as during installation, the flash drive will be formatted.
It will also be formatted and your hDD (ALL will be removed from it too)
Stage 1 Preparing Recovery USB-flash for Acer Aspire V5-551
1. After installation True image run it on the second tab “ Backup and recovery ”click restore and using the button“ search for backup copy ”we find the downloaded file.

2. On the “Backup and Restore” tab, we have a field with the name “USB_Recovery_Acer_V5 ...”, from the right of the field there is a “Restore” button, click it.

3. A new window opens, in it we check that from the right above it says “Switch to disk mode”, if it says “Switch to partition mode”, then click on this line. Next, click on the “Show MBR” button from the left, put checkmarks everywhere and select a USB flash drive in each drop-down list (focus on the volume of disks).

4. Click the “Restore Now” button and wait about 15 minutes until the data is written to the USB flash drive.
Stage 2 Configuring BIOS to restore Windows 8 system on Acer
When restoring the system for the first time, I came across an error when selecting “Return the initial state”(Restore to factory settings) an error occurred:“ The disk on which the windows system is installed is locked ...“. I tried to overwrite the USB flash drive, changed the BIOS settings, fought on the Internet, etc., in general, arranged dances with a tambourine until I paid attention to one line in the acer BIOS
Secure boot: Enable
Moreover, in order to turn off this function, I had to look for information.
I write immediately all the settings that need to be done in BIOS for a successful launch recovery windows 8 from a flash drive
1. To enter the BIOS, immediately after pressing the power button, press the F2 key (for those who do this for the first time, advice: press and release it as quickly as you can until the BIOS window appears). Moving on BIOS is done by arrows on the keyboard.
2. The first thing we do in BIOS is to check which boot mode of the operating system we have installed. On the Boot tab, boot line mode must contain a UEFI value. If so then everything is fine, but if it says the Legacy BIOS, change this value by pressing the Enter button on it, select UEFI.

If you changed the value of the parameters. then you need to save the changes, see paragraph 6
Boot Modes:
UEFI - for installing and working with Windows 8
Legacy BIOS - for installing and working with Windows 7 and earlier
4. In order to disable the Securety Boot parameter, it is necessary to set the supervisor password from the beginning. On the Securety tab, select the line Set supervisor password and press enter, enter any password twice.

5. Go to the boot tab again and set the disable value to secure boot
- How to restore factory settings samsung laptop ? I’ve been using the laptop for the second year, the Windows 7 operating system, it works with errors and freezes, my friends advise me to reinstall the operating system, but I read your article "and I think to follow your advice, reset the laptop to factory settings. I copied all the necessary data from the laptop to a USB flash drive and portable USB hard drive. What to do next?
- Admin, explain what's the matter? I rolled back my Samsung laptop to the factory settings, the system recovered and works like new, but I deleted all the partitions I created on the hard drive. How to return sections and how to avoid this next time. Boris
How to reset Samsung laptop to factory settings
Hello, friends! Immediately, two of my colleagues at work washed away with their families for a weekend break, and I was forced to work, or rather, they asked me to roll back two Samsung laptops to the factory settings, one old, the other relatively new. On an old Samsung laptop, factory utility will be restored to factory settings Samsung Recovery Solution 5. On the new laptop, the factory settings will be restored by the built-in recovery utility. I propose to do this together, and I will not be bored, and the information will be useful to you, join us!- Note: Before you roll back to the factory settings, you can copy all the data from the C: drive and the desktop using.
Procedure factory reset laptop Samsung, quite simple and you can cope with it without resorting to any specialists, the only thing you need is to take care of your data, copy them, for example, to a portable USB hard drive. Copying your files to an additional section of your hard drive will not help, in most cases the state of your hard drive will be restored to the factory one, that is, at the time of purchase. What does it mean? If, after purchasing a laptop, you created additional partitions, all of them will be deleted along with your data.
For example, you bought a laptop, turned it on, and saw on it one partition (C :) with the operating system installed, naturally you wanted to have a second partition for data and you created it in Windows itself, which is very easy to do, then assigned it a letter (D :) or any other, put there all the files you need: music, movies, documents, photos and so on. We used the laptop for a year, experimented with it ad libitum, installed on it everything we need and do not need, then we decided to return the laptop to factory settings. Many users think that after a rollback to the factory settings, they will remain safe and sound, the additional section (D :) or (E :) created by them. But let me, when you bought a laptop, this section was not! That's why, after the factory settings are returned to the laptop, this section will be deleted and you will again have one section (C :) from your Windows 7 or Windows 8. But not everything is so tragic, in the case of the new Samsung laptop, some user data will be saved. What kind? Read the article further.
So, after you have copied all your data to another storage medium, we restore the factory settings on the new Samsung laptop. We turn on the laptop and often press the F4 key in the initial phase of loading. The initial program window opens.

We accept the license agreement.

Recovery program, in addition to recovery, can create backup hard drive on DVD discs and on a portable hard drive. Initially, the Recovery utility thinks that we want to create recovery discs or a factory image on a portable hard drive. uSB drive, but we did not plan to create anything, click OK.

The initial window opens. recovery programs . We are not going to do backup, therefore we select the Restore item.

Friends, if you copied all the necessary data from your laptop, you can safely click the Restore button and immediately the process of rollback to the factory settings will begin. For the rest I’ll show what else can be customized here.
First, we select the earliest recovery point, most users never make recovery images, so many will have only one recovery point in this window.
Before clicking on the Recovery button, we see more options that can be enabled during recovery, some of which are useful. Drop the scroll down.

I tried to turn it on and off, anyway, when restoring the factory settings, I deleted additional sections on the hard drive and there was only one disk (C :). Try to experiment you, we’ll supplement the article.


Saving user data
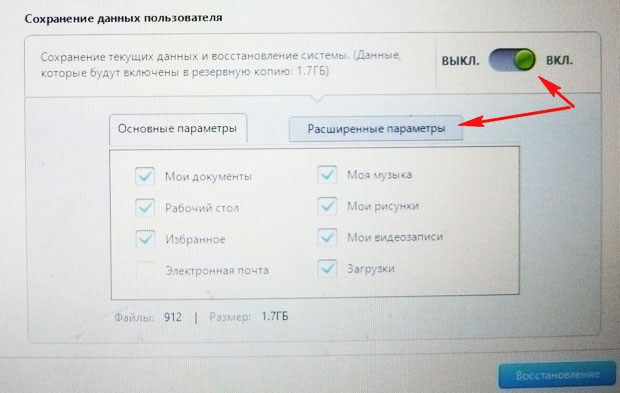
Turn on the Save user data item.
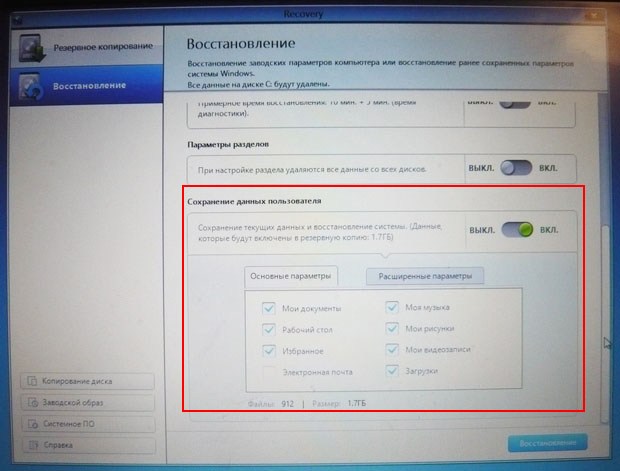
Key parameters - mark all the necessary folders, the contents of which must be saved when restoring factory settings. More detailed settings are in the advanced options.
Generally, very detailed description of what Recovery utility can do is in the Help, before recovery you can read everything in detail.


Click Recovery. Start recovery? All data on the C: drive will be deleted. Click Yes. After 40 minutes, our first laptop was brought to its factory state.

Samsung Recovery Solution 5
Factory Recovery Utility Installed on Second Laptop samsung settings Recovery Solution 5. The recovery process itself will not differ much from the previous one. Also at boot press F4.
Select Recovery.

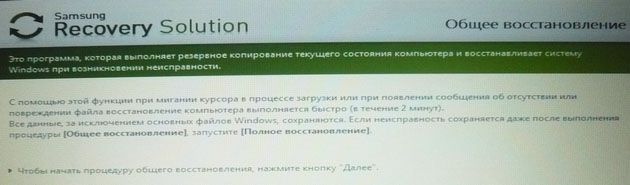
If you select in the second window that appears General recovery,
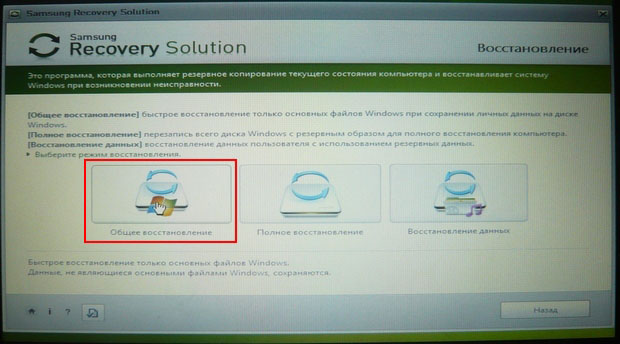
only the main ones will be restored system files Windows, most of the errors, viruses and problems you will have after such a recovery.
Therefore, we return to the previous window and select Full recovery.
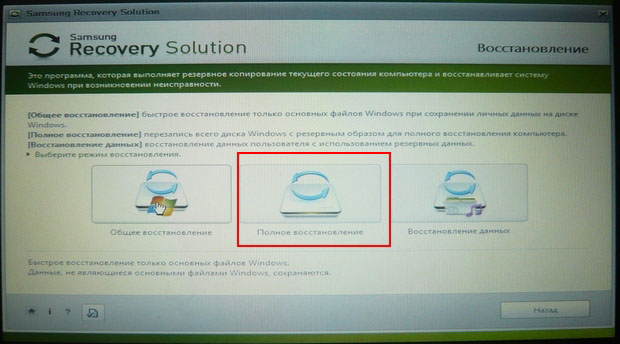
Select the earliest recovery image and Next. Run recovery? Yes. That's all, now it remains only to wait until the end of the operation to restore the factory settings of the Samsung laptop.

Articles on this topic.
In today's article, we are talking about returning to the factory settings for Acer, eMachines and Packard Bell laptops. Initially, I planned to write separate articles on them, but subsequently decided to get by with one.
The fact is that eMachines and Packard Bell are the same Acer and the recovery procedure is only slightly different in visual terms, and all the recovery actions for laptops released under these trademarks are almost identical, so I’ll just point out one single nuance in the course of the story .
So, before starting the process of restoring the Acer, Packard Bell or eMachines laptop to the factory state, first read the article if you have not read it before, as it describes the preparations that must be made before starting the laptop recovery from the system recovery section. Further actions are described on the basis that you have followed all the recommendations given by me in this article.
Well, do not rush to start recovery until you read this article to the end.
Use the Alt + F10 key combination to start the Acer, Packard Bell, and eMachines notebook recovery utility to the factory settings. Clamp this combination is necessary at the time of turning on the computer, before starting the operating system.
In order not to miss this moment for sure, I recommend holding the Alt key to make quick brief clicks on the F10 button.
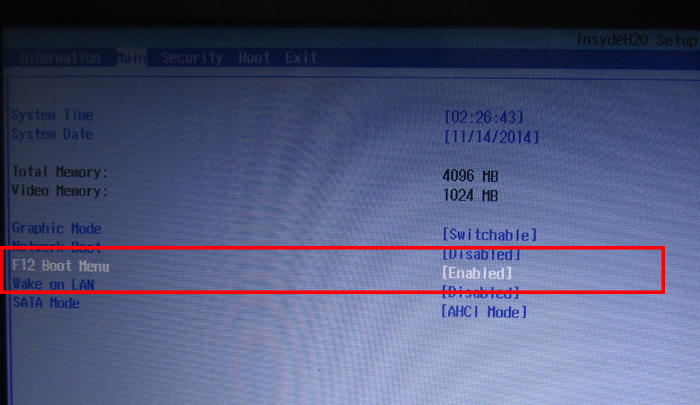
However, for the recovery utility to start in this way, it is necessary that the D2D Recovery option is activated in the BIOS settings. The desired setting is here:
If you have never worked with BIOS settings before and have a vague idea of \u200b\u200bwhat it is, I strongly recommend that you start the system recovery environment in a slightly longer, but safer way, standard for many manufacturers of mobile computers.
To do this, immediately after turning on the laptop power, quickly begin to click on the F8 key. This is usually done when they want to choose a special operating system boot mode. We need the following menu to appear on the screen:
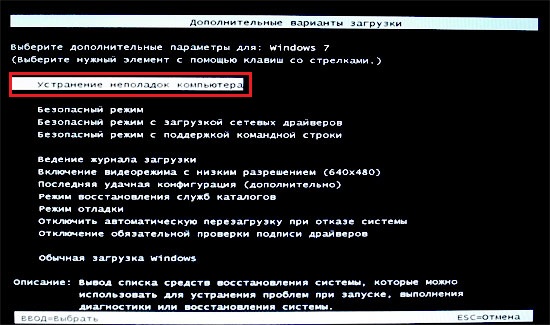
As you can see, at the very top is the “Troubleshooting your computer”. We select it (if for some reason it is not selected by default) and press the Enter key. The file download will begin.

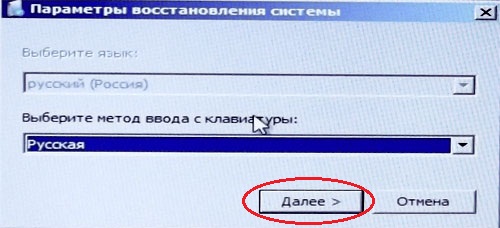
Now you will need to specify the user on whose behalf the recovery will be performed and enter the password for the selected user, if one was installed. Enter the required data and click OK.

In the next menu that appears, click Recovery Management.
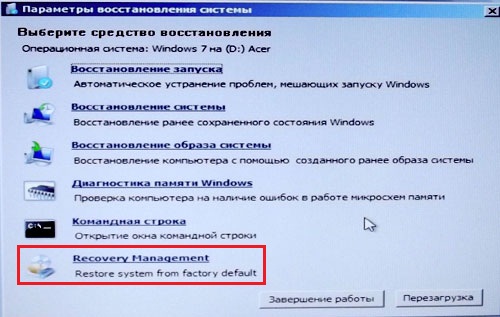
After that, the Packard Bell, Acer or eMachines laptop recovery utility will start. As I said, the differences in their interface are purely cosmetic.
If you intend to use the restore option using the Alt + F10 key combination, then all the previous steps are not relevant for you. The process of resuscitation of the system from the recovery section will begin immediately from this step.
So, since we assume that all of our important data has been previously saved, we select the option “Restore factory settings of the operating system”.

We will be warned about necessary measures precautions you already know about if you read the introductory article. To continue the process of restoring the laptop operating system, click "Next."

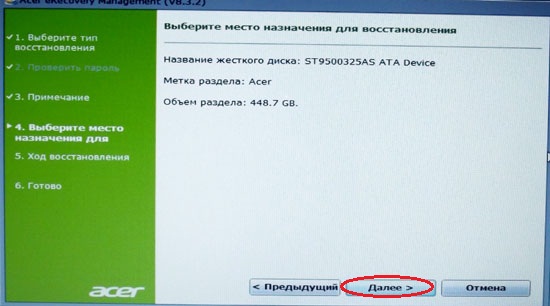
After that, we will be shown information about the hard drive of our laptop. Just click Next.
We agree with the next warning that all data will be lost.
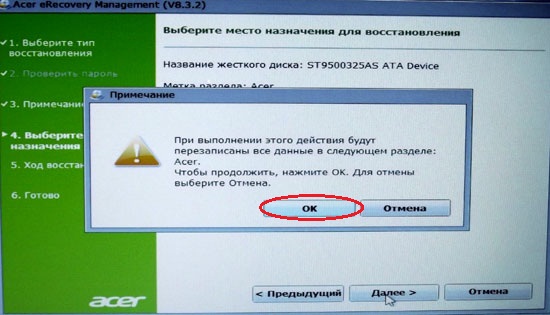
After that, the computer will need a little time to complete the preparations ...
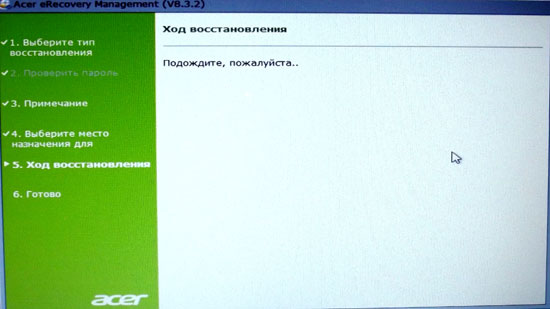
... after which the process of restoration to the factory state will begin. Just waiting.

Next, the Acer laptop and Packard Bell will automatically reboot, and eMachines will ask you to click OK to reboot. By the way, I could be wrong, but in my opinion some of the Acer models also ask to press a button to continue. In general, if asked to click OK - click.

The laptop will do the rest on its own. The system will periodically reboot. Do not bother her. Just wait for the initial start of the restored operating system.

In this lesson, the restoration of Acer, eMachines and Packard Bell laptops to factory conditions came to an end.
If my article was useful to you, please advise it to your friends using the buttons social networks or just sharing a link.
You can send your questions for the heading “Free Help” to the address: admin @ site. In the subject line write “Free Help”.
Reestablish operating system windows 7 (vista, XP, windows 8) on acer laptop aspire one can be still healthy state or completely to factory settings.
Only the latter option is not suitable for everyone, but only to owners of acer laptops who bought it with preinstalled windows 7 or another.
Then the recovery image is written specifically to a separate partition on the hard drive - by default it is hidden.
If you accidentally (unknowingly) screwed up something, then using the first option is much better (the second one deletes all your personal files: games, programs, settings).
First option to restore windows operating system on acer laptop
To restore Windows on your acer laptop, be sure to connect the charger. Then turn it off and on.
When you see the laptop logo, press two keys (simultaneously) Alt + F10 (you can several times).
The recovery utility “ Windows Acer eRecovery Management ”(in the BIOS the option Disk-to-Disk (D2D) must be enabled).
When requesting a password, here are the standard ones: "000000", "AIM1R8", "00000000". Next, click on the line " full recovery system factory settings. "
Yes, I almost forgot, there is also the possibility of recovery with saving user data.
On an Acer netbook, this takes about 15 minutes. Confirm by pressing “OK”. Computer reboot and
Second option to restore your system on an acer aspire one windows laptop
You can only use this recovery option if your laptop is still able to boot.
Then you can start restoring factory settings Acer erecovery Management directly from a running Windows operating system.
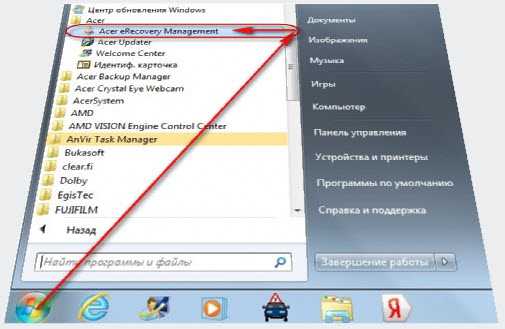
To do this, then click on the bottom “all programs” and click on the line “Acer eRecovery Management”.
After that, on the left side click "restore." Then you can choose "restore the operating system and save user data" or without them. All further steps are similar to the first option.
If "work does not go", as already described above, enter the "BIOS" and in the tab "Main" enable the option "D2D Recovery" - put the position "Enabled".
Immediately after that, you can press F10 and after rebooting Alt + F10. Then the process described in the first embodiment will go. Successes.


