Changing the Internet provider is not a frequent matter, but sometimes it is very necessary. Especially in Lately this applies to Beeline subscribers. Having gained a large customer base in due time, gradually the quality of services began to fall in comparison with developing competitors. However, when changing the operator, one problem arises. The fact is that Beeline, together with tariff package distributed all over the place his brand routers, which were quite good at that time, Smart Box One, which were designed to use the Internet only in their network. However, there is a way to save money - to flash the Beeline Smart Box router for all operators. How? I'll tell you now!
Configuring Beeline Smart Box router for all operators
Today you can find a bunch of ads on Avito selling Smart Boxes - at ridiculous prices and in excellent condition with a complete set and box. The fact is that few people know that the Beeline router is easy to set up to work with any provider. It doesn't even require a complicated firmware for beginners.
The secret is that when we enter the control panel under the default administrator account with the username and password admin / admin, which are indicated on the sticker, then the WAN port setting, which is just responsible for choosing the type of Internet connection, is blocked on L2TP for Beeline.

To unlock it, you just need to log into the router from under the super-user.
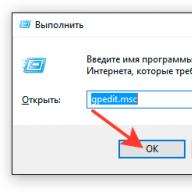
To do this, open the login page http://192.168.1.1 in the browser and use the pair:
- Login - SuperUser
- Password - Beeline $ martB0x
If these data do not fit, then we try to specify as a password serial number the router indicated on the sticker - it looks like "SFXXXXXXXXXX".

If you are, then read our other article that understands possible mistakes and suggestions for fixing them
After authorization in the "Advanced settings" section in the "Others" menu, we get full access to all configurations, including the Internet, without any firmware. There are now all types of connections, including via a 3G modem.
Beeline (formerly Bee Line GSM) is a well-known telecommunications brand that is the third largest operator in Russia. wireless communication and the second for the supply of general telecommunications services. For more than 20 years the company has been successfully operating not only in Russia, but also far beyond its borders: Armenia, Georgia, Ukraine, Kazakhstan, Kyrgyzstan, Vietnam, Laos and Australia - these countries also have numerous Beeline subscribers.
Beeline is not only a supplier of high-quality cellular, but also high-speed internet for smartphones, tablets, computers and other smart gadgets. Internet speed is constantly increasing and since 2013 it has reached a completely new level. These services now require more efficient equipment.
Beeline Smart box is a branded device that will allow you to combine multiple computers, mobile devices and even SMART TVs into a single local network and provide them with Internet access. In this article we will get acquainted with setting up a Smart Box router from TM Beeline.
Smart Box Beeline is a Wi-Fi enabled router, which is manufactured in Taiwan by Sercomm by order of Beeline. This device has support for wired multicast IPTV and a network storage option. Having such a device at home, you can use the Internet on 10 devices simultaneously, without loss of signal quality and speed. You can create a closed network and establish a highly secure Internet connection.
The technical characteristics of the Beeline Smart Box model are quite impressive:
- it Wi-Fi router working according to the 802.11b / g / n standard;
- Signal transmission speed - up to 300 Mbps;
- Reference board - Realtek 8197D;
- Operating modes - DHCP client, static IP, L2TP, IPoE;
- 1 USB port - version 2.0;
- LAN connectors - 4 pieces;
- Current software version: 2.0.19 (14Mb).
Smart Box Beeline routers have a USB port, which means that you can connect to it external drives and provide general access to them in their own way local network.
Today the Beeline company offers its users four models wireless routers Smart Box:
- Dual-band SmartBox TURBO + (3.6 thousand rubles);
- Dual-band SmartBox ONE (2.5 thousand rubles);
- 5GHz SmartBox PRO (5.9 thousand rubles);
- 2.4GHz Beeline SmartBox (2.5 thousand rubles).
Connecting the device
To connect the Beeline Smart Box Wi – Fi router, you need to decide what kind of connection you want to establish:
- Wired;
- Wi-Fi.
The first option is more convenient to use for initial connection. To do this, install the cable, which the Beeline operator has brought into your apartment, into the extreme socket of the router marked "WAN". After that, use a fiber-optic cable (patch cord) to connect the router to your computer: one end of the cord must be installed in one of the four connectors of the router marked LAN, the other end in network card PC.
To configure the operation of the router via Wi – Fi, the router will need to be connected only to the provider's cable (via the WAN connector) and already on the computer start a search for new equipment.
Setting process
We will configure Smart Box through a web browser on a computer. After connecting all the cables, turn on the computer, launch the browser and type the combination "192.168.1.1" in its address bar. This is the IP address of your device on the local network. You can see this data on the back of your Wi – Fi router. There is also a username and password, which we will also need for further configuration.
The first time you enter the configurator, you will see a welcome window. Click the button "Proceed", and a new window will open in front of you, in which you will need to enter your username and password. By default, all Beeline subscribers have admin / admin.
Now you need to activate the menu button "Quick setup"... The configuration form is quite simple, each section has its own tips, but even without them, everything is intuitive. Here you will need to enter the following data:
for home internet:
- Login is the number of your contract with the provider;
- Password - a combination for Internet access, which was determined by the provider.
for the Wi – Fi network of the router:
- Network name - create a name for your Wi – Fi connection (SSID);
- Password - come up with a secret cipher for entering the Wi-Fi network (from 8 characters).
for a guest Wi – Fi network (optional):
- Set the same parameters for the guest wireless network of your router.
for the Beeline-TV service (optional):
- These are the television settings (here you will indicate the number of the LAN connector into which you will connect the TV receiver).
Save the entered data and wait for the equipment to apply the new settings to its work. That's the whole process of setting up the router, now you have the Internet in your house.
If you don't want the wires to ruin appearance your home, you can establish a wireless connection, but for this, your PC or laptop must have a built-in or separately purchased Wi-Fi adapter:
- Turn on the Wi-Fi function on your laptop (or PC).
- Open the menu "Control Panel".
- Find the item in it "Network connections".
- Go to the section "Wireless network connection» and select the network you want to connect to.
Today all new routers can operate in two frequency modes:
- At a frequency of 2.4 GHz;
- At 5 GHz.
The first option is more common, but many devices work at this frequency, so there may be interference in the network. Almost no one uses the 5 GHz frequency, it has a slightly shorter range, but the signal purity and speed is higher .
After you have selected the desired channel, you will need to enter the login and password for the secure Wi-Fi network and save all the changes made.
The operator's website has three special detailed instructions for connecting a computer, mobile devices or SmartTV to the router's Wi-Fi network - https://moskva.beeline.ru/customers/help/home/domashniy-internet/instrukcii-dlya-mob- ustroistv /
Now let's get acquainted with the instructions for setting up a Wi-Fi network on a Beeline Smart Box router:
- In the address bar of the browser, enter the IP address of your device - "192.168.1.1".
- In the menu that opens, select the item "Advanced settings".
- At the top of the window, find the bookmark "Wi-Fi" and go to this menu.
- In the glory navigation list, select "Main settings".
- Opposite the line "Include wireless network(Wi-Fi) " there should be a checkbox.
- Below you can make any changes to the basic parameters of the router's wireless network (operating mode, select a separate channel number, disable the guest Wi-Fi network).
Save all the changes and go to the next section of the "Wi-Fi" tab - "Safety"... At this stage, you can set the most secure encryption type: set the authentication value to WPA2-PSK. Save these changes and reload the program.
Please note that if your apartment has appliances that do not support the WPA2 Wireless Certification Program, then the default authentication value is WPA-PSK.
WPA is the 802.1X standard and WPA2 is referred to as the IEEE 802.11i standard. Since 2006 all Wi-Fi devices released with WPA2 support.
Smart Box firmware
Smart Box is a device that runs on its own software, therefore it is very important that it software firmware has always been relevant. You can find out the latest firmware version and download it from this official website of the operator.
To download the update, you only need to follow five steps:
- In the address bar of your web browser, type the IP address of your router - "192.168.1.1".
- Go to the menu "Advanced settings".
- At the top of the window, find the bookmark "Others", and in the navigation menu on the left - the section "Update".
- Specify the path where the file with new firmware, and press the button "Perform update".
- Wait for the end of the boot procedure and automatic reboot of the equipment.
Starting with firmware version "2.0.25" smartboxes have the ability to work with 3G-modems in Wi-Fi mode.
Smart Box Beeline router can work with other Internet providers. If a new operator provides Internet network services using the DHCP dynamic configuration protocol or uses the network protocol of the link layer PPPoE, the equipment setting can be easily changed in the user account.
Note.
In our city, the Internet provider Beeline began to connect subscribers via the so-called "optics to the house" - FTTB - in parallel with Rostelecom. Dom.ru didn't even exist then. At first, it was proposed different models WiFi routers flashed with proprietary firmware - D-Link DIR-300, TrendNet, NetGear, etc. Then a new model appeared, which gradually replaced the rest - this is the Smart Box router. As it turned out later, this is actually the only good branded router not only for Beeline, but also among competing providers.
Setting up Smart Box yourself is very simple and there is no need to call a specialist. Now I will tell you how to do it.
Entering the configurator interface:
IP-address of the device in the local network (), as well as login and password for entering the configurator ( admin / admin) can be found on the sticker located on the bottom of the case:
After that, open a web browser and enter the address - http://192.168.1.1. Press the Enter key and see this greeting.
Click on the "Continue" button and see the following authorization form:
We enter the login admin, the password admin and get into the start menu of the Smart Box settings from Beeline.
Basic Smart Box setup
In the start menu, we need to call the configuration wizard, for which we click on the "Quick setup" button:
This will take you to the page where all the necessary parameters are collected. Honestly, as far as I remember, this was done by Dom.ru. On devices from Rostelecom and TTK, everything is much more complicated and confusing for an unprepared user.
In the field "Login" and "Password" you must enter the data for authorization in the billing Beeline. The account number is used as a login in our area. I think that it is organized this way in other areas as well.
In the "Network name" field, you need to come up with and enter the name of your home Wi-Fi network on the Smart Box. In the "Password" field, you also need to register a key phrase that the router will ask for when connecting to its Wi-Fi.
If you also connected the Beeline television, then in the very bottom section of the menu called "Beeline TV" you should mark the LAN port into which the set-top box will be connected. Click on the "Save" button.
That's all. You can check the operation of the device!
Something is not clear - watch the video instruction.
Smart Box firmware
As with any other router, you need to periodically update the firmware for Smart Box from Beeline to a more recent one. This measure is necessary, as the new firmware versions fix the problems that were in the previous ones. Download latest version on the official Beeline website - link.
In order to reflash the Smart Box router, you need to click on the "Advanced settings" button in the start menu:
In the window that appears, open the menu section Others >>> Software update:
Click on the "Select file" button, find and feed the firmware file to the Smartbox. Now you need to click the "Perform update" button. The following picture will appear:
After completing the process, the router will reboot itself. This usually does not reset the settings. But even if they reset, don't be alarmed, according to the instructions above, you can set everything up yourself without any problems!
Working with other providers
Now the transition from one telecom operator to another is a quite common procedure. Everyone is looking for a cheaper tariff, higher speed, sweeter conditions. This is understandable and quite normal. The Smart Box router is locked on Beeline. But if you have a Superuser password, then you can configure it for other providers. And at the same time, everything is done using standard software and no alternative firmware not required. The elevated user login is SuperUser. Password for firmware up to version 2.0.24 inclusive - Beeline $ martB0x. After version 2.0.25, the superadmin password was changed. Now the serial number of the device is used as SF **********. You can see it on the sticker. For example, on my device it is SF13F4FF1F78.
Next, open Advanced Settings >> Others >> WAN... Smartbox works seamlessly with almost any other provider. Here is an example of setting it up for Rostelecom and Dom.ru:
The router supports virtual VLANs, which means there will be no problems with interactive TV from Rostelecom, TTK, and Dom.ru!
Router connection
Configuring the router
Configuring a router for L2TP
Configuring the router for IPOE
Configuring a router for L2TP


4. « Home Internet»
"Wi-Fi router network"
"Guest Wi-Fi network"


Configuring the router for IPOE
1. Open your browser and type in address bar 192.168.1.1. You will be taken to the welcome page. Click the Continue button.
2. The router will prompt you for a username and password. Enter admin in the first field, and admin in the second. Click the Continue button.
3. You will be taken to the main menu of the router. Select Quick Setup.
4. "Home Internet"
"Wi-Fi router network"- here you can configure the wireless network of your router. In the Network name field, enter the name of your network, for example my_wifi, and in the password field, enter the password to access it. Please note that the password must contain at least 8 characters.
"Guest Wi-Fi network"- here you can set up your router's guest wireless network.
"Beeline" TV - if you have connected the service "Beeline" TV, you need to select the port of the router to which you connect the set-top box. If you are watching live feeds on your PC or Xbox 360, then there is nothing to set up.
To save the parameters you entered, click the Save button.

Fill the form:
Click the Login button.


Firmware upgrade
Reset
Firmware upgrade
2.0.38: (14.7 MB)


Reset
MCPE

Router connection
Connect the cable that our installers brought to your apartment to the Internet (WAN) port, and connect your computer to any of the Ethernet (LAN) ports. You can also connect your PC to a router wirelessly, but it's best to use a cable for the initial setup.
Configuring the router
Configuring a router for L2TP
Configuring the router for IPOE
Configuring a router for L2TP
1. Open a browser and enter 192.168.1.1 in the address bar. You will be taken to the welcome page. Click the Continue button.

2. The router will prompt you for a username and password. Enter admin in the first field, and admin in the second. Click the Continue button.

3. You will be taken to the main menu of the router. Select Quick Setup.

4. "Home Internet"- this section configures the connection to the Beeline network. All the configuration data required for connection is already contained in the router's memory, you only need to enter your username and password in the appropriate fields.
"Wi-Fi router network"- here you can configure the wireless network of your router. In the Network name field, enter the name of your network, for example my_wifi, and in the password field, enter the password to access it. Please note that the password must contain at least 8 characters.
"Guest Wi-Fi network"- here you can set up your router's guest wireless network.
"Beeline" TV - if you have connected the service "Beeline" TV, you need to select the port of the router to which you connect the set-top box. If you are watching live feeds on your PC or Xbox 360, then there is nothing to set up.
To save the parameters you entered, click the Save button.


Configuring the router for IPOE
1. Open a browser and enter 192.168.1.1 in the address bar. You will be taken to the welcome page. Click the Continue button.
2. The router will prompt you for a username and password. Enter admin in the first field, and admin in the second. Click the Continue button.
3. You will be taken to the main menu of the router. Select Quick Setup.
4. "Home Internet"- in this section you need to enter any number or letter in the fields "Login" and "Password" (the setting does not affect anything).
"Wi-Fi router network"- here you can configure the wireless network of your router. In the Network name field, enter the name of your network, for example my_wifi, and in the password field, enter the password to access it. Please note that the password must contain at least 8 characters.
"Guest Wi-Fi network"- here you can set up your router's guest wireless network.
"Beeline" TV - if you have connected the service "Beeline" TV, you need to select the port of the router to which you connect the set-top box. If you are watching live feeds on your PC or Xbox 360, then there is nothing to set up.
To save the parameters you entered, click the Save button.
6. Launch your browser, open the page http://login.beeline.ru
Fill the form:
Login - enter your personal account number (type 0891234567);
Password - enter a password for Internet access;
Click the Login button.
Firmware update and factory reset
Firmware upgrade
Reset
Firmware upgrade
Be careful when following the instructions in this section. In case of an error in the actions, a visit to the service center will be required to restore the device.
1. Download the firmware. The current firmware version is 2.0.22: (14.5 MB)
2. Open a browser and enter 192.168.1.1 in the address bar. You will be taken to the welcome page. Click the Continue button.
3. The router will prompt you for a username and password. Enter admin in the first field, and admin in the second. Click the Continue button.
4. Click on the "Advanced Settings" button.
5. In the top menu, select "Others".
6. The page with the basic settings of the router will open. In the left menu, select "Software Update". Click the "Select file" button and specify the location of the firmware file that you downloaded earlier.
7. After that, click the "Execute update" button.
8. Wait while the router is updating the firmware, this process takes approximately 5 minutes, after which the router must be rebooted and it will be ready for use.
Reset
Use a hard reset if you need to configure the device again (delete all user settings), you cannot access the web page of the router settings interface, after setting up the router, the Internet connection was not established or the password to access it was lost.
Attention! While doing hard reset settings, all user settings will be reset to factory settings!
On the body of the device there is a deep RESET (RESTORE) button that allows you to reset the settings to the factory settings. The RESET button (RESET, RESTORE) can be found on the same side of the router case where the rest of the connectors and buttons are located. In rare cases, the button may be located at the bottom of the router.
To reset the router settings to factory settings, do the following: Turn on the power of the router and wait until the device is fully loaded. Press the RESET, RESTORE button using a pointed, thin object (such as a paper clip) for 30 seconds, then release the button. After that, the router will reboot with the default settings (factory settings) and you will need to re-configure it.
You can also reset the setting through the MCPE platform
Or through the web interface of the router. Click on the "Revert to factory default settings" button.
Router connection
Connect the cable that our installers brought to your apartment to the Internet (WAN) port, and connect your computer to any of the Ethernet (LAN) ports. You can also connect your PC to a router wirelessly, but it's best to use a cable for the initial setup.
Configuring the router
Configuring a router for L2TP
Configuring the router for IPOE
Configuring a router for L2TP
1. Open a browser and enter 192.168.1.1 in the address bar. You will be taken to the welcome page. Click the Continue button.

2. The router will prompt you for a username and password. Enter admin in the first field, and admin in the second. Click the Continue button.

3. You will be taken to the main menu of the router. Select Quick Setup.
4. "Home Internet"- this section configures the connection to the Beeline network. All the configuration data required for connection is already contained in the router's memory, you only need to enter your username and password in the appropriate fields.
"Wi-Fi router network"- here you can configure the wireless network of your router. In the Network name field, enter the name of your network, for example my_wifi, and in the password field, enter the password to access it. Please note that the password must contain at least 8 characters.
"Guest Wi-Fi network"- here you can set up your router's guest wireless network.
"Beeline" TV - if you have connected the service "Beeline" TV, you need to select the port of the router to which you connect the set-top box. If you are watching live feeds on your PC or Xbox 360, then there is nothing to set up.
To save the parameters you entered, click the Save button.
Configuring the router for IPOE
1. Open a browser and enter 192.168.1.1 in the address bar. You will be taken to the welcome page. Click the Continue button.
2. The router will prompt you for a username and password. Enter admin in the first field, and admin in the second. Click the Continue button.
3. You will be taken to the main menu of the router. Select Quick Setup.
4. "Home Internet"- in this section you need to enter any number or letter in the fields "Login" and "Password" (the setting does not affect anything).
"Wi-Fi router network"- here you can configure the wireless network of your router. In the Network name field, enter the name of your network, for example my_wifi, and in the password field, enter the password to access it. Please note that the password must contain at least 8 characters.
"Guest Wi-Fi network"- here you can set up your router's guest wireless network.
"Beeline" TV - if you have connected the service "Beeline" TV, you need to select the port of the router to which you connect the set-top box. If you are watching live feeds on your PC or Xbox 360, then there is nothing to set up.
To save the parameters you entered, click the Save button.
6. Launch your browser, open the page http://login.beeline.ru
Fill the form:
Login - enter your personal account number (type 0891234567);
Password - enter a password for Internet access;
Click the Login button.
Firmware update and factory reset
Firmware upgrade
Reset
Firmware upgrade
Be careful when following the instructions in this section. In case of an error in the actions, a visit to the service center will be required to restore the device.
1. Download the firmware. The current firmware version is 2.0.15: (22.2 MB)
2. Open a browser and enter 192.168.1.1 in the address bar. You will be taken to the welcome page. Click the Continue button.
3. The router will prompt you for a username and password. Enter admin in the first field, and admin in the second. Click the Continue button.
4. Click on the "Advanced Settings" button.
5. In the top menu, select "Others".
6. The page with the basic settings of the router will open. In the left menu, select "Software Update". Click the "Select file" button and specify the location of the firmware file that you downloaded earlier.
7. After that, click the "Execute update" button.
8. Wait while the router is updating the firmware, this process takes approximately 5 minutes, after which the router must be rebooted and it will be ready for use.
Reset
Use a hard reset if you need to configure the device again (delete all user settings), you cannot access the web page of the router settings interface, after setting up the router, the Internet connection was not established or the password to access it was lost.
Attention! When performing a hard reset, all user settings will be reset to factory settings!
On the body of the device there is a deep RESET (RESTORE) button that allows you to reset the settings to the factory settings. The RESET button (RESET, RESTORE) can be found on the same side of the router case where the rest of the connectors and buttons are located. In rare cases, the button may be located at the bottom of the router.
To reset the router settings to factory settings, do the following: Turn on the power of the router and wait until the device is fully loaded. Press the RESET, RESTORE button using a pointed, thin object (such as a paper clip) for 30 seconds, then release the button. After that, the router will reboot with the default settings (factory settings) and you will need to re-configure it.
You can also reset the setting through the MCPE platform
Or through the web interface of the router. Click on the "Revert to factory default settings" button.

Router connection
Connect the cable that our installers brought to your apartment to the Internet (WAN) port, and connect your computer to any of the Ethernet (LAN) ports. You can also connect your PC to a router wirelessly, but it's best to use a cable for the initial setup.

Configuring the router
Configuring a router for L2TP
Configuring a router for L2TP

"Home Internet"- this section configures the connection to the Beeline network. All the configuration data required for connection is already contained in the router's memory, you only need to enter your username and password in the appropriate fields.
"Beeline" TV - if you have connected the service "Beeline" TV, you need to select the port of the router to which you connect the set-top box. If you are watching live feeds on your PC or Xbox 360, then there is nothing to set up.
"Router security"
To save the parameters you entered, click the Save button.

Firmware update and factory reset
Firmware upgrade
Reset
Firmware upgrade
First, define the revision of your router!

1. Revision B1 / B2 / B3 with firmware versions 1.2.100 to 1.2.119: current firmware 1.2.120
If the router revision B1 / B2 / B3 has a software version lower than 1.2.100 (1.2.99 and lower), then you need to update first to 1.2.100, THEN to the current firmware 1.2.120
For revision B5 / B6, you need to update to firmware 1.2.254, then to the newer 1.2.255
2. Router D-Link DIR 300 / NRU revision B1 / B2 / B3 / B5 / C1 works correctly in the Beeline network only with specially developed firmware from D-Link. This firmware optimized by D-Link specialists to work in our network.
If you have a D-Link DIR 300 / NRU router revision B1 / B2 / B3 / B5 / C1 with factory firmware, you can update the firmware to the customized one at the nearest D-Link service center, the update procedure is free, you will need the device itself and a valid subscription agreement.
Please note that services for restoring unsuccessfully flashed routers and returning from a customized firmware to the factory one are provided in the D-Link SC on a paid basis.
For routers of revision C1, after a successful firmware update, you must reset the router by holding down on the side panel RESET button for 30 seconds. Then produce standard setting router.
Do not install the firmware for DIR-300 / NRU hardware revisions B1, B2, B3 on the DIR-300 / NRU router with hardware revision B5. This leads to the inoperability of the router.
3. Open a browser and enter 192.168.1.1 in the address bar. The router will ask you to enter your username and password. Enter admin in both fields. Click OK.
5. On the left in the menu, go to the "System" section, then the "Software update" subsection. Click on the "Select file" button, and in the window that appears, select the file with the firmware. Click the Update button.

6. Wait while the router updates the firmware and reboots, this process can take up to 5 minutes. Do not unplug the router at this time.
Reset
Use a hard reset if you need to configure the device again (delete all user settings), you cannot access the web page of the router settings interface, after setting up the router, the Internet connection was not established or the password to access it was lost.
Attention! When performing a hard reset, all user settings will be reset to factory settings!
On the body of the device there is a deep RESET (RESTORE) button that allows you to reset the settings to the factory settings. The RESET button (RESET, RESTORE) can be found on the same side of the router case where the rest of the connectors and buttons are located. In rare cases, the button may be located at the bottom of the router.
To reset the router settings to factory settings, do the following: Turn on the power of the router and wait until the device is fully loaded. Press the RESET, RESTORE button using a pointed, thin object (such as a paper clip) for 30 seconds, then release the button. After that, the router will reboot with the default settings (factory settings) and you will need to re-configure it.
4. You will be taken to the page quick setup router. Click on the "Advanced Settings" button.

D150L

Router connection
Connect the cable that our installers brought to your apartment to the Internet (WAN) port, and connect your computer to any of the Ethernet (LAN) ports. You can also connect your PC to a router wirelessly, but it's best to use a cable for the initial setup.

Configuring the router
Configuring a router for L2TP
Configuring a router for L2TP
Open your browser and enter 192.168.1.1 in the address bar. The router will ask you to enter your username and password. Enter admin in the first field and 1234 in the second. Click OK.
You will be taken to the router's quick setup page. It also consists of three sections, consider the purpose of each of them:
"Home Internet"- this section configures the connection to the Beeline network. All the configuration data required for connection is already contained in the router's memory, you only need to enter your username and password in the appropriate fields.
"My Wi-Fi network" - here you can configure the wireless network of your router. In the Network name field, enter the name of your network, for example my_wifi, and in the Password field, enter the password to access it. Please note that the password must be at least 8 characters long.
"Beeline" TV - if you have connected the service "Beeline" TV, you need to select the port of the router to which you connect the set-top box. If you are watching live feeds on your PC or Xbox 360, then there is nothing to set up.
"Router security"- here you can change the password for accessing your router.
To save the parameters you entered, click the Save button.
After clicking the Save button, the router will take approximately 1 minute to establish a connection.
As soon as the router establishes a connection, opposite the Status line, you will see "Internet connected". Congratulations, you have completely configured your router to work in the Beeline network.
Firmware update and factory reset
Firmware upgrade
Reset
Firmware upgrade
Be careful when following the instructions in this section. In case of an error in the actions, a visit to the service center will be required to restore the device. It is recommended to flash the router by connecting a cable from a PC to any of the LAN ports. When flashing a router via Wi-Fi, there is a risk of getting an inoperative device that can be restored only in a service center, or not restored at all.
1. Open a browser and enter 192.168.1.1 in the address bar. The router will ask you to enter your username and password. Enter admin in both fields. Click OK.
2. You will be taken to the router's quick setup page. Click on the "Advanced Settings" button.
3. On the left in the menu, go to the "System" section, then the "Software update" subsection. Click on the "Select file" button, and in the window that appears, select the file with the firmware. Click the Update button.

4. Wait while the router updates the firmware and reboots, this process can take up to 5 minutes. Do not unplug the router at this time.
Reset
Use a hard reset if you need to configure the device again (delete all user settings), you cannot access the web page of the router settings interface, after setting up the router, the Internet connection was not established or the password to access it was lost.
Attention! When performing a hard reset, all user settings will be reset to factory settings!
On the body of the device there is a deep RESET (RESTORE) button that allows you to reset the settings to the factory settings. The RESET button (RESET, RESTORE) can be found on the same side of the router case where the rest of the connectors and buttons are located. In rare cases, the button may be located at the bottom of the router.
To reset the router settings to factory settings, do the following: Turn on the power of the router and wait until the device is fully loaded. Press the RESET, RESTORE button using a pointed, thin object (such as a paper clip) for 30 seconds, then release the button. After that, the router will reboot with the default settings (factory settings) and you will need to re-configure it.
You can also reset it through the router's web interface. Open your browser and enter 192.168.1.1 in the address bar. The router will ask you to enter your username and password. Enter admin in both fields. Click OK.
4. You will be taken to the router's quick setup page. Click on the "Advanced Settings" button.
5. On the left in the menu, go to the "System" section, then the "Configuration" subsection. Click the "Factory Settings" button.

N150L

Router connection
Connect the cable that our installers brought to your apartment to the Internet (WAN) port, and connect your computer to any of the Ethernet (LAN) ports. You can also connect your PC to a router wirelessly, but it's best to use a cable for the initial setup.

Configuring the router
Configuring a router for L2TP
Configuring a router for L2TP
1. Open a browser and enter 192.168.1.1 in the address bar. The router will ask you to enter your username and password. Enter admin in the first field and 1234 in the second. Click OK.
2. You will be taken to the router's quick setup page. It also consists of three sections, consider the purpose of each of them:
"Home Internet"- this section configures the connection to the Beeline network. All the configuration data required for connection is already contained in the router's memory, you only need to enter your username and password in the appropriate fields.
"My Wi-Fi network" - here you can configure the wireless network of your router. In the Network name field, enter the name of your network, for example my_wifi, and in the Password field, enter the password to access it. Please note that the password must be at least 8 characters long.
"Beeline" TV - if you have connected the service "Beeline" TV, you need to select the port of the router to which you connect the set-top box. If you are watching live feeds on your PC or Xbox 360, then there is nothing to set up.
"Router security"- here you can change the password for accessing your router.
To save the parameters you entered, click the Save button.
Attention! When performing a hard reset, all user settings will be reset to factory settings!
On the body of the device there is a deep RESET (RESTORE) button that allows you to reset the settings to the factory settings. The RESET button (RESET, RESTORE) can be found on the same side of the router case where the rest of the connectors and buttons are located. In rare cases, the button may be located at the bottom of the router.
To reset the router settings to factory settings, do the following: Turn on the power of the router and wait until the device is fully loaded. Press the RESET, RESTORE button using a pointed, thin object (such as a paper clip) for 30 seconds, then release the button. After that, the router will reboot with the default settings (factory settings) and you will need to re-configure it.
You can also reset it through the router's web interface. Open your browser and enter 192.168.1.1 in the address bar. The router will ask you to enter your username and password. Enter admin in both fields. Click OK.
4. You will be taken to the router's quick setup page. Click on the "Advanced Settings" button.
5. On the left in the menu, go to the "System" section, then the "Configuration" subsection. Click on the "Reset" button.

Wi-Fi router "Beeline"

| Default wireless network name (SSID) | Beeline_router |
|---|---|
| Default Wireless (Wi-Fi) Password |


Hello friends. In this note, I will gradually compile a short list of common questions and answers regarding router Beeline Smartbox.
Please indicate in the comments what general questions you think you need to add here.
Do you want to ask a question? Check if this post contains an answer to it.
Question: What is this Beeline Smartbox device?
Answer: Beeline Smartbox
- a branded router of the Beeline provider, originally designed to work only in Beeline networks.
The router itself is manufactured by Sercomm in Taiwan by order of Beeline. The router is based on a reference board based on Realtek 8197D
.
The router has support for IPTV (by wire, the port is selected in the settings) and the ability to use it as a network storage
Specifications:
Chip: Realtek 8197D (600 MHz)
RAM: 64 MB
Wi-Fi: 802.11b / g / n 300Mbps, 2 internal antennas: 2 × 2 MIMO
Interfaces: 5 RJ-45 connectors with auto-detection of cable type, USB 2.0 port.
Question: Should you buy this router?
Answer: It all depends on your needs, however, I would not recommend buying a router at the official Beeline price (1200 rubles), since for this money you can take a more interesting technically and hassle-free Zyxel Keenetic Lite 2. With Beeline networks, this router works well and is well suited to an undemanding user.
It makes sense to buy if you get a router much cheaper than it official prices.
Question: Is it possible to make the router work with another provider?
Answer: In a number of cases, when the provider provides the Internet directly via DHCP (without any tunnels, "plugged in the wire - it works") or using a PPPoE tunnel, setting up does not cause difficulties and is done from under account superuser.
Instructions for obtaining privileges.
detailed instructions on setting up the Internet from another provider is described.
Question: The router has a USB port. What can it be used for?
Answer: via usb to the router, you can connect flash drives, external hard drives(subject to additional power supply) to provide access to them over the network (for organizing network storage, for example), also some usb modems.
Question: Is it possible to use a router with 3g modems?
Answer: Yes, starting from version 2.0.25
firmware added the ability to work with 3g mods in the distribution mode via Wi-Fi. To configure, you need to go to them under the superuser and go to:
Advanced settings - Others - Wan, select the item with 3g and make the necessary settings, and also mark the interface as active (tick)
The list of working routers is still unknown, but it is most likely that it is similar to the same for Zyxel. The main thing is, if the 3g modem does not work, do not forget to switch it to “only modem” mode (there are enough instructions on the Internet).
Question: The Wi-Fi connection is unstable despite high signal level... What should I do?
Answer: Change the Wi-Fi channel in the router settings and also try to lower the Wi-FI power (paradoxically, but high power does not always give a satisfactory connection quality) and also rearrange the router.

Question: Wi-Fi is unstable. Signal level low... What should I do?
Answer: This is a common problem with routers with built-in antennas (especially those with low gain).
First, try moving your router and removing obstacles between the router and wi-fi clients.
Then, if the result is still not satisfactory, try replacing the built-in antennas with external ones.
This requires
0) :
1) Replace the wires going to the antennas with the U-fl - SMA wire (on one side, the ufl connector for connecting to the wi-fi board, on the other sma for connecting an external antenna) and looks like this:

Its cost on Ebay is in the range of 30-100 rubles, depending on the length, quality of workmanship and the impudence of the seller (I took around 70 rubles). This is also found in Russian online stores, but extremely rarely.
2) Bring the connector outside the case and connect any Wi-Fi antenna you have. You can use an antenna from any popular router, for example dlink, or purchase it at a computer store for 100-400 rubles.
The antenna looks like this (for those who do not know)
If after that the signal is unsatisfactory, then most likely you should change the router to a more powerful one.
Question: Can I use the router as a repeater (repeater)?
Answer: Yes it is possible. To do this, put the hardware switch on the router case into REP mode and make the necessary settings.
Question: I want to help / dig deeper with the firmware. How can I do this?
Answer: Excellent. Use the following.
Question: Is it possible to install alternative firmware on the router?
Answer: Yes, it is possible to install OpenWRT firmware on the router, but for this, on this moment, disassembly of the device and soldering to the UART-connector is required (to connect, you must use a usb-uart adapter).
There is also a risk of “killing” the device. Think if it is for you.
Detailed instructions will appear on the site a little later.
Question: One is not enough for me USB port... Is it possible to add another usb to the device.
Answer: Yes, it is possible, but it requires certain skills and straightness of hands. (difficult and precise soldering) The board was originally designed to use 2x usb ports, but one was removed to reduce the cost.
You can solder it and use it.
The instructions will come later.
For the information on the last two points, I thank my reader. Maksim