To begin, I’ll tell a story about two screws. I have two screws, each divided into two logical drives. On one screw - valuable data with a working Windows 7, and on the other screw there is no valuable data at all and there is a bare Windows XP. In general, I decided to turn this last screw with two sections into one with one section. Since there is nothing to save, you can simply bang the partitions, re-create one large partition, then format the screw and use this volume alone.
I delete these sections - delete, everything seems to be fine, but then I suddenly with horror notice that I actually bang the wrong screw !!! They just have about the same volumes, and they also have one company - Maxtor, in short, they are similar. In general, I mixed up the screws and deleted the sections of the screw with valuable data. In short, a nightmare :(. Well, I have to restore the screw! Since I did not format the screw after deleting the partitions and did not write anything to it, it is quite possible to restore the data. So, how can I recover deleted partitions.
Of course, you need to be careful, but since it happened, we proceed to restore the partitions on the screw. We cling it to a computer on which we will carry out resuscitation:
As expected, the system does not see the screw. Logical drives C: and D: are partitions of the resuscitation computer's screw. And our screw is not in the system:
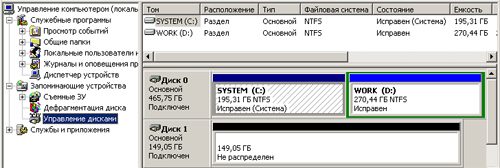
You can look at this economy through the disk management console. We click on the "My Computer" icon with the right mouse button, select "Management" in the menu that appears, and then select "Disk Management".
There, our nailed screw is visible as one large piece of incomprehensible space (it is displayed as "Disk 1" and the system considers it to be "not distributed"):
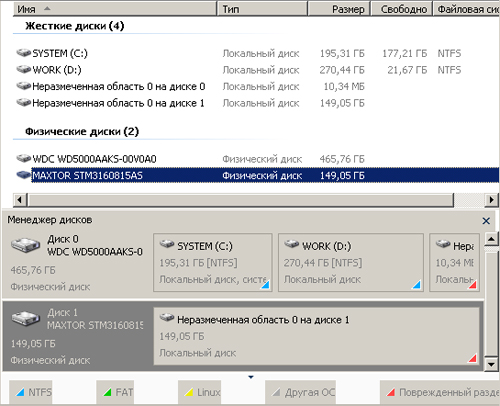
As they say, do not lose heart and proceed to restore the sections! The Starus Partition Recovery program will help us with this. And in this program, the nailed drive is also visible as "Unallocated area 0 on drive 1" - 149.05 Gb. By the way, it can be seen that on the screw of the resuscitation computer there is also some kind of “Unallocated area 0 on disk 0” of 10.34 Mb in size (it is not clear what it is, but it doesn’t matter in our case). This is the picture:
We click on the arrived disk with the right button and select "Open":

Now we select the analysis and information search mode on the disk. Select "Full analysis" (installed by default):

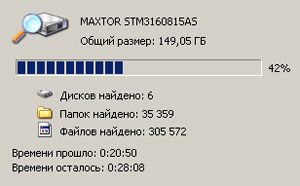
Finally, the process is complete:

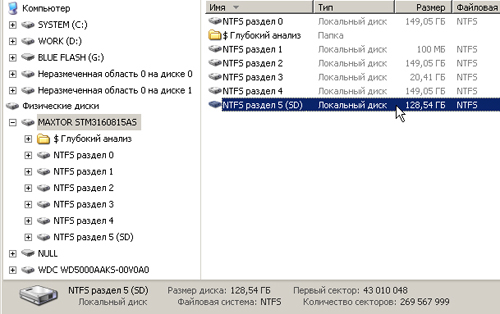
And now from all the sections that the program found, you need to choose the one in which our important data is stored and from which we will extract this data. As you can see, the program found as many as 6 sections instead of 2 that were on a live screw. One partition was small, gigs 20-30 - under the system, and the second took up the rest of the disk space - there were important data.
So, NTFS partition 0 - its size is equal to the capacity of the entire disk, this is nonsense, there were two partitions. Section 1 is 100 Mb. This is clearly the size of the Windows 7 service area. This is good, but completely unnecessary. Section 2 - the full size of the screw, another complete nonsense. Section 3 - but this is already something! Apparently - this is the system partition (drive C :) of the former live seven (20.41 Gb). However, I need information from the data section (drive D :). We are looking further. Section 4 - full screw size, already familiar nonsense.
Finally, NTFS partition 5 is just what you need! Judging by the size (128.54 Gb) - this is the data section:
Double click on section 5 and - please! Everything is in place:

Removing a non-system disk partition without user intervention is a rare occurrence. Of course, the reason for deleting a disk partition (or even several) can be malware, bad sectors and other hard drive failures, but more often the disappearance of entire sections of the data disk is the result of user experiments with software, which such users are not yet ready to work with.
Removing the system partition of a disk inside Windows is not easy, as operating system protected from self-destruction. As a rule, in order to cause such consequences as deleting a partition from Windows or the boot sector (a small partition reserved by the system), it is necessary to experiment with software working from bootable media. Or inside another operating system installed, respectively, on another partition of the disk. Therefore, non-systemic disk partitions on which users' personal data are stored are most often mistakenly deleted. In most cases, this data is of much greater value than the operating system, the performance of which is restored in extreme cases by reinstallation.
How to recover deleted disk partitions and save the data stored on them? Below we’ll take a look at this process using free program for Windows - AOMEI Partition Assistant.
AOMEI Partition Assistant has a paid edition that provides additional features for working with the computer's disk space. But to restore the disk partitions, the functionality of the free edition of the Standard Edition program will be enough. You can download one from the official website of the developer.
1. In what cases will the restoration of disk partitions help, and in which - no
But before proceeding directly to the instructions, a few points to clarify. Below we will consider a method of how to recover deleted partitions from a disk - in fact, return them to the state they were in before they were deleted. The restored partitions will have the same size, the same place in the disk partition table, they will contain the same data as before. To restore disk partitions, a special type of software will be used - distribution manager disk space, the aforementioned AOMEI Partition Assistant program. Partition recovery does not help to solve the problem of data recovery after erroneous formatting of disk partitions or removable drives. For these purposes, it is necessary to resort to the help of a separate type of program designed for data recovery: Recuva, R-studio and others.
Restoring disk partitions will not help if, after removal, disk space has been redistributed and new partitions have already been created in place of deleted partitions. In this case, we can only talk about data recovery through the above programs.
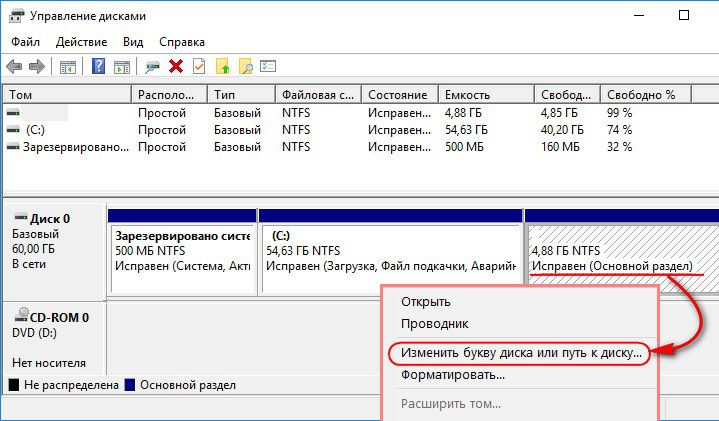
And one more nuance: if in the explorer or file manager the disk partition is not visible as the disk D, E, F, etc., it may not be deleted, and its invisibility is due to the lack of a letter. The letters of the disk partitions and computer devices can fly off after a system failure, experiments with windows settingsfailed rollback to backup, as well as the result of other interventions in the system. This is easiest to clarify in a standard disk management utility. A universal way to launch it for all versions of Windows is to use the Run system service (+ R keys). Command to enter:

If a letter has flown, a non-system partition will be marked as serviceable. And you can assign a letter to it using the appropriate command in the context menu.
The picture with the deleted partition (or several partitions) will be different: a certain part of the disk space will be labeled “Not allocated”.

This is the diagnosis for applying the instructions for restoring disk partitions, which is given below.
2. Recovery of non-system partitions
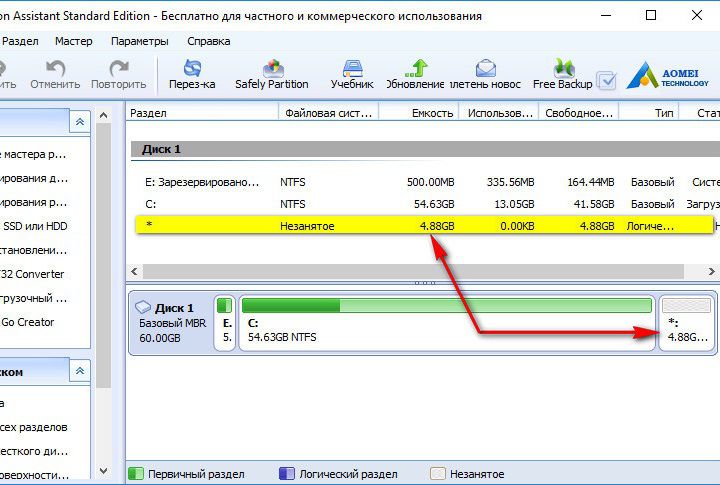
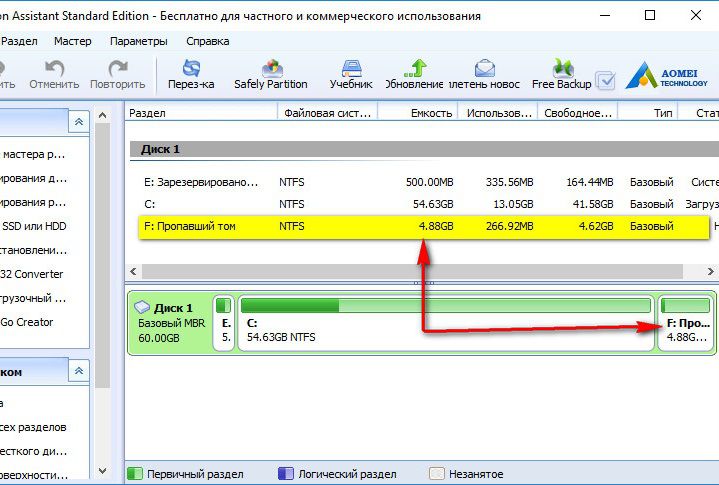
In the AOMEI Partition Assistant program window after its launch, we will see the same picture as in the management utility windows drives - the deleted section in the table above and in the visual representation below will be marked as unallocated space.
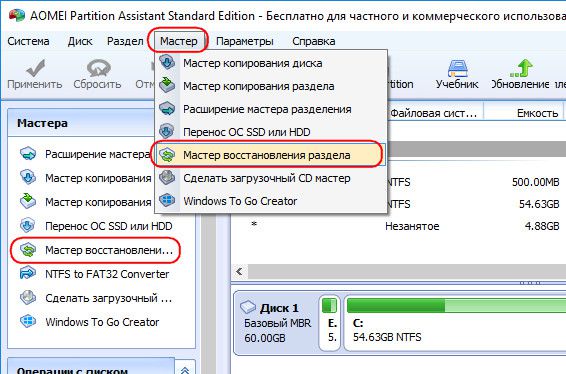
We start the partition recovery wizard - either in the "Wizard" menu at the top or on the side panel of the program interface.
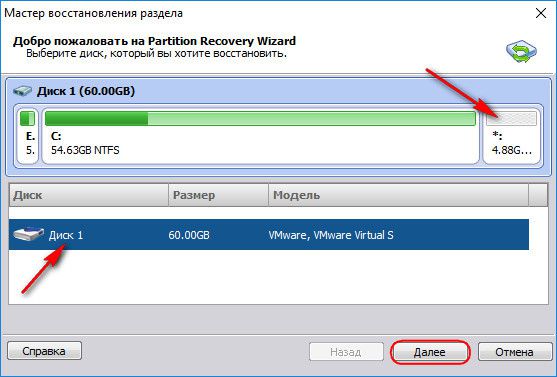
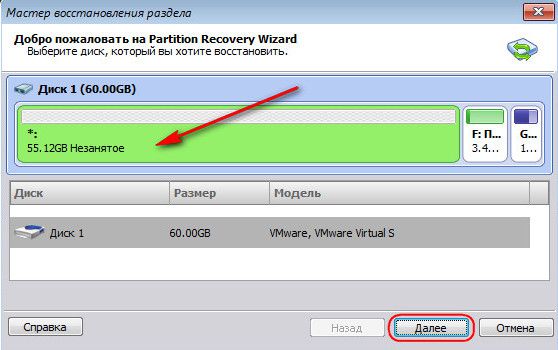
At the first stage of the wizard, we select the desired hard drive if there are several of them connected to the computer, and on the drive itself we click on the same unallocated (unallocated) space that remains after deleting the disk partition. Click "Next."
Next, we will see a window for selecting the type of search for deleted partitions. The selection scheme is simple: first we use quick search, and if during this process the deleted partitions are not detected, it remains only to repeat the procedure with the choice full search. Click "Next."

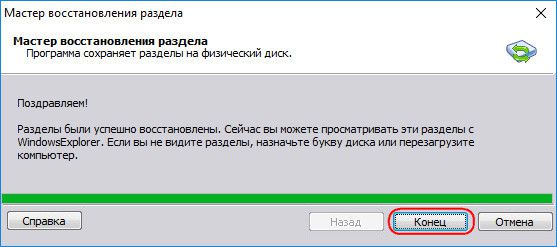
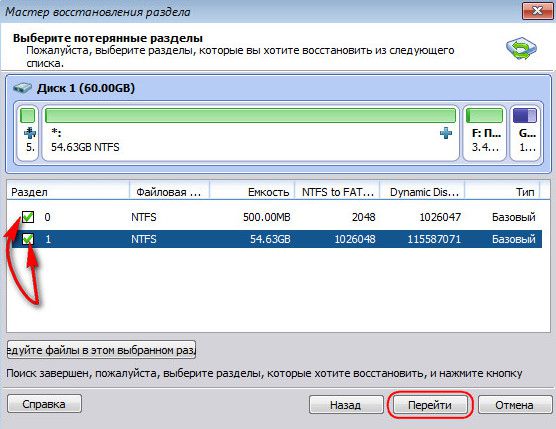
The section is found, mark it with a tick and click the "Go" button.

The end of the operation.
The deleted disk partition is restored. The folders and files stored on it were not affected.
If several disk partitions have been deleted, after the search is necessary, check the boxes for all detected partitions and restore them.

3. Restoring Windows system partitions
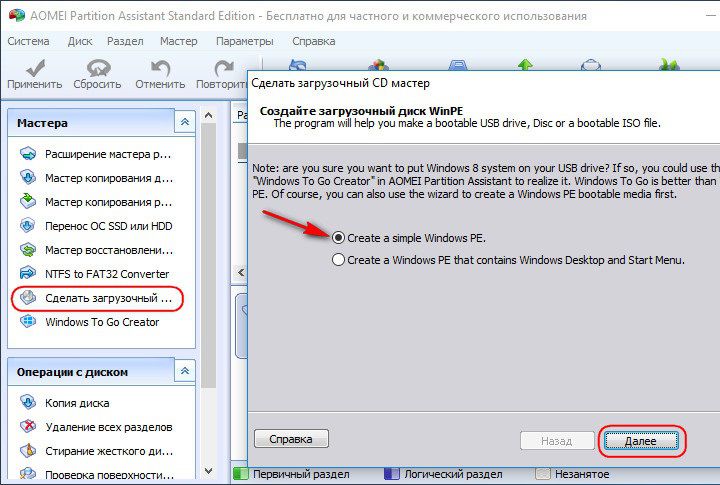
Recovery of mistakenly deleted system windows partitions will return the operating system the ability to boot. But the operation to restore the C drive and boot sector, in comparison with the recovery of non-system partitions of the disk, is more complicated because you have to work with bootable media. And to create one you need a workable computer device. On such a computer, you need to install AOMEI Partition Assistant and create a live emergency disk using the program. On the side panel of the program window, launch the Bootable CD Creation Wizard. At the first stage of the wizard, select the option “Create a simple Windows PE” (since the second option requires fuss with additional AOMEI software). Click "Next."

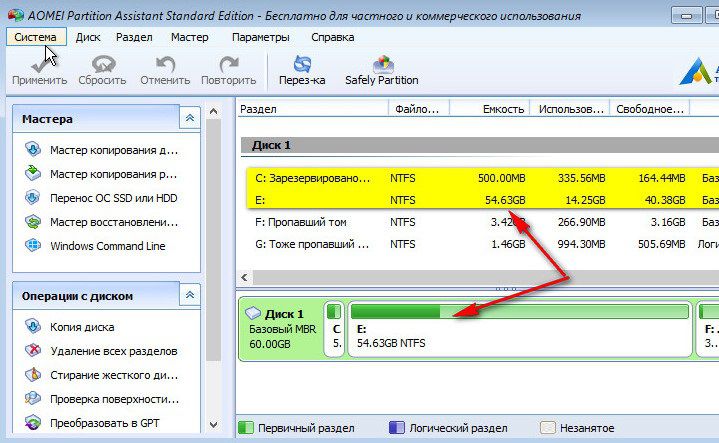
We boot the computer from a disk or flash drive. In the AOMEI Partition Assistant window, in our case, we see that both system partitions are both C drive and 500 MB boot sector - merged into a single unoccupied space. For recovery windows we follow the same path as for saving non-system partitions of the disk, described in the previous paragraph of the article. Launch the partition recovery wizard.

We click on an unallocated space.
Choose a quick search. If it does not help, repeat the operation with the choice of a full search.

We note the sections found by the program. Click "Go."
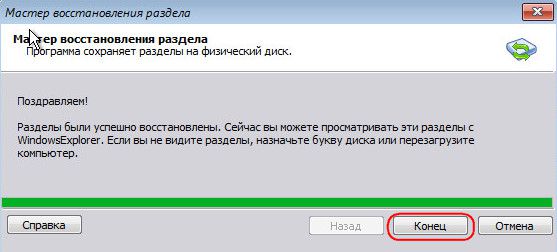
System partitions restored.
Have a great day!
Formatting result hard drive computer or external hard the entire disk, not one of the partitions; all partitions created on it are deleted along with the saved files. Most data recovery programs can recover from such a drive at best only a set of files, often with an unsaved name, without preserving the folder structure and directory tree.
R-Studio has the ability to recover data from a lost partition while preserving the folder structure and file names, let's look at how to recover files using it.
Suppose that on our hard drive there were four partitions with files: D :, I :, F :, E :. Given disk was formatted during the reinstallation of the operating system, and one partition was created on it.
To recover one of the deleted partitions with using R-Studio, run the program and select the hard drive from which you want to restore the partition, press the button "Scan".
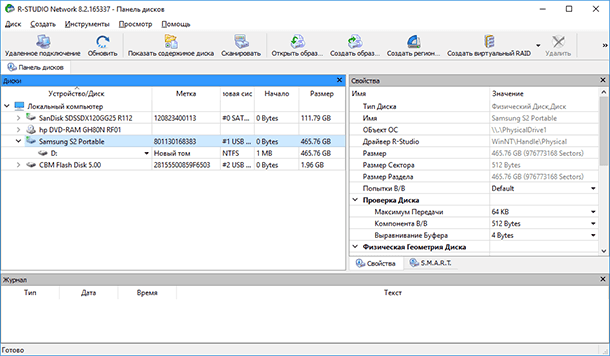
If necessary, in the window that opens, make additional settings and click "Scanning".
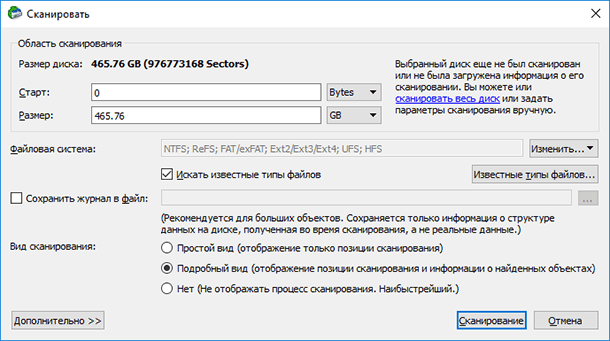
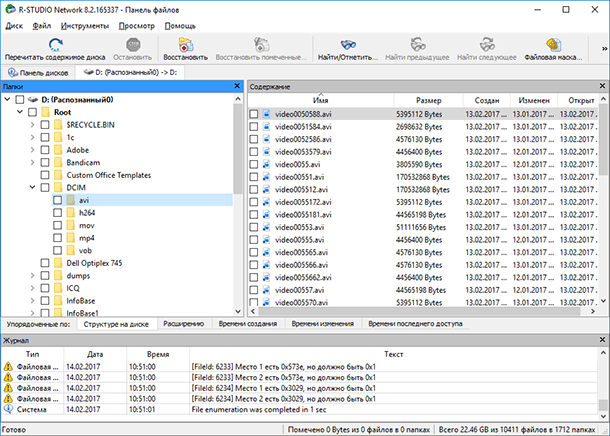
We are waiting for the end of the scanning process. Scan information is shown in a peculiar window on the right, which resembles the disk defragmenter window, as in old windows versions. Also, during the scanning process, the program calculates its duration, pay attention to the status bar at the bottom of the program window.
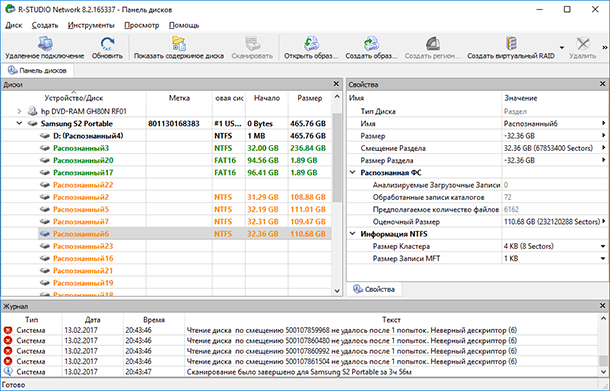
The disk scanning process lasted about 4 hours. As a result, R-Studio displayed in the window on the left a list of detected sections of the scanned hard drive: existing and deleted earlier. If you look at the list of detected partitions and compare it with those that were deleted from the disk (screenshot 1), then not all of them will be matched in size. Therefore, if it is necessary to restore a particular section, then it can be detected by checking each.
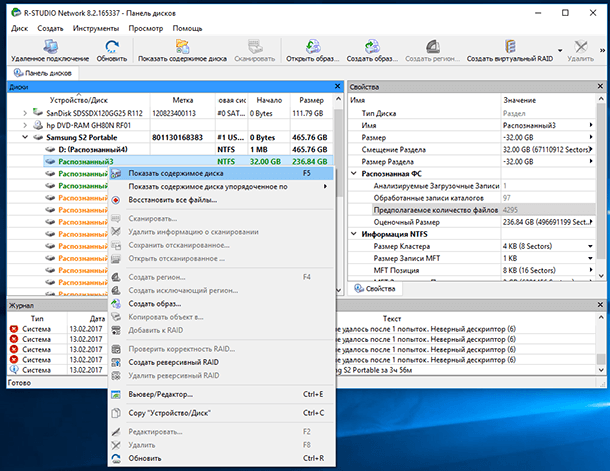
Let's look at the contents of the partition, the volume of which coincides with the previously deleted Drive I:
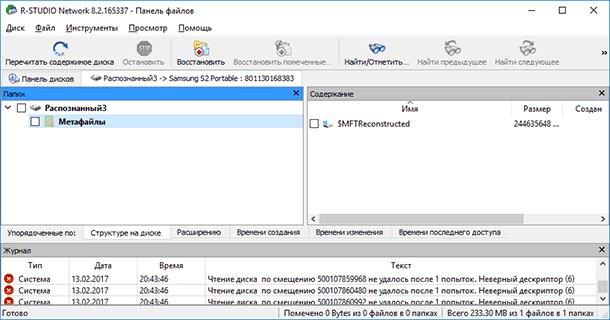
As a result, R-Studio displayed the contents of this section, in which no files deleted along with it were found. The same result was a result of checking other recognized sections.
As a result of scanning the existing disk partition " New volume", Which was created instead of the deleted four, the program still found the files of the deleted partitions.
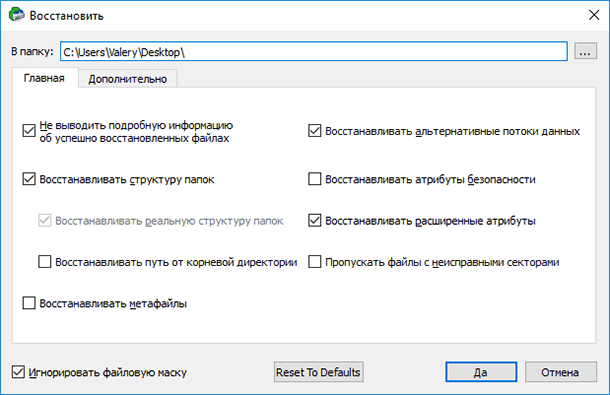
Select the files and folders that need to be restored and click the icon "Reestablish" in the top menu of the program.

Specify the folder to restore files and click "Yes".
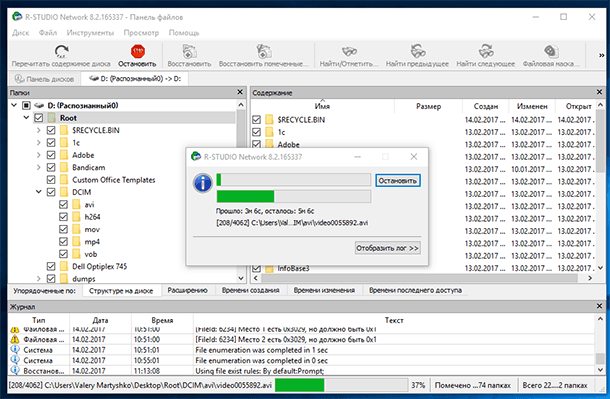
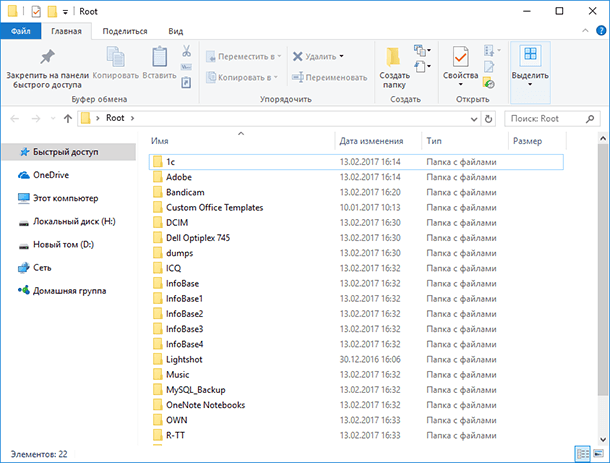
Files and folders restored.
In conclusion, we can say that the program coped well with the task. And the quality of data recovery R-Studio is a direct competitor Hetman partition recovery: also restores files from deleted or formatted disk partitions, creates disk images and restores data from them, has an adequate preview function of restored files.
What makes Hetman Partition Recovery superior to its competitor, it’s a simple intuitive interface, much higher speed (both scanning the media and data recovery), ease of use, the function of data recovery of virtual disks and disks of virtual machines has been added to the program in the latest update.
Using Hetman Partition Recovery, data recovery is possible in two or three steps, which greatly simplifies the data recovery process and only positively affects its result.
If you accidentally deleted a disk on your PC or several partitions, do not worry, you can recover lost data. There are many programs for this. This is a paid Acronis Disk Director, free, AOMEI, Partition Assistant Standard Edition and. Consider how to recover remote disk using the latest program.
Recovering a remote disk using DMDE
In order to recover deleted partition a disk or an entire disk, you need to download the DMDE program by going to. Next, open the archive and run the .exe file.
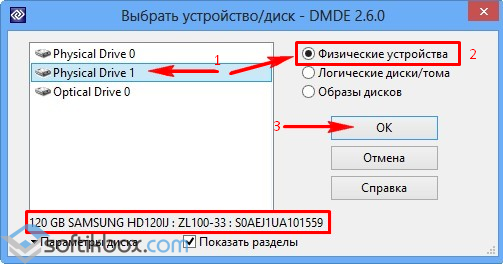
In the window that opens, select the physical disk, indicate that it is a device, and click OK.

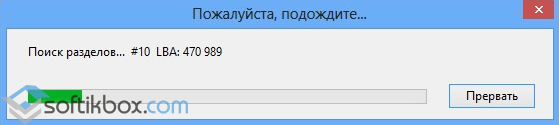
The search for deleted partitions and disks starts.

After the search, a table of results will appear. We look at the remote drive. It will be indicated by the green letters “BCF”. Pay attention to the volume. It must match the one that was before the removal. Choose desired drive and click "Paste."

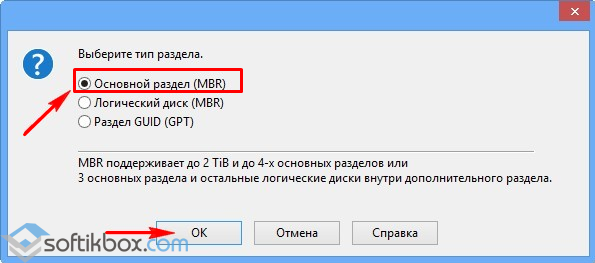
In the next window, select the type of section. If the operating system is installed on your PC windows system XP or 7 and you have removed the drive “D”, then you should choose “ Logical drive (MBR). " "Main disk (MBR)" is selected only when the loss of drive "C" on which the operating system is installed. In the case when you use Windows 8 and above, and your PC supports the latest GPT standard, we recommend choosing the third option.

Also, to facilitate the selection, it is worth looking at the standard of the remote disk in the previous window.

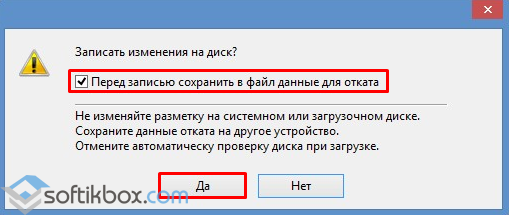
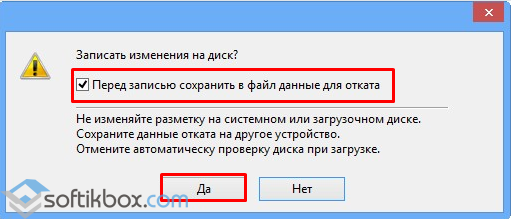
Before restoring the disk, put the mark "... save the file data for rollback" and click "Yes."
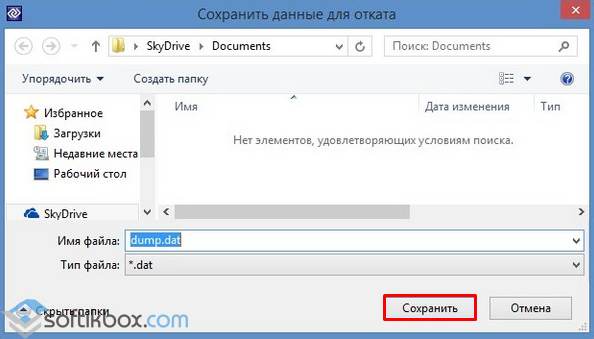
Choose a place to save the file.
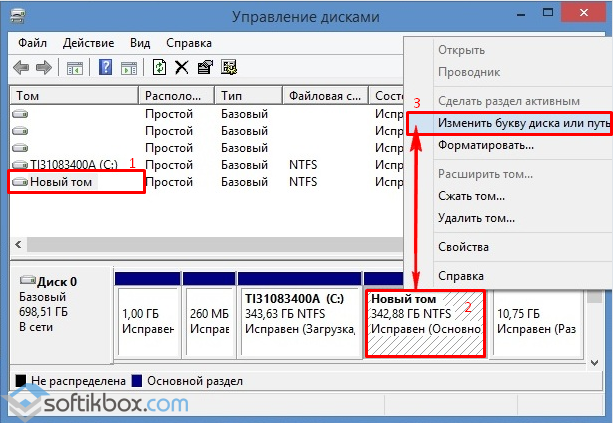
The disk is restored. Now go to "Disk Management", select the tab "Action" and "Update".

The remote drive “D” will appear, but without a letter. We right-click on it and select "Change drive letter or path."
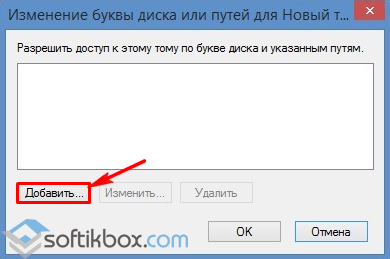
A new window will appear. Click "Add."
Select the letter "D" and click "OK."
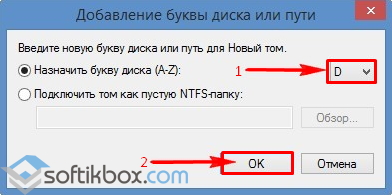
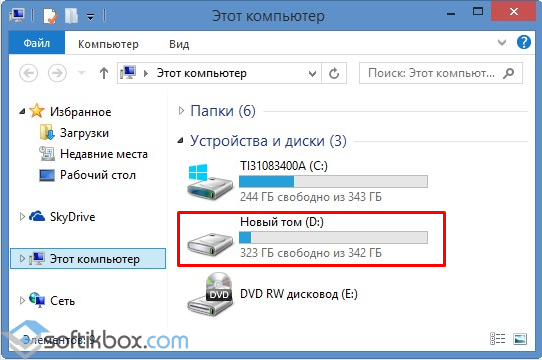
Close Disk Management. Go to the "Computer" and see that the disk "D" is restored.
Recovering a deleted partition using the DMDE program
Recover deleted hard drive partitions using dMDE programs going a lot harder. First you need to disconnect hDD from one PC and connect it to another, on which there is already an installed program.
In Disk Management, two will be displayed. base disk with installed operating systems.

For example, delete all partitions from the connected drive and restore them back.
We start the DMDE program. Select a physical disk. The name will be displayed below, so select the one that is connected to the PC and on which the partitions are lost. Click OK.
The search for deleted partitions starts.
We select only the desired section. This will initially be “Reserved by the system”. We look at the volume so as not to restore an earlier and unnecessary section.

We select “Main partition (MBR)”, since we need to restore the partition with Windows 7. Click “OK”. If we are restoring a disk with Windows 8, select the third option.
In the next window, select "Reserved by the system" and click "Apply."

We save the data for rollback and click "Yes."
The first section is restored.
In the same way, we repeat all the actions with sections that are referred to as “BCF”.

After their recovery, go to "Disk Management". Click "Action" and "Update."

After we change the drive letter, rearrange it back to the PC and start the system. Data recovered.
Hard disks of computers, which are also called hard drives or hard drives, are the main regular storage devices for its information. long-term storage. During computer operation, situations sometimes arise when data stored on the hard drive is lost for various reasons, which include hardware breakdowns and crashes or software crashes, but most often there is a need to recover lost data if it is lost as a result of accidental deletion by the user.
When using a computer, data may be accidentally deleted when formatting the hard disk, when cleaning the recycle bin, or there is a need recover data after deleting a hard drive partition. If the partition has been deleted recently and you remember the exact size of the disk, then you can try to create the same size partition without formatting. This situation has a high probability that the file system structure has been preserved, while you do not need additional resources to recover lost data.
Otherwise, practice provides for the implementation of standard algorithms for recovering lost data, which are determined by special software tools - utilities for recovering information arrays. There are a significant number of various paid and free utilities for recovering lost data. All of them have different functionality and capabilities, but commercial options for utilities are more efficient. Here is some of them:
TestDisk - allows you to recover deleted (lost) partitions on a hard drive or restore boot records on disks in situations of improper actions of programs, the user or due to virus exposure.
R-Studio is a very powerful recovery utility. Allows you to restore partitions of file systems FAT32, NTFS, Ext2, Ext3.
Pandora Recovery - used when necessary to recover lost files on hard drives with formatting in file system NTFS.
Recuva is a small free, but with a very high functionality utility for recovering lost files.
Acronis Disk Director Suite - a set of utilities that includes, besides the partition manager, for work windows and Linux, also a means of restoring arrays of information in the file system.
Such programs allow you to restore up to 10 slices of information, although absolute recovery is virtually impossible. But this is always better than the complete loss of important data. At the same time, the chances of restoring the information array increase while minimizing access to the hard drive after its loss. In addition, the recording or installation of the used utility should be performed not on the recoverable disk, but on another, healthy or bootable diskette. It is also advisable to connect the restored hard drive to a computer with a known good drive or connect a second disk to the restored computer. The main condition for success in the process of restoring an information array is that it is mandatory to access the restored hard drive only from the second disk.
Recovery is a complex and time-consuming process. The task immediately becomes more complicated when it comes to Linux-systems, where the number of recovery programs is much less. In any case, when working with recovery programs, first save the state of the restored partition to a file. For example, on Linux, this can be done using the dd command if \u003d / dev / (device or logical volume identifier) \u200b\u200bof \u003d / (path to the receiver file).


