If you accidentally deleted a data section on your laptop or simple computer, or even worse several sections at once, then this article can help you in some cases. We will not waste time and immediately get down to business and we will analyze all the nuances of recovering deleted partitions in the process.
1) How to recover a deleted hard disk partition using the DMDE program on a laptop that has a new standard for placing GUID partition tables (GPT).
2) How to recover several deleted hard disk partitions at once with the DMDE program on a simple computer.
If this article does not help you, try reestablish remote disk free software: AOMEI Partition Assistant Standard Edition, TestDisk, EASEUS Partition Recovery and paid Acronis Disk Director.
To understand how to recover a deleted disk with DMDE, take my long-suffering laptop (which I saved for several years) and delete the disk (D :) on it along with all my files! If suddenly the partition cannot be restored with the DMDE program, we will restore it with another program.
Friends, I warn you against such experiments, just read the article and take a note for yourself, if you accidentally delete a section of a hard disk, you can restore it this way.
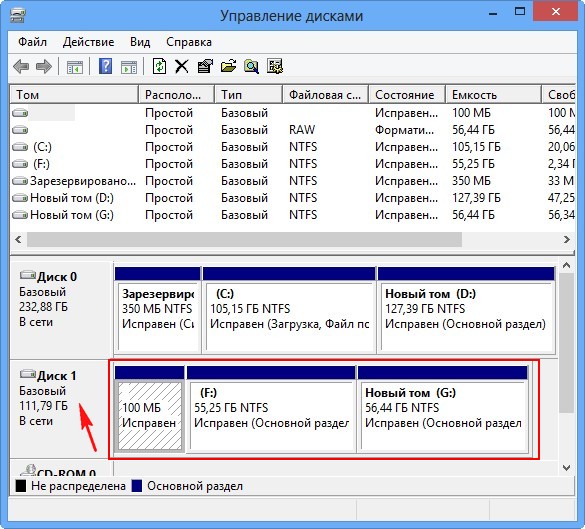
So, we go to the "Disk Management" of my laptop and see several service sections without a letter, they can not be touched. Next, we see the disk (C :) with installed windows 8 and an unsuspecting disk (D :), with files, delete it,

we see the warning "Deleting a volume destroys all data on this volume." Yes.

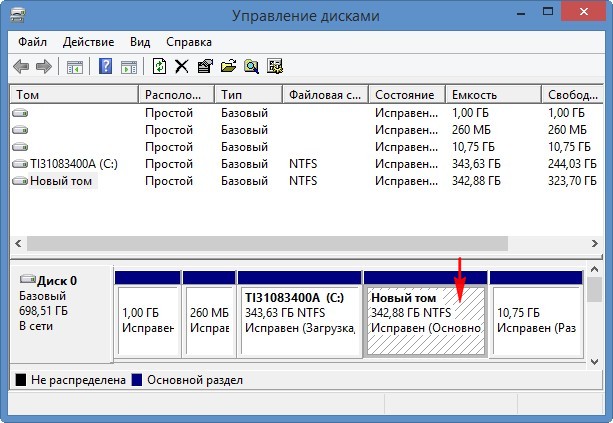
The disk is deleted, now it is an unallocated space.

We go to the site dMDE programs,
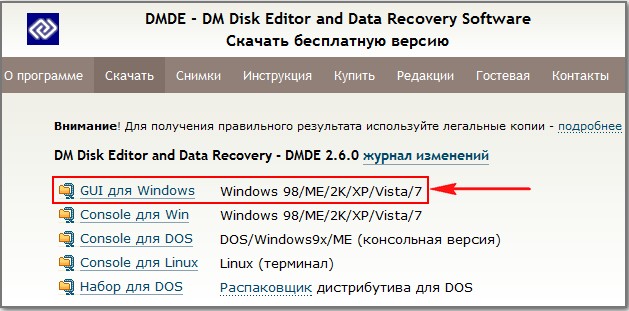
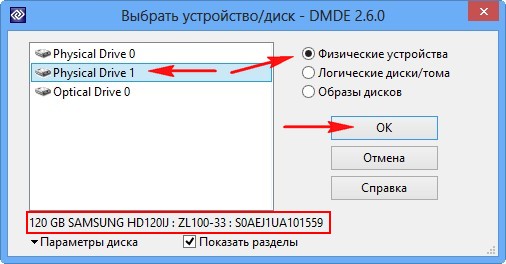
download it and run it. In this window, select the only hDD notebook and mark the item " Physical devices"and approx.

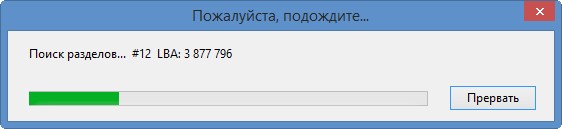
Search for deleted partitions on our laptop.
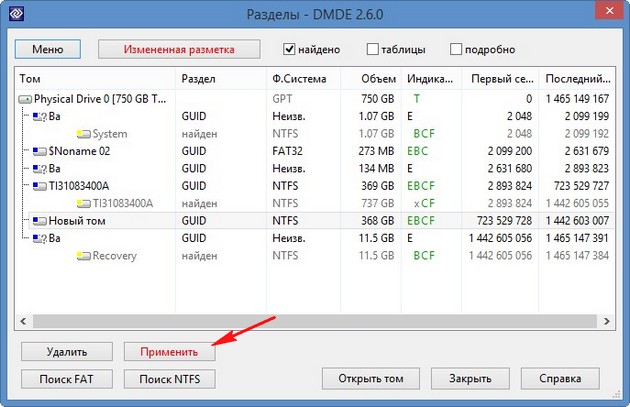
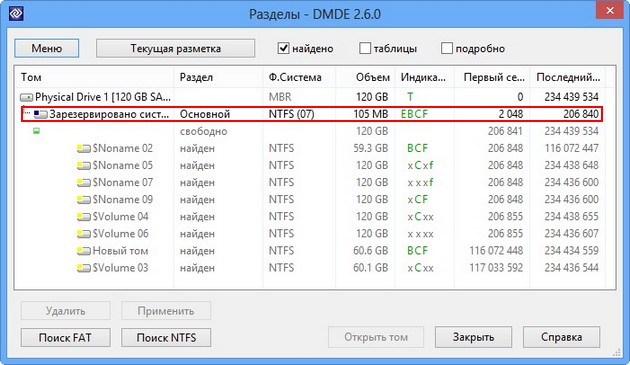
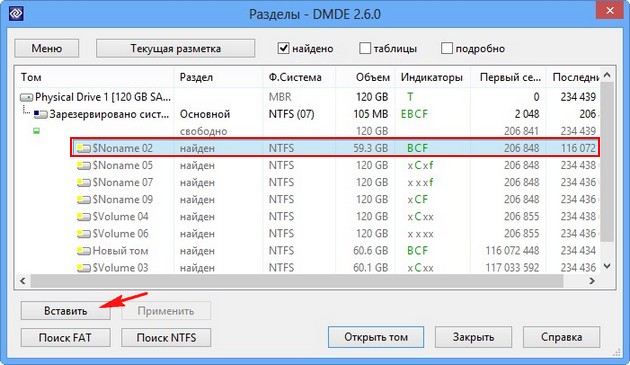
In the window that appears, you can see the existing and remote drives of our laptop, the file system, the volume of partitions, indicators (showing the presence of the corresponding structure), the first and last sectors. In order not to repeat myself, you can familiarize yourself with the detailed information of the DMDE program located on the official website.
http://dmde.ru/manual/partitions.html#addpartition
In our case, everything is relatively simple and our remote partition (D :) is visible with the naked eye, the name, volume, file system, the still remote disk is marked with favorable BCF indicators. We cannot be mistaken in this window, because if we select a partition for recovery incorrectly, in the best case, the DMDE program will not restore it, and in the worst case, it will, but then we will get an unnecessary partition and the chances of restoring the desired partition will drop. Select it with the left mouse and click on the "Insert" button.

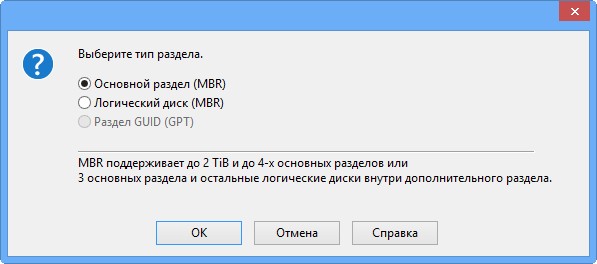
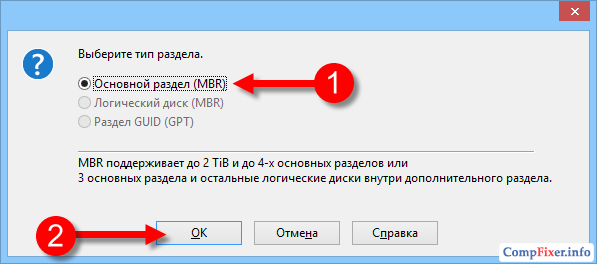
In this window, we must choose the type of partition, since the hard disk on our laptop has the latest GUID (GPT) standard, select it and click OK.

Note: If you don’t know which GUID (GPT) or just MBR you have, I want to tell you. Firstly, if you have a new laptop with Windows 8 installed, then your hard drive must have a GUID (GPT) style, and secondly, the DMDE program itself will tell you. Click "Apply."
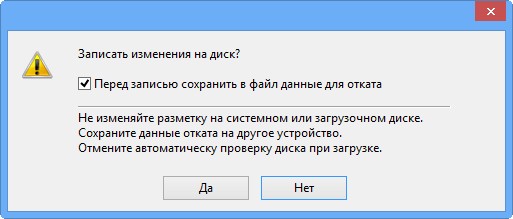
Before the program recovers the deleted partition, save the data for rollback to a file, save this file to a USB flash drive or other hard drive. Yes.
![]()
Save the file.

That's all, our disk is restored.

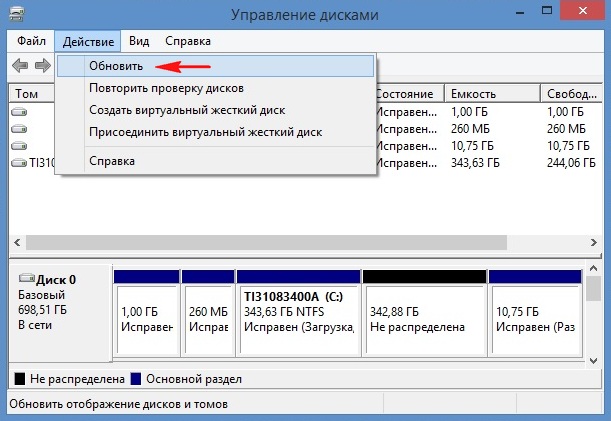
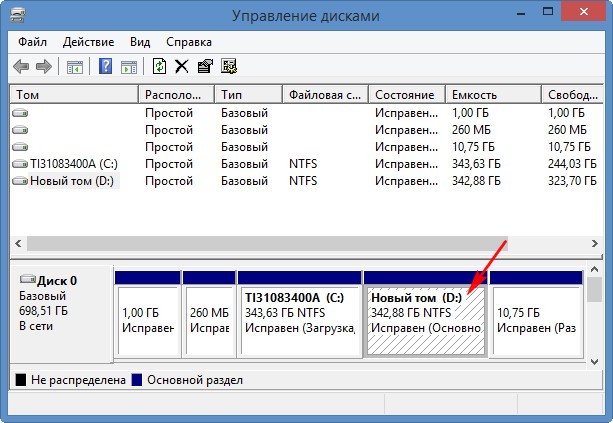
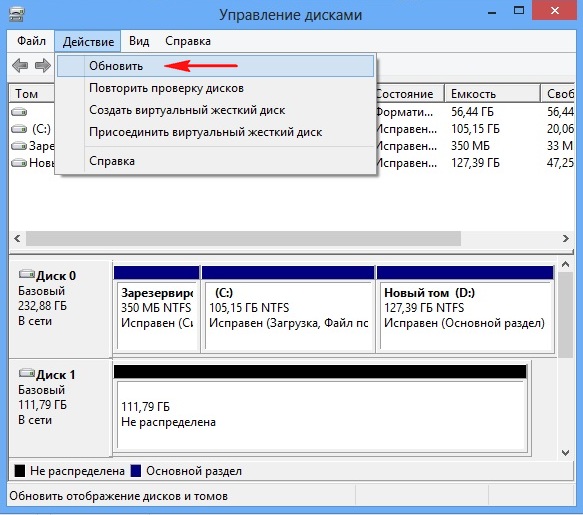
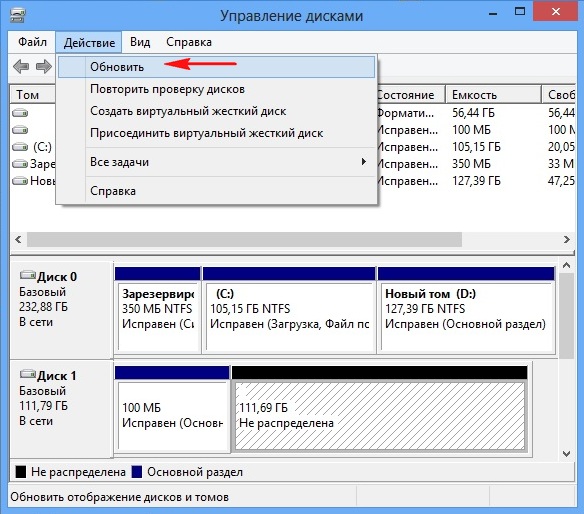
We go to "Disk Management" select "Action" and "Update".
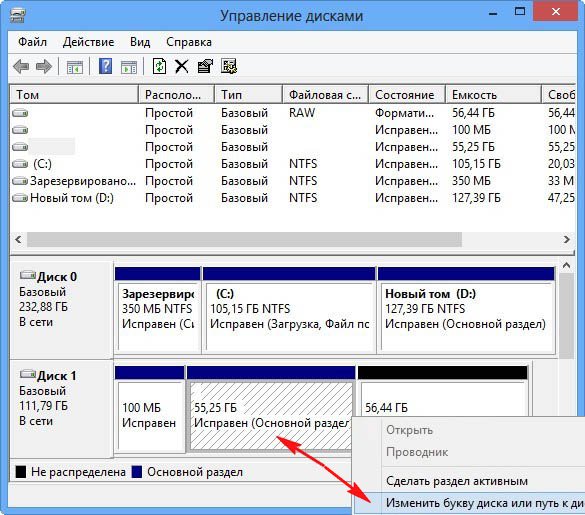
Our disk (D :) appears from oblivion, but for some reason without a letter.
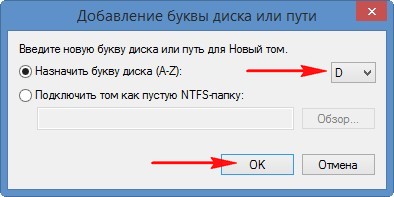
Right-click on it and select "Change drive letter or drive path ..."

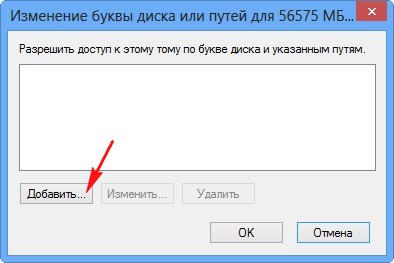
Add.

Select the drive letter (D :) and click OK.
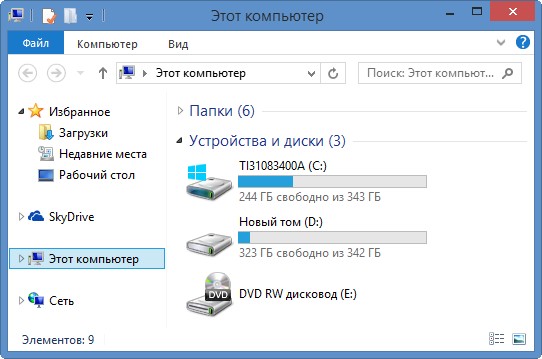
Now our disk (D :) is exactly in place and all the files in it, too.
How to recover several deleted hard disk partitions using DMDE on a simple computer
Now go to simple computer. Friends, if you accidentally deleted all partitions on your hard drive, you must remove it and connect it to another computer with established program DMDE
For example, take my computer. Please note that in my system unit there are two hard drive, respectively, in "Disk Management" also displays two hard drives. On the second Samsung drive (120 GB) there are three partitions: the first service partition 100 MB, the second partition with the Windows 7 operating system and the third partition with personal files.
I will delete all three sections. There are no partitions, now the space of the second hard drive looks like "Unallocated space". Let's try to restore them.

We start the DMDE program, check the box "Physical devices" and select the second hard disk with the right mouse, then click OK.
DMDE is looking for deleted partitions.

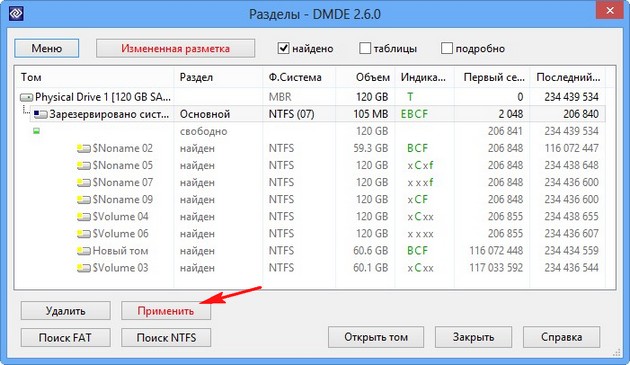
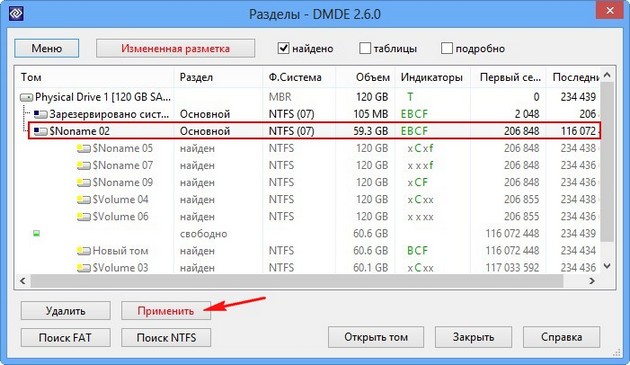
In the window that appears, you need to be careful. As you can see, the program found 9 partitions, of which three partitions we need to restore, the remaining partitions have existed on this hard drive for a long time and we do not need them.
The very first section, among those found by the program, goes our hidden section without a letter of 100 MB, restore it, select it with the left mouse and click the "Insert" button.

All three deleted partitions were the main ones, the program detected this automatically, click OK.

To apply.
Save the data file for rollback, click Yes.
Everything, the first section is restored.
Go to "Disk Management" and select "Action" "Update",
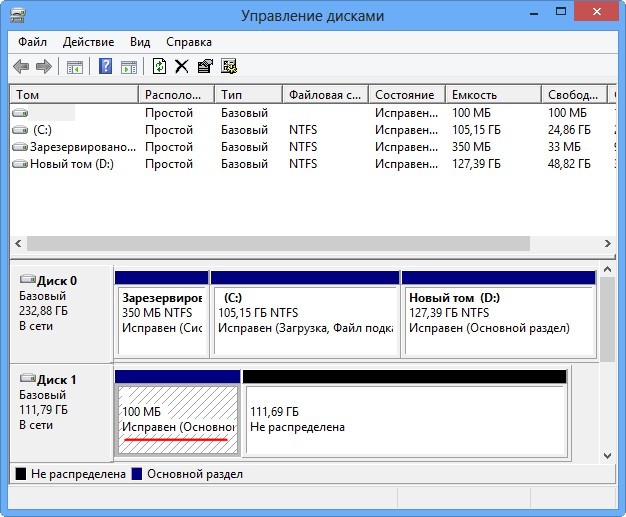
our section appears, we do not assign a letter to it, since it did not have it, this section is official and hidden.
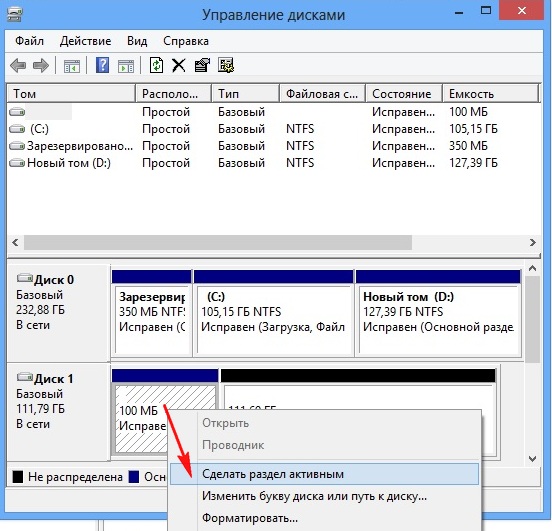
Important: Friends, I remind you that we are restoring partitions on the hard drive where it was installed operating system Windows 7. The partition that we restored (without a letter) is official and so that the operating system boots it must be “active”, right-click on it and select the “Make partition active” command in the menu
We restore the second section.
By volume, the second found section is suitable, which also has BCF indicators, select it with the left mouse and click on the "Insert" button
All our three sections were the main ones, click OK.
To apply.
We save the data for rollback to a file. Yes.
The second section is restored. We go to "Disk Management" select "Action" and "Update".
A disk appears (F :), but also without a letter. Right-click on it and select Change drive letter or drive path ...
Add.
How to recover information from an accidentally deleted drive?
The other day I had a terrible case - I accidentally deleted the section with hard drivewhich I really needed. I just went into the hard drive management console, and instead of the partition I needed to delete, I deleted the wrong one. Need I say that I had a terrible fit of horror and dumbfounded by what I did? Of course it did. I didn’t even close the console, .. still sat watching and wondering how to get everything back. But in the console I did not find the treasured button "back" ... like in Word or similar programs .. Well, or something like that .. Finally, I came to my senses, and started looking for programs to quickly return data to my disk .. I looked at some options of programs that were already posted on this site - Get Data Back - and similar programs to restore deleted files are not suitable for them, first there is a lot of data, 1.5 terabytes, and secondly, I did not delete them, but deleted the logical partition the disk, that is, the data on the disk is safe and sound, you just need programs that work namely the sections. I found the program "ACRONIS Disk Director Suite" which includes "ACRONIS RECOVERY EXPERT" .. I downloaded it, installed it, but for some reason this utility was not in my package. I started looking for other options - I can’t download the normal version. As a result, I tried programs from Paragon. The tag turned out to be even installed, and everything is in order, a complete set, but the demo version does not allow to restore partitions. Everything works, finds a section, but when trying to restore it, throws it to the website of the manufacturer of the program. It’s worth 599 rubles, it’s a pity not money, time is running out ...
I decided to stop precisely on this program, started searching, and found a wonderful "portable" version ... It doesn’t weigh much, it doesn’t require installation, it just starts from the disk, it doesn’t matter where from the flash drive, that's all.
Let's see how to make a miracle with this wonderful program:
When you start this program, the main menu window will appear first
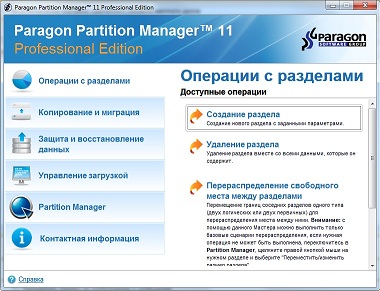
In this window, select Pfrtition manager, it opens

Well, don’t be scared, I just had a lot hard drives on this computer. What are we interested in here? So from the top of the window there is a list of your hard drives, there is a disk capacity, size file system in sectors .. and so on, we are not interested in all of this, below is a graphical representation of disk partitions. Here we already have what we need, look for the disk on which the partition was killed, click on the “unallocated” left mouse button, and in the menu that opens, select “restore partition”, then in the upper left corner click “Checkmark” “Apply all pending changes” .. And that's it ... We are waiting for some time, it depends on the size of your disk, and on the performance of your computer .. Upon completion of the operation, we see all our information in place. We are happy .. And henceforth, be careful and attentive .. This very good program has many features that we will certainly consider in a separate article.
Download, unzip to a USB flash drive.
Laid out for informational purposes only, for those who like the program, on the developers website you can purchase, the cost is from 599 rubles.
Developers site - http://www.paragon.ru
To start, I’ll tell a story about two screws. I have two screws, each divided into two logical drives. On one screw - valuable data with a working Windows 7, and on the other screw there is no valuable data at all and there is a bare Windows XP. In general, I decided to turn this last screw with two sections into one with one section. Since there is nothing to save, you can simply bang the partitions, re-create one large partition, then format the screw and use this volume alone.
I delete these sections - delete, everything seems to be fine, but then I suddenly with horror notice that I actually bang the wrong screw !!! They just have about the same volumes, and they also have one company - Maxtor, in short, they are similar. In general, I mixed up the screws and deleted the sections of the screw with valuable data. In short, a nightmare :(. Well, I have to restore the screw! Since I did not format the screw after deleting the partitions and did not write anything to it, it is quite possible to restore the data. So, how can I recover deleted partitions.
Of course, you need to be careful, but since it happened, we proceed to restore the partitions on the screw. We cling it to a computer on which we will carry out resuscitation:
As expected, the system does not see the screw. Logical drives C: and D: are sections of the resuscitation computer's screw. And our screw is not in the system:
You can look at this economy through the disk management console. We click on the "My Computer" icon with the right mouse button, select "Management" in the menu that appears, and then select "Disk Management".
There, our nailed screw is visible as one large piece of incomprehensible space (it is displayed as "Disk 1" and the system considers it to be "not distributed"):

As they say, do not lose heart and proceed to restore the sections! The Starus Partition Recovery program will help us with this. And in this program, the nailed drive is also visible as "Unallocated area 0 on drive 1" - 149.05 Gb. By the way, it can be seen that on the screw of the resuscitation computer there is also some kind of “Unallocated area 0 on disk 0” of 10.34 Mb in size (it is not clear what it is, but it doesn’t matter in our case). This is the picture:

We click on the arrived disk with the right button and select "Open":

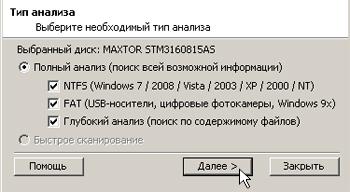
Now we select the analysis and information search mode on the disk. Select "Full analysis" (set by default):
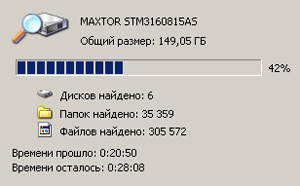
Finally, the process is complete:
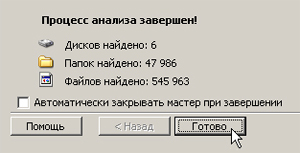
And now from all the sections that the program found, you need to choose the one in which our important data is stored and from which we will extract this data. As you can see, the program found as many as 6 sections instead of 2 that were on a live screw. One partition was small, gigs 20-30 - under the system, and the second took up the rest of the disk space - there were important data.
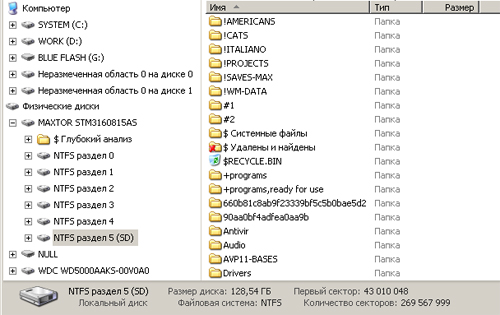
So, NTFS partition 0 - its size is equal to the capacity of the entire disk, this is nonsense, there were two partitions. Section 1 is 100 Mb. This is clearly the size of the Windows 7 service area. This is good, but completely unnecessary. Section 2 - the full size of the screw, another complete nonsense. Section 3 - but this is already something! Apparently - this is the system partition (drive C :) of the former live seven (20.41 Gb). However, I need information from the data section (drive D :). We are looking further. Section 4 - full screw size, already familiar nonsense.
Finally, NTFS partition 5 is just what you need! Judging by the size (128.54 Gb) - this is the data section:

Double click on section 5 and - please! Everything is in place:
To restore partitions in a DOS environment, read the instructions for the professional TestDisk utility:. However, for simple cases, the DMDE program, which works directly on Windows, can help.
How to recover a deleted disk partition under Windows.
We will show how to restore a partition in Windows 8.1.
Disk removal
For an example we take a disk D on the test machine. We go to the disk, we see that there are files of different types:
Now take and delete drive D. To do this, right-click on the system shortcut This computer and choose Control:
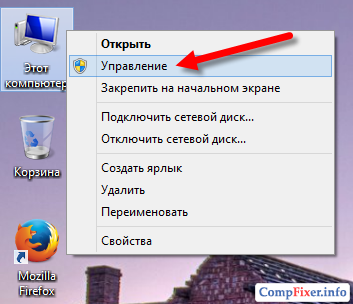
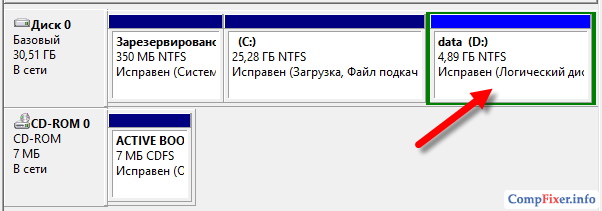
Going to the section Drive management we see how the hard drive is partitioned: boot partition, system disk C: and drive D: with volume label data. We right-click on the D: drive and select in the context menu Delete volume :
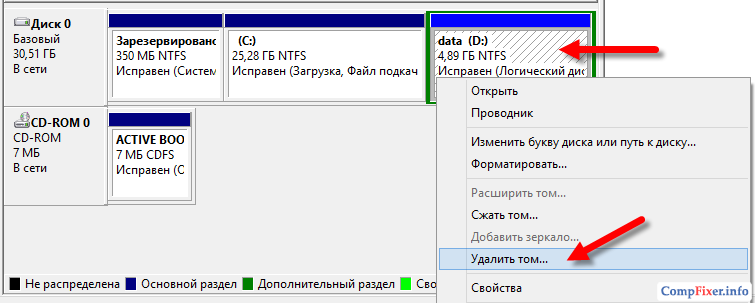
Push Yes:

And we see that the volume is deleted. The section is deleted and in its place we see an unallocated area:

Thus, we artificially simulated deleting a partition. In everyday life, the disappearance of a partition can be the result of malicious programs or erroneous user actions.
Now we will show how to restore drive D :.
Disk Recovery Using DMDE
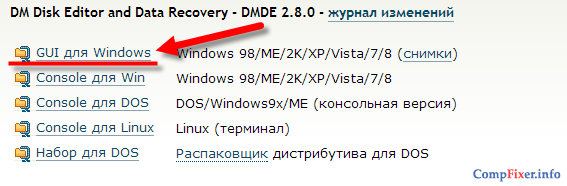
Download the DMDE program from the official website::
Open the downloaded file:
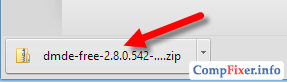
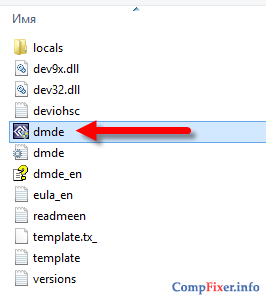
The program does not require installation. Therefore, we simply unzip the archive into a folder:

and run the dmde.exe file:
In the program window DMDE on the left side select Device Phys , on the right side, select the physical hard drive on which the missing partition was located, and click OK:

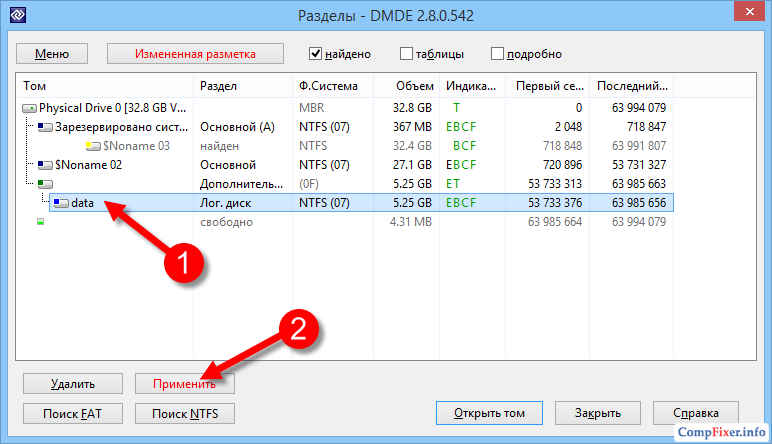
After that, the program will search for partitions on the disk and display them in a list. We find in the list the section that needs to be restored, select it with the left mouse button, and click Embed:

(In our case, we see a deleted section with the name datawhose volume coincides with the volume remote partition. By these signs, we understand that we need to restore it)
In the next window you need to select the type of partition. As a rule, the DMDE program itself determines the correct type of section and sets the selector on the desired option. You just have to click OK:
Now you need to press the button To apply To write changes to disk:
Confirm the record of changes with the button Yes:
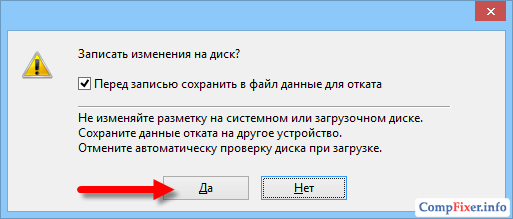
We save the file containing data for rollback of changes:

Partition recovery completed!
Checking DMDE Result
Push button Refresh in disk manager:
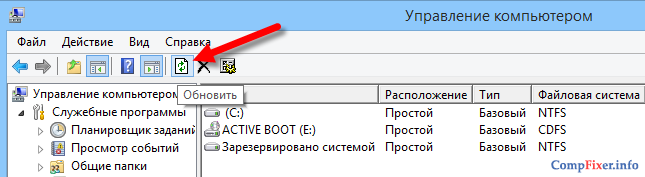
We see that the disk D we deleted in the experiment: with a volume label data reappeared in the system:
We go in This computer and we see that the D: drive is displayed here.


