To begin, I’ll tell a story about two screws. I have two screws, each divided into two logical drives. On one screw - valuable data with a working Windows 7, and on the other screw there is no valuable data at all and there is a bare Windows XP. In general, I decided to turn this last screw with two sections into one with one section. Since there is nothing to save, you can simply bang the partitions, re-create one large partition, then format the screw and use this volume alone.
I delete these sections - delete, everything seems to be fine, but then I suddenly with horror notice that I actually bang the wrong screw !!! They just have about the same volumes, and they also have one company - Maxtor, in short, they are similar. In general, I mixed up the screws and deleted the screw sections with valuable data. In short, a nightmare :(. Well, I have to restore the screw! Since I did not format the screw after deleting the partitions and did not write anything to it, it is quite possible to recover the data. So, how can I recover deleted partitions.
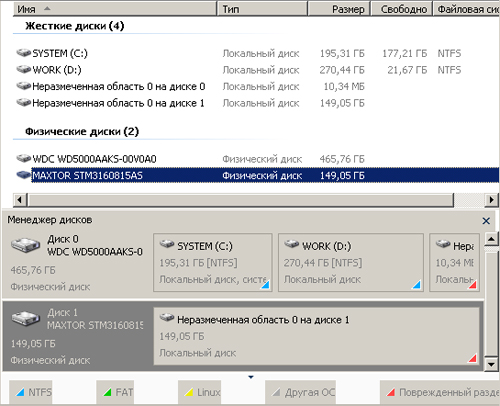
Of course, you need to be careful, but since it so happened, we proceed to restore the partitions on the screw. We cling it to a computer on which we will carry out resuscitation:
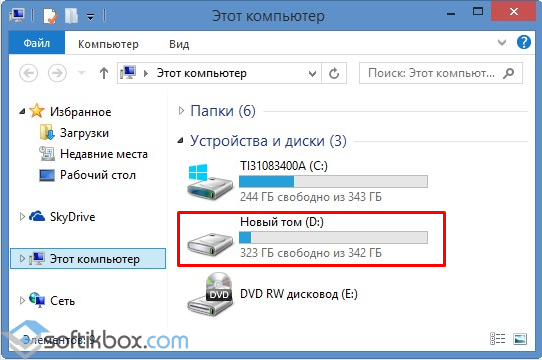
As expected, the system does not see the screw. Logical drives C: and D: are partitions of the resuscitation computer's screw. And our screw is not in the system:
You can look at this economy through the disk management console. We click on the "My Computer" icon with the right mouse button, select "Management" in the menu that appears, and then select "Disk Management".
There, our nailed screw is visible as one large piece of incomprehensible space (it is displayed as "Disk 1" and the system considers it to be "not distributed"):
![]()
As they say, do not lose heart and proceed to restore the sections! The Starus Partition Recovery program will help us with this. And in this program the nailed drive is also visible as "Unallocated area 0 on drive 1" - 149.05 Gb. By the way, it can be seen that on the screw of the resuscitation computer there is also some kind of “Unallocated area 0 on disk 0” of 10.34 Mb in size (it is not clear what it is, but it doesn’t matter in our case). This is the picture:
We click on the arrived disk with the right button and select "Open":

Now we select the analysis and information search mode on the disk. Select "Full analysis" (set by default):

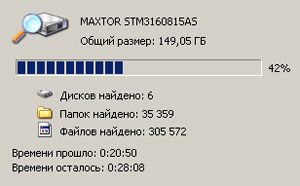
Finally, the process is complete:

And now from all the sections that the program found, you need to choose the one in which our important data is stored and from which we will extract this data. As you can see, the program found as many as 6 sections instead of 2 that were on a live screw. One partition was small, gigs 20-30 - under the system, and the second took up the rest of the disk space - there were important data.
So, NTFS partition 0 - its size is equal to the capacity of the entire disk, this is nonsense, there were two partitions. Section 1 is 100 Mb. This is clearly the size of the Windows 7 service area. This is good, but completely unnecessary. Section 2 - the full size of the screw, another complete nonsense. Section 3 - but this is already something! Apparently - this is the system partition (drive C :) of the former live seven (20.41 Gb). However, I need information from the data section (drive D :). We are looking further. Section 4 - full screw size, already familiar nonsense.
Finally, NTFS partition 5 is just what you need! Judging by the size (128.54 Gb) - this is the data section:
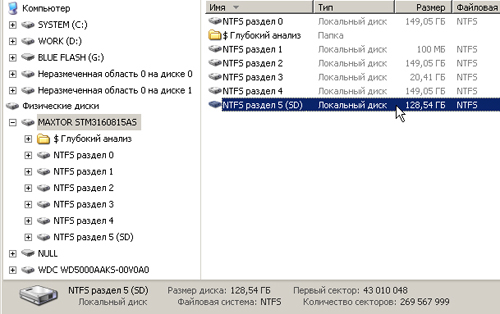
Double click on section 5 and - please! Everything is in place:

If you accidentally deleted a disk on your PC or several partitions, do not worry, you can recover lost data. There are many programs for this. This is a paid Acronis Disk Director, free, AOMEI, Partition Assistant Standard Edition and. Consider how to recover remote disk using the latest program.
Recovering a remote disk using DMDE
In order to recover a deleted disk partition or an entire disk, you need to download the DMDE program by going to. Next, open the archive and run the .exe file.
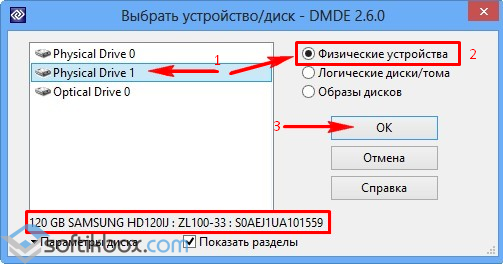
In the window that opens, select the physical disk, indicate that it is a device, and click "OK."

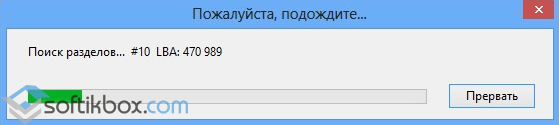
The search for deleted partitions and disks starts.

After the search, a table of results will appear. We look at the remote drive. It will be indicated by the green letters “BCF”. Pay attention to the volume. It must match the one that was before the removal. Choose desired drive and click "Paste."

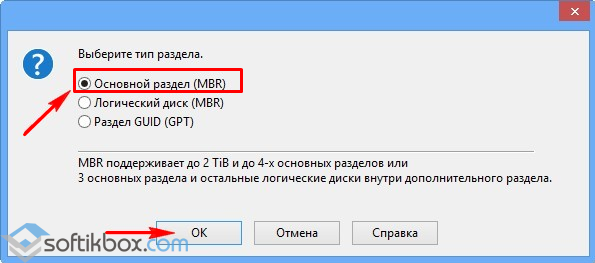
In the next window, select the type of section. If installed on your PC operating system Windows XP or 7 and you have removed the “D” drive, then select “ Logical drive (MBR). " "Main disk (MBR)" is selected only when the loss of drive "C" on which the operating system is installed. In the case when you use Windows 8 and above, and your PC supports the latest GPT standard, we recommend choosing the third option.

Also, to facilitate the selection, you should look at the standard of the remote disk in the previous window.

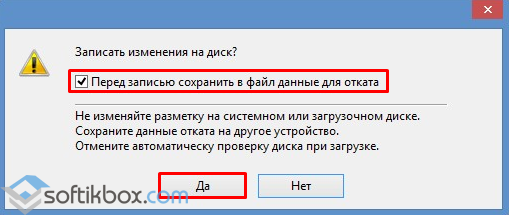
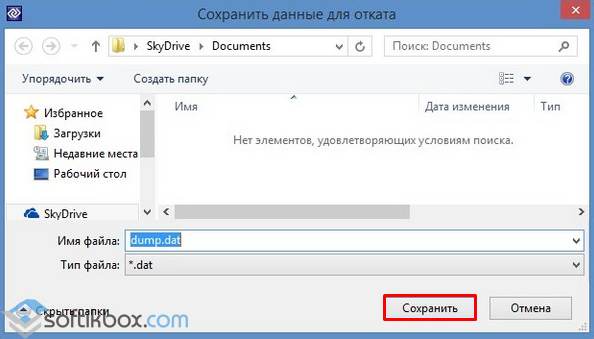
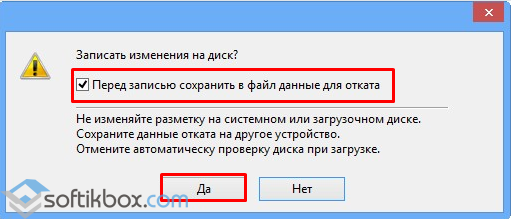
Before restoring the disk, put the mark "... save the file data for rollback" and click "Yes."
Choose a place to save the file.
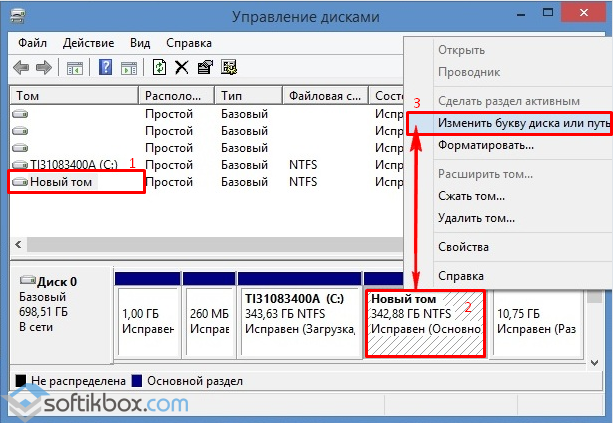
The disk is restored. Now go to "Disk Management", select the tab "Action" and "Update".

The remote drive “D” will appear, but without a letter. Right-click on it and select "Change drive letter or path."
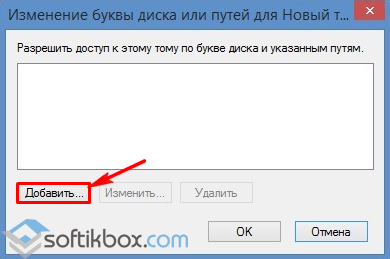
A new window will appear. Click "Add."
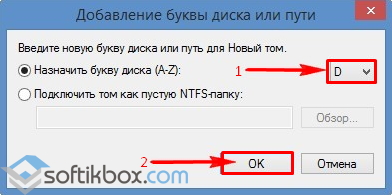
Select the letter “D” and click “OK”.
Close Disk Management. Go to the "Computer" and see that the disk "D" is restored.
Recovering a deleted partition using the DMDE program
Recover deleted hard drive partitions using dMDE programs going a lot harder. First of all, you need to disconnect the hard drive from one PC and connect it to another, on which there is already an installed program.
In Disk Management, two will be displayed. base disk with installed operating systems.

For example, we will delete all partitions from the connected drive and restore them back.
We start the DMDE program. Select a physical disk. At the bottom, its name will be displayed, so select the one that is connected to the PC and on which the partitions are lost. Click OK.
The search for deleted partitions starts.
We select only the desired section. This will initially be “Reserved by the system”. We look at the volume so as not to restore an earlier and unnecessary section.

We select “Main partition (MBR)”, since we need to restore the partition with Windows 7. Click “OK”. If we are restoring a disk with Windows 8, select the third option.
In the next window, select "Reserved by the system" and click "Apply."

We save the data for rollback and click "Yes."
The first section is restored.
In the same way, we repeat all the actions with sections that are referred to as “BCF”.

After their recovery, go to "Disk Management". Click "Action" and "Update."

After we change the drive letter, rearrange it back to the PC and start the system. Data recovered.
Hello everybody! I propose a short story in which I had to solve one small problem using the command line, I think it will be useful in your knowledge box.
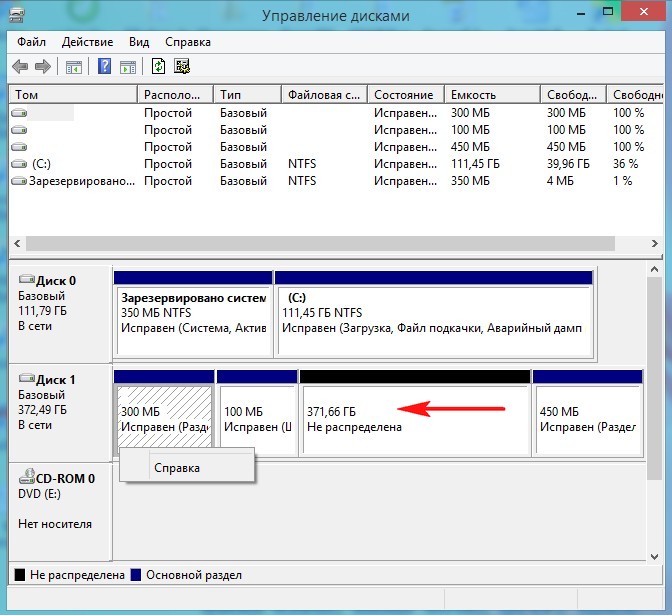
My friend bought a computer with a solid-state drive (120 GB) instead of a hard drive, there was simply not enough money for a simple hard drive (we all know that the prices of components have now risen). Our mutual friend decided to help him out and suggested that for the time being, the file is not quite old hard sATA drive II with a capacity of 400 GB. Together they connected the hard drive to the computer, went into Disk Management and saw that there were four partitions on the disk and only one was normally deleted from all four. The fact is that factory Windows 8.1 with all the service partitions was previously installed on this hard drive. If you click on the first, second and last section with the right mouse button, then of all the options, only "Help" will be offered

Without thinking twice, they decided that if you format the disk (D :) in the "Computer" window, then all partitions will be deleted. Entering the "Computer" window, they right-clicked on the disk (D :) and simply formatted it.

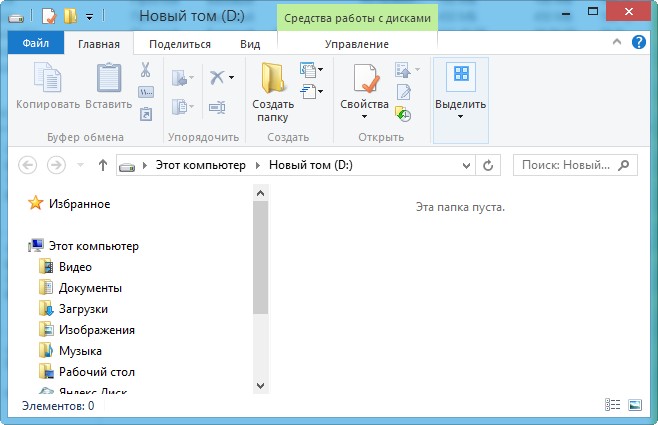
Entering Disk Management again, they saw that all partitions were safe and sound, then they simply deleted the disk (D :). Once again, seeing that nothing happened with the other sections, their patience ended and they called me.
Friends, many managers of hard disk partitions immediately came to mind: and, of course, you can also use them, but there is a simpler way, the command line!
We launch command line on behalf of the administrator.

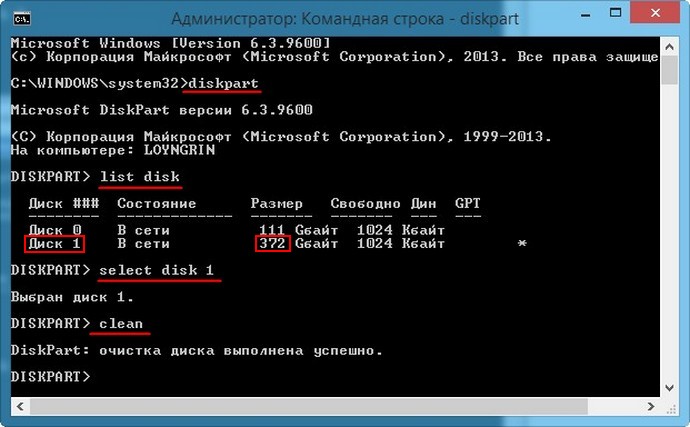
For management disk space enter the diskpart command.
We display the list of all disks with the list disk command, press Enter.
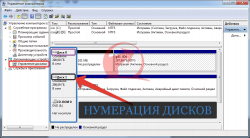
A list of all disks connected to the computer appears. Be careful, you can’t be wrong here. In terms of volume, you can guess that Disc 0 (111 GB) is an SSD solid state drive, and Disk 1 (372 GB), this is our second hard drive on which to delete all partitions.
Select to delete all partitions Disk 1 (372 GB), enter the command select disk 1. (Caution! In your case, the number in the team may be different).
We enter the clean command and press Enter, all partitions on the second hard drive are completely deleted.
Everything is ready, close the command line.
We go into disk management and see that all partitions on the hard drive are deleted.
Before creating a single partition, the disk must be initialized. Click on Disk 1 with the right mouse button and select Initialize disk.
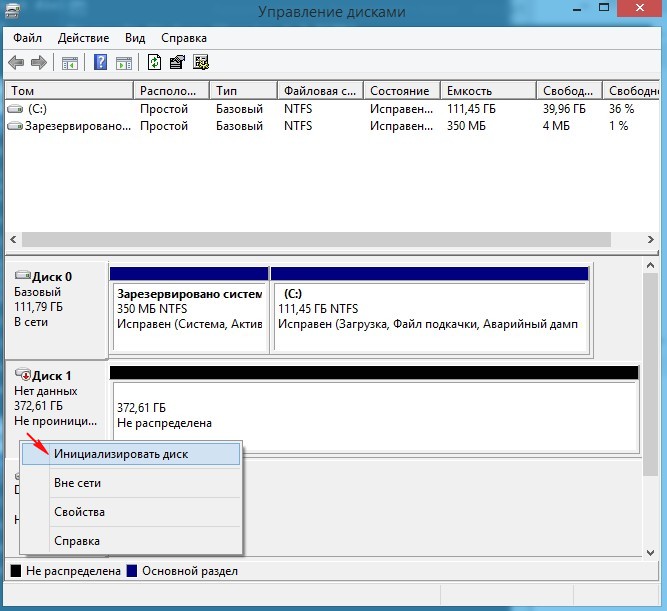
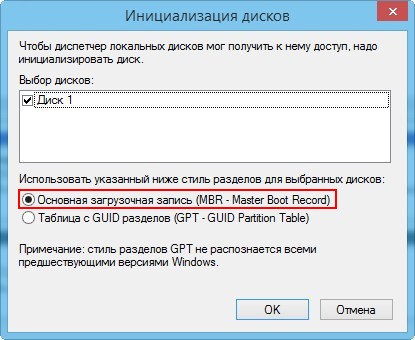
If you do not know what it is, then select Main boot record MBR and click OK ..
Now create a simple volume. Right click on unallocated space and select Create volume.
Partition recovery hard drive perhaps in 80% of cases. It is impossible to recover the HDD partition internally, so you will have to use third-party utilities.
Using TestDisk
TestDisk is a freeware program whose task is to recover lost partitions from a system after system or human errors.
This utility is perfect for inexperienced users who have lost the local volume on the HDD. Firstly, its interface is friendly for such programs, and secondly, the entire recovery procedure is fully automatic.
Instructions for hard recovery TestDisk utility disk:
After quitting the program (Quit) and rebooting the computer, the user will again be able to use the local HDD volume. All information will be restored completely unchanged.
Visual example in the video:
BIOS setup
A quick guide to configuring the BIOS to start from an external device:
- We go to the “First Boot” parameter, which can be in the “Boot” or “Boot Device Configuration” sections (depending on the version of the motherboard);
- In the parameter, set the value external mediaon which the program is located;
- We save and restart the computer by pressing the F10 key.
Recovery with Magic Partition Recovery
Another popular program that you can use to restore hard sections disk after their accidental removal, however, unlike the above utility, paid. In fairness, it is worth noting several important advantages:
- Ability to recover hard drive clusters damaged by malware;
- There is no need to configure the BIOS, since the work in the application is carried out from the Windows system interface;
- Speed \u200b\u200bof work. There are few utilities on the Internet for recovering partitions that could match the speed of Magic Partition Recovery.
Instructions for working with the application:
A few nuances when working with the utility:
- If several important files are missing, you can use the quick scan function, which will return recently deleted documents;
- If you need to restore a file whose name is known, then you can use the search integrated in the program.
Recovering a deleted volume is easy, but there is one thing to keep in mind: deleting partitions erases their physical coordinates, and the information remains unharmed.
As necessary, the system replaces this data with new ones. Therefore, a partition can be completely restored only if no new arrays were recorded on the HDD.
Details Category: OS Settings Created: 02/02/2016 16:33 Views: 4423Now I will tell you how to delete hard disk partitions through the "disk management console" or using the DiskPart utility.
Attention!!!
Only applicable to windows vista / 7/8 / 8.1 / 10
First of all, you need to log in to windows under an account with administrator rights.
You must also carefully indicate the disk number, since it will be difficult to recover data.
When a partition is deleted, all of those stored on it will disappear. Take care of the situation before proceeding. backups your documents.
Deleting a section on which any system files or herself windows version which you are logged in to, it is also impossible to delete a partition that is bootable or system, and if the swap file is located on the partition.
If there is only one partition on the hard disk, you can only delete it during the installation of Windows
Method 1. Uninstall through Windows Disk Management
right-click on my computer and select control.
2. Right-click the partition you want to delete and select the delete volume item.
and click on the Yes button to confirm your decision.

3. The section you have selected will be deleted and an unmarked area marked in black will appear instead.
In the unallocated area that has arisen, you can create a new partition or enlarge another partition available on this physical hard disk.
Method 2. Deleting a hard disk volume using DiskPart (command line)
1. Run the command line as administrator.
2. run the utility Diskpart using the diskpart command after each command, do not forget to press ENTER.
This command launches the utility Diskpart whose main function is to manage hard drives.
the command is designed to display all the drives that you have
select the disk on which you want to delete the partition. choose disk numbering carefully
Drive serial numbers look here. we enter also through management.
after executing this command, information on the disk partitions of which you have selected in step 4 will appear on the command line screen.
carefully select the section that you want to delete and remember the number that is shown next to the section.
With this command, you select a volume for subsequent operations with it.
7. Enter the command delete volume to delete the section selected in step 6 of this manual.
Warning! when this command is executed, the section and all information on it will be deleted. make sure you select the section you want to delete.
Another one command to delete is coarser: delete volume override.
8. Enter exitto exit the program Diskpart . and you can close the command prompt window
Method 3. Deletion through diskpart of all partitions of the hard disk.
Suitable for those cases where we say bought B. The HDD is connected to a PC and we see that it has old system + A few more sections, you need to clear it and make it one section to store any information.
to do this, run the command line again with administrator rights.
just like in the second method we drive a team Diskpart
after we introduce select disk X
we selected a disk which needs to be cleaned now we enter a command
this command deletes all partitions from the HDD completely
and create a partition in volume equal to the entire HDD for this we run the command
in order to format the disk
enter the command
assign to assign a letter to that.
and howl ready we have a new hDD without any information and sections.


