If you encounter serious problems that prevent Windows from loading normally, the built-in wizard usually suggests a recovery. However, if an error occurs during the recovery itself, the process may go in cycles and the system will start the recovery with each new boot. Of course, reinstalling windows solves the problem, but you lose everything installed programs. Well, if you took care of creating a full backup of the system in advance, and if there is no such copy?
Disabling Windows recovery through the registry
When he turned on the computer, he proceeded to the “Preparing for automatic repair” screen, and then automatically rebooted and restarted auto repair, again and again falling into the loop. There could be many reasons for a failed auto repair. However, the most common problem is a damaged registry or missing files on the hard drive.
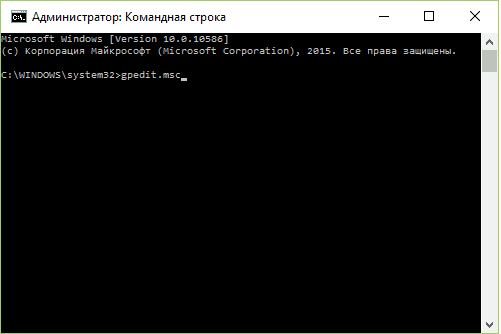
Disabling recovery through Group Policy Editor
All of the solutions below require you to execute certain commands on the command line. The following is a way to access the command line at boot. Solution 1. Launch control diskto find out if your hDD a problem. 
It may take several hours depending on the size of your hard drive. After the scan is completed, exit the command line and restart the computer to see if the problem has been resolved.
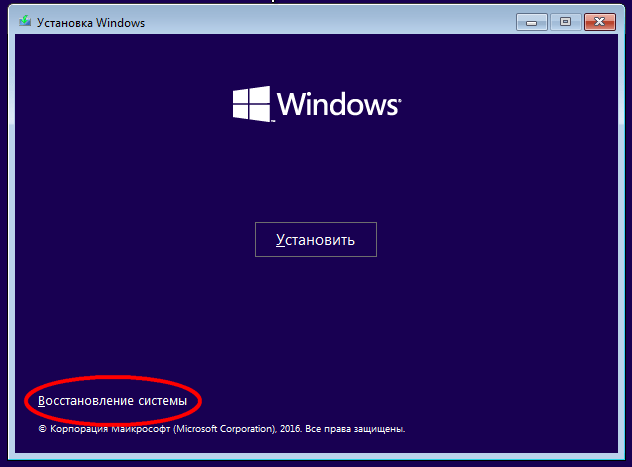
However, this is not a sentence. You can try to “knock out” a system from the recovery cycle using this instruction. All you need is installation disk with windows and a little attention. By setting the BIOS to boot from external media, insert a disk and boot from it. The Windows setup menu will appear.
Disabling OS recovery through the shell
Type the following set of commands at the command prompt one by one. Solution 3. Disable automatic start. Solution 4: Corrupted registry settings can also cause a loop. auto recovery. Recovery points are made to allow users to select previous system states. Each recovery point contains important data necessary to return the system back to the selected form. Recovery points are completed before major changes are made to the system.

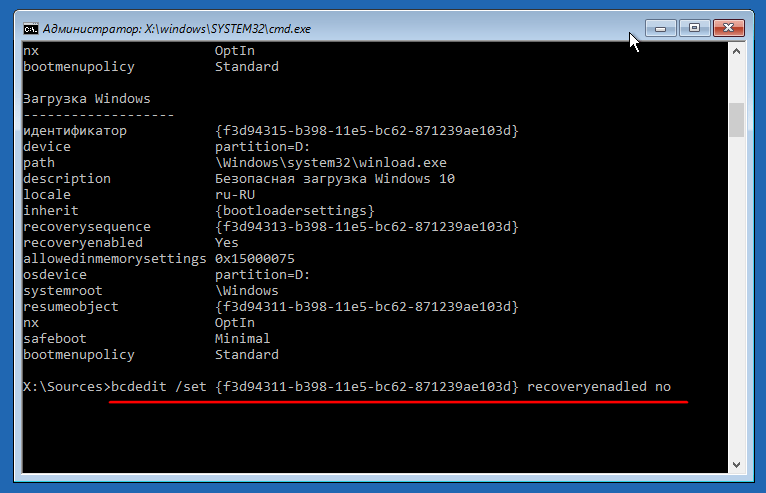
Run the bcdedit command in the console that opens.
As a result, you will get a list of boot options. In the first block " Windows boot»Find the resumeobject line and copy the identifier opposite it.

Disabling automatic recovery
Although you can make and give it a name for the recovery connection in any case for the disk on which the system protection is enabled, for manual control, the information below displays the triggers that lead to system recovery in order to automatically create a recovery point.
Event Recovery Points
System Restore itself makes a restore point to the following events. For example, if you accidentally select the wrong restore point, you can cancel the system restore procedure by selecting the restore point before the system restore occurs. Now the user can select the correct restore point.
Now run the bcdedit / set (GUID) recoveryenabled no command, substituting your identifier (GUID).
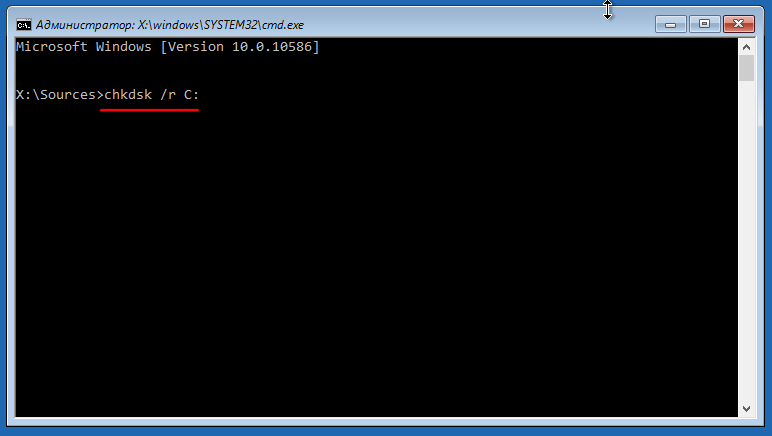
Thus, automatic recovery will be disabled and the cycle will be interrupted. Deactivating the recovery procedure, however, does not eliminate the errors that caused it. Therefore, it is highly advisable to check file systemby running on the command line chkdsk / r c:.
Disabling automatic recovery points can be greatly facilitated if you are limited by how much maximum disk capacity you can assign for recovery points. However, you can make a restore point in any instance that you like. You must have Administrative privileges to complete this task.
Method 1 - Disable System Restore
Enables automatic creation of a system restore point. Disabling the automatic creation of a system restore point. Upon completion of the above procedures, you can close the task scheduler if you want. The first thing you can try to do is disable system recovery. Well, backups stored in the "Information about that system" folder. If this folder is damaged, you will have to delete it. You can do this by disabling system recovery and then turning it back on.
And if this does not give positive results, you can run the command sfc / scannowto recover damaged system files.

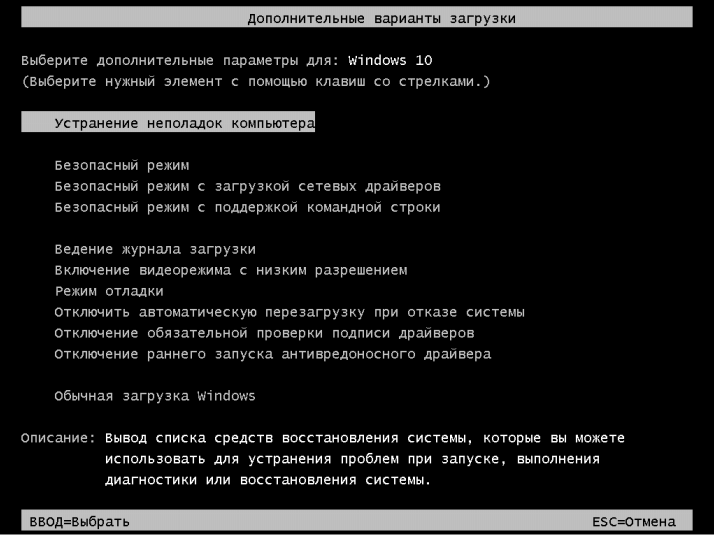
You can also enable the boot manager, called, as in Windows 7, by pressing F8 immediately after turning on the computer. To do this, in the running console, you must run the bcdedit / set (default) bootmenupolicy legacy command.
You should also see that it says “On” for the current drive. You will receive a message asking if you want to do this. Please note: this will delete all previous restore points, since this folder reserve copy deleted.
Method 2 - Verify Disk Space Usage
Restart your computer and put it back in and turn on the system again. Now try manually creating a recovery point and see if it disappears when the machine reboots. Make sure this value is not small. System recovery requires a certain amount of space, and old recovery points will be automatically deleted if there is not enough disk space.

If all this does not help to start Windows, most likely you will have to go to the radical options - reinstalling or resetting the system to its original state.
Another thing to check is the actual disk space left on your hard drive. This would also be what would prevent the creation of system restore points. Basically, antivirus programs will not cause this problem, but sometimes you may encounter some settings or a program that interfere with the creation of certain files. It is worth disabling protection for a while, creating recovery points and seeing if they adhere.
In addition, another third-party application may cause this problem, so you will have to try and remember which programs you installed on your computer before the problem occurred. This is especially true for those disk cleanup programs or settings that say that they can make your computer 100% faster by running their own software. Many times, these programs do dangerous things for your system, disabling all kinds of things that you otherwise would like to continue.
Have a great day!
System Restore is a function that is designed to solve problems that have occurred in the OS due to a malfunction or incorrect actions of the user. But in addition to its positive purpose, the tool has a number of significant drawbacks that make owners of Windows PCs turn off system recovery. There are three ways to do this:
Another thing you can try is to create a recovery point in safe mode. If you cannot understand which program or service is causing the problem and does not allow you to restore the system, you can still create it by going into safe mode and then creating it. This may not work for some, but it seems to be an option for others.
When you reboot, recovery points may be deleted. Try to remove dual boot or install each operating system on your disk. Many viruses erase your recovery points, so you can never restore your computer in the previous time. It is a good idea to run a full virus scan at the moment if nothing works.
- Across user interface;
- Using Group Policy Editor;
- Using the registry.
Reasons for disconnecting
There are two main reasons why you might need to disable the rollback function:
- Viral threat.Some malware registers in the recovery environment. That is, after removing the virus without user confirmation, the OS rollback procedure is initiated at the moment when Windows was infected;
- Profitability. The more information stored on the hard drive, the more massive the recovery point. In some cases, its volume can reach several gigabytes, but if there are several points?
If you decide to disable system recovery, it is important to remember one thing: in the event of the loss of important system files due to a virus or other failures that could seriously harm Windows, instead of rolling back, you will have to completely reinstall the OS with possible data loss.
Although this feature may be useful for the average user, in some situations this automatic repair can be very annoying. Sometimes it is also known that it is stuck in the repair loop. To provide you with all the content in German, many articles are not translated by people, but by translation programs that are constantly optimized. However, machine-readable texts are usually not ideal, especially with regard to grammar and the use of foreign words, as well as special covers.
Microsoft makes no warranties, implied or otherwise, regarding the correctness, correctness or completeness of the translation (s), and is not responsible for any problems that may arise directly or indirectly from translation errors or the use of translated content by customers. This issue may occur if one of the following situations is true.
Disabling OS recovery through the shell
The easiest way to disable system recovery. Ideal for inexperienced users, as the steps are quite simple.
Algorithm:
It is worth mentioning about the use of disk space. If there is little memory on the computer, then decreasing this indicator (the default is 5 GB, but if necessary, the volume automatically expands) - a great alternative to disabling system recovery. So, a gigabyte will be enough to store one or two control points to reserve.
A new device or driver causes conflicts with other drivers that are installed on the computer.
- Hardware related issue.
- The installed driver is damaged.
To start the recovery console, follow these steps: To do this, follow these steps. If the computer does not start in safe mode, click "Startup Help" in the "System Restore Options" dialog box to fix some problems that may cause the operating system to malfunction. If the launcher does not diagnose or fix the problem, go to step. For more information about how to use the help system to start, click the following article number to view the article in the Microsoft Knowledge Base: In the System Restore Options dialog box, click Restore Restore to Restore System if a program or driver is installed. To do this, follow these steps: In the System Restore Options dialog box, click Input Request. Enter the following commands. Use this data to determine the most recently installed driver. After you determine which driver was last installed, determine if a driver is required to start the computer. If the driver comes with a disk controller or chipset or the driver is provided operating system, find the driver name and symptom of the problem on the following Microsoft website: Determines whether the driver can be disabled before continuing. You must repeat these steps until all drivers installed since the last successful start were disabled. Startup troubleshooting section. . The same applies if the screen remains completely black during loading and only the mouse pointer is displayed.
Disabling Windows recovery through the registry
For inexperienced users, it’s better not to go into the registry, since there are a huge number of parameters important for the OS, changing which you can completely disable Windows.
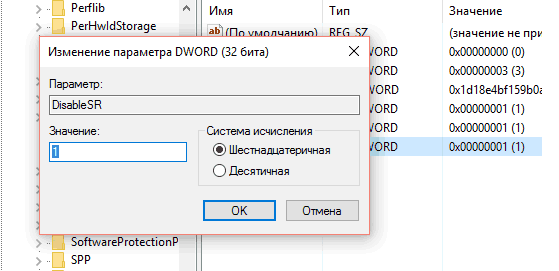
Despite the complexity, the method is worth using. Using the registry, you can disable system rollback in any situation, even if the virus blocked the ability to enter the recovery tool through the user interface. The main thing is not to change any third-party parameters so as not to complicate the situation.
First of all, you should check if you installed the previously installed hardware driver and, if possible, uninstall it. Click Run as Administrator. Confirm the following safety warning. At the command prompt, enter the following command and click the button.
In the System Settings Utility, go to the Services tab. The list is sorted immediately, only displaying third-party services. Changes take effect after a system reboot. Check if the problem has disappeared. Suspected viral infection procedure.
Disabling recovery through Group Policy Editor
This method will help if it is not possible to turn off the rollback function in the usual way through the control panel. Algorithm:
After these steps, the Windows 7 rollback tool will stop functioning.
The following procedure shows how to restore the original version. system file for the correct operation of the system. However, you must subsequently perform a virus scan to completely remove the pest from the system. Click "Restore Computer." In the next dialog box, select the appropriate language in English and click the "Next" button.
In the next dialog box, click " Command line»To open the input window. An input window will open. Pay attention to the exact spelling. Then press the button. Ask the system to check your antivirus. Usually, repairs are performed using the current system image that you created shortly before.
Disabling automatic recovery
Automatic rollback of the OS appears, as a rule, after a power failure and a sudden shutdown of the computer. From an objective point of view, the opportunity is of little use and quite annoying, so many users would like to get rid of it. For this:
- We launch the console as administrator;
- We enter the command that disables the automatic rollback of Windows:
bcdedit / set bootstatuspolicy ignoreallfailures
Pressing enter will disable the function.
Video for greater clarity, which details how to disable the rollback tool through the easiest way - the user interface:


