Install and configure operating system An order of magnitude harder and longer in time than to create an image and transfer to another computer. If you have the need to transfer OS along with all programs (the reason may be, for example, the purchase of a new device), you should not panic - this is done quite simple. Carefully read the recommendations below and select a successful way to "move" Windows. All the files you need and utilities will be in place, you will no longer lose weight of time and nerves to reinstall OS. With installation SSD Disc There will be no difficulty.
The image of the system. Transferring Windows 7 without installing utilities
Perhaps the easiest and fast option. The system has a backup tool - go to the Start menu, select "All Programs", then "Maintenance" and "Archiving and Recovery". Next, you need to create an OS recovery disk and create an image. We carry out the following actions:
- To create an image, you need to specify the path where the archive of all data will be created: Select the disc, optical or outdoor HDD. By the way, you can create an image and store online, but about it later. Choose a disk with a sufficient place to implement this process, better if it is still logical or external disk. Archive.
- After the process is completed, you load another device, insert our media with a copy and load the system.
- Click on "OS Restore", specify the carrier with a way.

- The action is executed, reboot the device.
Note! So that the system is loaded, you must put in bIOS settings Download from hard disk.
In principle, the method is quite simple and does not require installing any utilities. However, the archive is created not so quickly and there is no possibility of its compression. There are more efficient programs.
Create a clone OS. Paragon Drive Copy.
The following Windows transfer method is via a backup application or virtualization. You can run the operating system without installing.
To complete the cloning of the old PC disk, you need to download and put the application. This program will easily help carry out the migration of Operations from one device to another. The utility is quite functional, has many options for creating an image and storage.
So, in order to transfer OS using this utility, you must perform a number of actions:
- Click "Archiving a disk or section".
- We mark the cloning disk.
- Mark the checkbox to "change archiving parameters".
- Next, select the option "without compression".
- The settings should be noted the possibility of direct access to the sectors of the section.

Archive data. Create a new section
Now that we have created an image that transfer it to a new device. It often happens that there is an outdated operating system on the computer (for example, Windows XP), but the user wants to put a modern OS there. In this case, you need to make a new section in the already existing system and select it in the system boards.
What do you need to do for this?
- We put the application to a new device.
- In the additional features of archiving, the program will submit disk sections. If the area required by volume is available (the size of the partition being created should not be less than the archive with Windows XP), create a new section.
- After the end of the process of creating a section, click on it with a mouse in the "Backup & Recovery" utility, restore logical disk. Following the applications of the application, complete the settings and copy a copy to the new Operation.
The image of windows in a virtual environment. Annex Live Skydrive.
If you have a good connection speed to the network, you can store backup Operations in virtual storage. The advantage of this method is that you not only migrate the system from one device to another, but also easily restore any data in case of failure. In addition, if you own a laptop, such a method will allow you to restore all files when the device is loss. If the laptop is stolen, you will not lose important documents and programs, and you can restore everything to another device. However, do not forget about security by placing an image into a virtual storage.

The first thing to pay attention to is the presence of free space. If you want to place a not high volume disc, you can use a free resource - Windows Live. Skydrive. The amount of information may be up to 25 GB.
The tool allows you to create 3 types of folders that are stored online:
Folders that are only available to the Creator,
Folders for which the creator can make a list of persons for access,
All available open folders.
This utility Opens such features:
- Ability to store data by up to 25 GB. Access can be carried out from any device, even with mobile phone. A simple interface helps without difficulty download information to the server.
- File storage free. Today, many similar services allow free to store files on the network, but some may require a fee for expanding functions.
- The ability to create a folder of your own structure and store any files. You can create direct links to folders.
How to safely encrypt information?
Some services provide the ability to encrypt data online. But still, it is better to take more than once with caution and fulfill this action on your computer, excluding the opportunity to infect files.
To encrypt information, follow these steps:
- Install TrueCrypt utility.
- Click "Create Tom".
- The selection of encryption power is too highly desirable not to encrypt, otherwise the download speed and boot may change. The optimal option is the average power.
- Move the data to the ready-made container, mount and enter the password. Perform encryption by following the tips of the utility.
We carry the OS Operation on a new device (OS OS)
Most typical optionWhen you need to transfer OS to another device with a similar system. In this case, the migration is quickly carried out by creating a backup backup protocol.
"My Documents" and other standard folders do not differ in windows versionsThis simplifies the task - you only need to designate the desired copy in the program and perform the installation, following the prompts.
Note! Use Default Access Permissions Function must be activated, otherwise the new OS will not receive rights to access files.
We carry the OS Operation on a new device (Windows OS)
The free Windows Easy Transfer program allows you to transfer the system and all the settings for Windows another version. Do not forget about the features of certain systems. For example, profile information is saved in different folders.
The program has a fairly simple interface and functionality. There are several restrictions: the utility will not allow migration if the localization of the system on devices is different, difficulties may occur with the transfer of the OS, if one of them is 64-bit, and the other is 32x.
In the seven, this utility is already there, so you can easily and simply transfer with the help of the Master Tips.
Carry OS on SSD disk
How to transfer windows with IDE or SATA on SSD?
Information on hard diskx is usually saved on tracks that have sector separation. SSD is distinguished by the lack of such a breakdown. When you install a seven to the drive, it independently defines the memory storage characteristics. However, when importing copies of the old device, the disk is twice the speed of operation, the reason for this is the preservation of the copy, according to the sectors of the breakdown.
OS route utility on SSD
There are quite a lot of programs, consider one of the most popular and functional. This is Drive Copy 11 Professional Production of the Paragon brand. This utility makes it possible to transfer the image to the disk. What is the advantage of this program?
Solid-door discs perfectly perform their functions, they work almost silently, however, the price for larger volumes is quite significant, and the entire discs are often not placed all the necessary information. So the main functioning of the utility is the exclusion of all extra. Thus, you can not spend a lot of money on the larger disk, and simply eliminate the program that absolutely no need.
Problems arising when using 3TB disk
Buying a disk with a capacity of more than 2.2 TB, many often face a problem: the operating system does not want to use the entire volume of the disk - it simply does not see it. The reason is simple - the standard MBR markup option does not allow such actions. However, there is a way out of the situation and it is just - to take advantage of the already known to us dRIVE utility Copy 11 Professional, it will provide the ability to read the entire free amount of hard disk.
Thus, transfer the operating system is quite simple. It is only worth installing the desired utility and use the prompts of this article.
The acquisition of a new SSD or HDD does not have to have a consequence installing Windows from scratch. On the new hard The disc, if the old is still connected to a computer, Windows with all its settings and the installed software can be transferred using special software. This process is called the migration of the operating system. It provides for the cloning of the system partition (disk C and boot sector) On another hard disk. Such operations can conduct Acronis. True Image., Different software assemblies from Paragon, including specially intended for these purposes, the Paragon Migrate OS to SSD utility, as well as products from Aomei developer. But then, the products from Acronis and Paragon can only be used on a fee, by Aomei is available completely free of charge.
The ability to transfer Windows to another hard disk contains in two Aomei products - in the program for reserve copy Aomei Backupper Professional and in Disk Manager Aomei Partition. Assistant. Use free Windows Migration feature in Aomei Backupper Professional is only a month, until the term of the full-featured trial version is over. But with the free editors of Standard, the Aomei Partition Assistant disc manager to transfer Windows from one hard disk to another can be constantly. But not only this moment makes Aomei Partition Assistant a favorable solution for transferring Windows to another hard drive. This program is essentially a single tool and for the migration of the operating system, and for the distribution of space on a new hard disk for the specific needs of the user. Today we consider how using Aomei Partition Assistant transferring Windows to another empty hard disk.
1. Specificity of operation: necessarily read
The Windows migration method described below does not save partition structure and target hard disk data (the ongoing operating system will be transferred). Because this method is suitable only for cases when nothing needs to be saved on the target SSD or HDD. For example, in the case of purchasing a new device with unallocated space. Or when the Used device is connected, the data of which does not represent values. Aomei Partition Assistant can transfer Windows to a separate system section of the target hard disk while saving the structure of the latter and stored on other sections of the data. In this case, the migration method from the above will differ. If there is important data on the target hard disk, the use of the manual below cannot be used.
2. Download and launch the program
Aomei Partition Assistant can be downloaded from the official website of the creators. In the list of editors, you can choose a free Standard. Its features will be enough to transfer Windows to another hard drive and to create partitions on it (if necessary).
After starting the program in the center of the window, we will see the picture of all connected disks and their partitions - in the table form at the top and visual format at the bottom. If the target SSD or HDD is new, its space will be retained, as shown in the screenshot.
In this case, I remember its sequence number - disk 1, disc 2, etc. - And immediately proceed to paragraph 4 of the article.
3. Deleting partitions on the target hard drive with existing markup
Before launching Windows transfer operation target hard drives With the existing marking, it is necessary to get rid of sections by removing them. Operation to remove sections requires special care. If several is connected to the computer hard disks With a similar partition structure, deal with where the target for which Windows should be transferred will help their properties window. To find out which of the hard drives is displayed as a disk 1, like a disk 2, etc., we make the click on it (on the block of the entire disk, as shown in the screenshot), call the context menu and select "Properties".

In the properties window in the first column we will see the brand and model of the hard disk.

We are convinced that the desired hard disk is selected, and in turn, delete its sections. Each of the sections, call the context menu and select "Delete the section".

For each of the sections, confirm the deletion without changing the preset option "Quickly delete the section".

When the target hard disk will be displayed as a unallocated space, click the button at the top of the Apply program window.


Once again, confirm the decision to remove partitions.

Upon completion of the operation, click "OK".

4. Migration (migration) Windows to another hard drive
Well, on the target SSD or HDD disk space not distributed, now we can proceed directly to the transfer process on it, which is located on the source hard disk and in this moment works. In the Aomei Partition Assistant window, click the Master menu and select "Transfer SSD or HDD".


Then click on the target disk with unallocated space. Click "Next".

In the next window, the size of the future system partition is configured on the target disk. Aomei Partition Assistant installs for disk with and bootable windows sectors The same dimensions as on the source hard disk. If the target disk is not a 60-gigabyte SSD, and the carrier with a large space, the system partition slider can delay up to 70-100 GB. it optimal size To date, for Windows 7, 8.1 and 10. The remaining space of the target disk will later be given to non-system sections for storing data. Click "Next".

The work of the wizard is completed - click "End".

Returning to the main window of the program, click the button at the top "apply".


Then we will see another dialog box with a warning that the operation will be carried out in the preloading mode. Save the files open on your computer, close the other active programs and in the Aomei Partition Assistant window, click "Yes".

The computer will restart, and on the screen we will monitor the operation of transferring Windows.

5. Checking the target hard disk
Upon completion of the operation, the system will boot from the original hard disk. You need to restart the computer again to configure the download to the BIOS already from the target hard disk and check the performance of the transferred Windows.
For Windows transfer cases to the only SSD system section, the stokery process.
6. Creating non-system sections on the target hard disk
Aomei Partition Assistant has moved to the target hard disk along with Windows. After downloading the computer from the target disk, we can use the program to create non-system sections. Making click on by retained space After the C partition, call the context menu (or use the "Section" program menu) and select "Creating a section".

In the window that appears, dragging the slider on the visual block, allocate for the part being created by all available space or only part it. Click "OK".

If the disk space is divided into several sections, we do this operation the required number of times. Upon completion of the formation of sections, we use scheduled operations.

Confirm their launch.

Click "OK".

The formation of disk partitions is completed.
Excellent day!
Imagine the situation when we needed to transfer the hard disk with installed windows 7 to another computer. In this case, there is a high probability that the new equipment OS will refuse to load. Another typical example of such a problem is an upgrade of a computer, for example, when the motherboard is replaced.
If you encountered a similar problem, do not hurry to reinstall the system, and try using the OS preparation method to transfer using the utility sysprep.. SYSPER utility is part of Windows Vista. and Windows 7. The SYSPREP program provides the following advantages:
Removal from Windows systemic data. SYSPREP can delete all information related to the operating system from the installed Windows image of the computer (SID) security identifier. Then the Windows installation can be recorded in the image and install all the organization.
Setting up Windows to download in audit mode. Audit mode allows you to install third-party applications and device drivers, as well as check the computer performance.
Setting up Windows Welcome Screen Loading. The SYSPREP program configures the installation of Windows to boot with the greeting screen when the computer starts next. As a rule, the system should be configured to download the greeting screen before delivery of the computer to the Customer.
Reset Windows activation. SYSPREP can reset activation of Windows up to three times
Note: Computer holders with pre-installed OEM version of Windows 7 After transferring the hard disk to another computer, using this tool will have to reactivate the OS by phone, because Information on activation is rigidly tied to a specific "hardware", such as the motherboard.
Stage 1. Preparation of a system disk to transfer to another PC.
Sysper utility can be launched as in graphic interfaceAnd from the command line on behalf of the administrator with various parameters, depending on the task facing you. For example, the team
c: \\ Windows \\ System32 \\ sysper \\ sysper.exe / Oobe / Generalize / Shutdawn
removes from installation Windows Datarelated to the operating system and turns off the computer. Information relating to the operating system includes event logs, unique security identifiers (SIDs) and other data. After deleting unique information about the system, the computer is completed. After completing the computer, you can download windows computer PE or other operating system, and then record the installation of Windows using the program Imagexby creating the source image that will be used on computers with similar equipment. In detail about the syntax of the SYSPER utility, running from the command line, can be found.
A few moments that useful to know the operation of the SYSPREP utility:
the configuration of the computers to which the system is planned, should be approximately the same. For example, if you created an image of a single-processor system, then you will not be able to use it for deployment on a two-processor machine;
the target computers must have the same BIOS types. For example, image source computerhaving an ACPI BIOS is not suitable for a computer with AWP BIOS;
the size of the system disk of the target computer should be the same or more than that of the source computer;
sysprep does not create a disk image, but only prepares the system to clone.
So, to prepare the transfer of hard disk with the installed Windows 7 to another computer you need to perform in command line On behalf of the administrator, the team:
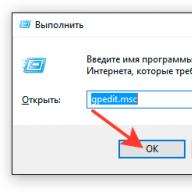
% WINDIR% \\ SYSTEM32 \\ SYSPREP \\ SYSPREP
The utility window will open in the graphical interface (it is this method that we will consider further):

Pay attention to the settings you need to set:
in "System Clearing Action", select the option "Go to the System Greeting Window (OOBE)" and note the option "Preparation for use";
in the "Options" parameters, choose "Completion of work". Selecting the "Restart" option will allow you to immediately remove the image of the already prepared system disk by booting with uSB disk Windows PE. If you boot from the prepared system disk, the entire process of preparing the transfer of the system on the disk will have to begin again.
After pressing the OK button, the system cleaning process starts, after its completion, the computer turns off. Now you can transfer the hard drive to the new system, change motherboard etc.
At the beginning of the download, you will see the inscription "Preparation of the system to use", then "Device Installation" is running ":

The system can reboot and continue the installation is normal.
In the end, you must see the Regional Settings window (the appearance of this window already indicates that the transfer was successful):

Enter the name of the new user. In order not to confuse the settings of existing users enter a name that has not previously been used (for example, a test). This user can then be removed.

Next are performed standard settings date and time automatic update etc. As a result, you will get the test desk test. Now you can make a way out of the system and go under your usual account. Last action - This is updating device drivers.
As mentioned above, the microsoft advises to make this operation only for computers with the same configuration (AMD-AMD, Intel-Intel). Otherwise, various glitches are very likely.
There are cases when you need to transfer the operating system to another hard drive. For example, imagine that the hard disk is installed on your computer, and you lack memory. And now you finally bought a new hard disk with a large amount of memory, and want to install it on your PC. The question arises - how to transfer the operating system to another screw. After performing my instructions, you can make it absolutely no problem. So, if you are ready, then start!
My computer has two hard drives. One of them old on 80 GB (disk a), the second is a new volume of 500 gigabytes (disc b). Here it turns out I need to postpone the operating windows system From a hard disk A on a B. Disk for transfer, we will use a very convenient and multifunctional program called Acronis Disk Director 11 HOME. It will not be difficult to find it on various trackers, as it is very popular.
Well, the program installed, now turn off the PC. Open the side cover, insert a new hard disk (it is also called hard drive or screw). Turn on the computer. You do not have to prepare a new hard disk to copy the OS. So, launch the Acronis program.
IMPORTANT! Before you begin to transfer OS, you need to turn off the sleep mode in the computer.
Running the program, we see that another disk appeared. Now you need transfer the system from one hard disk to another. Press the right mouse button on which the system is installed to invoke the context menu where you choose the item cloning basic disk.


In this window, do not forget to celebrate the pointer one to one. With this mode, the disk will be copied one to one. Click to complete

It remains to be applied by pressing the button with the checkbox.

Akronis will ask in a new window where you click to continue

At this stage, the program will report that it is necessary to restart the computer, since all system copying operations will be carried out in DOS mode. Before clicking OK, read the pictures below, in order to understand what will happen from PC after its restart.

When the computer reboots, do not click anything, because now important operations are being carried out. After the second time reboot, see carefully - this inscription will appear in the lower left corner.

After that, the process of copying the Windows operating system will begin.

Here you click OK.
When all operations are made, we can see that all information from the old Winchester (including Windows itself) is transferred to a new one. However, the new hard disk has a greater memory greater than the old one, so we will remain unblit empty area. We can correct it.
At first we click right-click on the disk and in the menu that appears click to change the size of the volume

Here we change the size of our disk. To do this, stretch the slider at the very end.

Next, exhibit the size of an unoccupied space before the disk itself, since to increase the disk C free place. The disc with I had 50 GB, but I decided to increase the system disk to 100 gigabytes. To do this, I need about 50 GB to leave, in order to add to the C drive after all operations. Now click OK.

The same operations are done with system disk S. By the way, I wrote recently.


After the sizes of the disks were adjusted under the required volumes, click on the button with the checkbox, so that our changes have entered into force.
Hello, dear readers with Trishkin Denis.
Over time, any hardware shares morally and physically. Fortunately, computers are designed in such a way that they can be changed separate elements. After the procedure itself, it usually does not arise any problems. But what to do if you want to fully update the equipment, leaving only the hard drive? Fortunately, the developers from Microsoft have provided such a situation and implemented the transfer of Windows 7 to another computer. After all, if you just rearrange the hard drive, in most cases, when turned on, it will appear blue screen Death, since the system simply will not find the relevant drivers connecting the motherboard with HDD, and therefore all others.
Immediately it is necessary to say that the problem does not always appear. If you install an old hard drive in a couple with motherboard, the firm of which is the same as the previous one - great chances that nothing will need to do at all. The only one is to download and install updates. This will help independently operating at the program level to associate all connected components.
As usual, it is possible to do this using several ways:
built-in SYSPREP utility;
acronis tool.
Transfer using SYSPREP( )
The first way implies use special Program Sysprep Before moving a hard disk with an installed operating system to new equipment.
To do this, make a chain of action:
The program deletes controllers and most of the information related to Windows. Therefore, the transfer of updates is not carried out. This is the best, because the OS will be able to find everything that she lacks, including missing drivers.

After the image cloning will be prepared to take advantage of them for installation in a new environment. Then the work will be completed.
Next is replaced by the desired hardware elements. Or at all HDD is installed in a new system unit.
After that, a few more simple movements are carried out:

At least this method and makes transfer installed programsNevertheless, all of them removes activation. The only thing is fully implemented - profile transfer. There will be no problems here.
Transfer using Acronis( )
To transfer data using Acronis, we need True Image tool from this developer and disk. In addition, you need a removable uSB memoryon which the image of the Ourser will be placed (it should be portable hard disk). And for a successful launch, you need to install the program to save the drivers to external media. We have such DRIVERMAX.
From the very beginning we make a copy of all running drivers using the above application.
Important! When transferring size initial section should not exceed the final. That is, a C: \\ disk on the first computer in volume should be the same or less than on the second.
So what should I do? This method requires more movements. But I just could not tell you about him:

The second part of this procedure is to restore the image on another computer. For this, too, you need to make several movements:

This is copied by everything that was on the past computer. Sometimes the truth of the OS does not want to transfer a license. So be careful.
Well, it can be seen that such tools can simplify the procedure for setting up new equipment for the needs of the user.
Despite the presence of such a function, I still recommend putting a clean operating system. This will allow not only to adjust the equipment correctly, but also remove all sorts of troubles that were met in the previous version.
I hope you have found useful information in this article. Subscribe and tell your friends about my blog.