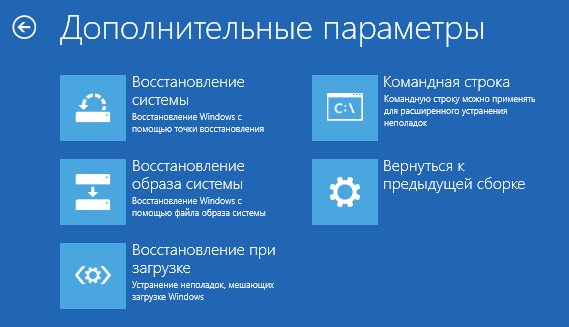
The system recovery disk contains several tools to fix problems on your computer. To use the system recovery disk, follow these steps:
Windows Memory Diagnostic Tool in System Recovery
Diagnostic tool windows memory used to check computer memory for errors. You can choose to run the test immediately or at the next booting windows. If you selected the option to restart the computer and immediately run the test, be sure to save the results and close all running programs. Checking your computer's memory may take several minutes. Upon completion of the test, Windows will restart automatically.
If you recently installed memory modules, make sure that the type of new memory modules meets the memory requirements for the system board. If the memory meets the memory requirements for the system board, or if the memory worked correctly before, but the test completed with an error, follow these steps:
Remove and reinstall the memory module in the slot to check if the problem is caused by a connection defect.
Remove each memory module, replacing the one removed before.
After removing and reinstalling the DIMMs, re-run the memory diagnostics.
If the test still fails, replace the defective memory module.
This manual details how to create a disk. recovery windows 10, as well as how to use a bootable USB flash drive or DVD with installation files system as a recovery disk, if the need arose. Also below is a video in which all the steps are shown clearly.
The Windows 10 recovery disc is able to help in case of a variety of problems with the system: when it does not start, it began to work incorrectly, you need to restore the system by performing a reset (returning the computer to the initial state) or using a pre-created one.
Many articles on this site mention the recovery disk as one of the tools to solve problems with the computer, and therefore it was decided to prepare this material. You can find all the instructions related to restoring the startup and working capacity of the new OS in the material.
Creating a Windows 10 recovery disc in Control Panel
Windows 10 provides a simple way to make a recovery disk or, rather, a USB flash drive through the control panel (the method for CD and DVD will also be shown later). This is done in several steps and minutes of waiting. I note that even if your computer does not start, you can make a recovery disk on another PC or laptop with Windows 10 (but be sure to use the same bit capacity - 32-bit or 64-bit. If you do not have another computer with 10-bit, the next section describes how to do without it).
Done, now you have a recovery disk available, by booting from it into BIOS or UEFI (or using) you can enter the Windows 10 recovery environment and perform many tasks of resuscitating the system, including rolling it back to its original state, if nothing else Does not help.
Note: you can continue to use the USB drive from which you made the recovery disk to store your files, if there is such a need: the main thing is that the files already placed there are not affected. For example, you can create a separate folder and use only its contents.
How to create a Windows 10 recovery disc on a CD or DVD
As you can see, in the previous and mainly for Windows 10 method of creating a recovery disk, such a disk means only a flash drive or other USB stickwithout the ability to select a CD or DVD for this purpose.
However, if you need to make a recovery disc specifically on a CD, this possibility is still present in the system, just in a slightly different location.
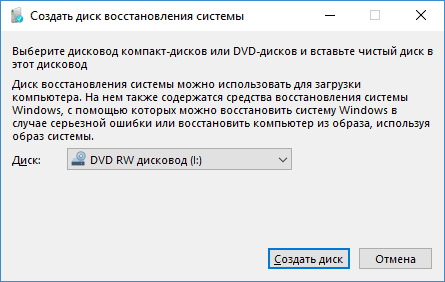
After that, you will only have to choose a drive with clean disk DVD or CD and click “Create Disc” to burn the recovery disc to the optical CD.
Its use will not differ from the flash drive created in the first method - just put the boot from the disk into the BIOS and load the computer or laptop from it.
Using a bootable USB flash drive or Windows 10 drive to recover
Make or installation dVD disc with this OS is easy. At the same time, unlike a recovery disk, it is possible on almost any computer, regardless of the version of the OS installed on it and the state of its license. Moreover, such a drive with a distribution can then be used on a problem computer as a recovery disk.
When working with a computer, anything happens, perhaps each user finds himself in a situation where the OS stopped working partially or fully . As a result, there was a need for full reinstalling windows, which led to the loss of important and not very data. It is unlikely that it will be possible to avoid malfunctions in the system, but it is possible and necessary to make the process of resuming operation of the OS faster and more comfortable. Here you will come to the rescue function. This article will figure out how to create a Windows system recovery disc. Let's get started. Go!
To begin with, it should be noted that as a recovery disk you can use not only a regular DVD, but also a USB flash drive, which in our time will be a more acceptable option.
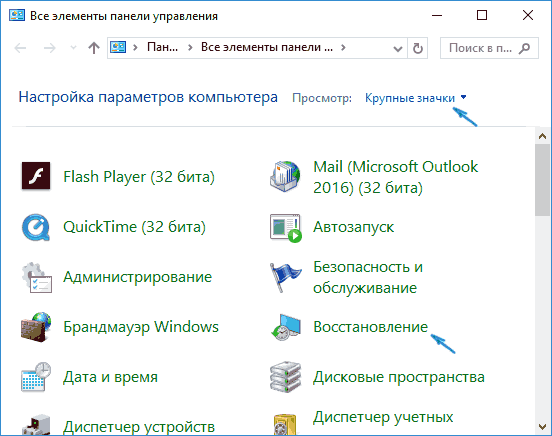
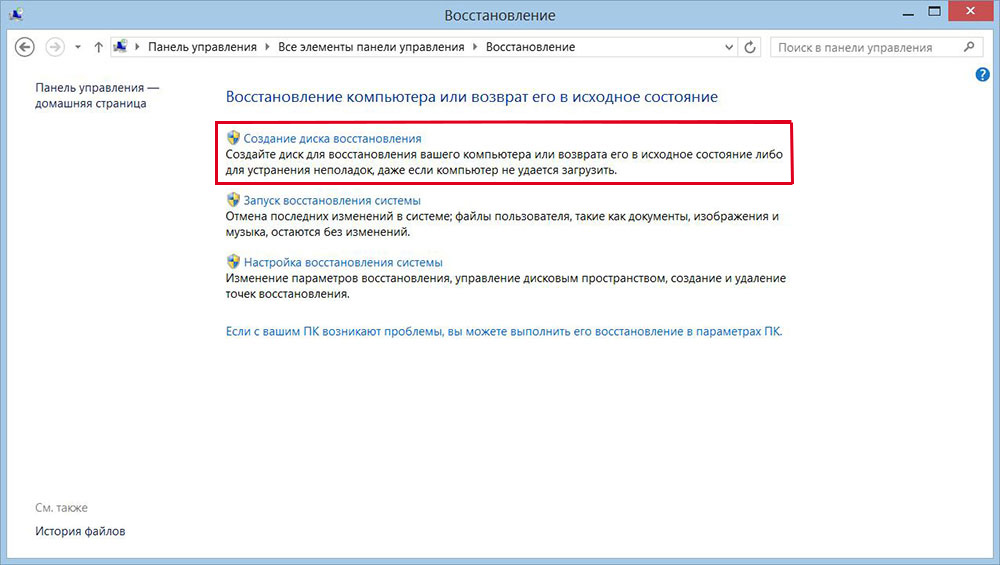
If the operating system is installed on your computer windows system 10, then in this version the function of creating a recovery flash drive is implemented, which allows you to do this very easily and quickly. First you need to go to the Computer Control Panel. Among all the menu items, find "Recovery" and click on it. In the window that opens, select the function to create a recovery disk. If you want backup to be done copying windows files, check the corresponding item in the next window. Please note that when this option is activated, the occupied disk space will be larger, however, this will greatly facilitate the entire system reset procedure in the future. Therefore, it is recommended that you enable this option. Next, in the window for selecting a USB flash drive, select your USB flash drive. The USB drive must have a capacity of at least 8 gigabytes and be empty. Otherwise, all data will be erased from it. It remains to click the "Next" button and wait for the operation to complete. After that, you can use the USB flash drive to store your files and folders. The main condition is not to affect the recorded system files.
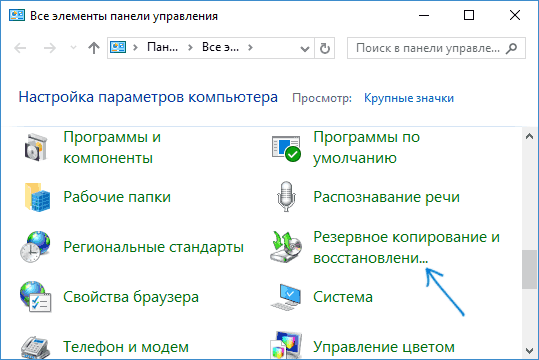
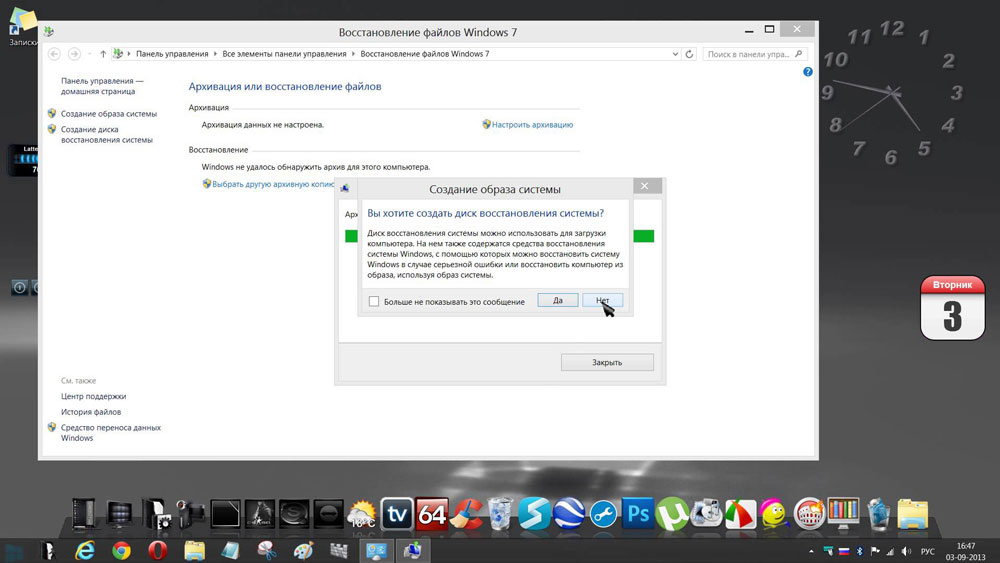
Now let's figure out how to make a system recovery disk for Windows 7. This is done as follows. First you need to open the Panel management and go to the "System and Security" section. Then select "Backup and Restore". In the window that opens, click on "Create a system recovery disk." Further steps are very simple - insert a CD or DVD into the drive, then select the drive with the disc and start the process.
Before starting Windows from the recorded media, you need to change the boot options in BIOS . To do this, go to the BIOS (when you turn on the computer, press the Del key or another, depending on the manufacturer of your PC). Once in the BIOS, go to the "Boot" section. There you will find an item where you can change the priority of devices from which the OS will boot. Put in the first place an optical disk or flash drive. Save your changes by pressing the F10 key on the keyboard. Now, if at the start of the computer any media is detected, then the OS will be loaded from it.
In addition, you can make a system image in which all OS files will be stored in a compressed form. Please note that in this case the current status of your OS will be recorded. You can record the image both on the computer's hard drive and on a CD / DVD, however, it is worth noting that a lot of space will be required. To do this, select the appropriate item in the menu, and then specify the place where you want to save the archive. Click on the “Next” button to start the procedure. You can also use this method if Windows starts to work incorrectly.


