Typically, a memory card in a tablet or phone has one partition with the FAT or FAT32 file system. In order to be able to move and then run the program from the memory card, the card must contain two sections. One of them will be designed as usual for data storage, and the other will be used for programs moved to the card.
Important! It is the second of the sections that will be used to move programs to it. This must be taken into account for further work.
IN Android version 2.2 and higher, the ability to transfer applications to a memory card is already available in the system, but for those who have a tablet or phone with an earlier version Android, and there is no possibility or desire to update the firmware, there is nothing left but to use third-party applications.
So, to transfer programs already installed on the internal memory to the memory card, we need two programs. Program for creating and deleting partitions file system, and a program for transferring programs to a memory card.
Card preparation
Let's start with the first program. There are many programs that allow
manage sections on physical media data, but we will probably focus on the simplest and most convenient of them. This program .
You can download it at the following link: download
The program works with operating systems Windows 2000 / XP / Vista, and Windows 7.
For work, we need two things - the program itself and the card reader.
Getting started with the program MiniTool Partition Wizard Home Edition.
Attention! Before working with the program MiniTool Partition Wizard Home Edition, save everything that is recorded on the memory card, since all data on the card in the process of working with the program will be destroyed.
1. Download and install the program. We take out the memory card from the device and insert it into the card reader. Windows will detect new disc and displays it as " removable drive". 2. Delete sections on the memory card. To do this, run the program. At the bottom of the program window, all disks that are currently connected to the computer will be displayed. This and hDD, and a USB flash drive, if connected, and our SD card.
The picture is an example. We see two hard drive, 465 and 74 gigabytes in size, and an 3.8 gigabyte SD card with two partitions on it:
We right-click on each of the sections, and select the “ delete»- delete the section.
Before this step, you should make sure that you select the partitions on the memory card, and not on the hard drive or another drive!
1. Create a section for your data. To do this, right-click on the free space of the memory card, and select the option " create».

2. In the window that opens, in the drop-down menu " Create As:"Select" Primary", And in the menu" File System:»Select the type of file system Fatif the partition will be less than 2 gigabytes in size. If you want to create a partition larger than 2 gigabytes, select the type of file system Fat32. Using the slider, set the size of the partition and click " OK».
3. We create a section for the programs that we will transfer to the memory card. To do this, again, right-click on the free space of the memory card, and select the option " create". In the drop-down menu " Create As:"Select" Primary", And in the menu" File System:»Choose Fat32 as a file system. Using the slider again, set the size of the partition and click " OK».
4. We apply all changes made by us. To do this, click on the button "in the upper left corner of the program window Apply ". After that, the program will create and format partitions.
Important! Program MiniTool Partition Wizard Home Edition does not make any changes to the memory card until you press " Apply ". Up to this point, you can cancel the operation using the “ Undo ", Or completely discard all changes by clicking" Discard »
Now that the card is ready, you can install it on your tablet or phone and begin the process of transferring programs to it.
Transfer of programs.
To do this, we need to download and install the program on a tablet or phone Link2SD.
Link to download the program: Link2SD market.android.com
Attention! To work with the program you need Root rights. How to get rights Root on your tablet, described in the appropriate thread of our forum.
When you turn on the phone or tablet, the program mounts the second section on the memory card and makes it available for the operating system.
Working with the program is very simple. After the first launch of the program, a window for selecting the type of file system appears on the second section of the memory card. Choose the type of section that you created in the first part of our manual. Then a window will appear on granting the Root program rights, and they should be granted it. After that, the program will create a mount point in the system for the second section of the card, and ask you to restart the phone or tablet.
After restarting the tablet, you can proceed to transfer applications from internal memory to map.
1. Run the program Link2SD. The tablet’s screen displays a list of installed applications.

2. Select the program that you want to transfer to the card. In the window that opens, click " Create link»
3. The following window will open. If we want to transfer temporary files (cache) to the card, put a checkmark in front of " Link davlik-cache file too"And click" OK»

4. For some time, the program will “think over”, and in case of successful application transfer, the message “ application linked to SD card.»

5. Click " OK", Exit Link2SD, and now we can run the moved program.
Applications already transferred to the memory card in the Link2SD program list contain a corresponding mark.

Questions and answers:
-All programs can be transferred to a memory card?
No, some programs can work correctly only when installed in the internal memory of the device.
-Can I cancel the transfer of the program and return it to the internal memory of the device?
Yes, just select it in the list and click " Remove link»
-What happens if I update the program moved to the map?
When updating a moved program, the application file and data files will first be saved in the internal memory of the device, and then the program Link2SD will automatically transfer them to the memory card in the background. No need manually move the updated application.
-How much space does the program take in random access memory devices for everyday use?
The program starts only the process of mounting partitions on a memory card, and is not located in the device’s memory during normal use.
Some comments.
Program Link2SD It itself determines the applications that were moved by the Android operating system itself (in versions Android 2.2 and higher)
System applications cannot be transferred to a memory card. Program Link2SDwill not give you this opportunity.
When you connect your device to a computer, OS Android unmount the first Fatsection of the file system of the memory card. However, the second section will remain mounted, and you will be able to run programs from it.
Program Link2SD it does not move the program folder itself from internal memory; only the program and cache files themselves are transferred.
Normal 0 false false false RU X-NONE X-NONE MicrosoftInternetExplorer4 MiniTool Partition Wizard Home Edition
The Android platform (Android) compares favorably with iOS in that it provides much more file management capabilities. In this article, we will tell you how to transfer files on Android through a computer or directly on a smartphone / tablet using third-party applications.
How to transfer files through a computer
The advantage of Android is that when connected to a computer, a smartphone / tablet is recognized as a regular flash drive. True, many manufacturers still offer to use their own proprietary utilities for synchronizing with a computer, so by default the operation mode as an external drive can be disabled in Android.
- To enable it in “Android” versions 2.1-2.3.7, open “Settings” on your smartphone / tablet, go to the “For Developers” section and select the “USB Debugging” check box. Click “OK” in the notification that appears.
- In the "Android" versions 4.0-4.1.2, find the "More" item in the "Settings", and in it - the "USB Utilities" section. In the "USB storage device", click the "Connect USB-drive" button.
- Finally, in “Android” versions 4.2 and higher, open the “About phone / tablet” item in “Settings”, select the very last item “Build number” in it and click on it repeatedly. After seven clicks, the menu item "Developer Options" should appear. Click OK, go to this section and enable USB debugging.
Now you can connect the device to the computer via USB. After connecting, click on the USB connection icon on the smartphone / tablet and select the “USB connection is established” option. In the dialog box that opens, click the "Turn on USB drive" button and confirm the operation by clicking "OK" in the notification that appears.
After that, the smartphone / tablet will be available in Windows Explorer as usual external storage. You can drag and drop files onto it, transfer them from folder to folder and generally do anything you want.
File Transfer Applications
You can transfer files on a tablet with Android without using a computer. It is enough to install one of the file managers widely represented in Google play. Among the most popular apps this kind - ASTRO File Manager, ES File Explorer, File Expert and many others. Choose to your taste!
Transfer files from computer to tablet
After purchasing a tablet, the question often arises how to transfer files from a computer to mobile device. Too many users try in vain to do this, although in principle there is nothing complicated about it.
Basically, there are several ways to transfer files from a computer to a tablet. One way is to buy a microSD memory card. This memory card can be inserted into a special slot in a laptop or a regular desktop computer, copy the necessary files to it, and then insert it into the tablet, and actually use this memory card as ordinary hard disk. The tablet should automatically scan the microSD card for files. However, unfortunately this is not always possible to do, since not all laptops and not all tablets have slots for connecting microSD memory cards. Therefore, buying a tablet is best to make sure in advance that it has a very necessary slot for expanding memory. Before buying a tablet, you should always carefully read it. So, for example, in popular iPad tablets there is no such slot, but in tablets aSUS, for example, or it is available.
The second way is to use a cable with which a computer and tablet are connected. The cable comes with tips on what to do to transfer files from one device to another. By the way, Asus tablets can be connected to your laptop using a proprietary cable for charging batteries. For this reason, one end of this cable looks like a USB cable. To transfer files, you must install Asus desktop suite software. This tool installs drivers on your computer to help it recognize your tablet. Then you need to use windows program Explorer to copy files. But just do not confuse this program with Internet Explorer.
There is another way when the laptop is configured to transfer files using the file manager such as ES File Explorer to access the drive on your laptop via WiFi, copy and paste files to your tablet.
The next most obvious way to transfer files is to use the tablet dock, unless of course you have one. To do this, you need a USB cable that connects two devices: a docking station and a computer. One end uSB cable inserted into uSB port in the dock, and the other in a similar port on the computer. Asus Company supplies its tablets with an application that analyzes files (file explorer). This application allows you to copy.
The first method is very popular, as it is a simple and long-term solution. However, this method is not always applicable with all tablets.
Almost any owner of a mobile gadget is faced with the problem of downloading a file from a tablet to a USB flash drive. At the same time, some of them are not aware of the possibility of direct exchange, but first they download the content on personal Computer or a laptop, and then the necessary data is transferred to a mobile device via email services using Bluetooth or Wi-Fi interfaces. However operating system, beginning with android version 3.1 (Honeycomb) and above, allows the user to directly download files from the tablet to the USB flash drive, and those who cannot transfer the desired content to the flash drive or inattentively read the instructions of their gadget, or have not completed the necessary settings, because of which the tablet does not see USB flash drive.
What you need to copy files
Tablet computers do not have a standard USB connector, but are equipped with either a microUSB form factor socket or a proprietary but non-standard connector like a gadget Samsung Galaxy Tab. In order to adapt the flash drive to a tablet with a standard socket, it is necessary to use an adapter cable, called the OTG cable according to the "scientific" one, and in common people it is more commonly known as USB - microUSB - tail. Usually this accessory is included in the sales kit, and if it is not available, then it can be found in consumer electronics supermarkets, where its cost does not exceed 150 rubles. There is a microUSB plug on one side of this cable, and a standard USB socket on the other. This adapter will enable the user not only to install a USB flash drive, but also allow connecting other external devices - for example, an external hard drive with a large capacity or a regular keyboard, which for many purposes is much more convenient than a screen one.
If the user bought from the hands of Samsung Galaxy Tab without a proprietary adapter or managed to “grab” a Chinese clone of this gadget, in order to connect a usb flash drive, you should contact a Samsung dealership (company store) or look for an adapter cable in the Internet commerce system, where its price is about 250 rubles.
USB stick connection
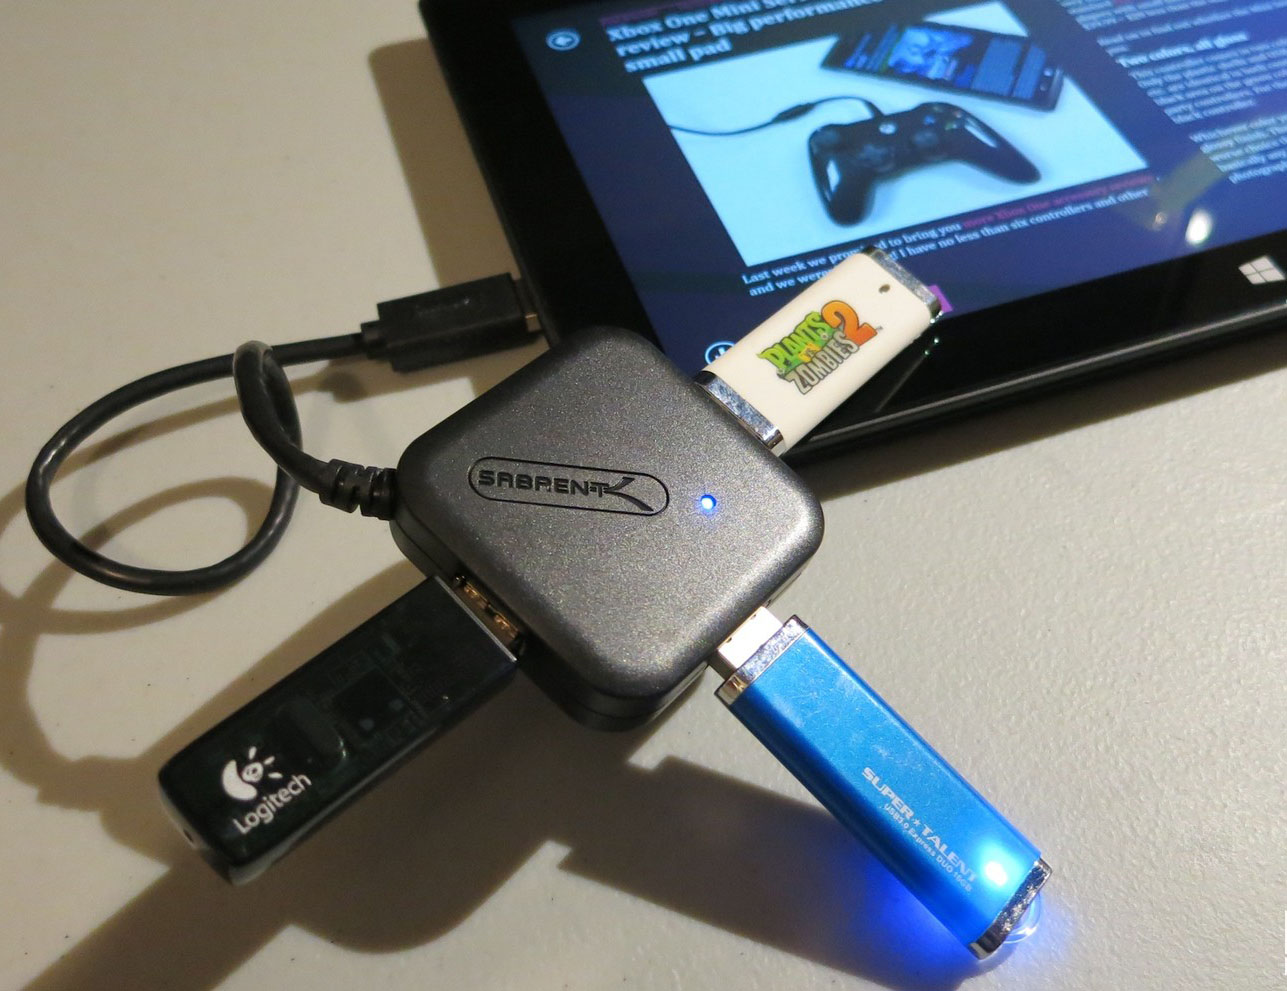
After everything you need - a tablet, and a flash drive (external USB-drive) are at hand, you need to turn off your gadget and connect the entire system into a single whole. To do this, you need:
- connect a USB flash drive to the USB 2/3 jack of the OTG cable;
- insert the connector (plug) into the corresponding socket of the tablet computer;
- turn on or unlock the tablet.
After loading the operating system, on the screen of most models, an inscription appears on the connection of an external storage device. After connecting, you need to check whether the tablet “sees” the external storage device or not. To do this, you must:
- go to the "Settings" menu;
- select the "Memory" section;
- check the box Mount / Unmount usb storage (Mount USB stick);
- restart the tablet.
After re-entering the menu, information should appear about the connected flash drive and the presence of free and occupied place in gigabytes.
Having figured out how to connect the USB-drive, you need to immediately find out how to safely disconnect the USB flash drive from the tablet computer. This will not only avoid accidental damage to the external device, but also guarantee the safety of the copied data. To safely remove the USB drive, go to the "Memory" section in the "Settings" menu and click on the "Remove SD card" touch key or uncheck the Mount / Unmount usb storage checkbox. After that, the flash drive can be removed without turning off the power of the gadget.
Despite the developers of the Android operating platform announced that they support external USB devices, some manufacturers of low-cost devices do not include this feature in their products. In order not to be puzzled by solving the problem, you can connect a USB flash drive or not, you must first make sure that you can copy data from your tablet to a USB flash drive and vice versa. USB OTG Checker, which can be downloaded from the service, will help to solve this problem. Play market. The program tests your device and determines the ability to connect a USB flash drive. After installing and starting the program, you need to click on the touch label Check Device OS on USB OTG and then the screen will display a message about the support or non-support of the function of connecting a USB flash drive through the OTG adapter.
Programs for copying and moving files
In order to copy or move files from a tablet computer to a USB flash drive and vice versa, you need to install it on the tablet special program - file manager. Almost all gadgets with the Android operating platform have a pre-installed file manager File Manager, however, ES Explorer is more convenient, which allows you to not only download the file to your tablet via USB / microUSB port, but also copy or transfer files via the Bluetoot interface.
File manager ES Explorer quite functional, has a simple user interface, and the advantages of this software product, most users consider:
- free distribution and installation of updates;
- multilingual interface supporting 32 languages \u200b\u200b(Russian language is present);
- multifunctionality and multitasking of the program;
- the ability to control applications installed on the device from ES Explorer;
- the presence of many user settings.
Installing “ES Explorer” is not difficult: after downloading the installer in the form of an ARC file from the Play Market virtual store, the program must be installed on the tablet. It takes up little space, so it is up to the user to transfer it to the SD card or leave it in the integrated memory. After that, in the setup menu, you need to set custom parameters. When deleting files, the manager will ask the user for confirmation to complete this procedure.
It is necessary to pay attention to the advanced functionality, which allows you to not only copy, move or delete files. In addition to standard operations performed by most file managers, ES Explorer can:
- send files using the web services Gmail, Email, and Classmates;
- supports telephone functions for sending SMS / MMS - messages;
- display files and folders on the control panel as a tile or list;
- access files in the Network, Bluetooth, LAN, FTP and PDA tabs, the latter designed to exchange the file “inside” the tablet — from the SD card to the integrated storage (memory) and vice versa.
The user will be able to enable all these functions - disable in the "Settings" of the program.

File Manager Total Comander, which is also available free of charge in the Play Market software content store, tablet owners who previously worked with this software on "large" computers will surely like it. Using Total Comander helps to greatly simplify the process of copying, transferring and deleting files and folders thanks to the support of the Drag & Drop function - highlighting file content by long clicking on the icon of the selected object. The main advantage of the program is the presence of a two-window interface, so that moving (copying) files from the tablet to the USB flash drive and vice versa is carried out by a simple finger movement on the touch screen. The context-sensitive help function is very user-friendly. The features of Total Commander include:
- built-in text editor;
- high selection hierarchy - starting from a single file and ending with a group of folders with attachments;
- a separate area for placement of graphic content, which can be represented by icons, thumbnails or pictures;
- the ability to unzip ZIP and RAR archives;
- support for direct file deletion, without first placing in the trash.
- the user interface is intuitive, and the “settings” menu allows you to give it the most user-friendly look.
Situations when the gadget does not see an external USB drive
Sometimes the user is faced with the situation that the file manager is selected correctly, and the settings are set correctly, and the OTG cable is selected correctly, and the gadget does not detect the presence of a connected external device. The reasons for this may be the following:
- The flash drive is formatted in NTFS format, which is the operating android systeminstalled on some gadgets does not read. To eliminate this reason, it is enough to reformat the USB flash drive to FAT 32 format and the gadget will detect it
- The USB drive has a capacity that exceeds the readable limit (usually 32 gigabytes. In this case, you need to connect a USB flash drive of a smaller size from 4 to 16 gigabytes and check its reading.
- A tablet system crash that could happen for any reason. To do this, just turn off the tablet, wait a few minutes and turn on the device again. Some users repeat this procedure several times and reading is restored;
- Low voltage, which is fed to the USB flash drive via the tablet’s USB port. Usually this defect is eliminated by using a smaller flash drive with less power consumption.
Conclusion
Using an external USB drive - a flash drive is not just a whim of the user, but a way to increase the amount of stored information and increase the security of its storage. In addition, the convenience of data exchange between users is increased. A large amount of information can be thrown off the gadget to a USB flash drive and transfer this device to another user. At the same time, data can be transferred from a device operating under running windows to a gadget with a preinstalled Android platform.


