Acer has developed technology to make life easier for users. eRecovery, which includes the application itself Acer erecovery , as well as a hidden partition on the hard drive with a volume of several gigabytes. Typically, on Acer laptops, this section is called PQService. Main function Acer erecovery - Restoring the operating system along with preinstalled programs and drivers as at the time of purchase of the laptop. Looking ahead, I note that to restore the operating system with programs and drivers, you must click when the laptop boots at the moment a white screen appears with the inscription Acer keyboard shortcut ALT + F10. On laptops AsusFor example, you must press the key F9. Information from C: drive is erased, but from D: and other partitions - no. As a result, after about an hour, the laptop will have an OS with programs and drivers as at the time of purchase
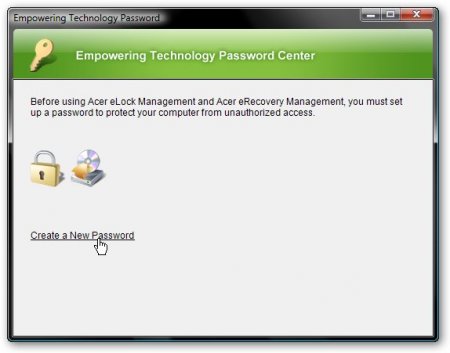
Technology Review Acer erecovery it’s logical to start with a description of the program Acer erecoverywhich is preinstalled on Acer laptops. At the first start, this program asks for a password:

Click on the button Setupand then on Create New a Password
In the upper window we enter the password, on average we enter it again for confirmation, and in the lower one we enter the hint
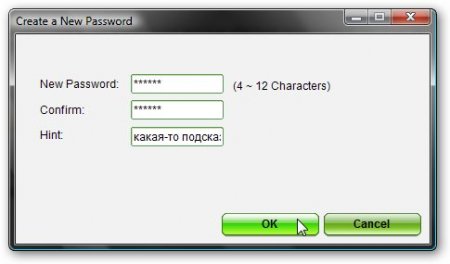
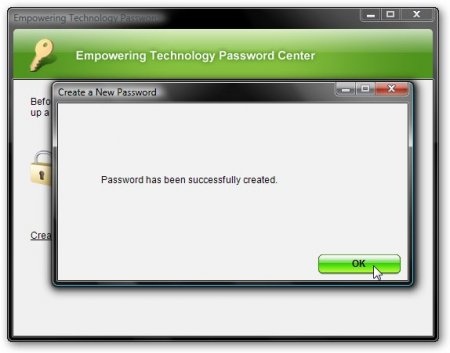
If everything went well - we get such a window and click OK
I will explain why that password. It must be entered during system recovery. Without entering this password, recovery will not start. It's done Acer for security. When recovering, all information from the C: drive is erased. If an outsider gets access to the laptop, then he can, deliberately / unintentionally, when loading, press ALT + F10 and all information (including valuable information) on drive C: would be erased. But if he does not know the password, then he will not succeed. If you do not know the password, then you can find it out by reading
Now we pass directly to the program itself. At the bottom of the main window you can see 3 tabs Backup, Burn disc and Restore. I will describe the tab first Backup
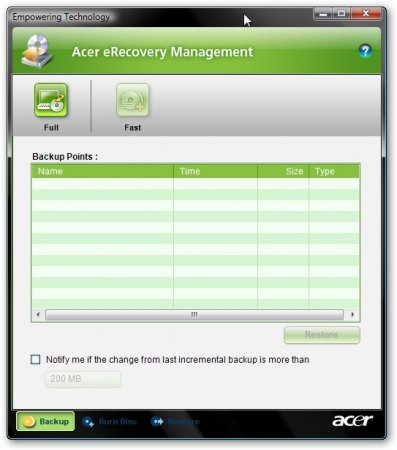
At the top you can see 2 buttons Full and Fast. I will explain why they are needed. If you click on the button Full, then the process of creating a system restore point will begin, in other words, the entire contents of the disk FROM: It is archived and at any time you can restore the state of the system at the time of archiving. The process of creating a recovery point begins by specifying its name:
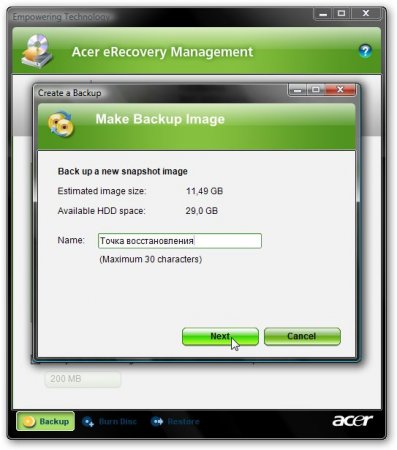
Click Next and a window appears warning that the recovery point is taking quite a lot disk space and it is recommended to close all applications before starting the archiving process:

Choose Yes and click Next. After that, the process of creating a recovery point starts:

When the creation is completed - click OK

Now I will explain why the button Fast
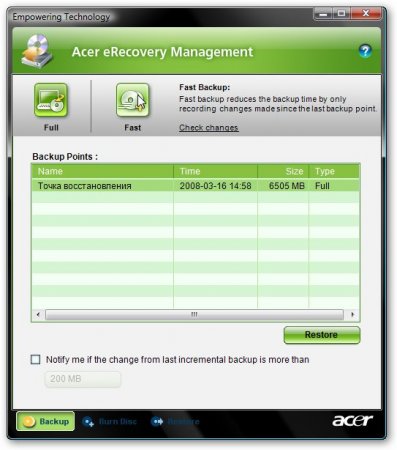
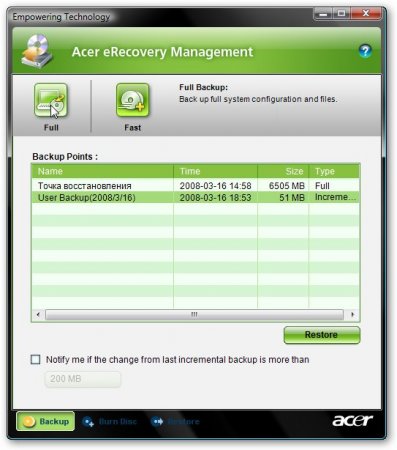
By clicking on this button we start the incremental archiving process. This means that only changes are recorded in the archive compared to the original archive, which we did by clicking on the button Full. Modified files take up significantly less space and the archiving process is much faster. At the bottom of the main window, you can check the box next to Notify me if the change from last incremental backup is more than This checkbox includes notifications if the size of the changes since the last incremental archiving is larger than a certain volume, which is indicated in the window. The incremental backup process begins by specifying the name of the restore point:

Then the program asks us to close all applications before starting archiving, and also notifies that the archive occupies a certain space on the hard drive. To start the process, select Yes and click Next
When the archiving process is completed, click Ok

As a result, we will have one complete archive, which contains all the information from the C drive: as well as one incremental archive, which contains only the changes after the creation of the main archive.
If we want to restore the state of the system (more precisely, the contents of the C :) drive at the time of archiving, press the button Restore. Recovery archives are stored in hidden folder D: erData
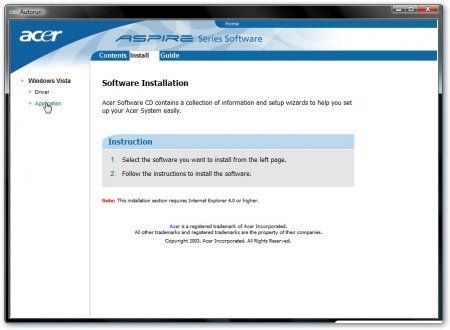
Go to the description of the tab Burn disc. We have already encountered her in.
There are 4 buttons on it:
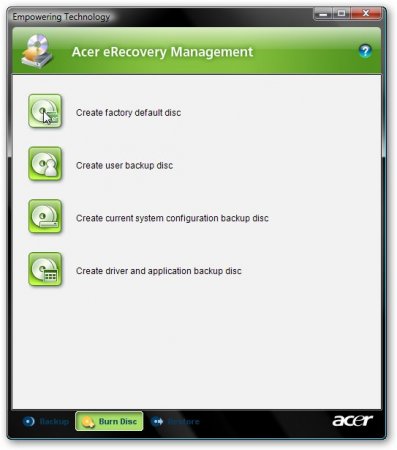
Create factory defeault disc - by clicking on this button we will start writing recovery discs, from which you can restore the entire system with drivers and programs as at the time of purchase of the laptop. Do these discs MANDATORY
Create user backup disc - write to the recovery point disks, which is essentially the archived contents of the C: drive. This button will be active only when a complete archive is made (to create it, on the tab Backup click Full).
Create current system configuration backup disc - if you click on this button, the contents of the C: drive are archived first, and then it is written to the drives.
Create - the distributions of all programs and drivers that come with the laptop are written to the disk. This drive is necessary MANDATORY do.
When you click on the buttons, such a recording window opens:

At the top, how many drives are needed. To start recording, click Next
Consider the tab Restore

On this tab, as on the previous one, 4 buttons are placed. I will describe them in order:
Restore system to factory defeault - Restore the OS with drivers and programs from hidden partitions. Information from drive C: is erased, but from other drives is not.
Restore system from user "s backup - restore the system from the user's recovery point.
Recover system from CD / DVD - restore the OS with drivers and programs using Factory defeault disc
Reinstall applications / drivers - reinstall programs and / or drivers. If you click on this button, this window will open:

Click the button Install and in the menu on the left we select programs or drivers:
In the list we look for the application / driver that interests us and click Install ... for installation:

I think this can be finished with a description of the utility Acer erecovery
Now we pass to the most interesting - hidden sections
It is quite logical to begin the consideration of hidden sections with a brief description of their contents. In order to view the contents of hidden partitions, we will use the Acronis True Image 10 utility (mirror) and directly images of hidden partitions. How to make them described
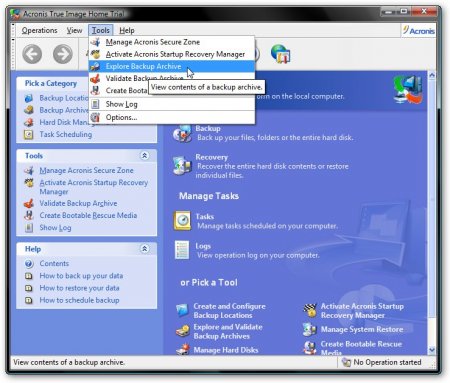
We launch Acronis True image 10
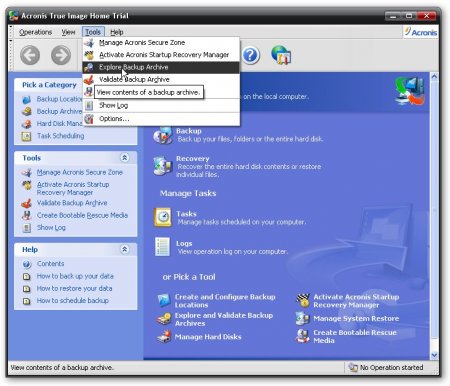
and in the menu Tools select item Explore Backup Archive
Select the image of the hidden section (if the image consists of several pieces, then select the first one) and click Open

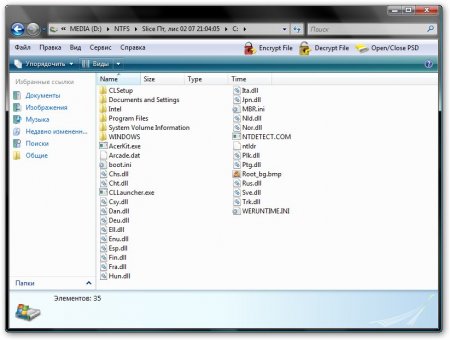
Open the archive. The screenshot shows the approximate contents of the section. PQService
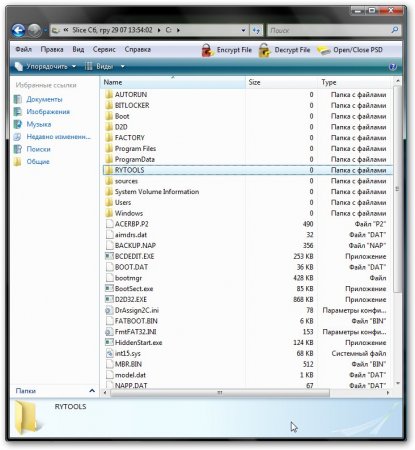
In folder Rytools There is a utility for working with and directly MBR itself.

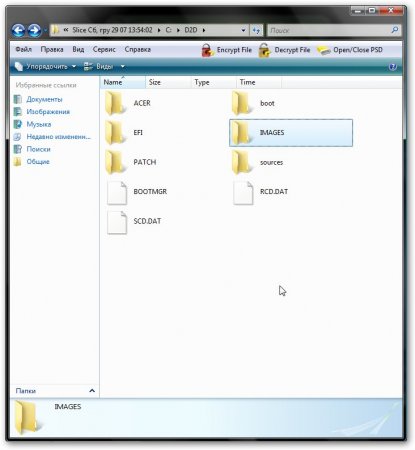
In folder D2D / IMAGES posted recovery image of section C: laptop:
And here is the content of the second hidden section NTFS laptop Acer aspire 5920
This section is used to implement Acer IOArcade technology - download media center based on stripped down windows versions XP when you click the button with the little man on the right. This section contains Windows XPe and Acer Arcade.
I will describe how you can restore this section with only Driver & application backup disc. To do this, using the partition utility (Acronis Disc Director Suite 10, for example), create a regular NTFS partition with a volume of 3.248 GB at the end of the hard drive, create a file in notepad that contains 11 units (11111111111 ) and call it Arcade.dat. We move this file to the created 3.248GB partition. Then it remains only to find on Driver & application backup disc folder IOArcade and start the installation.
If someone needs an image of a hidden IOArcade section - DOWNLOAD HERE (thank you so much Sleganzov)
We have superficially dealt with the structure of hidden partitions, now we will consider the issue of their restoration. For this we need:
- made Acronis True Image images of sections. .
- Acronis True Image 10 (version 11 I do not recommend because of possible blue screens
while loading)
- Acronis Disc Director Suite 10 ( This program It is offered for reference only. Using this program you agree to remove it within 30 days or purchase it in order to continue using it, you must respect copyrights)
- It is recommended that you also download this boot disk image, which can help recovery. (This program is offered for informational purposes only. Using this program you agree to remove it within 30 days or purchase it in order to continue using it, you must respect copyrights)
Suppose that when restoring hidden partitions, we have re-partitioned the hard drive and installed Windows XP. Environment Recovery Procedure Windows Vista the same. Hidden sections are stored on drive D:
Warning: any operations with partitions pose a potential risk to your information. Therefore, it is better to write all critical information to discs or to another computer.
Let's get started. First of all, we need to find out the exact size of the hidden partitions. To do this, run Acronis True Image 10 and click Try now. Demo yet

On the menu Tools select item Explore Backup Archive
First, select the first section
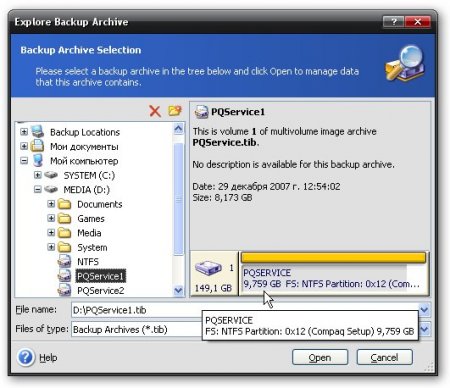
and look at its size. In our case, this is 9.759 GB ... write this number somewhere on a piece of paper
Then we select the second one (if you have only one hidden partition on your laptop - skip this step)
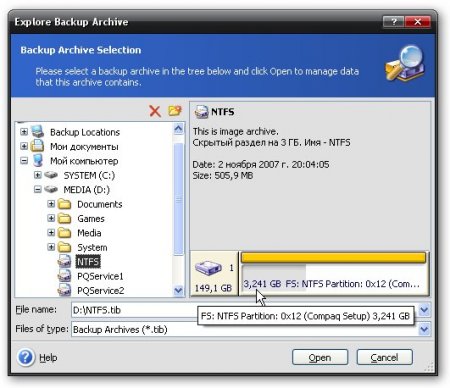
rewrite the size on the same leaflet. In our case, it is 3.241 GB
Run and select in the menu Manual mode (Manual mode)
The program window opens. At the top we see a list of partitions on the hard drive.
Note: If the C: drive size is less than 20 GB, it is recommended that you first reduce the D: drive size and increase the C: drive size to 20 or more gigabytes due to free space. This is necessary so that during the recovery process section C does not overflow due to its insufficient size.
In the process of resizing using Acronis Disc Director Suite 10 information DO NOT DELETE.
When you have put things in order with the dimensions of the C: drive, you can proceed with the direct restoration of the partition (s) First you need to create using Acronis Disc Director Suite 10 free areas with sizes that correspond to the sizes of hidden partitions. We will create these areas by reducing the size of the D: drive. When creating free areas for partitions, it is VERY IMPORTANT that their placement on the disk corresponds to the original. That is, if the hidden partition was at the beginning of the disk, then the area under it should be created at the beginning of the disk, if the hidden partition was originally at the end of the disk, then you need to create an area of \u200b\u200bfree space for the hidden section at the end of the disk. This is a very important point, otherwise it is quite possible that auto recovery won't want to work.
To create free areas, click on drive D: right-click and select Resize
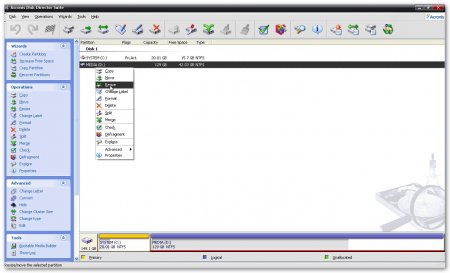
Such a window opens:

Unallocated space before - in this window sets the size of the free area before the section. In our case, a hidden section NTFS should be at the beginning of the disk, so indicate its size, which was previously rewritten from Acronis True Image 10 PQService and placed it in STARTING A DISC Unallocated space after leave zero.
Unallocated space after - in this window sets the size of the free area after the section. In our case, the section is a hidden section PQService should be at the end of the disk, so indicate its size, which was previously rewritten from Acronis True Image 10. If you have only one section - PQService and placed it in END OF DISC, then indicate its size in this window. In this case, in the field Unallocated space before leave zero.
Push OK and get about the same picture. Everything as we asked. Before section D: 3.248 GB of free space, and after it - 9.759 GB. Now we need to move section C: so that at the very beginning of the hard drive there is free space the size that we set in the field Unallocated space before when resizing the partition D :. If you have only one section, which is located in END OF DISC, then you can skip this step because before section D: free space no and move section C: there’s simply nowhere to go. After disk D: you should see a free area with a size equal to the size of your hidden partition.
We click on the C drive: right-click and select Resize
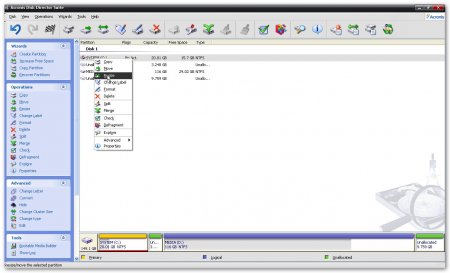
In the window that appears, simply move the C: section all the way to the right:

Push OK and get something like this
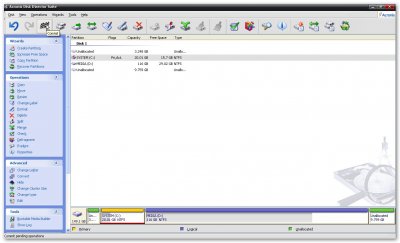
Unallocated area in front of drive C: for partition NTFS and unallocated area for the section PQService after drive D:
Note: all changes are made after the laptop is rebooted, any change can be canceled by clicking on the blue arrow at the top of the program.
To apply the changes, click on the checkbox, then on the button Proceed:
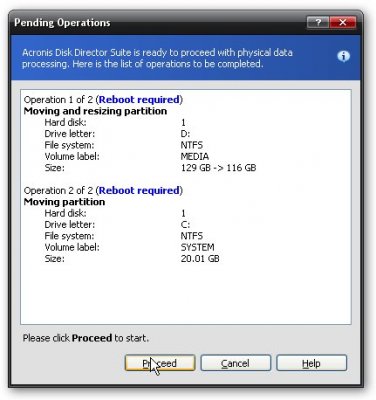
And we reboot the laptop by clicking on Proceed
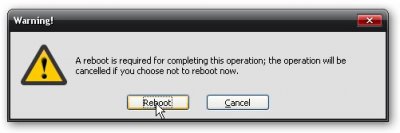
After that, the laptop will reboot, then disk operations will begin to take place, and then 2 more reboots. At this time, it is very important that the laptop does not turn off, otherwise you will lose information. Therefore, make sure that the battery is charged and the laptop is connected to the network.
Operations with a hard drive can take quite a while.
When the sizes are resized, you can proceed to directly restore the hidden partitions. I STRONGLY RECOMMEND TO USE 10 VERSION Acronis True Image
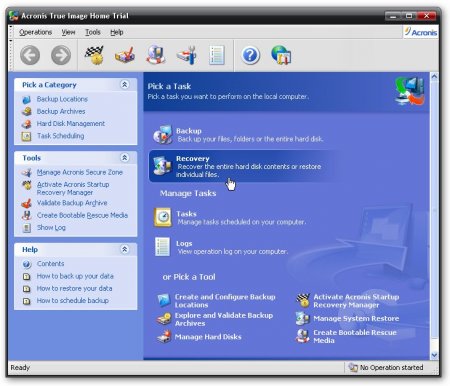
Let's get started. We launch Acronis True Image 10 and click Try now! (demo version...)

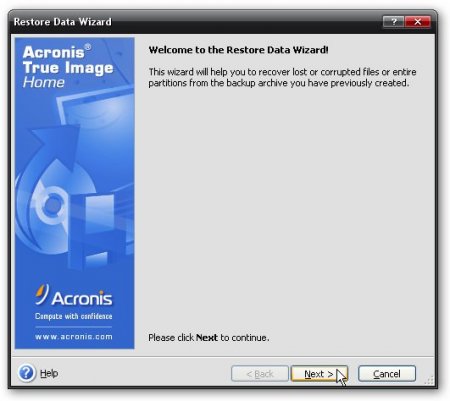
In the main window of the program, click on Recovery
Click Next
Select a partition image. In our case, it was divided into 2 parts for more convenient burning to DVD-ROMs. We select the first part, and Acronis already guesses that PQService2 is the second part.

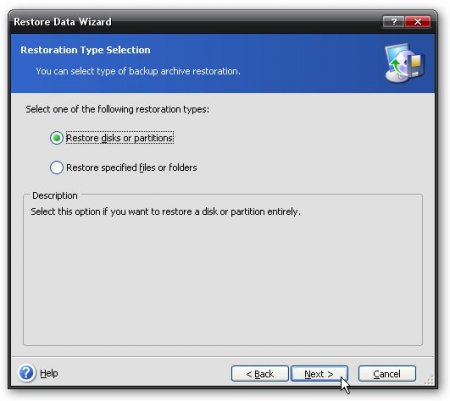
Click Next
Choose recovery disks or partitions
Acronis True Image Supports writing multiple partitions to a single image file. When we made images of hidden partitions, we recorded an image of one partition in one image file. Specify the only section from the image file:

Specify default settings and click Next
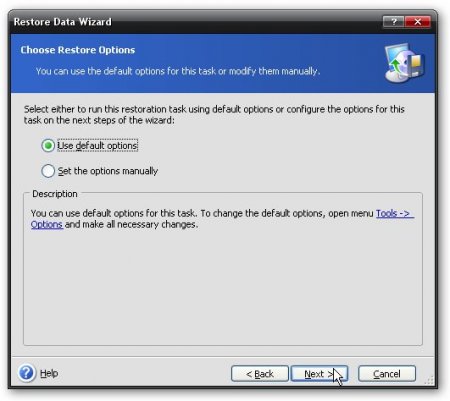
To start the process of restoring partitions from an image, click Proceed

A window like this will appear

when recovery is complete - click OK
Acer has developed technology to make life easier for users. eRecovery, which includes the application itself Acer erecovery, as well as a hidden partition on the hard drive with a volume of several gigabytes. Typically, on Acer laptops, this section is called PQService. Main function Acer erecovery - Restoring the operating system along with preinstalled programs and drivers as at the time of purchase of the laptop. Looking ahead, I note that to restore the operating system with programs and drivers, you must click when the laptop boots at the moment a white screen appears with the inscription Acer keyboard shortcut ALT + F10. On laptops AsusFor example, you must press the key F9. Information from C: drive is erased, but from D: and other partitions - no. As a result, after about an hour, the laptop will have an OS with programs and drivers as at the time of purchase
Technology Review Acer erecovery it’s logical to start with a description of the program Acer erecoverywhich is preinstalled on Acer laptops. At the first start, this program asks for a password:
Click on the button Setupand then on Create New a Password
In the upper window we enter the password, on average we enter it again for confirmation, and in the lower one we enter the hint
If everything went well - we get such a window and click OK
I will explain why that password. It must be entered during system recovery. Without entering this password, recovery will not start. It's done Acer for security. When recovering, all information from the C: drive is erased. If an outsider gets access to the laptop, then he can, deliberately / unintentionally, when loading, press ALT + F10 and all information (including valuable information) on drive C: would be erased. But if he does not know the password, then he will not succeed. If you do not know the password, then you can find it out by reading the FAQ
Now we pass directly to the program itself. At the bottom of the main window you can see 3 tabs Backup, Burn disc and Restore. I will describe the tab first Backup
At the top you can see 2 buttons Full and Fast. I will explain why they are needed. If you click on the button Full, then the process of creating a system restore point will begin, in other words, the entire contents of the disk FROM: It is archived and at any time you can restore the state of the system at the time of archiving. The process of creating a recovery point begins by specifying its name:
Click Next and a window appears warning that the recovery point occupies quite a lot of disk space and it is recommended to close all applications before starting the backup process:
Choose Yes and click Next. After that, the process of creating a recovery point starts:
When the creation is completed - click OK
Now I will explain why the button Fast
By clicking on this button we start the incremental archiving process. This means that only changes are recorded in the archive compared to the original archive, which we did by clicking on the button Full. Modified files take up significantly less space and the archiving process is much faster. At the bottom of the main window, you can check the box next to Notify me if the change from last incremental backup is more than This checkbox includes notifications if the size of the changes since the last incremental archiving is larger than a certain volume, which is indicated in the window. The incremental backup process begins by specifying the name of the restore point:
Then the program asks us to close all applications before starting archiving, and also notifies that the archive occupies a certain space on the hard drive. To start the process, select Yes and click Next
When the archiving process is completed, click Ok
As a result, we will have one complete archive, which contains all the information from the C drive: as well as one incremental archive, which contains only the changes after the creation of the main archive.
If we want to restore the state of the system (more precisely, the contents of the C :) drive at the time of archiving, press the button Restore. Recovery archives are stored in a hidden folder D: erData
Go to the description of the tab Burn disc. We have already encountered it in this material.
There are 4 buttons on it:
Create factory defeault disc - by clicking on this button we will start writing recovery discs, from which you can restore the entire system with drivers and programs as at the time of purchase of the laptop. Do these discs MANDATORY
Create user backup disc - write to the recovery point disks, which is essentially the archived contents of the C: drive. This button will be active only when a complete archive is made (to create it, on the tab Backup click Full).
Create current system configuration backup disc - if you click on this button, the contents of the C: drive are archived first, and then it is written to the drives.
Create - the distributions of all programs and drivers that come with the laptop are written to the disk. This drive is necessary MANDATORY do.
When you click on the buttons, such a recording window opens:
At the top, how many drives are needed. To start recording, click Next
Consider the tab Restore
On this tab, as on the previous one, 4 buttons are placed. I will describe them in order:
Restore system to factory defeault - Restore the OS with drivers and programs from hidden partitions. Information from drive C: is erased, but from other drives is not.
Restore system from user "s backup - restore the system from the user's recovery point.
Recover system from CD / DVD - restore the OS with drivers and programs using Factory defeault disc
Reinstall applications / drivers - reinstall programs and / or drivers. If you click on this button, this window will open:
Click the button Install and in the menu on the left we select programs or drivers:
In the list we look for the application / driver that interests us and click Install ... for installation:
I think this can be finished with a description of the utility Acer erecovery
Now we pass to the most interesting - hidden sections
It is quite logical to begin the consideration of hidden sections with a brief description of their contents. In order to view the contents of hidden partitions, we will use the Acronis True Image 10 utility (mirror) and directly images of hidden partitions. How to make them described
We launch Acronis True Image 10 and in the menu Tools select item Explore Backup Archive
Select the image of the hidden section (if the image consists of several pieces, then select the first one) and click Open
Open the archive. The screenshot shows the approximate contents of the section. PQService
In folder Rytools There is a utility for working with MBR and MBR itself.
In folder D2D / IMAGES posted recovery image of section C: laptop:
And here is the content of the second hidden section NTFS laptop Acer Aspire 5920
This section is used to implement Acer IOArcade technology - loading a media center based on a stripped-down version of Windows XP when you click the button with the little man on the right. This section contains Windows XPe and Acer Arcade.
I will describe how you can restore this section with only Driver & application backup disc. To do this, using the partition utility (Acronis Disc Director Suite 10, for example), create a regular NTFS partition with a volume of 3.248 GB at the end of the hard drive, create a file in notepad that contains 11 units (11111111111 ) and call it Arcade.dat. We move this file to the created 3.248GB partition. Then it remains only to find on Driver & application backup disc folder IOArcade and start the installation.
If someone needs an image of a hidden IOArcade section - DOWNLOAD HERE (thank you so much Sleganzov)
We have superficially dealt with the structure of hidden partitions, now we will consider the issue of their restoration. For this we need:
- made Acronis True Image images of sections. .
- Acronis True Image 10 (version 11 I do not recommend because of possible blue screens while loading)
- Acronis Disc Director Suite 10 (This program is offered for informational purposes only. Using this program you agree to remove it within 30 days or purchase it in order to continue using it, you must respect copyrights)
- It is recommended that you also download this boot disk image, which can help recovery. (This program is offered for informational purposes only. Using this program you agree to remove it within 30 days or purchase it in order to continue using it, you must respect copyrights)
Suppose that when restoring hidden partitions, we have re-partitioned the hard drive and installed Windows XP. The recovery procedure in Windows Vista is the same. Hidden sections are stored on drive D:
Warning: any operations with partitions pose a potential risk to your information. Therefore, it is better to write all critical information to discs or to another computer.
Let's get started. First of all, we need to find out the exact size of the hidden partitions. To do this, run Acronis True Image 10 and click Try now. Demo yet
On the menu Tools select item Explore Backup Archive
First, select the first section
and look at its size. In our case, this is 9.759 GB ... write this number somewhere on a piece of paper
Then we select the second one (if you have only one hidden partition on your laptop - skip this step)
rewrite the size on the same leaflet. In our case, it is 3.241 GB
Run and select in the menu Manual mode (Manual mode)
The program window opens. At the top we see a list of partitions on the hard drive.
Note: If the C: drive size is less than 20 GB, it is recommended that you first reduce the D: drive size and increase the C: drive size to 20 or more gigabytes due to free space. This is necessary so that during the recovery process section C does not overflow due to its insufficient size.
In the process of resizing using Acronis Disc Director Suite 10 information DO NOT DELETE.
When you have put things in order with the dimensions of the C: drive, you can proceed with the direct restoration of the partition (s) First you need to create using Acronis Disc Director Suite 10 free areas with sizes that correspond to the sizes of hidden partitions. We will create these areas by reducing the size of the D: drive. When creating free areas for partitions, it is VERY IMPORTANT that their placement on the disk corresponds to the original. That is, if the hidden partition was at the beginning of the disk, then the area under it should be created at the beginning of the disk, if the hidden partition was originally at the end of the disk, then you need to create an area of \u200b\u200bfree space for the hidden section at the end of the disk. This is a very important point, otherwise it is quite possible that automatic recovery will not want to work.
To create free areas, click on drive D: right-click and select Resize
Such a window opens:
Unallocated space before - in this window sets the size of the free area before the section. In our case, a hidden section NTFS should be at the beginning of the disk, so indicate its size, which was previously rewritten from Acronis True Image 10 PQService and placed it in STARTING A DISC Unallocated space after leave zero.
Unallocated space after - in this window sets the size of the free area after the section. In our case, the section is a hidden section PQService should be at the end of the disk, so indicate its size, which was previously rewritten from Acronis True Image 10. If you have only one section - PQService and placed it in END OF DISC, then indicate its size in this window. In this case, in the field Unallocated space before leave zero.
Push OK and get about the same picture. Everything as we asked. Before section D: 3.248 GB of free space, and after it - 9.759 GB. Now we need to move section C: so that at the very beginning of the hard drive there is free space the size that we set in the field Unallocated space before when resizing the partition D :. If you have only one section, which is located in END OF DISC, then you can skip this step because before section D: there is no free space and move section C: there’s simply nowhere to go. After disk D: you should see a free area with a size equal to the size of your hidden partition.
We click on the C drive: right-click and select Resize
In the window that appears, simply move the C: section all the way to the right:
Push OK and get something like this
Unallocated area in front of drive C: for partition NTFS and unallocated area for the section PQService after drive D:
Note: all changes are made after the laptop is rebooted, any change can be canceled by clicking on the blue arrow at the top of the program.
To apply the changes, click on the checkbox, then on the button Proceed:
Before asking a question in the eRecovery thread, please check the following:
1. The presence in the system of a hidden partition. To do this, just go to the "management" menu by right-clicking on the "my computer" icon and select the "disk management" menu. If you have Windows XP preinstalled, you will see the first section labeled "PQService" (configuration "EISA") ranging in size from 2.5 to 5 GB. If you have a preinstalled system - Windows Vista, then, as a rule, the first section is visible without a label (also the "EISA" configuration) and has a size of 9 GB or more. If there is no such partition, you should look for a solution to your problem in the topics of restoring / creating a hidden partition.
2. The presence in the system of a workable hidden partition. Sometimes it happens that when installing the operating system a user accidentally or intentionally deleted the first (hidden) partition and did not remove the "D2D Recovery - enable" function in the BIOS. In this case, when installing the original Acer mbr, an empty hidden partition is created or the first partition where the user installed operating system, marked as hidden and inactive (configuration "EISA"). In the latter case, of course, the operating system will not boot, as the computer will try to boot from the second partition. Just pressing hot keys "Alt-F10" will launch the first partition and, accordingly, the installed operating system. Therefore, you need to check the contents of the hidden section. It is not difficult to do this with the mbrwrwin.exe program (using the command in command line mbrwrwin mount hd0: 1 X :). This program allows you to mount a hidden partition (assigns a drive letter to it), and its contents can be viewed in Explorer. If you are experiencing difficulty in mounting, you can use this program. Peculiarity of the program in Windows Vista: when launched "as administrator", the hidden section will be visible only on the command line, you will not see it in Explorer. To view the contents, the dir X: command is used: (X: is the letter of the mounted partition, it can be any, for example, for the above program, the drive is assigned the letter N :). If you just run the program (on behalf of the current user), then the hidden section will be visible in Explorer, but you can’t do anything with the files, just view the contents. In the case of a non-working hidden partition (empty or where the operating system installed by you is located), you should also, as indicated above, look for a solution to your problem in the topics of restoring / creating a hidden partition. After the computer restarts, the PQService partition will become hidden again.
3. Enough free space on the system partition (the section where the OS is restored / installed). Windows Vista and Windows 7 require a partition of at least 30-35 GB, respectively. With insufficient free space, problems may arise with the use of recovery discs.
So, if you have a hidden section and you are experiencing problems with its use, then carefully read the answers to frequently asked questions and only if there is no solution you need, ask your question in the subject.
Question: How to start system recovery from a hidden partition?
Answer:By simultaneously pressing the Alt and F10 keys when the computer boots up (at the moment the Acer logo appears). Tip: hold down the Alt key and press F10 repeatedly. It does not always work out the first time, so try it several times.
Question: The keyboard shortcut "Alt + F10" does not work. How to be
Answer:In the vast majority of cases - not the original mbr (from Acer) was installed. Use this patch to correct the situation (in Windows Vista, run "as administrator" with the right mouse button).
Question:The hidden section (eRecovery management) has started, but the program requires a password to restore the system.
Answer: In the recovery system, the default password is six zeros (000000). Sometimes - AIM1R8. In order to change / delete it, you need to make the appropriate changes in the Empowering Technology application or in the aimdrs.dat file located in the hidden section (how to mount / open it - see above). The aimdrs.dat file can be edited in notepad (the password is specified explicitly) or deleted, then the password will not be requested in the future.
Question:When starting the "restore factory configuration" error appears "FAIL to get Disk 0 partition 3 drive letter"
Answer:An error occurred while assigning a letter to a partition due to incorrect operation on partitions. Launch console eRecovery Recovery (by Alt-F10) and press Alt-Home, a command line will appear. If this does not work out, use boot disk with Vista or Windows 7. Boot the computer from the disk and select "restore-command line". At the command prompt, type:
diskpart
sel disk 0
list part
In the list that appears, see if there is a 3rd partition (Partition 3), whether it refers to a data partition (usually drive D). If the partition is in place and is primary, then try to assign a letter to the partition with the command:
sel part 3
assign letter \u003d E
exit
After rebooting, drive E will become drive D, and recovery will take place in the usual way. If the disk is not formatted, then do:
sel part 3
format quick label \u003d DATA
assign letter \u003d E
Question:When installing the application eRecovery system reports the error "Not D2D System. eRecovery can not be installed ..."
Answer:
1. There is no hidden section.
2. Attempting to install the wrong version of eRecovery. To clarify the version you need, open in notepad the file napp.dat, located in a hidden section (how to open / mount it - see above). So:
NAPP 1.x.x or NAPP 3.2.x.x - eRecovery version 1.2.x.x (image created using the GHOST program)
NAPP 3.3.x.x - eRecovery version 1.3.x.x (hereinafter the image was created using the WASAY ImageIT program of different versions, the extension * .wsi)
NAPP 4.0.x.x - eRecovery version 2.0.x.x
NAPP 5.x.x.x - eRecovery version 2.5.x.x (this version and higher is used for preinstalled Windows Vista)
NAPP 6.x.x.x - eRecovery version 3.0.x.x
Question: When installing the eRecovery application, the system reports the error "Old NAPP Version ..."
Answer: Install the wrong version of eRecovery (see previous answer).
Question:When installing the eRecovery application, the system reports the error "Not Acer System ..."
Answer:Some parameters are not indicated in BIOS (model, computer manufacturer, etc.). Asset Tag - Acer is very important. To solve the problem, you must use special utility dmitools.exe. The program runs under DOS, so use a boot disk or other media to be able to work in this environment.
Dmitools.exe program commands:
[/ R | / Wp | / WS | / WU] [STRING]
: Read DMI Information from Memory
: Write Manufacturer Name to EEPROM. (Max. \u003d 16 characters)
: Write Product Name to EEPROM. (Max. \u003d 16 characters)
: Write Serial Number to EEPROM (Max. \u003d 22 characters)
: Write UUID to EEPROM. (Ignore String)
: Write Asset Tag to EEPROM. (Max. \u003d 32 characters)
For example: dmitools / wa Acer System
dmitools / wm Acer
dmitools / wp Aspire 5730
Question:Installation of eRecovery application is delayed indefinitely long time, the system does not "hang" and you have to shut down the application yourself.
Answer: Invalid structure hard drive. If Windows XP is preinstalled, then three partitions are required (1st PQService, 2nd Acer - system, 3rd ACERDATA). If Windows Vista is preinstalled, then you must have either three partitions (see above) or four (if there is an Instant-On-Arcade function that allows you to launch a multimedia application without loading the main operating system). In the latter case, the first and fourth sections are hidden, the other two are Acer and Data.
Question:When installing the eRecovery application version 3.x.x, the error "eRecovery can not be installed - 1. Bootable File" appears. How to be
Answer: This error means that the hidden section does not contain the files necessary to create a recovery disk. Mount the hidden partition and see if the acerboot.iso file is in the root of the partition.
Question:When installing the eRecovery application version 3.x.x, the error "eRecovery can not be installed - 6. SoftwareDisc" appears. How to be
Answer: You need to create the folder C: \\ Acer \\ Preload \\ Autorun and copy all the files from the Applications \\ Drivers disk that was previously created using the eRecovery application to this folder.
Question:When installing the eRecovery application version v6 (Windows 8), the error "The default configuration for the hard disk is not installed." How to be
Some versions of eRecovery require the presence of the folder C: \\ OEM \\ Autorun \\ Preload for normal operation.
We express all questions in this forum topic:
The material was prepared specifically for the http: // site (author - Guryev Denis, GDenis)
e-mail [email protected]
(change of material, copying and distribution only with permission of the author)
Acer laptops are very popular today. In fact, this is one of the most common laptops among the citizens of our country. This is due to the fact that it has good performance and high quality work. But when buying, not all models come with a preinstalled OS, so you should know how to 7 on Acer.
Installation process
BIOS on Acer laptops is standard, it includes various elements of the UEFI system. For this reason, the Acer is a rather difficult task for untrained users. From the very beginning, these same UEFI options must be disabled and after that you can proceed directly to the installation.
First you need to pay attention to the fact that acer laptopon which you are going to install the operating windows system 7, supports floppy drive or USB connectors. To do this, you need to go into the BIOS, for which, at the very beginning, when loading, you need to press the F2 key, go to initial section BIOS (BOOT) and press the keys Ф5 and Ф6 (depending on what you use - DVD or USB-connector - put a suitable device in priority place).

After that, go to the “Exit” tab and select “Save”. Once this is done, downloading of the entire necessary information directly from the drive used, and only then from the hard drive of the computer.
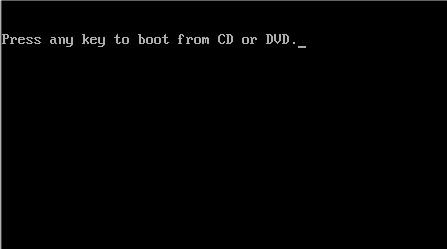
Immediately after that, it remains only to correctly indicate the most suitable edition of Windows 7. For example, if your Acer laptop is 64-bit, then you should install the 64-bit system accordingly. If you see “Press any key to boot from DVD or CD” on your screen, you just need to press any key - thus we accept the agreement on downloading from DVD / CD and after that the download starts.
If the installation for some reason did not start, then most likely this means that you have an outdated version of the laptop and you need to press the F10 key to enter the menu, and then everything is the same as described above. But besides the above actions, it is highly not recommended to do any other, especially if you do not have experience in carrying out this work. This can seriously affect the continued operation of your computer. The most important thing here is that all actions should be performed in accordance with the specified instruction.
As soon as a 100% mark appears on the installation progress indicator, the computer will restart and that's it - windows installation 7 on the Acer laptop successfully completed.
Using Utility Utilities
You can still do a little differently using the standard program True acronis Image  You from the very beginning just make an image of everything system disk C: (in short, all files on the C: drive are packed into an archive), and after that, if necessary, you can simply return the system status to the initial state. Thus, you not only install Windows 7 on your Acer laptop, but also save the most important files.


