Some applications require elevated privileges to run on Windows and must be run as an administrator. This prompts you to " User Account Control" (User Account Control or UAC), in which the system asks for your consent to launch the application.
Many users incorrectly believe that User Account Control is just a nuisance and turn it off. At the same time, the security of the computer is seriously affected, because. user consent to run applications is no longer required, and any malware can start and run smoothly. The presence of an antivirus also cannot 100% guarantee the security of a computer.
In this article, I'll show you how to simplify the process of running your favorite applications as an administrator without disabling UAC (fully or partially) and without compromising security.
There are several ways to run the application as an administrator:
As an example, we will run the command line (cmd) as an administrator.
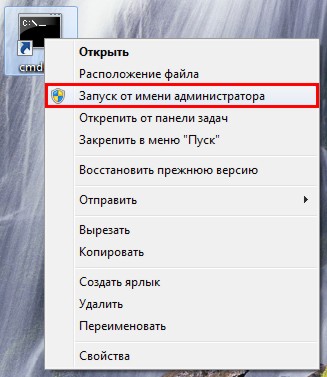
Method number 1 (normal) - launch via the right mouse button (UAC prompt is displayed)
Right click on the icon desired application and select " Run as administrator":
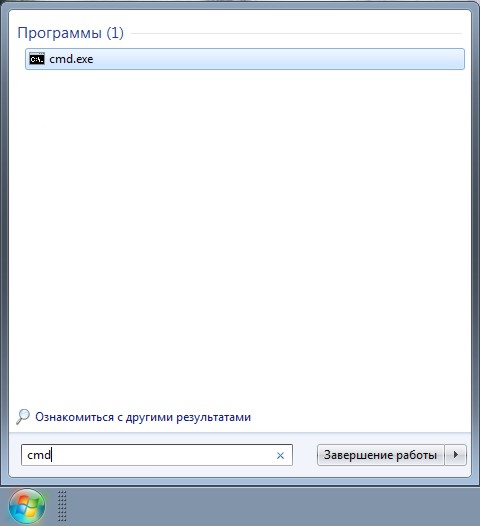
Method number 2 - launch using " Ctrl+Shift+Enter" (UAC prompt displayed)
Click Start, in the search bar, type the desired command and click Ctrl+Shift+Enter.
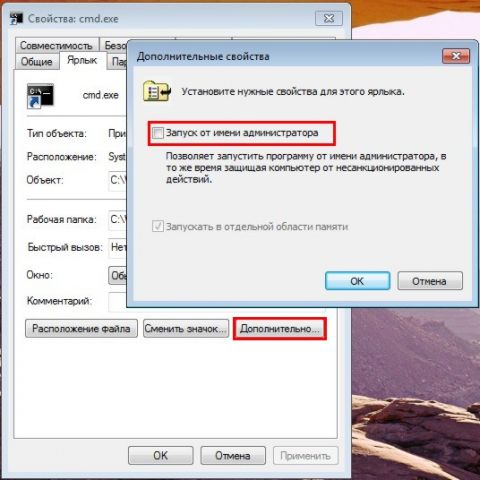
Method number 3 - set the run as administrator in the properties of the shortcut (the UAC prompt is displayed)
Right-click on the desired shortcut and select " Properties".
Go to tab " Label", press " Additionally", check the " Run as administrator":
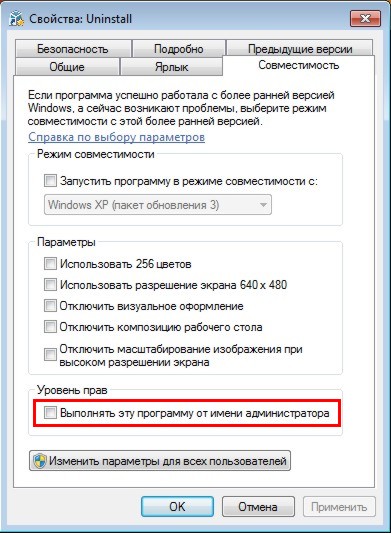
Or go to the " Compatibility" and check the box " Run this program as an administrator":
Method #4 - Make it easier to launch for selected applications using the Task Scheduler (UAC prompt is not displayed)
Important! This method only works for accounts that are members of a group. Administrators. It won't work for regular users because their ceiling is limited permissions.
Let's move on to interesting way. If there is an application that you run all the time and it comes from a trusted software vendor, for example, this windows application- can be easier to start. Create a shortcut for desired program does not take more than 2 minutes and this will allow you to get rid of unnecessary actions in the future. We launch task Scheduler (Start---> All programs ---> Standard---> Service---> Task Scheduler) and press " Create a task":
Specify Name for a new task and check the box " Run with highest privileges":
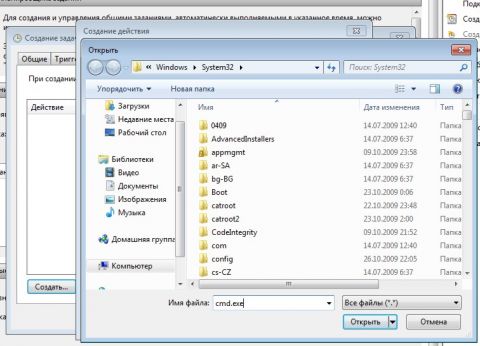
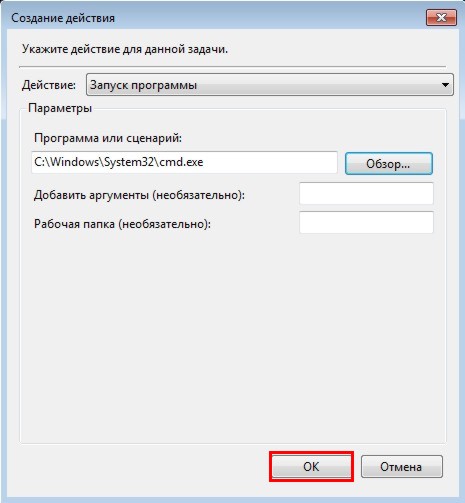
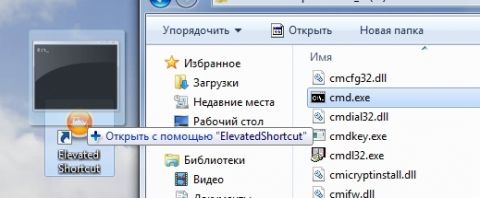
Go to tab Actions, press " Create", in the next window press " Review":

Specify the path to the desired application and click " Open":
Enlarge picture
Press " OK":
Close the scheduler and proceed to create a shortcut.
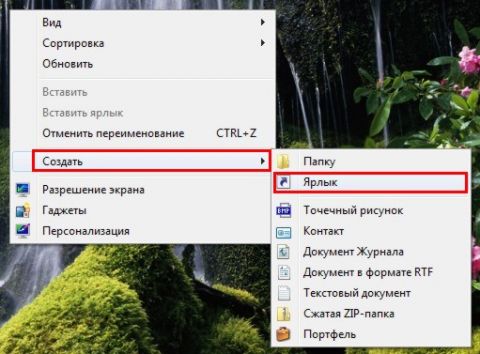
To create a shortcut on the desktop, right-click, select " Create" ---> "Label":
In field Property location enter:
Schtasks /run /tn cmd_admin
Where cmd_admin- the name of the task we created. If the name contains spaces, it must be enclosed in quotation marks.
Set the name of the label:

Enlarge picture
The shortcut is created and ready to use.
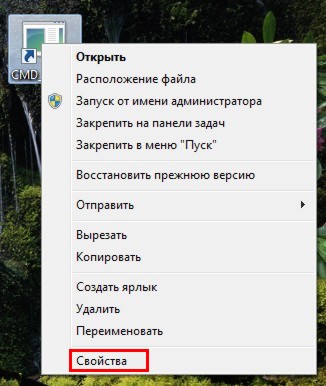
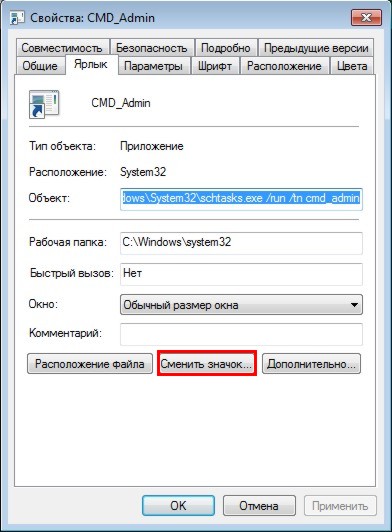
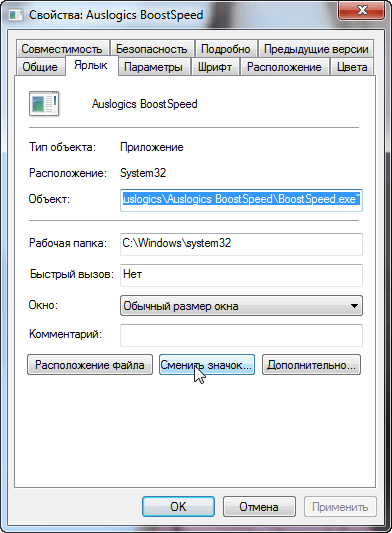
To change the icon - right-click on the shortcut, select " Properties":
Go to tab " Label"and press " change icon":
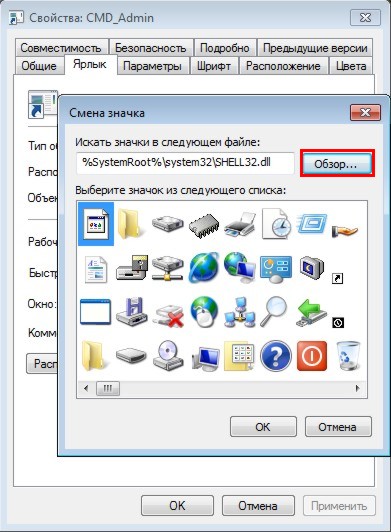
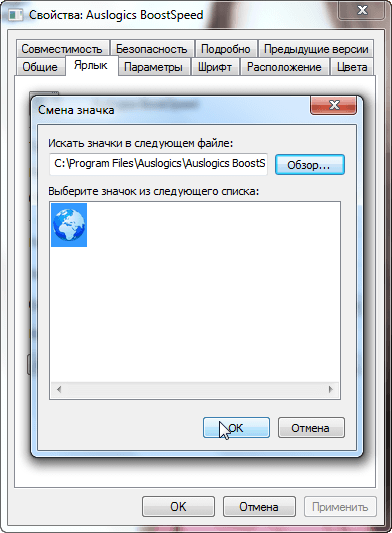
"Review..."
Specify the path to the program:
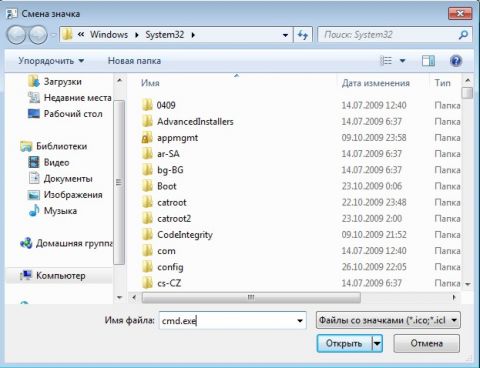
Enlarge picture
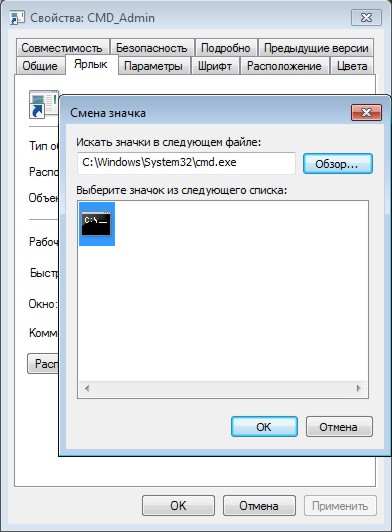
Select the desired icon and close both windows with the " OK":
Now the launch of the desired application as an administrator is performed by double-clicking on the created shortcut, while the UAC prompt is not displayed and the security remains intact.
Utility for automation "Method No. 4"
If you need to create shortcuts for a large number of programs, it is convenient to use the utility.
Working with the utility comes down to two simple steps:
- Installation
- Dragging an executable file (*.exe, *.bat, *.cmd) onto the utility shortcut:
Auto-transfer focus to a running program
The specifics of launching applications from the scheduler is that the focus is not transferred to the window and, for example, to type a command on the command line, you have to additionally click on the window. This behavior can help automate routine scheduled operations, but for "Method # 4" it is not always convenient.
There are several methods to "bypass". They work a little differently, so choose the one that suits you best. The first is more convenient for running programs, and the second for running scripts.
Add when creating a task:
Using the start command
Program or script:
Arguments:
/c start /d "path_to_program" file_name.exe
/c start /d "C:\Windows\System32\" cmd.exe
Using the NirCmd Utility
Program or script:
Path_to_nircmd\nircmd.exe
Arguments:
Exec show "path_to_program\file_name.exe"
Exec show "C:\Windows\System32\cmd.exe"
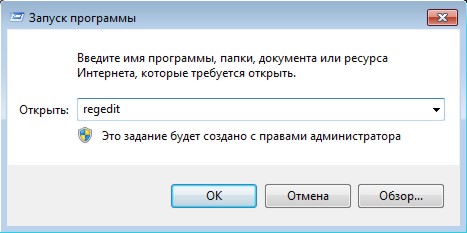
Launching the "Run" Dialog as an Administrator
Similar to starting command line you can configure the launch of the dialog box " Run", and the commands entered into it will also be run as administrator. The convenience of this approach is that the list of previously used commands is saved, and you can select the one you need from the list.
When creating a task in the scheduler, in the " Create an action"specify:
in field " Program or script":
Rundll32
in field " Add Arguments":
Shell32.dll,#61
Download the utility, unpack. We launch the command line, enter the desired command, the syntax is quite simple:
<путь к утилите> <путь к нужному приложению>
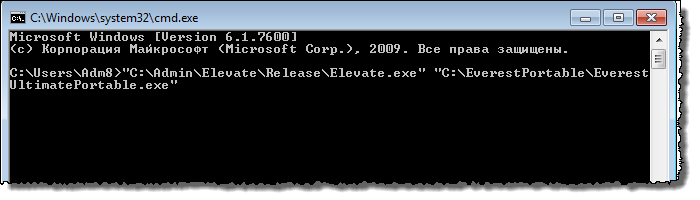
A UAC prompt will be displayed and the application will run as an administrator.
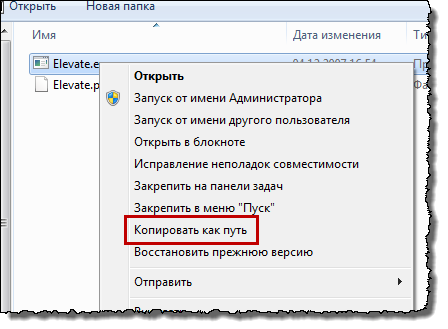
Note: In context windows menu 7 there is a very convenient function of copying the file path: hold down Shift, right-click on the file, select " copy as path".
Launching programs by a user as an administrator without entering an administrator password
Important! This method is insecure because it allows a user with limited rights to run code with full rights. A cunning user or malware can take advantage of this and compromise the system.
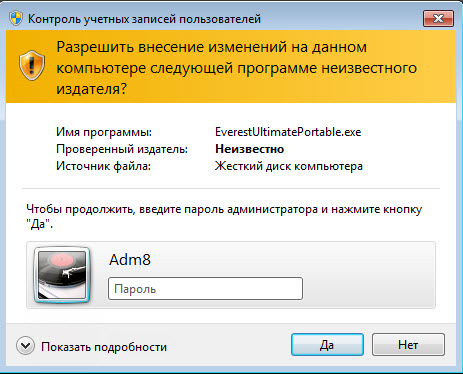
Consider another interesting problem: your account Windows entry is a member of the Administrators group, there is one or more accounts that are members of the Users group. The user needs to run a program that requires elevation. It usually looks like this: the user right-clicks on the file and selects "Run as administrator", which prompts you to enter the administrator password:
Of course, distributing an administrator password to users is not the most good idea. To "get around" this, we will use Alexey Kuryakin's AdmiLink utility. With its help, the administrator can create a shortcut for the user to launch the necessary program, while entering the administrator password is required only 1 time - when creating the shortcut. When the user starts the program, the password will be transmitted in encrypted form.
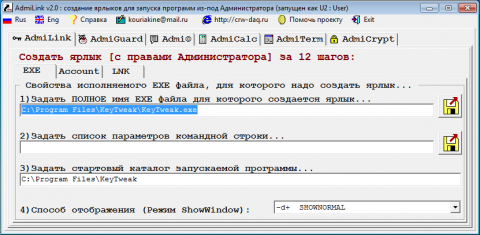
This method will work if the program can only be run as an administrator and the developer has not forgotten to specify this condition in the manifest. However, there is still a large number of old programs or programs that can be run as in normal mode, and on behalf of the administrator (in this case, a different set of functions will be available). When you try to run such a program using AdmiLink, it starts in normal mode (without administrative privileges). And if you try to check the box "Method number 3. The original style of the author is preserved.
Do you want to allow users with a standard account to run applications with administrative privileges without UAC or a password prompt? Then I'll tell you how to do it. We will create a shortcut using the command runas /savecred, which stores the password. I note that this can be considered a security hole - a normal user will be able to use runas / savecred to execute any command as an administrator without entering a password. However, in some situations it can be useful - for example, if you want your child to be out of the standard account could run applications as administrator without asking you.
Enable administrator account
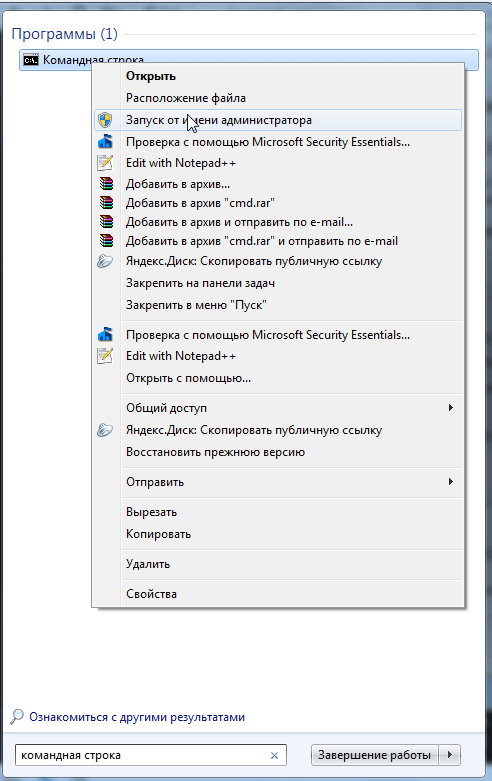
The first step is to enable the built-in administrator account, which is disabled by default. So, right-click on the command prompt shortcut and select "Run as administrator".
In the command prompt window that opens, run the following command:
net user administrator /active:yes
![]()
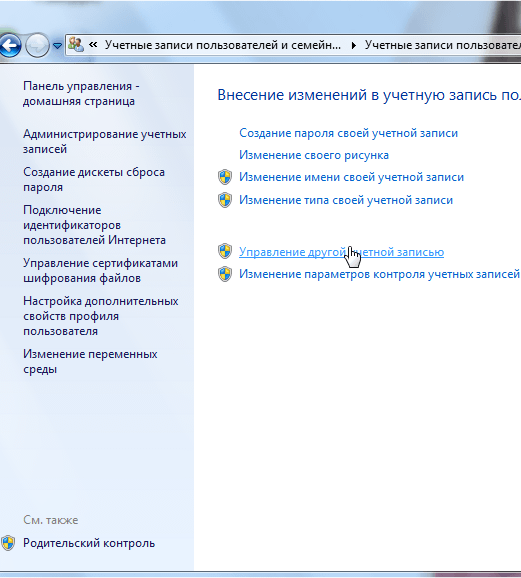
The account is now enabled, albeit without a password. To set a password, open the Control Panel, select the User Accounts and Family Safety category, and then open the User Accounts menu. Then click on the "Manage another account" link.
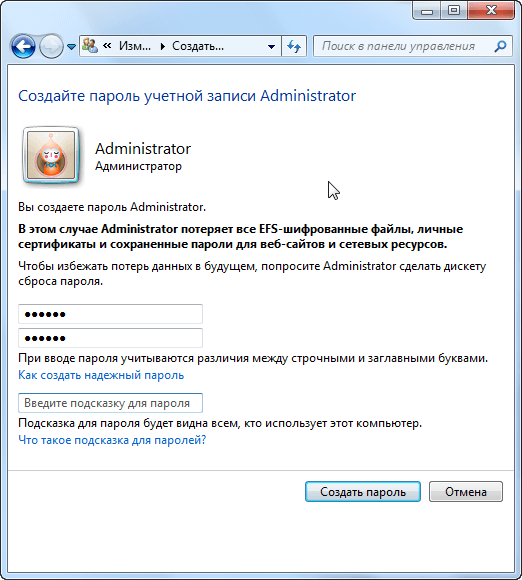
Select an administrator account, click on the Create Password button, and create a password for the administrator account.
Create a label
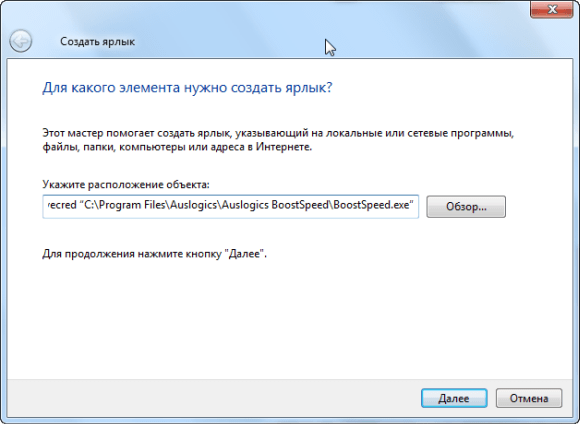
Now we will create a shortcut that will launch the application with administrator privileges. Right-click on the desktop, select "New" and then click on "Shortcut".

In the window that opens, enter the following command:
runas /user: computer name\Administrator /savecred" C:\Path\To\Program.exe“
Please note that you need to replace computer name to the name of your computer, and C:\Path\To\Program.exe to the full path to the program you want to run. For example, if the computer name is Laptop and the program you want to run is Auslogics BoostSpeed, you would enter the following path:
runas /user:Laptop\Administrator /savecred “C:\Program Files\Auslogics\Auslogics BoostSpeed\BoostSpeed.exe"
In the next window, enter a name for the shortcut. Optionally, you can choose an icon for the new shortcut - right-click on it and select "Properties".
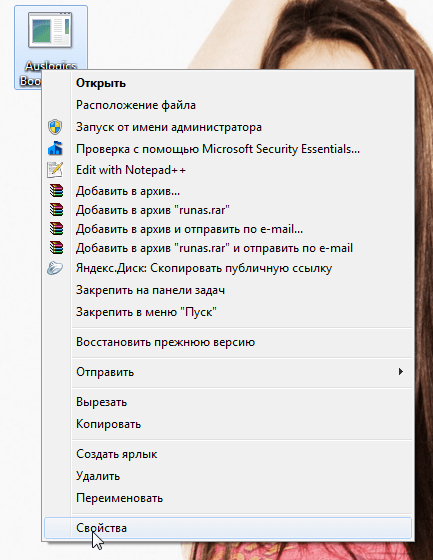
In the "Properties" dialog box, click on the "Change icon" button and select the appropriate one.
The first time you double-click the shortcut, you will be prompted for the password for the administrator account you created earlier.

This password will be saved - the next time you run the program, you won't have to enter it again.
As mentioned above, under standard accounts, users can run any program with administrator rights without entering a password (using the runas /savecred command), so keep that in mind.
The admin password is stored in the "Credential Manager" - if you want to delete the saved password, you can do it from there.
Have a great day!
The most important thing was not described in sufficient detail: how to run this code on real hardware? How to create your own boot disk? In this article, we will answer all these questions in detail (partially, these questions were dealt with in the previous article, but for ease of reading, we allow ourselves a slight duplication of material).
There are a huge number of descriptions and tutorials on the Internet about how to write your own mini-OS, there are even hundreds of ready-made small hobby OSes. One of the most worthy resources on this topic, which I would like to highlight, is the osdev.org portal. In order to complement the previous article about PCI (and the ability to write subsequent articles about the various functions that are present in any modern OS), we will describe step by step instructions on creating a bootable disk with a familiar C program. We tried to write as detailed as possible so that everything could be figured out on our own.
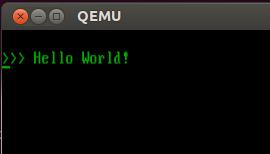
So, the goal: with as little effort as possible, create your own bootable USB flash drive that just prints the classic “Hello World” on the computer screen.
To be more precise, we need to “get” into protected mode with disabled paging and interrupts - the simplest mode of the processor with the usual behavior for a simple console program. The smartest way to achieve this goal is to build a multiboot kernel and boot it using the popular Grub bootloader. An alternative to this solution is to write your own volume boot record (VBR), which would load your own written loader (loader). A decent loader, at a minimum, should be able to work with the disk, with the file system, and parse elf images. This means writing a lot of assembly code, and a lot of C code. In short, it's easier to use Grub, which already knows how to do everything you need.
Let's start with the fact that a certain set of compilers and utilities is required for further actions. The easiest way is to use some Linux (for example, Ubuntu), since it will already contain everything you need to create a bootable flash drive. If you are used to working in Windows, then you can configure virtual machine with Linux (using Virtual Box or VMware Workstation).
If you are using linux ubuntu, then first of all you need to install several utilities:
1. Grub. To do this, use the command:
sudo apt-get install grub
2. Qemu. It is needed to make everything fast, for this the command is similar:
sudo apt-get install qemu
Now our plan looks like this:
1. create a C program that prints a line on the screen.
2. collect an image from it (kernel.bin) in miniboot format so that it is available for boot using GRUB.
3. create a boot disk image file and format it.
4. install Grub on this image.
5. copy the created program (kernel.bin) to disk.
6. write the image to physical medium or run it in qemu.
And the system boot process:
To make it work, you will need to create several files and directories:
Step 1. Creating the code of the target program (kernel):
We create a kernel.c file that will contain the following code that prints a message on the screen:
#include "printf.h" #include "screen.h" #include "types.h" void main(void) ( clear_screen(); printf("\n>>> Hello World!\n"); )
Here everything is familiar and simple. Adding the printf and clear_screen functions will be covered next. In the meantime, we need to supplement this code with everything necessary so that it can be loaded by Grub.
In order for the kernel to be in multiboot format, the following structure must be in the first 8 kilobytes of the kernel image:
If all the specified conditions are met, then Grub passes a pointer to the multiboot Information structure and the value 0x1BADB002, respectively, through the % eax and % ebx registers. The multiboot Information structure contains various information, including a list of loaded modules and their location, which may be needed to further boot the system.
In order for the file with the program to contain the necessary signatures, let's create a file loader.s with the following content:
Text .global loader # making entry point visible to linker # setting up the Multiboot header - see GRUB docs for details .set FLAGS, 0x0 # this is the Multiboot "flag" field .set MAGIC, 0x1BADB002 # "magic number" lets bootloader find the header .set CHECKSUM, -(MAGIC + FLAGS) # checksum required .align 4 .long MAGIC .long FLAGS .long CHECKSUM # reserve initial kernel stack space .set STACKSIZE, 0x4000 # that is, 16k. .lcomm stack, STACKSIZE # reserve 16k stack .comm mbd, 4 # we will use this in kmain .comm magic, 4 # we will use this in kmain loader: movl $(stack + STACKSIZE), %esp # set up the stack movl %eax, magic # Multiboot magic number movl %ebx, mbd # Multiboot data structure call main # call C code cli hang: hlt # halt machine should kernel return jmp hang
Let's consider the code in more detail. This code is taken from wiki.osdev.org/Bare_Bones almost unchanged. Since gcc is used for compilation, the GAS syntax is used. Let's take a closer look at what this code does.
.text
All subsequent code will fall into the executable .text section.
.global loader
We declare the loader symbol visible to the linker. This is required because the linker will use the loader as the entry point.
.set FLAGS, 0x0 # set FLAGS = 0x0 .set MAGIC, 0x1BADB002 # set MAGIC = 0x1BADB002 .set CHECKSUM, -(MAGIC + FLAGS) # set CHECKSUM = -(MAGIC + FLAGS) .align 4 # align subsequent data to 4 bytes .long MAGIC # place the MAGIC value at the current address .long FLAGS # place the FLAGS value at the current address .long CHECKSUM # place the CHECKSUM value at the current address
This code generates the Multiboot format signature. The .set directive sets the character value to the expression to the right of the comma. The .align 4 directive aligns the following content by 4 bytes. The .long directive stores the value in the next four bytes.
.set STACKSIZE, 0x4000 # set STACKSIZE = 0x4000 .lcomm stack, STACKSIZE # reserve a STACKSIZE byte. stack refers to range.comm mbd, 4 # reserve 4 bytes for mdb variable in COMMON area .comm magic, 4 # reserve 4 bytes for magic variable in COMMON area
During the boot process, grub does not set up the stack, and the first thing the kernel must do is set up the stack, for this we reserve 0x4000 (16Kb) bytes. The .lcomm directive reserves the number of bytes specified after the comma in the .bss section. The name stack will only be visible in the compiled file. The .comm directive does the same as .lcomm, but the symbol name will be declared globally. This means that by writing the following line in the C code, we can use it.
extern int magic
And now the last part:
loader: movl $(stack + STACKSIZE), %esp # initialize stack movl %eax, magic # write %eax to magic movl %ebx, mbd # write %ebx to mbd call main # call main function cli # disable interrupts from hardware hang: hlt # stop cpu until interrupt occurs jmp hang # jump to hang label
The first instruction saves the value of the top of the stack in the %esp register. Since the stack grows downwards, the address of the end of the range allocated for the stack is written to %esp. The next two instructions store in the previously reserved 4-byte ranges the values that Grub passes in the %eax, %ebx registers. Then the main function is called, which is already written in C. If this procedure returns, the processor will loop.
Step 2. Preparing additional code for the program (system library):
Since the entire program is written from scratch, the printf function must be written from scratch. To do this, you need to prepare several files.
Let's create a common and include folder:
mkdir common mkdir include
Let's create the common\printf.c file, which will contain the implementation of the familiar printf function. This file can be taken in its entirety from the www.bitvisor.org project. Path to the file in bitvisor sources: core/printf.c. In the printf.c file copied from bitvisor, for use in the target program, you need to replace the lines:
#include "initfunc.h" #include "printf.h" #include "putchar.h" #include "spinlock.h"
to the lines:
#include "types.h" #include "stdarg.h" #include "screen.h"
Then, remove the printf_init_global function and all its references in this file:
Static void printf_init_global (void) ( spinlock_init (&printf_lock); ) INITFUNC("global0", printf_init_global);
Then remove the printf_lock variable and all references to it in this file:
static spinlock_t printf_lock; ... spinlock_lock(&printf_lock); ... spinlock_unlock(&printf_lock);
The printf function uses the putchar function, which also needs to be written. To do this, let's create a common\screen.c file with the following content:
#include "types.h" #define GREEN 0x2 #define MAX_COL 80 // Maximum number of columns #define MAX_ROW 25 // Maximum number of rows #define VRAM_SIZE (MAX_COL*MAX_ROW) // Size of screen, in short"s # define DEF_VRAM_BASE 0xb8000 // Default base for video memory static unsigned char curr_col = 0; static unsigned char curr_row = 0; // Write character at current screen location #define PUT(c) (((unsigned short *) (DEF_VRAM_BASE)) \ [(curr_row * MAX_COL) + curr_col] = (GREEN<< 8) | (c))
// Place a character on next screen position
static void cons_putc(int c)
{
switch (c)
{
case "\t":
do
{
cons_putc(" ");
} while ((curr_col % 8) != 0);
break;
case "\r":
curr_col = 0;
break;
case "\n":
curr_row += 1;
if (curr_row >= MAX_ROW) ( curr_row = 0; ) break; case "\b": if (curr_col > 0) ( curr_col -= 1; PUT(" "); ) break; default: PUT(c); curr_col += 1; if (curr_col >= MAX_COL) ( curr_col = 0; curr_row += 1; if (curr_row >= MAX_ROW) ( curr_row = 0; ) ) ); ) void putchar(int c) ( if (c == "\n") cons_putc("\r"); cons_putc(c); ) void clear_screen(void) ( curr_col = 0; curr_row = 0; int i; for (i = 0; i< VRAM_SIZE; i++)
cons_putc(" ");
curr_col = 0;
curr_row = 0;
}
The specified code contains simple logic for printing characters to the screen in text mode. In this mode, two bytes are used to write a character (one with the character code, the other with its attributes), written directly to the video memory displayed immediately on the screen and starting from the address 0xB8000. The screen resolution is 80x25 characters. The character is directly printed using the PUT macro.
Now only a few header files are missing:
1. File include\screen.h. Declares the putchar function, which is used in the printf function. File contents:
#ifndef _SCREEN_H #define _SCREEN_H void clear_screen(void); void putchar(int c); #endif
2. File include\printf.h. Declares a printf function that is used in main. File contents:
#ifndef _PRINTF_H #define _PRINTF_H int printf (const char *format, ...); #endif
3. File include\stdarg.h. Declares functions for iterating over arguments, the number of which is not known in advance. The entire file is taken from the www.bitvisor.org project. Path to the file in the bitvisor project code: include\core\stdarg.h.
4. File include\types.h. Declares NULL and size_t. File contents:
#ifndef _TYPES_H #define _TYPES_H #define NULL 0 typedef unsigned int size_t; #endif
Thus, the include and common folders contain the minimum system library code that any program needs.
Step 3. Scripting the linker:
We create the linker.ld file, which will be used by the linker to generate the target program file (kernel.bin). The file must contain the following:
ENTRY (loader) LMA = 0x00100000; SECTIONS ( . = LMA; .multiboot ALIGN (0x1000) : ( loader.o(.text) ) . text ALIGN(0x1000) : ( *(.text) ) .rodata ALIGN (0x1000) : ( *(.rodata*) ) .data ALIGN (0x1000) : ( *(.data) ) .bss: ( *(COMMON) *( .bss) ) /DISCARD/ : ( *(.comment) ) )
The built-in ENTRY() function allows us to set an entry point for our kernel. It is at this address that grub will transfer control after loading the kernel. The linker will use this script to create a binary file in ELF format. An ELF file consists of a set of segments and sections. The list of segments is contained in the Program header table, the list of sections in the Section header table. The linker operates with sections, the image loader (in our case, GRUB) with segments. 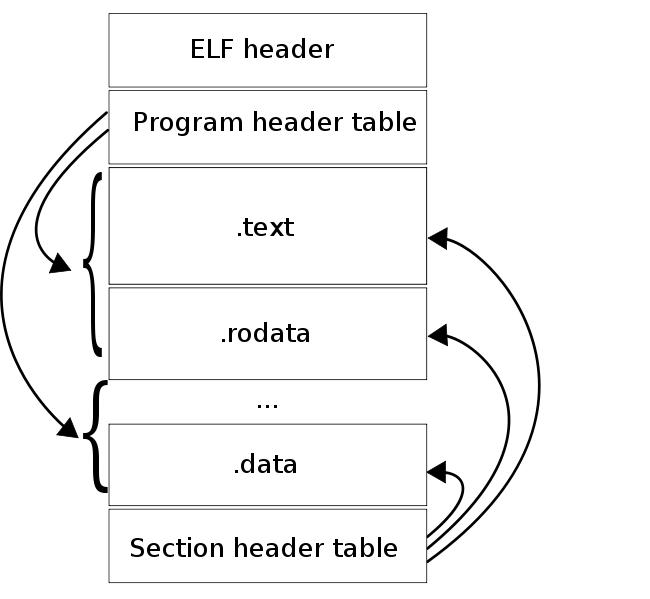
As you can see in the figure, segments are made up of sections. One of the fields that describes a section is virtual address, where the section should be at the time of execution. In fact, a segment has 2 fields describing its location: the virtual address of the segment and the physical address of the segment. The virtual address of the segment is the virtual address of the first byte of the segment at the moment the code is executed, the physical address of the segment is the physical address where the segment should be loaded. For application programs, these addresses are always the same. Grub loads image segments by their physical address. Since Grub does not set up paging, the segment's virtual address must match its physical address, because in our program virtual memory also not configurable.
SECTIONS
Indicates that sections are described next.
. = LMA;
This expression tells the linker that all subsequent sections are after the LMA address.
ALIGN (0x1000)
The directive above means that the section is 0x1000 byte aligned.
.multiboot ALIGN (0x1000) : ( loader.o(.text) )
A separate multiboot section, which includes the .text section from the loader.o file, is made to ensure that the multiboot format signature gets into the first 8kb of the kernel image.
.bss: ( *(COMMON) *(.bss) )
*(COMMON) is the area where memory is reserved by the .comm and .lcomm instructions. We place it in the .bss section.
/DISCARD/ : ( *(.comment) )
All sections marked as DISCARD are removed from the image. In this case, we remove the .comment section, which contains information about the version of the linker.
Now let's compile the code into a binary file with the following commands:
as -o loader.o loader.s gcc -Iinclude -Wall -fno-builtin -nostdinc -nostdlib -o kernel.o -c kernel.c gcc -Iinclude -Wall -fno-builtin -nostdinc -nostdlib -o printf.o -c common/printf.c gcc -Iinclude -Wall -fno-builtin -nostdinc -nostdlib -o screen.o -c common/screen.c ld -T linker.ld -o kernel.bin kernel.o screen.o printf .o loader.o
Using objdump, let's see what the kernel image looks like after linking:
objdump -ph ./kernel.bin
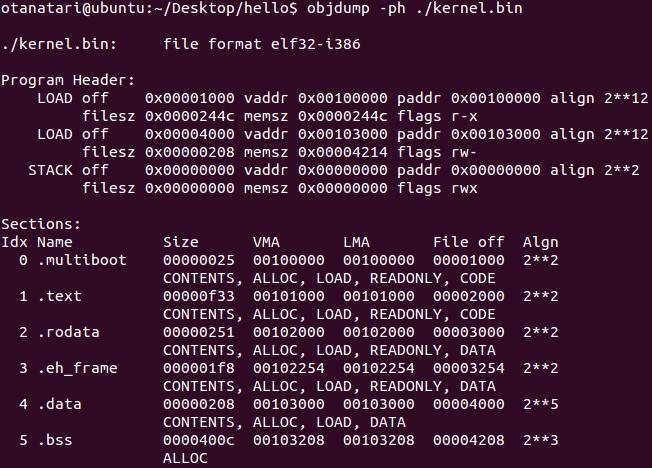
As you can see, the sections in the image match those we described in the linker script. The linker has formed 3 segments from the described sections. The first segment includes the .multiboot, .text, .rodata sections and has a virtual and physical address of 0x00100000. The second segment contains the .data and .bss sections and is located at 0x00104000. So everything is ready to load this file using Grub.
Step 4Preparing the Grub Boot Loader:
Create grub folder:
mkdir grub
Copy to this folder some Grub files that are needed to install it on the image (the following files exist if Grub is installed on the system). To do this, you need to run the following commands:
cp /usr/lib/grub/i386-pc/stage1 ./grub/ cp /usr/lib/grub/i386-pc/stage2 ./grub/ cp /usr/lib/grub/i386-pc/fat_stage1_5 ./grub /
Create a grub/menu.lst file with the following content:
timeout 3 default 0 title mini_os root (hd0,0) kernel /kernel.bin
Step 5: Automate and Create a Boot Image:
To automate the build process, we will use the make utility. To do this, we will create a makefile that will compile source, build the kernel and create a boot image. The Makefile should have the following content:CC=gcc CFLAGS=-Wall -fno-builtin -nostdinc -nostdlib LD=ld OBJFILES=\loader.o\common/printf.o\common/screen.o\kernel.o image: @echo "Creating hdd.img. .." @dd if=/dev/zero of=./hdd.img bs=512 count=16065 1>/dev/null 2>&1 @echo "Creating bootable first FAT32 partition..." @losetup /dev/ loop1 ./hdd.img @(echo c; echo u; echo n; echo p; echo 1; echo ; echo ; echo a; echo 1; echo t; echo c; echo w;) | fdisk /dev/loop1 1>/dev/null 2>&1 || true @echo "Mounting partition to /dev/loop2..." @losetup /dev/loop2 ./hdd.img \ --offset `echo \`fdisk -lu /dev/loop1 | sed -n 10p | awk "(print $$3)"\`*512 | bc` \ --sizelimit `echo \`fdisk -lu /dev/loop1 | sed -n 10p | awk "(print $$4)"\`*512 | bc` @losetup -d /dev/loop1 @echo "Format partition..." @mkdosfs /dev/loop2 @echo "Copy kernel and grub files on partition..." @mkdir -p tempdir @mount /dev/loop2 tempdir @mkdir tempdir/boot @cp -r grub tempdir/boot/ @cp kernel.bin tempdir/ @sleep 1 @umount /dev/loop2 @rm -r tempdir @losetup -d /dev/loop2 @echo "Installing GRUB. .." @echo "device (hd0) hdd.img \n \ root (hd0,0) \n \ setup (hd0) \n \ quit\n" | grub --batch 1>/dev/null @echo "Done!" all: kernel.bin rebuild: clean all .s.o: as -o [email protected] $< .c.o: $(CC) -Iinclude $(CFLAGS) -o [email protected]-c $< kernel.bin: $(OBJFILES) $(LD) -T linker.ld -o [email protected]$^ clean: rm -f $(OBJFILES) hdd.img kernel.bin
The file declares two main targets: all, which compiles the kernel, and image, which creates the boot disk. The all target, like the usual makefile, contains the subtargets .s.o and .c.o, which compile *.s and *.c files into object files (*.o), as well as the target for generating kernel.bin, which calls the linker with the script created earlier. These targets execute exactly the same commands as in step 3.
Of greatest interest here is the creation boot image hdd.img (image target). Let's consider step by step how this happens.
dd if=/dev/zero of=./hdd.img bs=512 count=16065 1>/dev/null 2>&1
This command creates an image with which further work will take place. The number of sectors is not chosen randomly: 16065 = 255 * 63. By default, fdsik treats the disk as if it had CHS geometry, in which Headers (H) = 255, Sectors (S) = 63, and Cylinders (C) depends on disk size. Thus, minimum size disk that fdsik can work with without changing the default geometry is 512 * 255 * 63 * 1 = 8225280 bytes, where 512 is the sector size and 1 is the number of cylinders.
Next, the partition table is created:
losetup /dev/loop1 ./hdd.img (echo c; echo u; echo n; echo p; echo 1; echo ; echo ; echo a; echo 1; echo t; echo c; echo w;) | fdisk /dev/loop1 1>/dev/null 2>&1 || true
The first command mounts the hdd.img file to the /dev/loop1 block device, allowing the file to be treated as a device. The second command creates a partition table on the /dev/loop1 device, which contains 1 primary boot partition disk that occupies the entire disk and is labeled FAT32.
Then we format the created partition. To do this, you need to mount it as a block device and format it.
losetup /dev/loop2 ./hdd.img \ --offset `echo \`fdisk -lu /dev/loop1 | sed -n 10p | awk "(print $$3)"\`*512 | bc` \ --sizelimit `echo \`fdisk -lu /dev/loop1 | sed -n 10p | awk "(print $$4)"\`*512 | bc` losetup -d /dev/loop1
The first command mounts the previously created partition to the /dev/loop2 device. The -offset option specifies the address of the beginning of the section, and -sizelimit the address of the end of the section. Both options are obtained using the fdisk command.
mkdosfs /dev/loop2
The mkdosfs utility formats the partition in file system FAT32.
To directly build the kernel, the commands discussed earlier in the classic makefile syntax are used.
Now let's look at how to install GRUB on a partition:
mkdir -p tempdir # creates a temporary directory mount /dev/loop2 tempdir # mounts the partition to the mkdir directory tempdir/boot # creates the /boot directory on the partition cp -r grub tempdir/boot/ # copy the grub folder to /boot cp kernel.bin tempdir / # copies the kernel to the root of the partition sleep 1 # wait for Ubuntu umount /dev/loop2 # unmount the temporary folder rm -r tempdir # delete the temporary folder losetup -d /dev/loop2 # unmount the partition
After executing the above commands, the image will be ready to install GRUB. The following command installs GRUB into the MBR of the hdd.img disk image.
echo "device (hd0) hdd.img \n \ root (hd0,0) \n \ setup (hd0) \n \ quit\n" | grub --batch 1>/dev/null
Everything is ready for testing!
Step 6 Launch:
To compile, use the command:
make all
After which the kernel.bin file should appear.
To create a bootable disk image, use the command:
sudo make image
As a result, the hdd.img file should appear.
Now you can boot from the hdd.img disk image. You can check this with the following command:
qemu -hda hdd.img -m 32
or:
qemu-system-i386 -hda hdd.img 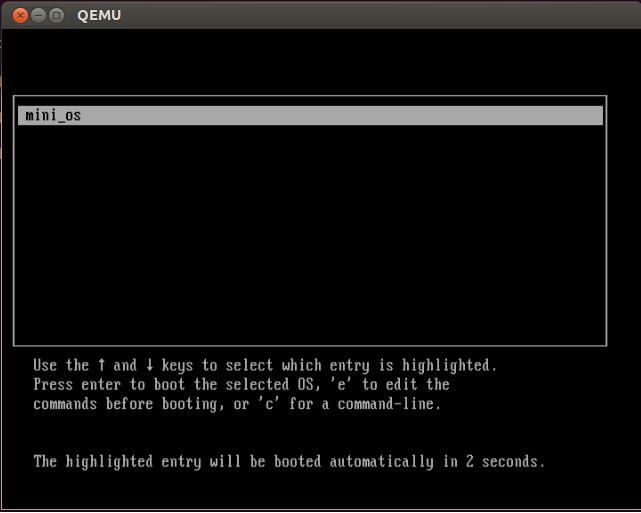
To check on a real machine, you need to dd this image to a flash drive and boot from it. For example this command:
sudo dd if=./hdd.img of=/dev/sdb
Summing up, we can say that as a result of the actions taken, a set of source codes and scripts is obtained that allow you to conduct various experiments in the field of system programming. The first step towards the creation of a systemic software such as hypervisors and operating systems.
What if you need to run a program but don't want to install it? Zero Install Help!
Billions of people around the world use computers or laptops in the operating room. Windows system. Usually, we install programs, after which they take free place on disk and use RAM. This reduces the speed of the computer.
Today we will tell you how you can increase the performance of your computer and reduce the load on memory. For this you need to run necessary programs without installing them.
How to run the program without installation?
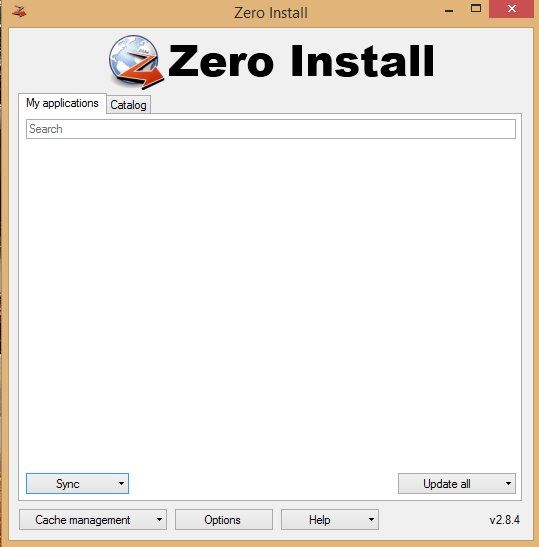
1. Download Zero Install.
First, download the Zero Install software, which will allow you to run programs without having to install them on your computer.
2. Install Zero Install.
Once you have downloaded Zero Install, double click on the file to install it. Then run new program on your computer.
3. Click onmasonry "Catalogue".
As soon as Zero Install is launched on the computer or Windows laptop, you must go to the "Catalog" tab. Here click on the "Refresh list" button to refresh the list available programs.
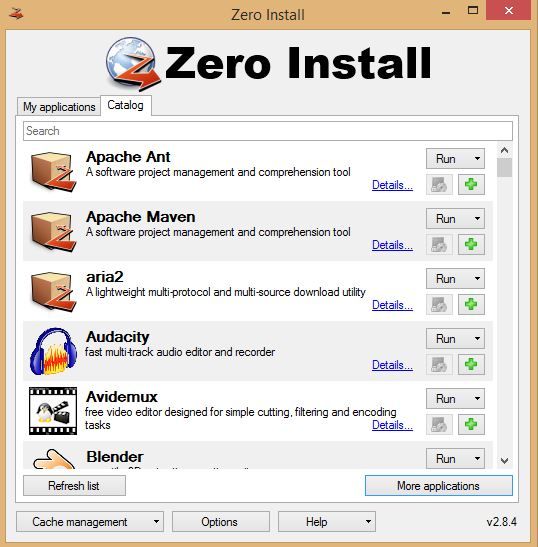
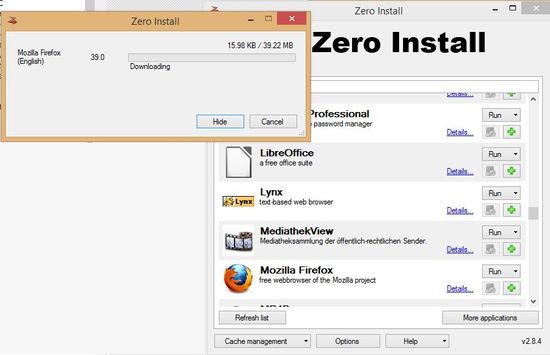
4. Select a program to run.
Take a close look full list available programs. If you find the program you need, select it and click "Run". Some programs may choose Firefox browser or Mozilla to run. Just wait for the software to fully download and then you can run it on your computer without installing it.
Summarizing
If your computer does not have enough free memory or power to run the program, you can use Zero Install. I think this is a great way to not clutter up your computer with the programs you need at one time.
Also, your computer may not have enough power to run certain programs, such as Eclipse IDE, JetBrains, NetBeans, etc. These are really heavy programs for developers that consume a lot of RAM.
Zero Install will help you run these and many other programs without installing them on your computer.


