Tabs Mozilla firefox - This is a magical browser function that allows you to speed up your work in the Internet browser and at the same time save workspace in the program window.
Today I want to tell you what you can do with tabs in Mozilla Firefox. You will learn how to group and sort them, change the size and color, pin and clone, how to implement a preview in a pop-up window when you hover over any tab, how to enable tab auto-update through certain time…
I really love mozilla Browser Firefox for its "flexibility" and very painfully switched from it a year ago only because of the incomparable speed of the latter.
But life goes on, everything changes and after drinking some useful vitamins for the brain, manufacturers in their twenty-fourth version twisted the Mozilla Firefox engine so that the browser caught up with the product of the “good corporation” in terms of speed. In any case, visually I do not notice the difference in their work.
By the way, I read somewhere on the net that the Mozilla Firefox browser 26 there will be a bomb in general! Developers are threatening to hit the whole world with the speed of their browser and its capabilities. It seems like version 24 is just flowers. Well, wait and see, but for now I will hold my fists for them.
I am not conservative and easily accept anything new or improved, so Mozilla Firefox returned the default browser status. Hurrah!
Moving was absolutely painless, as recently I learned between different browsers.
Something misplaced me in the wrong steppe, an article like Mozilla Firefox tabs?
So, we will improve and optimize tabs in Mozilla Firefox with the help of add-ons, this is natural. But first, I'll show you a built-in function in the browser for grouping tabs.
How to group tabs in Mozilla Firefox
For a very long time, Mozilla Firefox learned to group tabs, but not all users are aware of this and know how to use this feature when working in the browser. But everything is very simple and convenient ...
Open a dozen tabs now. Opened? Now click on the button that lives in the upper right of the window ...
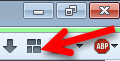
Do you have such a button? Then right-click anywhere in the toolbar and go to settings ...
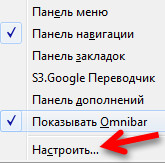
Find and drag (holding the left mouse button) it to the toolbar ...
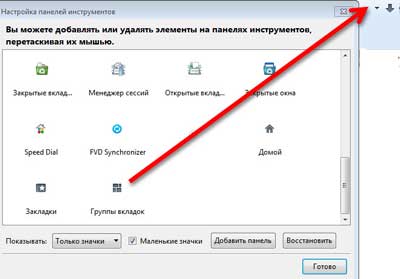
Remember to click Finish.
After clicking on this button, you will be taken to the tab groups window. You will have one group, which for convenience can be stretched for the lower right corner.
Now drag any tab from this single group to an empty space on the right or bottom and release the left mouse button. You have created a second group of tabs. You can drag and drop into this new group how many tabs you need, for example, on the subject of open sites.
Groups can be given a title - just click on the top line in the group and enter your name. You can also change the size of the groups and drag them around the window positioning as you like.

In each group on the right, your pinned tabs will be displayed - very convenient.
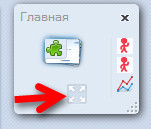
And if you make a lot of groups and you don’t have enough space in the window, simply reduce as much as possible some group and the tabs in it will be grouped together. When you click on the box with arrows at the bottom of the group, a pop-up window will appear with a detailed view of the group ...
I assure you, accustomed to using groups of tabs, you will be greatly surprised at how you did without them before.
Tab groups is a built-in function of the browser and does not affect the speed of the browser.
We will do the rest of the optimization of the Mozilla Firefox tabs with the help of add-ons.
After installing ALL the add-ons described below, I did not notice a slowdown in the browser.
Add-ons for optimizing Mozilla Firefox tabs
The most important addition to optimizing tabs is ...
Just think about it - more than a million users have installed it! List and show all the features Tab mix plus in this article I just can’t. The settings for this wonderful addition are completely in Russian, logical and simple.
I will show you those points that are important, but not immediately noticeable ...
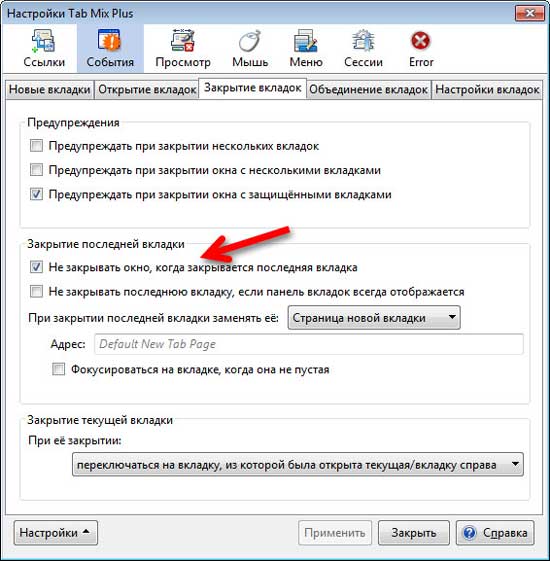
Personally, I really did not like it, when I closed the last tab, I got the entire browser closed. Now this is not a problem - when closing the last tab, you can specify an action, for example, open a blank tab or home page.

If you have many open tabs, you can arrange them in several rows or scroll them with the mouse wheel in one line. Here you can change the location of the tab bar and buttons to add a new tab.
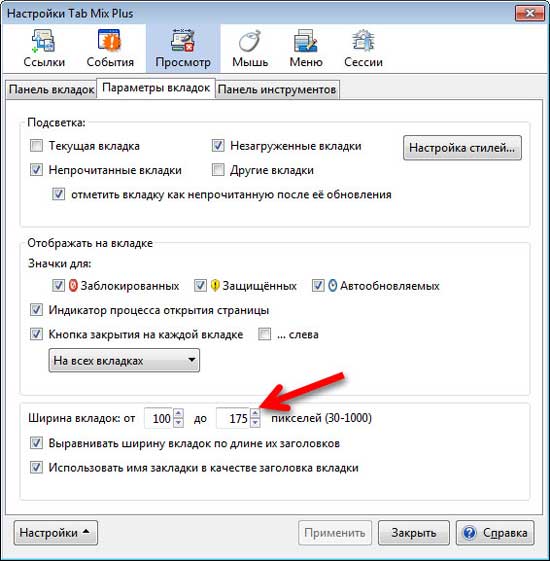
And here you can change the size of the tabs, enable their alignment and display icons on the tabs.

Here we determine the composition of the context menu of the tabs. For example, you can remove those functions that you do not use and enable the ones you need.
The decoding of each item appears when you hover over the item ...
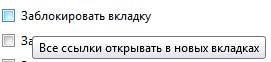
I think that it will optimally freeze the tabs, and not just block them. Thus, you will never accidentally close it and all links will open in a new tab - praise be to the author of the add-on!
I turned on the tab auto-update item after a specified period of time. This is a very convenient feature, for example, for a tab with statistics or mail. Now, when RIGHT-clicking on any tab, select the item “Update tab every ...” ...

... and we get the tab auto-update. Incidentally, before this was a separate addition.
For lovers of keyboard combinations, there is a separate item for customization.
More in addition Tab mix plus There is a very powerful and good session manager.
Having a little understanding and spending 10-15 minutes, you can permanently optimize your work with Mozilla Firefox tabs. By the way, after all the settings you can save them ...

The standard tabs in Mozilla Firefox are very boring, monochrome and merge, which is not ice. The importance of the visual perception of information I tell you. Let's color them with all the colors of the rainbow.
Using the add-on ColorfulTabs in addition to more information, we will receive a positive charge when working in the browser.
Initially, the color of the tabs will be assigned randomly, but you can easily assign your color to a specific site and quickly, subconsciously “grab” it in the heap of tabs ...

Just click “Add Domain”, enter the site address in the left line and click on the right button with the color to select your favorite shade. The color code is inserted into the middle row automatically. Now all the pages of a particular site will be of the color that you personally assigned.
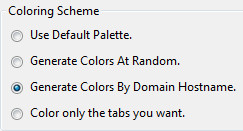
You can assign color generation to the domains (addresses) of sites and all pages of one domain will have their own color, which will choose the add-on yourself.
Addition Tab scope enables you to display the site thumbnail in a pop-up window when you hover over the tab. Such a gadget was before. With many open tabs, this is also very convenient and informative.
I’ll already be rounded, otherwise the article turned out to be long and you can get tired of it, and when you leave, you will no longer return to this site.
Of course, these are not all the additions with which you can optimize mozilla Firefox Tabs. On the official browser site there is a whole section of add-ons with the name
Do you always have a bunch of tabs open in your browser? What if the browser closes with an error or you just want to save these tabs so that you can open them next time? How to recover closed tabs in browsers? No panic. There is a solution.
We show how to open all the tabs from the last session in each of the five most popular browsers when the browser starts - and you can continue at the same time where you left off.
How to recover closed chrome tabs
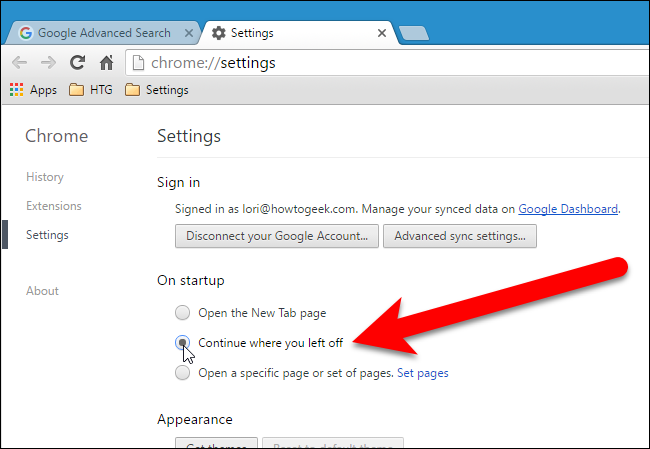
To automatically reopen the tabs that were the last time you started Chrome, press the menu button (with three horizontal stripes) and select "Settings."
Settings will open in a new tab (unless you have chosen so that the settings open in a separate window). In the "At startup, open" section, select "Previously open tabs».

Recover Firefox Closed Tabs
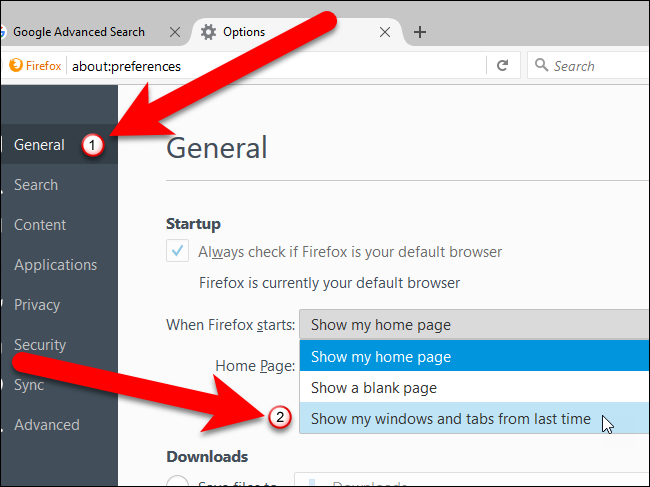
Firefox remembers not only the tabs opened in the last session, but also all open windows if several separate windows with Firefox were opened. To automatically open all the tabs and windows of the last session, click the menu button in the upper right (with three horizontal stripes) and select "Settings".

Settings will open in a new tab. Here, on the “General” tab, in the “Launch” section, next to “When starting Firefox”, select “Show windows and tabs opened last time”.
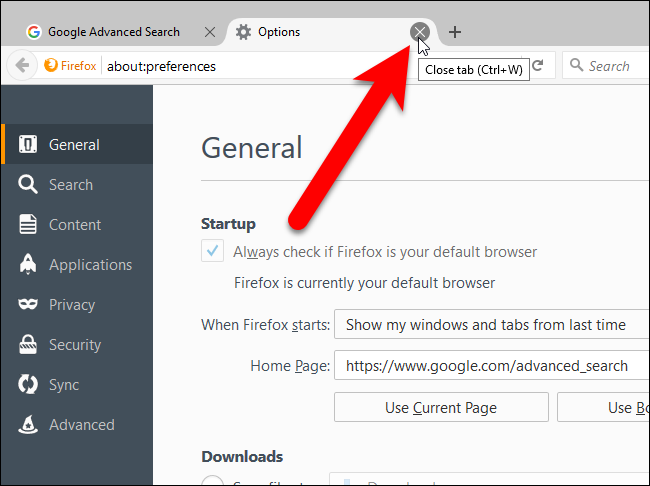
Settings will be saved automatically. To close the settings tab, click the cross in the upper right of the tab or press Ctrl + W.
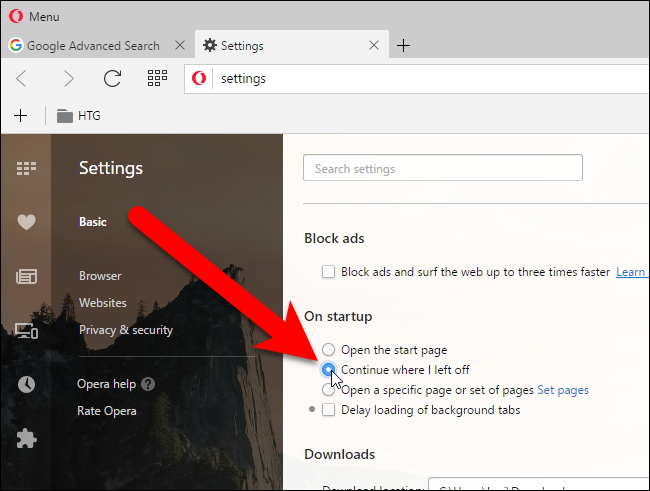
To open tabs from the last session in Opera, click the menu button in the upper left corner and select "Settings".
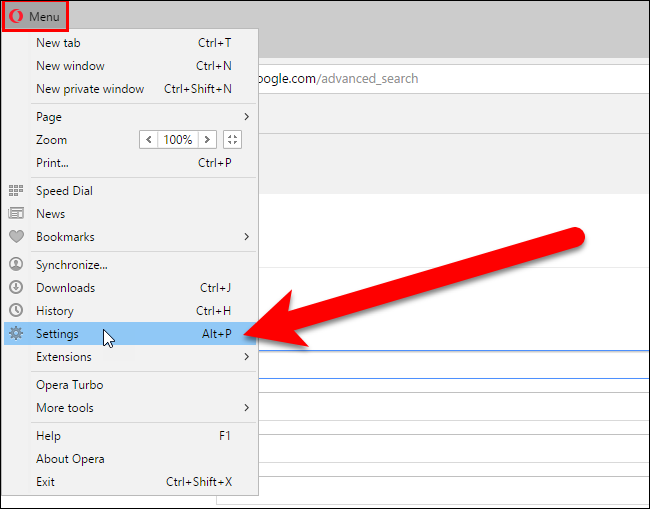
Settings will open in a new tab. In the "General" tab, in the "At Startup" section, select "Continue from the disconnection point."
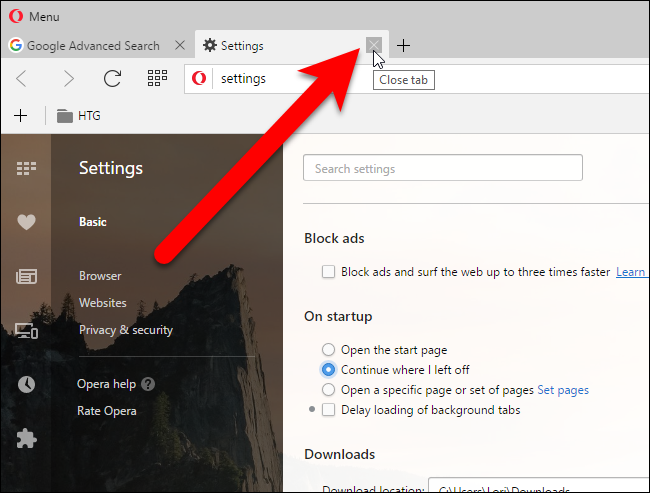
Settings will be saved automatically. To close the settings tab, click the cross in the upper right of the tab or press Ctrl + W.
To open tabs from the last session in Internet Explorer, click the gear button in the upper right corner and select “Internet Options” in the drop-down menu.
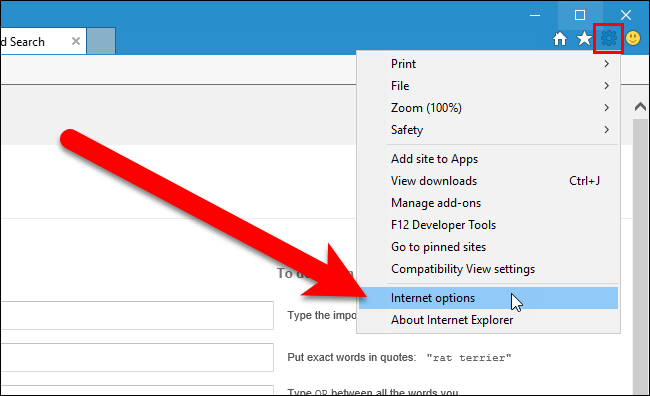
In the "General" tab, in the "Startup" section, select "Start with tabs opened in a previous session." Click OK.

To open tabs from the last session in Microsoft Edge, click the menu button (three dots) in the upper right corner and select "Settings" in the drop-down menu.

The settings panel will open on the right side of the browser window. Under Download, select Previous Tabs. To close the settings panel, click anywhere on the right of it.

Now you will not lose your tabs if you accidentally turn off your browser.
Probably, each of us is familiar with such a service as Yandex Bookmarks. Using this add-on, you can quickly create any directory from your favorite sites and navigate to them without entering an address in the browser bar. And use the service " Visual tabs Yandex ”is possible not only on a computer, but also on a laptop or even a smartphone. What is especially this add-on, how to use it and how to install? You will learn all this in our article today.
What are Yandex Visual Tabs for?
Clean for ease of use. This small but very useful addition makes your browser more functional and convenient to use. Agree, it is much better to open and click on the icon with your favorite site on it than enter its full name in the address bar or constantly search through the search engine. Go to any bookmark you like in one click. Also one of the main advantages due to which Internet users install the Yandex Visual Tabs add-on on their browser is the ability to save up to 24 bookmarks. Thus, you can go to any of these 24 sites in one click without opening the search engine and entering anything in
Competitors
The main competitor of the service "Visual Tabs Yandex" is the addition " Speed \u200b\u200bdial". In fact, these two extensions are practically no different, the only thing is that in Yandex, when you open a new tab, your search is displayed (at the very top of the bookmarks). That is, if necessary, you do not need to go to Yandex, since it is already present in a new tab. The function is very convenient and does not interfere with working with bookmarks at all. This is probably why the Yandex Visual Tabs extension is more popular in Runet than Speed \u200b\u200bDial. 
How to install this add-on?
It should be noted that visual tabs are available on several browsers at once:
- "Google chrome";
- Firefox
- "Yandex browser".
In the case of the latter, this function is already present, but on the other two such an addition would not hurt.
How to set visual bookmarks in "Google Chrome"? First, click on the "grid", which is located in the upper right corner of the browser. After that, go to "Tools" - "Extensions". Further in the window you will see all the extensions that have already been installed in Google Chrome. We do not touch them, but go to the very bottom of the page. Here you will see the "More extensions" button. After clicking it, you will be taken to the Google Chrome Web Store. Now in the search engine, which is located in the upper left corner, you should enter the query. Then you will be taken to a page where this extension is described in detail. We find the "Install" button, click "Add" and wait while the application is downloaded to the computer. The download process can be seen from the bottom left corner. As a rule, the download time is no more than 10 seconds (even with the slowest Internet no more than a minute), since the extension weighs on the order of one megabyte. After downloading, you must install the add-on. There is nothing complicated here, and the installation itself does not last very long. That's all, you just have to restart your browser and open a new tab to make sure that it works. 
How to install the extension in "Firefox"?
Installing this add-on in this browser is similar to the previous case. In "Firefox" you need to go into the extension and type the request " Visual bookmarks". Once there is a suitable application, download it and install it. Do not forget to restart the browser, as often in such cases the tabs may not appear immediately, you need to close and reopen the program.
An easier way to set tabs from Yandex
There is another add-on jump method that can work for both Mozilla and Google Chrome. After entering the query “Download visual bookmarks from Yandex” into the search bar, we go to the plugin’s official website. Here the site will automatically detect your browser and download the appropriate version of the extension for you.
How to use it? How to make tabs in Yandex?
Using this extension is very simple. If you want to add any site you like to the tab, you need to point to any of 24 tabs (by the way, at any time you can move it to another or replace it) and point to the icon. After that, you will see three gray icons for editing. When you hover over them, prompts appear. We need to select the "Settings" button. It is on the left, looks like a gear. We click on it with the right mouse button, and a window appears in front of us with the address bar and the name of the site (if it is saved there). Enter the address of the site you like and click "OK." The application itself determines the name, so you can leave this line blank. The same thing happens with the icon. It sometimes does not appear immediately, so here you also need to restart the browser (although the bookmarks themselves can be used immediately after the settings, without rebooting). 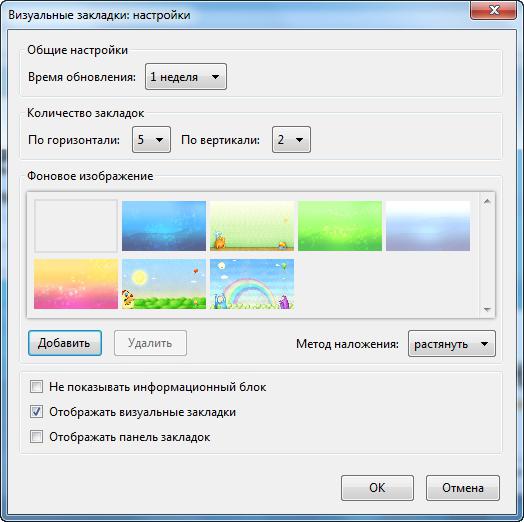
How to make Yandex a new tab?
Similarly to the above steps, open the settings and enter "Yandex official website" in the address bar. Click "OK" and check the bookmark. Usually, this application already includes such a tab as VKontakte and Yandex News. But that is not all. Go to its official website by clicking the "Yandex" button on top search bar. Everything is very simple and convenient.
How to make new Yandex tabs, we’ve already figured out, now let's talk about how to delete a particular bookmark. This is done even faster than adding. When you hover over the icon with the site that you want to delete, select the gray cross and click the mouse button. After that, the bookmark itself will be deleted from the panel. In its place, you can install a new one or move an icon to another place. You can move bookmarks in any direction, just hold down the tabbed image with the mouse button and drag it to the desired location in the window. 
Additional application settings
It is worth noting that the “Settings” button is highlighted not only when the cursor is on the icon. There are two of them in total. One of them is located in the lower right corner of the page. After clicking it, you can choose a background for bookmarks (by the way, there are very interesting images there) and choose the number of tabs. In earlier versions, you could choose up to 48, now only 24. However, this amount is enough to save all your favorite sites in one page.
How to remove tabs in Yandex?
If you do not want to use the visual bookmarking service anymore, you can delete this application from the browser. But it’s best not to uninstall, but to disable the extension so that you don’t reinstall it on your computer or laptop later. It is worth noting that there is no general rule for disabling tabs on all browsers, so everyone has different options for deleting bookmarks.
How to delete tabs in Yandex? If you use the Google Chrome application, go to the main menu under the "bars" next to the address bar. Next, find "Settings" and right-click. On the left you will see a menu in which there is an item "Extensions". Go into it. Here, as during installation, you will see a list of add-ons you have installed. Find "Visual Bookmarks" in the list. A basket-shaped icon will be visible next to them. After clicking on it, all bookmarks that you previously installed are automatically deleted. 
And now about how to disable the tab option in "Mozilla". To do this, you need to open a browser window, in the upper part find the "Tools" section, select the "Add-ons" item. After that, a panel will appear before you, which relates to visual bookmarks (usually it is in the settings for Yandex Bar). Opposite this item, you need to uncheck or click the "Disable" button (depending on the version of the browser). 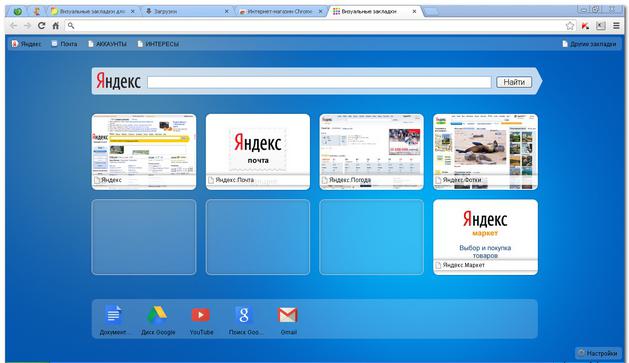 Next to this value is the “Delete” button. You should not click it, because when uninstalling visual bookmarks, you will need to download them again. And since this extension weighs very little and does not take up much memory on the hard drive, for this it is enough to disconnect this rather useful and convenient add-on from Yandex developers and surf the Internet further. Anyway, at any time it can be turned on and used again.
Conclusion
So, we found out all the features and nuances of installing the extension called "Visual Bookmarks from Yandex" for the most popular Internet browsers.
For most of us, a browser is the most popular and most often launched program on a computer. We use it to listen to music, watch movies, check mail and so on. And although browsers are updated almost every week, they have enough problems. One of them is not the most comfortable work from large quantity tabs.
Actually working with tabs is like in that joke about cats. Don't you like cats? You just don’t know how to cook them. You just need to learn how to work with tabs and use the appropriate browser features for this. And you cannot understand how you lived before.
Keyboard Shortcuts (Hotkeys)
Hotkeys are a very convenient way to manage tabs. Especially when the tabs become so tiny that it’s even inconvenient to click on them.
- Ctrl + Tab- Switch between tabs to the right.
- Ctrl + Shift + Tab- Switch between tabs to the left.
- Ctrl + W / Cmd + W on Mac- close the active tab.
These are just a few combinations that let you quickly switch between tabs. Keyboard shortcuts exist. And some of them may make you use the keyboard instead of the mouse to control tabs.
Remembering open tabs
When you constantly switch between the browser and another program, there is a chance that you may accidentally close the browser, and then you will have to open everything again. And it’s good if you remember what you had openly. The browser function, which allows you to remember which tabs were open before closing it, can save you from all this headache.
Turn on this feature and thereby free yourself from unnecessary work in the future:
- Google Chrome: Settings → Start group → Continue work from the same place.
- Firefox: Settings → General → When starting Firefox → Show windows and tabs opened last time.
- Apple Safari: Settings → General → Safari opens at startup → All windows from the last session.
Adding Tabs to Favorites
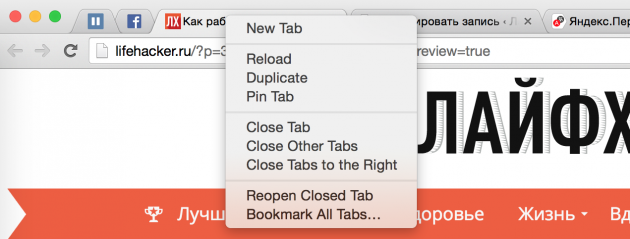
One more quick way save open tabs, to work with them later, is to add them to a separate folder in the bookmarks. To do this, right-click on the tab and select "Add Tabs to Favorites". The name of the item may vary in different browsers, but it is easy to understand that this is exactly the item that you need. As a result, a folder with the addresses of the sites you need will appear in your bookmarks. Next, right-click on this folder, select "Open all bookmarks" - all the tabs are again in front of us.
Sort tabs by individual browser windows
Who said that all tabs should be in one browser window? You can sort your tabs by different windows. For example, you can transfer all tabs that relate to one project in one browser window, and everything related to entertainment to another, and so on. Just drag the tab to an empty area of \u200b\u200bthe desktop and a new window will open. Another way is to right-click on the link or bookmark and select "Open in a new window" from the list.
Select multiple tabs at once
You can perform various actions not with one tab, but with several at once. But for this, you first need to select these same tabs. Hold down the Ctrl key (or Cmd on Mac) and select the tabs you need at the moment. That's all, now you can close them, reload, add to bookmarks and so on.
Pin tabs
In modern browsers from good developers, there is a wonderful feature “Lock tab”. This is very convenient if you keep this or that tab constantly open. For example, it could be a tab with Gmail or a music service. Once you pin a tab, it will be harder to close and it will take up less space on the tab bar. Just right-click on the tab and select the desired item in the list.
Restore closed tab
Sometimes it turns out that you accidentally close a tab that you didn’t want to close at all. The hand twitched or changed his mind at the time of closing - anything happens. To open this tab again, you can, of course, go to your browser history and find this site. Or you can use the keyboard shortcut Ctrl + Shift + T (or Cmd + Shift + T on a Mac in Chrome and Firefox and Cmd + Z in Safari) to return this tab. Also, right-clicking on any tab of your browser can help you.
Tab Groups in Firefox
Almost five years ago, developers added to firefox browser very cool feature called “Tab Groups”, or “Panorama”. She practically performs the trick described above. It's about using different browser windows for tabs. Only here all this is done more beautifully, and you do not need to produce many windows. A couple of clicks, and you have already switched to working with another project, or, conversely, have fun after work. To launch tab groups, use the keyboard shortcut Ctrl + Shift + E or Cmd + Shift + E on a Mac.
I hope that now your work with a large number of browser tabs will become a little easier.
I recall how many years ago, for the first time, I came across such a concept as the “Internet” and the Internet itself.
My advanced colleagues installed on my computer a program - a browser " Netscape navigator»(Netscape navigator), which at that time was a leader among Internet browser programs.
Scored seems to be in address bar www.rambler.ru, showed how to use the search for information on the Internet and ... allowed me to swim freely on the boundless seas and oceans of the Internet.
All of this, I caught, “by typing”, pretty quickly - how and where to dig. But then for me it arose a problem, or rather, the inconvenience that poisoned me "digging" in the Internet.
I liked the sites and pages on the Internet, or rather their addresses, I wrote down in a notebook so that I could then type in the address bar and return to the site or page I need. And it was a long, uncomfortable and very annoying.
After my next matyuk, my colleagues took pity on me and showed me an automation tool for this very Internet navigation - bookmarks bar.
The bookmarks bar is present in all programs - browsers in one form or another. The differences are minor, but the principle of operation is the same for everyone.
I want to tell you and show you the work with the browser bookmarks bar (google chrome). Why exactly google browser Chrome? Firstly, because I like him the most. Secondly it’s very popular browser. And thirdly, this browser continues to gain popularity.
I will definitely do a quick review. about bookmark panels various browsers, but I want to show in detail exactly Google Chrome as an example.
All. Enough of the lyrics. So panel google bookmarks Chrome
We open the browser. Right-click on the "Google Chrome". Then we move the mouse pointer to the menu item "Open" and left-click on it.
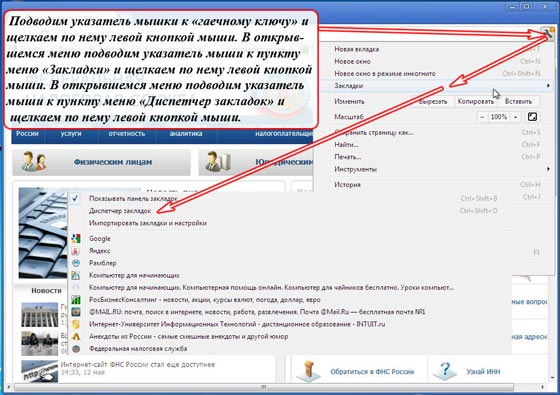
We will open a browser window. Move the mouse pointer to the "wrench", which in Russian means "Settings" and click on it with the left mouse button. In the menu that opens, move the mouse pointer to the "Bookmarks" menu item. Another menu should open (if it didn’t open, then left-click on the “Bookmarks” menu item).
In the menu that opens, move the mouse pointer to the menu item "Show bookmarks bar" and left-click on it.

A gray bar will appear above the address bar field, which, in fact, is a bookmark bar. If you just installed, then this strip will look the same as you see in the screenshot.
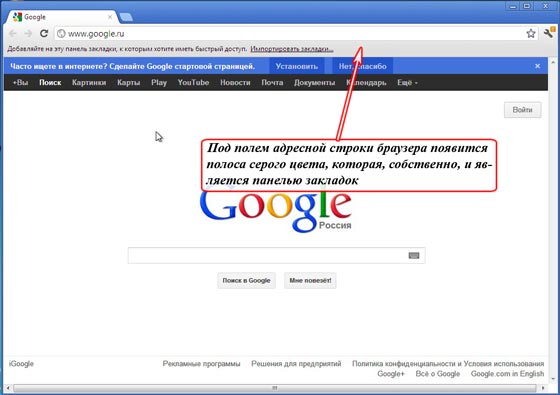
Now we can add bookmarks to this panel, which we will do now. Let's add a bookmark to the site that we are currently on, i.e. http://www.google.ru
To do this, move the mouse pointer to the "star" and click on it with the left mouse button. A menu appears in which we are informed that the bookmark has been added with the name “Google” and saved in the “Bookmark Bar” folder. If desired, we can change the name of the bookmark and folder, but so far this is not necessary (this can be done at any time).

Now let's type some other site in the address bar, for example http://www.yandex.ru and add this site to the bookmarks bar in exactly the same way.

Thus, for our example, I placed 10 bookmarks for different sites in the bookmarks bar to show you what happens.
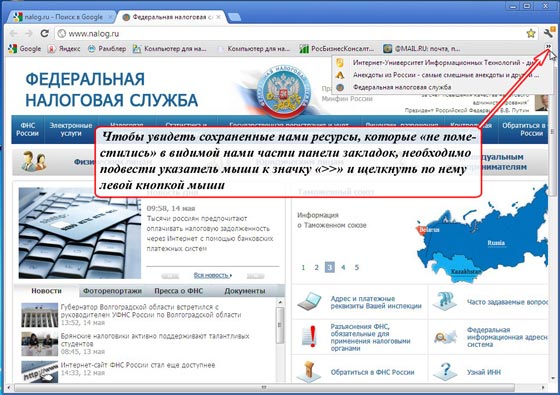
Note. In the visible part bookmarks bar I only fit 7 bookmarks, the rest is not visible. To see the rest of the bookmarks, you must move the mouse pointer to the "\u003e\u003e" icon as shown in the figure and click on it with the left mouse button. In the drop-down list we will see the other bookmarks that we made surfing the Internet (in my example there are 3 sites).
So here. Now, I can at any time get to that site or resource on the Internet that is stored in my bookmark bar. It is enough to bring the mouse pointer to the desired inscription and click on it with the left mouse button.
For example, if I move the mouse pointer to the inscription "@ MAIL.RU: mail, p ..." and click on it with the left mouse button, then I will immediately go to the site http://www.mail.ru. And if I move the mouse pointer to the inscription "Google" and click on it with the left mouse button, then I will immediately go to the site http://www.google.ru.
Above all saved bookmarks, you can perform plus everything else and various actions. And this is done in bookmark manager.
To get to the bookmark manager, follow these steps:
Move the mouse pointer to the "wrench" and click on it with the left mouse button. In the menu that opens, move the mouse pointer to the “Bookmarks” menu item and left-click on it. In the menu that opens, move the mouse pointer to the menu item "Bookmark Manager" and click on it with the left mouse button.
We will open the “Bookmark Manager” window, in which we see all the saved bookmarks in the “Bookmark Bar” folder with their relatively complete description.
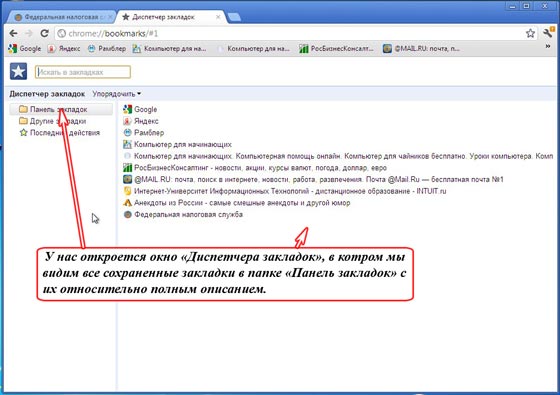
You can do a lot here. But in this part of the article I want to show you how you can "sort" bookmarks by the degree of their need for us at the moment.
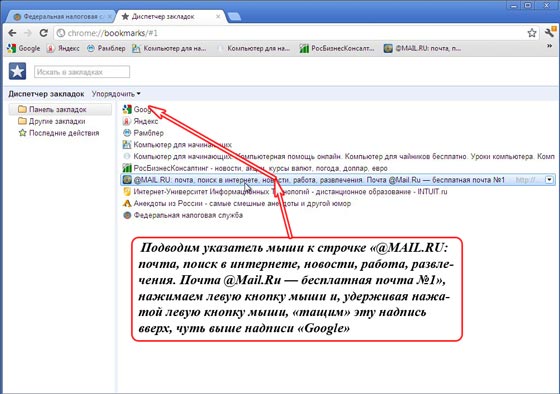
I explain. For example, I want mail.ru to be in the first place in bookmarks.
What am I doing. I move the mouse pointer to the line “@ MAIL.RU: mail, Internet search, news, work, entertainment. Mail @ Mail.Ru - free mail number 1 ", I press the left mouse button and, while holding down the left mouse button, I" drag "this inscription up, just above the inscription" Google ".
Release the left mouse button. Now in the first place in the list and in first place in the bookmarks panel of ours in the first place is the mail.ru bookmark.
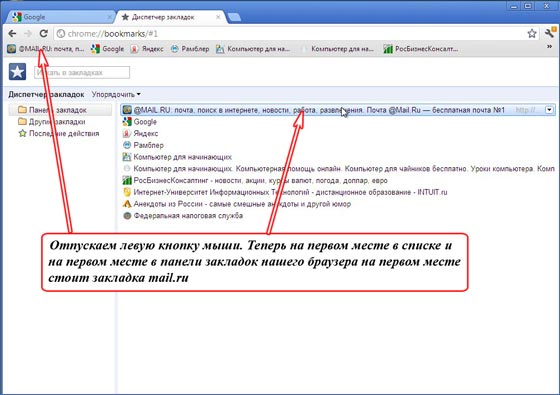
Thus, you can "re-sort" the bookmark order, depending on which bookmarks are relevant to you for a given period of time.
In principle, this could have ended the article on google Chrome browser bookmarks bar, since this way of working with bookmarks can last for a year and a half to two, if you have 20 to 50 bookmarks.
If there are more bookmarks, it’s rather inconvenient to look for the site we need in this list.
To do this, you can sort bookmarks by topics. Then navigation on these bookmarks will become very convenient.


