This article provides information on how to add, change, or delete different types of addresses. emailthat can be used with an Apple ID.
Email Addresses Used with Apple ID
To sign in to your Apple account apple ID ID uses email addresses. Using an Apple ID, you can access services such as App store, Apple Music, iCloud, iMessage, FaceTime, etc. Your email addresses are used to send you information about account, and also to help friends and family members communicate with you and share various data.
Before using your new or updated Apple ID, we will send you a confirmation email to make sure the email address is yours.
Apple ID Email
Additional email addresses
Many of us have several email addresses that we use to communicate with friends and family. Add your frequently used email address to your Apple ID account so that your friends and family can easily find and chat with you through Apple services like FaceTime, iMessage, and Find Friends.
To add an alternate email address:
- Log in to your Apple ID account page.
- In the "Account" section, click "Edit."
- Below the Contact Details option, select Add.
- Please enter an alternate email address and we will send a confirmation email to it.
- Enter the verification code and click Verify.
Make sure the email address you enter is not used as your Apple ID. If you want to delete one of the alternate email addresses, click next to the address.
Backup Email Addresses
Adding a backup address is optional, but recommended. If you can’t remember your own, you can use a backup email address to reset them. If you do not have a backup email address, you will need to get help. All security notifications are also sent to your backup email address.
Follow these steps to add or change a backup address.
In order to fully use your iPhone, you must create Apple ID. With this user account you can use AppStore and iTunes - Download paid and free content (games, music, applications). Use a unique service IMessege, which allows you to receive and send free multimedia messages (only between Apple users). Make free audio and video calls in Facetime.
And of course, use another free service from Apple- ICloud. Thanks to which all your photos, videos, documents, music, applications and other files will be safely stored in the cloud and synchronized on all your devices. Therefore, you will always have access to necessary files. Apple provides 5 free GB for its users. Detailed instructions iCloud setup can be found.
Tune Apple ID can be in the phone settings. To do this, select the App Store and Itunes Store in the settings menu, then create a new Apple ID.
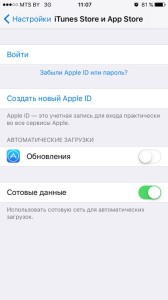
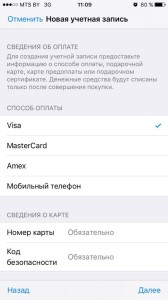
This method is only for those who have a bank card. and plans to link it to her account for future purchases, if not, then you cannot create an ID in this way. If you still have a bank card, then you must follow the instructions, indicating your details. Then you just need to fill out the questionnaire, as described below.
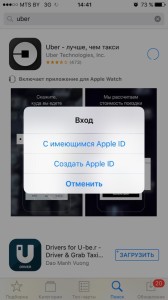
If there is still no card, you must create an account in another way. Absolutely uncomplicated. For this we go directly to the AppStore and select any free application you need and click download? then click "Create New Apple ID".
![]()
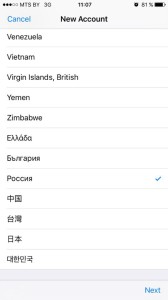
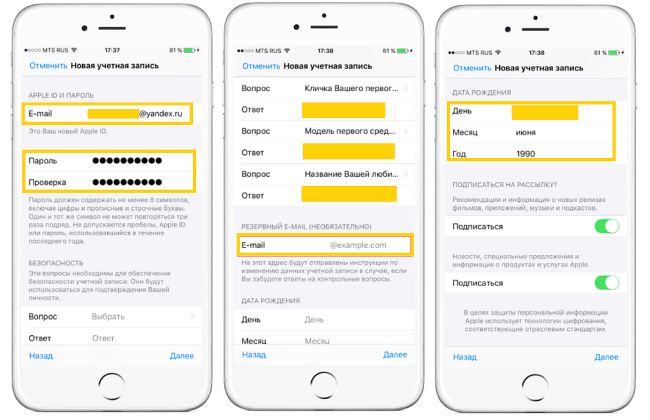
After that follows standard registration IDonly a card is no longer required. It is necessary to prepare in advance emailthat you use, well, or you will use it on an ongoing basis, you also need to know the password from email. Choose a country at will (if you choose Belarus, the AppStore will in English, Russia- in Russian), enter your email address and password.
Email address is your Apple Id. The password must contain at least 8 characters, including numbers, capital and small letters, while the same character cannot be repeated in the password more than three times, spaces are also not allowed.
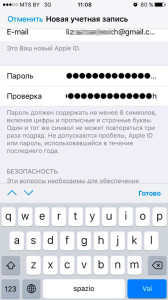
Then, to enhance security, you must answer three security questions. It is better to answer them honestly, in order to better remember, or, as an option, write down. They can need to restore your account.

The backup email field can be left blank. Bank card not required in this case, mark this with a tick.
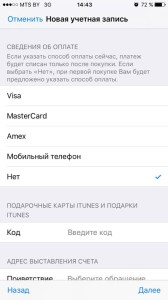
Item Gift Cards ITunes leave it blank. Fill in your personal information (last name and first name, zip code and phone number), click next. In case you register a Russian Apple Id (so that it is in Russian), you must specify the Russian postal code and phone number. Optional existing.
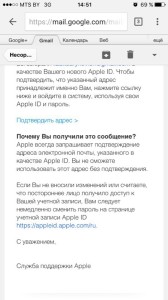
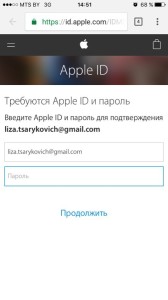
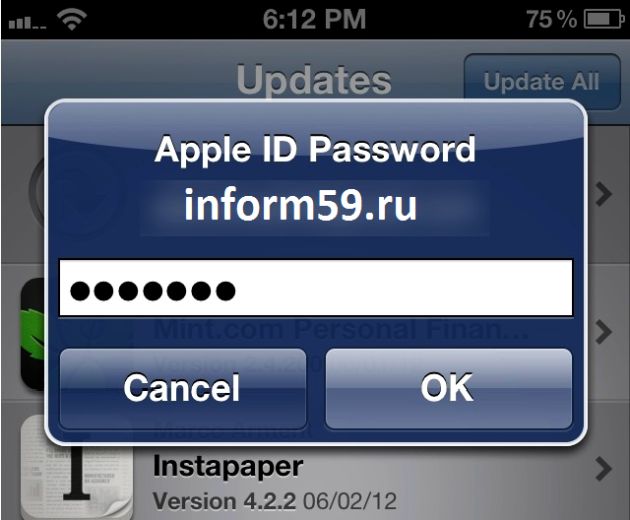
Then necessary check mail. An email from Apple should be sent to the email address specified during registration to confirm the account. Open this email, click Verify Address (Verify now). Enter your Apple ID (which is email) and password. If suddenly there was no letter in the mail, check the spam folder.
Apple ID created, now you can go to the AppStore and download whatever your heart desires. The main thing is not to forget the password and test questions. Enjoy using)
Creating an account on the iPhone is one of the most important manipulations for each owner of an Apple smartphone. Only with your own ID you can enjoy the full range of features of this device. In addition, carrying out important operations such as security settings or synchronization with iCloud, you will need confirmation with Apple ID. Thanks to your Apple ID, you can make purchases, download content and use the “Find iPhone” feature.
Typically, the Apple ID on the phone is created when you first use the gadget. If you change your model to a newer, you can snap new iPhone to an existing account. But if you are using gadgets from an American company for the first time, you will need to go through a full registration. Before you change your Apple ID to a new one, you need to get mailbox. Best of all, if you need to create an Apple ID account, you will use a separate, newly created email address.
The data, during the initial authorization on the official website, must be entered real so that if necessary you had the opportunity to restore access. In addition, truthful information about you will be required during the subsequent account setup. Therefore, be extremely careful and try not to make mistakes when entering your account information.
Create an account using iPhone
Apple company accounts can be created directly from your iPhone. To do this, there are two options: to go through the standard registration, in which you must specify information from your bank cards to make payments, or create an Apple ID without credit card. Actual payment information will be required if you will purchase any software in the AppStore store. If you do not plan to shop and do not want to do it by accident, for example, by mistake. We recommend using the second, more sophisticated, method.
The standard procedure is as follows: you must open the tab iTunes Store, App Store and find there the item "Create a new Apple ID".
If you want to register your Apple ID without payment cards and for free, proceed as follows:
- Go to the App Store.
- Choose a game or application that is offered for free.
- Download and wait for it to install on your iPhone.
- The next step is to enter an existing record or make a completely new one. When prompted, select "create a new ID."
After this, the steps are similar in both cases:
- If you do not want to tie the card, for one reason or another, it is better to put Russia as the country, even if you live in another state - this will give a wider choice of applications, programs and other things.
- After that, you need to carefully read and accept the standard user agreement.
- Then personal data is entered. When specifying an existing email address and password, be careful - for security reasons, the password must consist of at least eight characters, have letters in both registers.
- When specifying age, please note that you cannot specify less than 13 years of age, and if you specify less than 18, access to content will be limited.
- The answers you introduce to security questions are best kept in text file or write on paper and hide. This is done so that if necessary, quickly and safely restore access to your account.
- If you are registering in the first way, then you will need to enter information about the payment data.
- The procedure is completed.

After that, you need to go into the mailbox that was used to create the account. A technical support letter should come to him, confirming the creation of an Apple ID. For the first apple id registration to pass quickly and correctly, just click on the selected link with the text of the letter.
iTunes to help
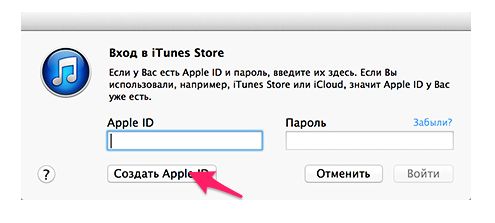
As an option, an account for an iPhone or iPad can be issued using the official iTunes. In this situation, you can choose to indicate information about your cards or not. Before changing the ID, you need to go to the menu and find the iTunes Store item there. If you want to learn how to create an Apple ID without payment data, as in the first case, you need to download any free application and go to this menu using it.
After this action, standard in both cases:
- The system will offer to log in to a newly created, existing account or issue a new one.
- After choosing the option to create a new one, enter your data. As stated earlier, they must be true so that you can verify their accuracy.
- After that, you will have to answer security questions (it’s better to write down the answers) and enter the card information or refuse it if you want to create an Apple ID without a credit card.
- After completing registration, be sure to go to the mailbox and immediately confirm the creation in the mail, using the highlighted link in the body of the letter.
If the letter from those. Support doesn’t come for a long time, check spam folders and filtered messages in other categories - often letters come there by mistake.
What mistakes can be made?
To learn how to register an ID on an iPhone correctly, how to change an ID on a device, you need to know what errors should be avoided. Most often, the following difficulties arise in the process:
- You do not want to shop on the App Store. In order not even to accidentally buy any paid content without specifying bank card details.
- The age is best indicated real, but only if it is more than 13, and better - more than 18 years. If you put the age of 12 years or less, the system simply will not allow you to create your own Apple Idi. And if you specify an age of less than 18, you will not get access to all the content.
- If you managed to get mail with the address on @ iCloud.com or @ me.com, you will have to create a new mailbox for registering an account for an iPhone. These addresses are not suitable for creating accounts.
- If the name you entered contains invalid characters, please note that the mail address does not contain Russian letters, but the name and surname of extra characters, periods, numbers, etc.
- Password must be complicated. With too simple a password, the system will not allow to complete the process to the end. Numbers, letters large and small, symbols - the more they will be in the password, the better.
- An obstacle in creating an ID on an iPhone can be a server crash. In this case, it is best to wait and continue after half an hour - an hour, when the servers will be operational.
In general, the registration of the new Apple Idy does not take much time. Even an inexperienced user will be able to carry out this operation if he acts according to the instructions.
How to configure and manage Apple ID, we will describe in the next article, stay tuned.
Conclusion
You already understood, creating an account for iphone is no more difficult than having an e-mail. It is necessary to understand the essence of the process and further, to mechanically fill in the necessary fields. Registration does not take a lot of time, so after 20 minutes you can use smartphones as the full owner of a smart device capable of many amazing things.


