In budgetary organizations, and in commercial organizations, albeit less often, electronic digital signatures (EDS) are used quite often. Today we will talk with you about how to be if you need to quickly spread it out into several personal computers the same EDS. In addition, the method that we will use will help us save physical / hardware flash drives that are used as a storage medium for a closed EDS key... Since not all programs used to connect to various "Bureaucratic services" work with private keys placed in the computer registry and require a removable drive, we will deal with what can truly be called magic - a virtual flash drive.
And so ... you are a budgetary organization and you have just received a USB stick from the federal treasury. EDS on a flash drive and you are preparing to install these signatures on a bunch of computers throughout the organization. Signatures are needed to place your organization's applications on the public procurement site, most likely these functions are assigned to your lawyer. The chief accountant needs an EDS to send reports through electronic document management programs, to work on completely different portals * .gov.ru, such as Electronic budget, Budget planning, the same state procurements etc. The accountant is a cashier of a budgetary enterprise to interact with the treasury necessarily uses the SUFD, the economist has accumulated a lot of reports. The deputy or deputy directors are also involved in this, they are accountable in various systems for the area of work under their jurisdiction. And everywhere EDS is invariably used, they are used both directly for signing documents and for establishing secure communication channels by interacting with some exotic software such as JinnClient, ContinentTLS, sometimes even with plugins / extensions installed directly into the browser.
I think you have already felt the charm of everything that can happen to you in the event of the loss of this only flash drive with an EDS, which is so easy to lose or in some, albeit very rare cases, simply burned. The first step is to do backup and hide in several places known only to you, it's obvious !!!
In order to sleep peacefully, we will use a simple program ImDisk Virtual Disk Driver (Download from the official site). The software has spread quite well on the network, you can search on softportal.com or just in a search engine. The essence of this program is that a driver is installed in the operating system that completely emulates the storage medium from the image lying on your hard disk. Sure this program can emulate any disk, let's say virtual disk, a disk inside a CD drive, a floppy disk, but its functionality is important for us in relation to the so-called removable drives, namely flash drives. It is also not unimportant that the functionality of virtual devices is completely repeated in relation to their iron copies, that is, the image is not only emulated in the form of a flash drive, but on this flash drive, as well as on a regular one, you can write and erase data from it, it you can format and most importantly, this virtual flash drive is visible through the main encryption provider of "All Russia", a program that has been personally approved for use by the FSB of Russia - CryptoPro CSP.
We got to the most important thing, the introductory part is over and now we will proceed to create a flash drive. Installation of the above-described ImDisk Virtual Disk Driver program should not cause any difficulties, read carefully and click on further ... After installation, we will be able to work both with the console program imdisc.exe and with the application (GUI of the console application) located on the control panel.
For help on the console application in CMD, enter the command imdisc.exe /? and we get the complete syntax for working with the description of the keys for working in the console mode.

This information will be useful to us a little later, but for now we will use the GUI. Open the control panel, set the viewing parameter to the "Large icons" mode, then find and run the ImDisk Virtual Disk Driver, in the window that opens, press the "Mount new ..." button.

In the next window, we indicate the drive letter that we want to use for a virtual flash drive (in the example F :), we indicate the disk size of 32 megabytes, put a full stop opposite to store the image file in physical memory, and indicate that our disk will be removable, you can also explicitly specify the type of disk but will be created by default desired disk therefore, leave this field in Auto mode. After the settings have been made, press the "Ok" button to confirm the actions taken.

Now in the program window we see in front of us a newly created virtual disk - a USB flash drive, the operating system will most likely offer you to format it. Format the virtual flash disk and give it a convenient name for example EDS. Returning to the program window, save the image of our virtual flash drive with the "Save image" button

When prompted for options to save the disk image, check the second option and click "Ok". Next, a warning will follow about blocking the virtual flash drive for the time of copying, answer in the affirmative "Ok" to continue. The next window will ask for the location and file name, select a directory and specify a name, click the "Save" button, in order to avoid difficulties with entering long names in the future, it is advisable to place the image in a folder with a short name for example "c: \ img \ virtflash.img" ... After saving, the program will notify you about the successful creation of the virtual flash drive image file on your computer.

Congratulations, you just received a full-fledged virtual USB flash drive that can be mounted to any computer by first installing the ImDisk Virtual Disk Driver program and simply moving the image file that we saved a paragraph earlier on the computer to the target computer.
Next, we need to use the CryptoPro CSP program to copy the private key from the physical flash drive received from the Federal Treasury or another certification center to our virtual flash drive. Do not forget, just copy the certificates themselves, most likely they are on the same flash drive, with the name in the form of the name of the person to whom the EDS was issued. We will not consider the issue of installing CryptoPro CSP within the framework of this article, I will only say that you can download the distribution from the official website only after registering on it, in matters relating to EDS, you should not try to take the distribution from dubious sources. Without a key, CryptoPro CSP will start and work up to 90 days, it is very convenient if you need to equip a new one workplace and you don't have a license yet. You can install CryptoPro CSP without a key and start working immediately, and order the key later. In the case of budgetary organizations, the key can be obtained by letter of request for a license directly from the treasury. Licenses issued by the Treasury are usually perpetual.
Let's take a closer look at the procedure for copying private keys. Let's open CryptoPro CSP go to the "Service" tab and in the "Private key container" section select the "Copy" button

In the window that opens, opposite the "Key container name" field, click the "Browse ..." button, then select the key container by its name from the "iron", physically existing USB flash drive (in this case, Disk N, Surname First name Patronymic to whom the signature was issued) press the button "Ok" to confirm your selection. After we have confirmed the choice of the container, we will see it in the "Key container name" field, press the "Next>" button and go to the next window.

In the next window, you are prompted to enter a name for the key that will be created on another flash drive by copying, that is, the name of the key that will be assigned to it when it is created on our virtual flash drive (the name can be changed, for example, add the expiration time of the digital signature for convenience). After entering the name, click the "Finish" button

After clicking the "Finish" button, you will see a window in which we will need to find our previously created virtual flash drive, if we rewind a little back then we will remember that it was Disk F, the disk label (name) was set by us as "EDS", in fact this is what we see in the inserted media field. After making sure that the choice is correct, press the "Ok" button.

A pop-up window next prompts us to enter a password for a new private key, usually I don’t do this, because sometimes it is difficult to remember a given password some time after entering it (a month or two). But if you are confident in your memory, then I still recommend installing it, this will be additional protection when using the key further. Leave the password and confirmation field blank or enter the same password in both fields if you decide to strengthen the security of your future EDS on a virtual flash drive, then press the "Ok" button.

This completes the transfer of the private part of the key from the physical flash drive to the virtual one. If necessary, repeat the operation with other EDSs available on the flash drive until all containers are transferred. Let's check what we got on our virtual flash drive.

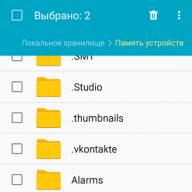
We see what distinguishes our virtual flash drive from a real one - physical, it lacks security certificates. We will copy them from a physical flash drive and paste them onto a virtual one by means of the operating system. We get the following:

Now you can safely pull out your physical flash drive ... Hide it as soon as possible in the safe, it may still be useful to you. Now you can use your virtual one in the same way as you would with a physical one, but now you got a bonus, you don't have anything sticking out of your computer, or maybe from a laptop that has to dive into your bag every evening and you had to pull from it here and there physical USB stick with EDS. Now you can easily simply transfer your EDS to another computer by simply copying the image of the virtual flash drive and mounting it in a new location.
The only thing that is certainly depressing is that every time you need to mount this image with pens, but we are not looking for easy ways with you! If you carefully read this article, then you remember that we mounted our virtual flash drive with the letter "F:", we also said that our flash drive is removable media, and of course at the very beginning we discussed the moment that in addition to the GUI of the ImDisk Virtual Disk Driver program, it has a console application. Let's take a closer look at what keys the console application has, and how we can monitor our image in the form of a virtual flash drive from the console (without the GUI interface located on the control panel). It turns out like this:
-a - drive connection key
-f c: \ img \ virtflash.img - use a disk file to create a virtual flash drive;
-m f: - volume to mount, virtual drive F is created;
-o rem - this is additional parameter, removable drive(flash drive rem - remote), if this parameter is not specified, the hard disk will be mounted.
Run it in the console and make sure everything works. We check the disks by opening the "My Computer" shortcut, the disk is created and connected as a removable disk, that is, a flash drive, in our case a virtual one.

You ask me why do we need to do all the same that can be done through the GUI program located on the Control Panel. And I'll tell you that you can, for example, make a bat file with this command and put it in the startup folder in the Start menu. Thus, it will be possible to run it at system startup, but I do not like the "Excessive crutch" of this method. Bat scripts are good in their own way, but with a controlled launch directly by the user, and, in principle, the entire script would consist of this line, and therefore we can try more elegant option. We will try to execute our console command from the startup menu located in the Registry of the operating system, for this we will need to create a string parameter in the registry key HKEY_CURRENT_USER \ SOFTWARE \ Microsoft \ Windows \ CurrentVersion \ Run.
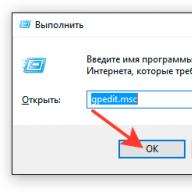
So let's try to enter the registry, press and hold the Win + R keys in the "Run" field, enter the regedit command and click "Ok"


On the right side of the Registry Editor menu that opens, there is custom software that starts at system boot. There you can also add or remove some program from it. To do this, right-click on the empty right segment of the editor, select "New" in the context menu that opens, then "String parameter". Let's enter the name of the newly created string parameter, for example, let's set the name ImDisc, the name can be chosen arbitrarily. After double clicking on a new string parameter, you must set the "Value" to the following: imdisk -a -f c: \ img \ virtflash.img -m f: -o rem, which will henceforth be launched for execution at the same time as the OS is loaded. After changing the value of the string parameter, it is necessary to confirm the changes by pressing the "Ok" button.

That's all we were able to get our team to start at the same time operating system and now our virtual stick will be automatically mounted when Windows boots.
It seems to me that we have fully disclosed the topic. And lastly, a lyrical digression :)
- Do you see a USB flash drive with an EDS? ..
- Not...
- And I don't see ... But she is!
The goal of development is to get VirtualBox to work without installation and run from anywhere, such as a USB stick. It is interesting that the utility is completely written in AutoIt scripts (all the sources are openly, but because of this, however, it does not look very elegant. But the main thing is the result. So, download the application (I have it Portable-VirtualBox_v4.1.6- Starter_v6.4.8-Win_all.exe) and run it - the program will offer to select a path for unpacking. After that, you can run Portable-VirtualBox.exe. All settings are set automatically, you do not need to fix something manually (for example, paths). The window that appears - this is the so-called launcher. It appears once and is intended to download the latest VirtualBox distribution and extract from there required files... Interestingly, at this stage, the files can also be packaged in a special way so that they take up less space on the USB flash drive (although with the current size of flash drives, this is hardly relevant). Click on the button "Download installation files of VirtualBox", select the bitness of the system (for example, "Extract the files for 32-Bit system") and wait for the launcher to do its job. For the installer to adapt the paths to the system (correct the necessary parameters in the VirtualBox.xml config), the Portable-VirtualBox.exe binary must be run again. Voila - we have a full-fledged VirtualBox at our disposal. Without any installation on the system.
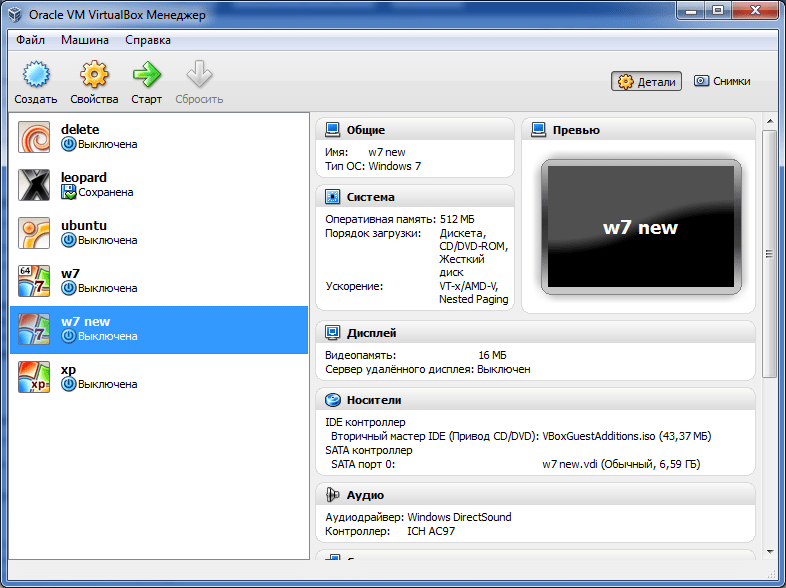
A VirtualBox icon will appear in the tray, with which you can control the virtual machine and further customize it. Both USB and networking are enabled by default in guest operating systems. But in order to release the guest OS to the external network (Internet), you will have to carry out some additional manipulations. In the tray, select "Settings -> Network" and enable the "Start VirtualBox with network support" option. Next, you need to restart Portable-VirtualBox and agree to install the driver. The process is organized in such a way that when you exit the virtual machine, everything that was installed on the system is deleted. It is reasonable to place the guest OS files directly on the USB stick along with VirtualBox. I have only one system, so you can start it right away, without additional manipulations, by specifying its name in the parameters:
Portable-VirtualBox.exe "leopard"
Considering that the virtual machine is always not in a shutdown state, but in the "Save the state" mode, it starts up very quickly. Therefore, she is always ready to work without unnecessary hemorrhoids. And anywhere.
Sometimes a situation arises when you need a flash drive, but it is not at hand. For example, some accounting and reporting software requires a external storage... In such a situation, you can create a virtual storage of information.
Using a special software, this can be done in several ways. Let's consider each of them step by step.
Method 1: OSFmount
This small program is very helpful when there is no flash drive at hand. It works on any version of Windows.
After you have downloaded the program, do this:


Additional functions may be required while working with this program. To do this, you need to enter in the main window in the item "Drive Actions"... And then it will be possible to use the following options:
- Dismount - unmount the volume;
- Format - formatting the volume;
- Set media read-only - puts a ban on recording;
- Extendsize - expands the size of the virtual device;
- Savetoimagefile - serves to save in the desired format.
Method 2: Virtual Flash Drive
A good alternative to the above method. When creating a virtual flash drive, this program allows you to protect information on it with a password. The advantage of this is its performance in old Windows versions... Therefore, if you have a version or lower on your computer, this utility will help you quickly prepare a virtual storage device on your computer.
The instructions for using this program look like this:
- Download and install Virtual Flash Drive.
- In the main window, click the button Mount new.
- A window will appear "Create new volume", specify the path for creating the virtual media in it and click "OK".

As you can see, the program is very easy to use.
Method 3: ImDisk
It is one of the more popular virtual floppy disk programs. Using an image file or computer memory, it creates virtual disks. When using special keys when loading it, a flash drive will appear as a virtual removable disk.

Method 4: cloud storage
The development of technology allows you to create virtual flash drives, and store information on them on the Internet. This method is a folder with files that is accessible to a specific user from any computer connected to the Internet.
Such data storages include, and Cloud Mail.ru. The principle of using these services is the same.
Let's consider how to work with Yandex Disk. This resource allows you to store information up to 10 GB on it for free.


Working with such a virtual storage medium allows you to completely manage your data: group them into folders, delete unnecessary data, and even share links to them with other users.
All popular hypervisors for Windows - Hyper-V
, VirtualBox
, VMware- provide for the launch of virtual machines (VM) from boot ISO-images and flash drives. Launch VM with the latter, not in every case it will be a process without problems: without dancing with a tambourine from flash drives UEFI only run VM on the base BY EFI in programs VirtualBox and VMware. How to simplify VM startup from flash drives in other cases?
To do this, you can create a so-called virtual flash drive- all the contents of the real USB- transfer to virtual HDD and, accordingly, run VM from him. But the content must be transferred along with the structure of the physical flash drive - so that the virtual disk will inherit all partitions, if there are several (for example, in the case of Mac OS or Chrome OS) as well as boot device attributes (unless it is UEFI media) ... This can be done in at least two ways, described below.
All actions in our case will be carried out with. In other programs for virtualization, it is necessary to act by analogy.
1. R-Drive Image software
The first way to create a virtual flash drive is to transfer the structure and content of a real USB- media to a virtual disk using the program - backup... Opening the parameters of an existing VM and click.
Add one more disk.

Leave the controller type by default.

We create new disk... We indicate its size: let it be approximately the same as the size of the flash drive, but let it differ a little. This is necessary so as not to confuse devices when cloning. We save it as a single file.

We indicate the placement path. We press.

Launch VM, connect a real flash drive to it. Install in the guest OS trial-version of the program ... In its window, select "Copy Disc to Disc".

In the graph "A source" choose a real flash drive. In the graph "Receiver"- the newly created virtual disk.


And - "To begin".

Upon completion of cloning, exit the program.

Now in the guest explorer OS we have two identical devices.

We can disconnect a real flash drive from VM... As well as we can disconnect the virtual disk from the current VM and use it to launch others VM.
2. Rufus program
The second way to create a virtual flash drive is to use the capabilities of the program Rufus 3.1... In the updated version 3.x this program, in addition to the existing functions for creating bootable USB-devices, learned to clone real flash drives into files VHD... BUT VHD compatible with Hyper-V, and with VirtualBox, and VMware... Launch Rufus 3.1 on the host system. Choosing the right one USB-carrier, if several are connected, in the column "Device"... Next, press the button in the form of a floppy disk.

Specify the file storage path VHD .

We are waiting for the completion of the operation and close Rufus.

3. Connecting a virtual flash drive and launching from it
So, the virtual flash drive has been created, how to connect it to the VM and, accordingly, run it?
In parameters VM click HDD.


We select the existing one.

In the explorer window, specify the path to the file storage folder VHD... In the file display column, set. And we click our virtual VHD- USB flash drive.


On the EFI-machines we enter BIOS- either use the button on the hypervisor toolbar, or at startup VM press F2.

In the bootloader window, select Hard drive with the number under which it is listed in the general list of connected virtual disks, but in terms of zero. In our case, the virtual flash drive is the second disk VM because in EFI-firmware it appears as Hard Drive 1.0.

On ordinary VM based on emulation BIOS Legacy, to boot from a virtual flash drive, you need in the parameters VM specify it first hard disk... You need to delete all existing disks of the machine and add them again, specifying the virtual flash drive first.

11.06.2016 11152
There is a small group of programs that, for their work, most often to save data, require a mandatory connection to a computer. external media... These can be accounting or some other special applications. A similar need may also arise when working with virtualization systems to which you need to connect physical flash drives. But what if the flash drive was not at hand, but you still need to do the work in the program?
In such a situation, a small free program called. It is intended mainly for mounting ready-made disk images, but it can also be used to create RAM-discs, that is, those that exist only in random access memory computer. In this case, the user can set the type of the virtual device, assign a letter to it, and also set the required attributes.
The program is very simple and convenient to use, except perhaps without the support of the Russian language. To add media, click the button Mount new and in the window that opens, configure the mount options.

Option "Source" allows you to select the source of the image. They can be screwed on (Image file) or uploaded to RAM (Image file in RAM) the image file as well blank disc from RAM (Empty RAM drive)... If you need a virtual flash drive, specify the path to ISO or another supported image format.

Settings "Volume options" you can leave them by default, and they do not matter for virtualization of a flash drive, they may be needed only when loading an image into memory and creating a disk from memory. Where settings are more interesting Mount options.
Option "Drive letter" specifies the drive letter.
"Drive type"- type of image.
There are four such types:
- Auto (the program itself chooses the type)
- Floppy (Floppy Disk)
- CD / DVD (optical disc)
- HDD (USB flash drive or removable hard drive).
There will also be two checkboxes at the bottom of the window. "Read-only drive" and Mount as removable media... If you are going to write to a virtual disk, you need to uncheck the first checkbox. The second, on the contrary, must be installed so that the system does not recognize the trick and identifies the mounted image as a USB flash drive. Having established such settings, click "OK"... That's all, now you can work with the image as with a regular removable medium.


The options that you may need when working with a virtual flash drive are in the menu "Drive actions".
Commands available:
- Open (open)
- Dismount (unmount)
- Save to image file (save as a new image in the desired format)
- Extend size (expand)
- Format (format)
Additional options include Set media read-only(prohibit recording) and Set media writable (recording resolution).