Lenovo A706 is a powerful device with a quad-core processor, a large touch screen, high-quality sound and support for two SIM cards.
Firmware Lenovo A706 allows you to restore the device in the event of software failures, expand the functionality and capabilities of the device.
Drivers # 1 |
https://yadi.sk/d/UMfFnXSsdGrUt |
|
Drivers # 2 |
https://yadi.sk/d/IOGAJFvpdGrUv |
|
Firmware: |
https://yadi.sk/d/UpwUzvSGdGrqK |
Instructions for flashing Lenovo A706
- Download and transfer to internal memory device archive with firmware files.
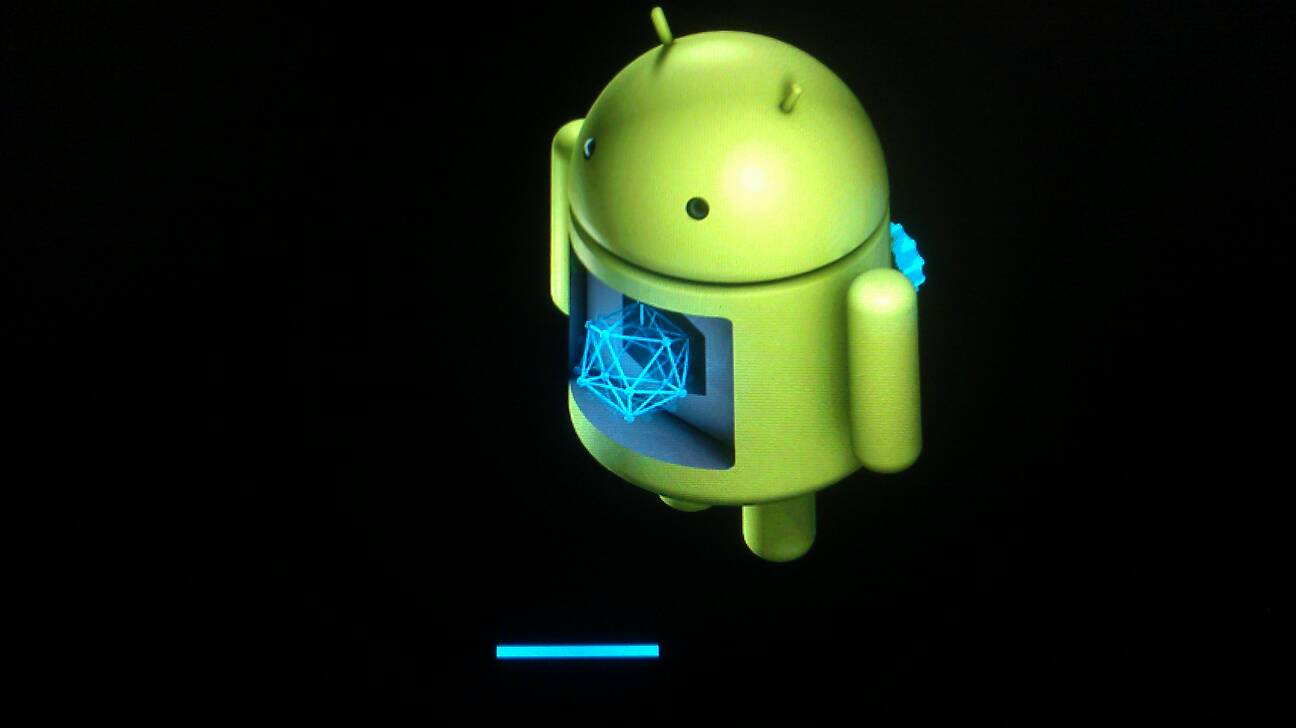
- Turn on the device in mode CWM Recovery. To do this, hold down the power button and both volume keys until the CWM Recovery logo appears on the screen.
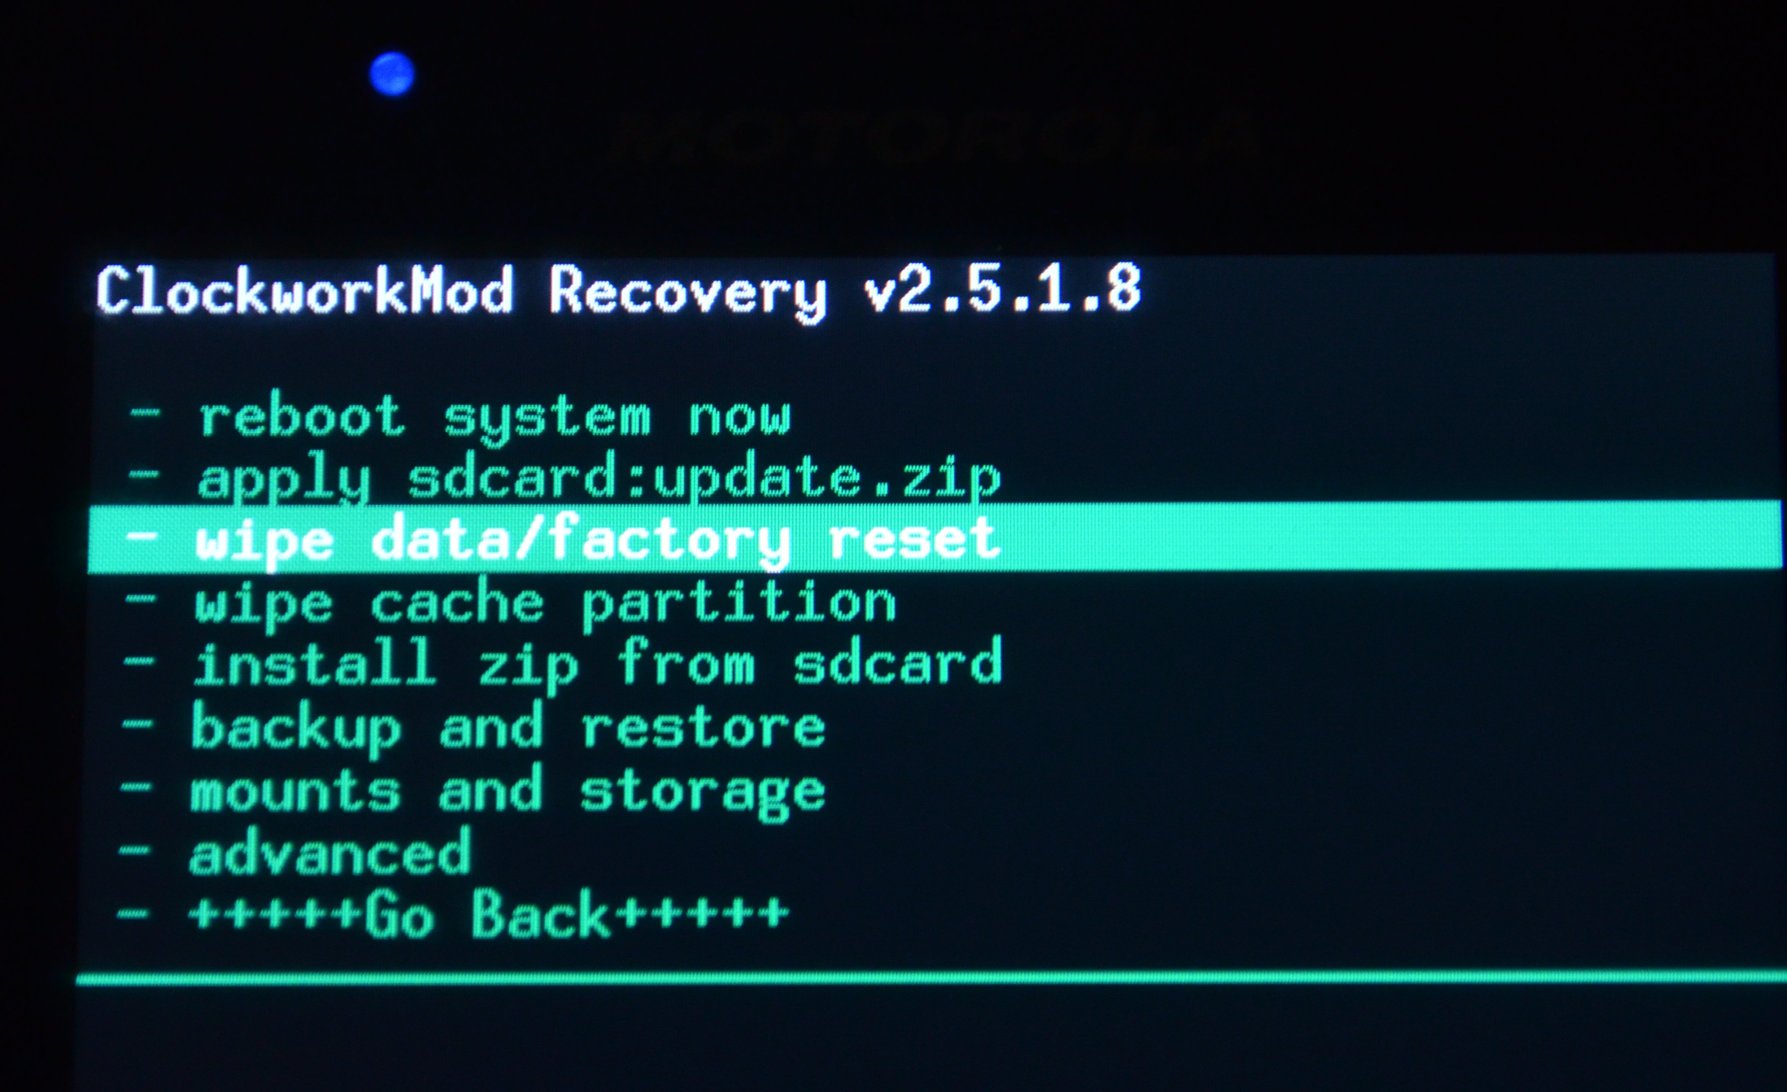
- In ClockworkMod click on the item "wipe data / factory reset" for data wipe and "wipe cache partition" to clear the cache.
- Go to the sub Mounts and storage and alternately execute the following commands: format / data, / system, / cache.
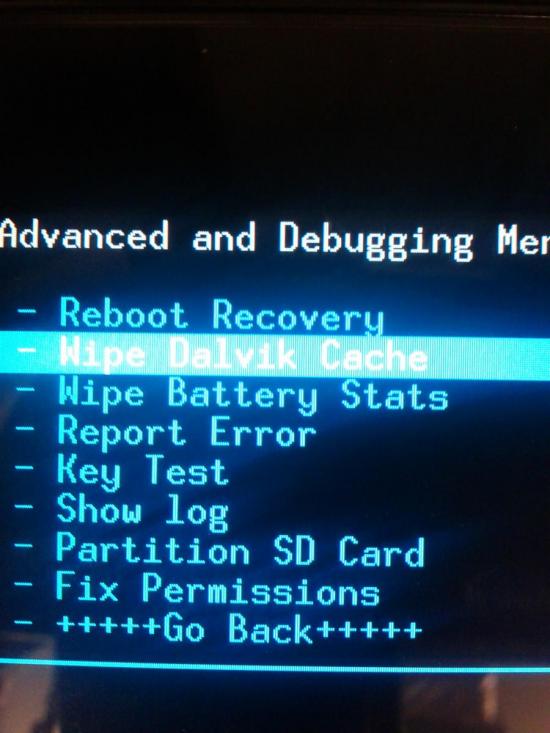
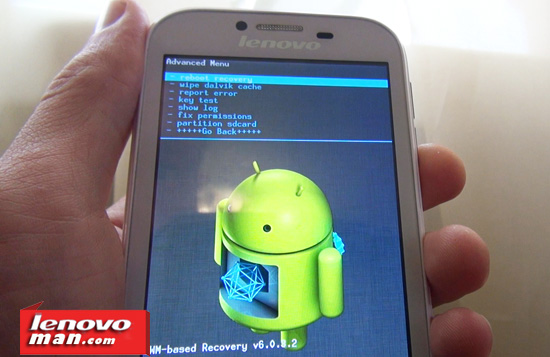
- With the command "Go back" go back to the main menu and go to the submenu Advanced and select the line wipe dalvik cache.
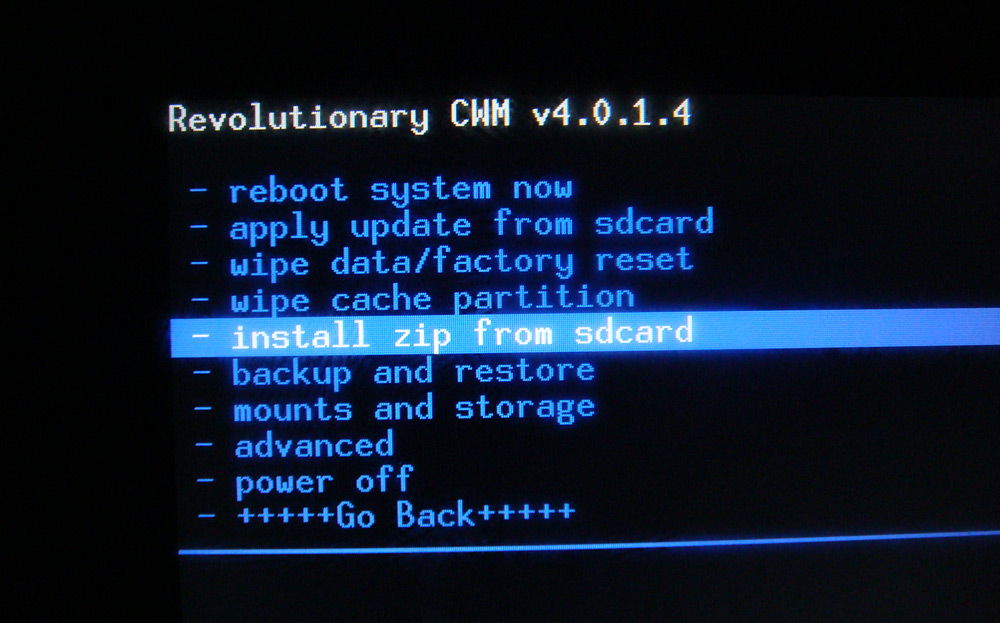
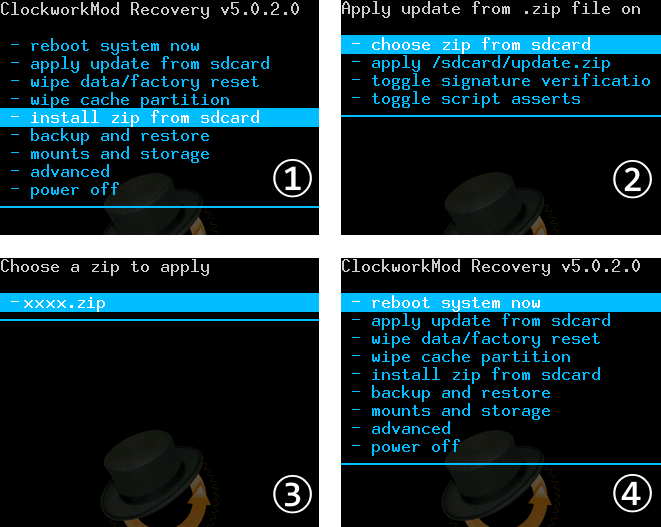
- In order to update the firmware, in recovery menu select the line install zip from sdc \u003d\u003e choose zip from sdc, indicate path to the firmware file.zip, select the installation of files.
- After the update is completed, the display will indicate success.
- Press the power button and return to the main menu, select the line Reboot system now. We are waiting for a reboot, which on average takes up to 7-13 minutes.
The nuances of the firmware Lenovo A706
Before you start working with CWM, you must complete a full backup of the system.
Like other similar devices, it periodically requires firmware. Indeed, during its operation, various errors occur: freezes, problems with the charge, and so on. This article will present the firmware for lenovo a706.
What do the firmware give?
Firmware is needed in order to:
- get rid of phone glitches
- improve software;
- get advanced features
- increase battery backup and more.
"Underwater rocks"
Despite the obvious advantages of the firmware, there are certain disadvantages. They are not always detected, but they should also not be excluded. Of course, you can get rid of old mistakes, but it is quite possible to get new ones. In addition, sometimes the speed decreases or the power consumption increases. However, having experience in this matter, these errors are practically nullified. In any case, the firmware for lenovo a706 requires the user full responsibility and deliberation.
Instruction manual
In this case, it will be considered how to perform custom firmware for the Lenovo a706 smartphone. It is produced through ClockworkMod Recovery. Some devices in the previous version of the firmware already have such an extension. If not, you will have to install it.
So, the following actions are performed:
- The archive containing the firmware is downloaded to your computer. After that, it should be thrown into the phone’s memory by connecting uSB wire. It is worth being careful, the archive is not thrown onto the memory card, but namely into the smartphone itself.
- The transition to Recovery is in progress. To do this, you must simultaneously hold down the keys: Power, volume (up and down). They are held for several seconds. Actions are performed on the phone off.
- The main Recovery menu appears on the screen. When using the volume rocker, items are selected, with the use of Power, the selection is confirmed. You must click wipe data / fastory reset and Yes in the window that appears.
- Then wipe cache partischions is selected, then the action is confirmed, as in the previous paragraph.

- After that, the choice falls on advanced.

6. Then the Advancer Menu will appear, where you should select wipe dalvik cache. When this is done, the choice is once again confirmed.
- Next, you need to return to the main Recovery menu and select the Install zip from sdcard section.
A window appears on the screen where you need to click on choose zip from sdcard.

When the file explorer is displayed, it is worth choosing the archive where the firmware is contained. The action is confirmed. The firmware starts.
When the process is completed, you need to restart the smartphone. This is done through Recovery. You must again go to the main menu, which is done using the Go Back item. Then you should select Reboot system now and confirm the action to restart the phone.
Launcher Choice
When the smartphone boots up, you need to choose a launcher. Two options are proposed for this: Xperia and Baidu. As an example, you can turn on the first launcher and get acquainted with what is offered. There are widgets, wallpapers, themes for design. As for the second launcher, it also has its own features. You can switch between them, choosing which launcher is preferable.
Thus, the firmware for lenovo a706 is quite simple. Not only that, it will take a little time. Even a user who does not have experience can understand this process.
Today we will flash the smartphone. So we have this phone, which already has custom QNeon Modern firmware version 1.7. This firmware is considered one of the most stable for the A706, but for some reason the smartphone began to behave inappropriately over time, which was primarily reflected in the regular departure of most launched applications that simply did not want to work. What became the reason is not clear. Our task is to reflash the smartphone.
We will not reinstall QNeon Modern, but install the assembly RASA MOD XPERIA (this is a build from LeWa), in which there are two nice launchers to choose from (Baidu or Xperia), SuperSU is preinstalled and google servicesincluding Play market. The firmware has a good translation into Russian, although in some places English words slip through. In general, in terms of functionality, the firmware is very, very decent and completely suits us. In addition, judging by the reviews, it works stably.
We will flash through ClockworkMod Recovery, the desired version of which is already available in the previous firmware. If you do not have such an advanced Recovery, install it. How? You will find it on the Internet, because this is a topic for another discussion.
LENOVO A706 FIRMWARE STEP-BY-STEP INSTRUCTIONS:
1. First of all, download the archive with the firmware to the computer. In the same form as you downloaded it, we drop the archive into the smartphone’s memory (but not onto the memory card), after connecting our A706 with a cable to the computer in USB-drive mode.
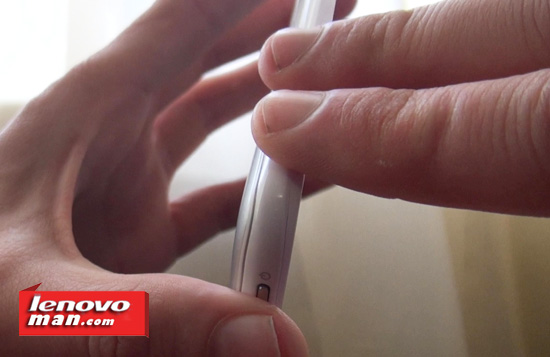
Simultaneously press “POWER” + “Volume Up” + “Volume Down” on the smartphone turned off
3. The start menu of Recovery usually looks like this (photo below). Navigation on it is carried out by volume buttons that move the cursor up or down. And with the “Power” button we select any item. So, we need to select the “wipe data / fastory reset” item and confirm the selection by clicking “Yes” in the next menu.
4. In the next step, select the “wipe cache partischions” item and again confirm the selection by clicking on “Yes”.
6. We return to the start menu of Recovery and select the item “Install zip from sdcard”. In the next window, select "choose zip from sdcard". In the file explorer that appears, select the archive with the firmware, followed by confirmation with the “Yes” item. We will see that the flashing process has started.
7. After the firmware is finished, the smartphone will ask you to restart it through Recovery. To do this, using the “Go Back” item, we return to the main Recovery menu, where we select the “Reboot system now” item to restart the smartphone. Again confirm the selection through the item “Yes - Disable recovery flashing”.
That is the whole process. Now we can see the first start of the Lenovo A706 smartphone with the new firmware. The first download takes a very long time - about 2-3 minutes. We can only wait. In the future, the download time will be spent several times less.
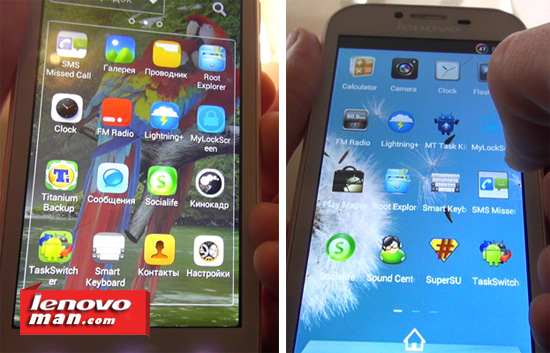
Immediately after the start, the system will prompt us to choose a launcher - Xperia or Baidu. Let's turn on the Xperia interface as an example. We see that there is the Play Market, and SuperSu, and file guides including Root Explorer. Launcher has its own widgets, themes, wallpapers. The Baidu interface also works and has its own characteristics. Which launcher is more convenient for you - only practice will show. You can switch between them at any time.
VIDEO VERSION OF THE LENOVO A706 FIRMWARE INSTRUCTIONS:
That's all. And we can only thank the developer of the firmware and use it for our pleasure.
And article receipt Root Lenovo A706 will help you!
What is a root?
For those who have just become a beginner or are not an expert in the vast world of Android and are not particularly familiar with the concept of how - Root Android, and also why it is needed, what can be done after receiving root right or how to get rid of them if they are no longer needed, all this can be found in the detailed article!
Primarily!
This article has no "left" links or unnecessary actions! If you really need Root Rights, then read carefully and follow step by step, this is a guarantee that you will do everything right! This article on obtaining Root rights is divided into two parts: The first part is Prerequisites and conditions, the second part is Instruction manual how to get root rights using the received files and programs. If in the process of obtaining root rights Android constantly reboots or in the process of perpetual download (it happens extremely rarely, but still), then it’s worth it. Now let's get Root rights!
Android manufacturers sometimes release new firmware, on which it is impossible to get Root in one of the proposed ways, if the article still has alternative methodstry them. It doesn’t work anyway? Indicate android version and the firmware version in the comments (you should not write malicious govnokommentarii, this you will not put yourself, nor the other). Android hangs (does not load), read and re-read from the FIRST paragraph, all the necessary links in the article are present!
Still have questions?
Have questions or can’t get root access on your Android? Leave comments about what you did or didn’t succeed, or you did otherwise.Necessary components and conditions for obtaining
Method 1
1. Charged lenovo smartphone A706 at least 30%
2. Download and install the application for root access - Framaroot
Method 2
1. Computer or laptop
2. At least 50% charged battery
3. Downloaded and installed program Adb run
6. Downloaded firmware update archive Lenovo_A706_root_buding.zip and move to the smartphone’s memory card.
Instruction for getting Root Lenovo A706
Method 1
1. Run installed application Framaroot
2. Select the application for managing Root rights SuperSu from the proposed choice
3. Select and click on any prepositional character - Boromir,Sam, Frodo, Legolas, Aragorn, Gandalf
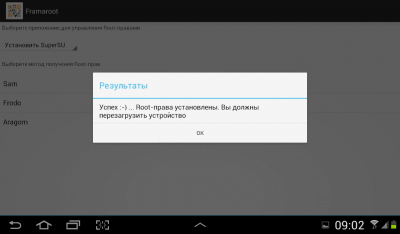
4. Wait until the application notifies you that Root rights have been successfully obtained
5. Reboot Lenovo A706 smartphone
6. After downloading, find the SuperSu, eu application in the menuif it is, then Root rights are received and you did everything right.
Video instruction
Method 2
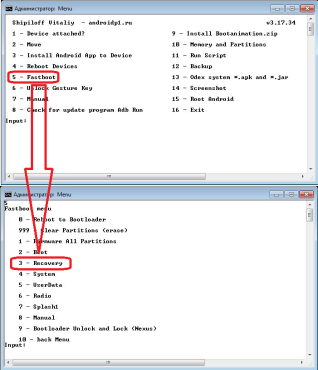
1. Put the smartphone into Bootloader mode using Adb Run (Reboot -\u003e Reboot Bootloader)
waiting for device error
If you long time the inscription in the command window waiting for device- means:
- Driver not installed or incorrectly installed - reinstall or install
- Android device not in Bootloader mode - put into appropriate mode
- Incorrect connection to USB port - use rear uSB ports 2.0 computer, do not use USB hubs
[collapse]
7. Put the smartphone into Recovery mode using Adb Run (Reboot -\u003e Reboot Recovery)
8. Install previously downloaded update archive Lenovo_A706_root_buding.zip with menu Recovery
9 Reboot the smartphone. Root rights to the smartphone received!


