Instructions for eliminating unnecessary rows breaks that often occur when copying and inserting different formata text documents in Word.
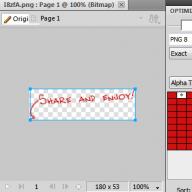
If you ever copied and inserted into the document Word text From a regular text document (especially from service descriptive files), it could notice that in the editor the text is displayed as a poem - a column. Approximately like this:
Try This Fast and Small Color Picker
designed for Webmasters and Designers.
Enjoy with Colors.
To turn the location of this text to normal (locate along the entire width of the page), you need to get rid of lines. I draw your attention that such a way can help not in all cases and it is necessary to use it carefully not to drain all the text into one solid paragraph.
To check, and whether there is a row rupture here, click the "Unprintable Symbols" button (SHOW / HIDE) on the toolbar. The text will explain the formatting symbols. The row rupture is indicated by such a symbol. If you have a different symbol, for example, this is a symbol of paragraph. And to delete it, you will need a different sign in the "Find" field, which will be mentioned below.
So, to remove the row of rows in the text you need:
1. Highlight that part of the text you need to convert.
2. Press the "Ctrl + H" key combination to open the "Find and Replace" dialog box (Find and Replace).
3. Press the "More" button (more) if the window has opened in short form.
4. Clean all fields and uncheck all check boxes from the search options, except for one parameter - "wildcard" (USE WildCards). The checkbox on this parameter must be installed.
5. Put the cursor in the "Find" field and click the "Special" button at the bottom of this dialog box. A list of available commands opens, as in the screenshot below:
6. Find and click on the Line Break Team (MANUAL LINE BREAK). The "Find" field will appear ^ L
7. Enter the space in the "Replace" field.
8. Click "Replace" if you want to control the replacement process, or the Replace All button (without confirmation requests).
After this operation, a window opens with a notification of the number of replacements made and the proposal to check the rest of the document. If no further replacement is required, refuse it and close the dialog box.
The text will take a normal look and will take the entire width of the page.
In the event that instead of the sign of the row, you have a paragraph gap, then to delete it in the "Find and Replace" dialog box, you must remove all the checkboxes from the search options, including the parameter "wildcard". In the "Find" field, you need to insert a paragraph symbol by selecting it from the list by clicking on the "Special" button. Further actions are similar to those described above.
If you often produce such replacements, it will log in to display the entire process in the form of a macro and place the macro button on the formatting panel for quick access to him.
Surely many of you when copying texts from the Internet to your own mini-archive, faced with ill-fated transfer. They are extremely harmful to text aesthetics. Of course, they can be deleted by hand, but it will take too much time. Of course, no one will spend its precious time on such a senseless occupation. That is why we offer you instructions, where it is said how to remove the word transfer in Word.
Remove the word transfer in Microsoft Office Word
Not everyone knows that the functionality of the Word program allows you to deal with a huge amount of problems with ease, getting rid of which in manual mode Take a lot of your time. Unfortunately, not everyone knows about the existence of certain functions. Yes, yes, no matter how it sounded, but most of the ordinary users sitting behind computers and able to work with office programs do not even bother with the study of their functional. And in vain. After all, they have a large number of Interesting chips.So let's figure out how to remove the word transfer to Word. You need to do the following:
If you want to ask them again, you should get to the same button and select the item you need.
Removing portes in Word when manual separation
A separate problem can be transferred by hand-made manually - so simply will not get rid of them. In this case, automatic deletion according to the instructions above can not lead us.Remember: Transfer, which were installed manually, manually and deleted. Unfortunately, this is not avoided. The fact is that in the properties of the document, information on the dash, manually stitched.
However, the small trick of us is seized and for such a case. You must act according to the following scheme: 
In principle, even in this case there is nothing superpower. If you did not have our instructions, I would have to be unlabossed with removing portes in Word manually. But since it is, they will not even think about what could happen.
When working with documents in text editor Word The user may encounter many problems, especially if the work proceeds with a strange file. The article will tell how to remove the transfer of words by syllables in the "Word", because this function is quite rarely found in the program, and normal user Simplicity does not know how to turn it off. You can allocate two types of transfer: Prepared automatically and manually. Below they will be considered both.
Method 1: Removing automatic transfers
And let's start with how to remove the automatic transfer of words to the "Word", since this species is considered the most common. You can often encounter the transfer when downloading from the Internet of a document in which the other author included this feature. It is quite simple to distinguish it, for this, do the following:
- Open a document with automatic word transfer to syllables.
- Go to the tab "Layout".
- Click on the "Movement" button, which is located in the page of the "Page Parameters" toolbar.
- In the new menu, click on the point "No".

After that, all transferences will disappear in the document, which were made automatically, respectively, it will be given in the usual view that the user is used to see when working with text file. It was a way to remove the word transfer to the Word.
Method 2: Deleting manually deployed gears
Word transfer to the "Word" is not always performed automatically, sometimes, opening a document or copying text from any Internet resource, you may notice that the transfer signs in the syllables are not at the end of the lines, as it should be, but in general in any places. In this case, unfortunately, remove the word transfer in the "Word" the previous way will not work, but also to delete each sign "-" does not have to. We turn directly to the instructions for eliminating incorrectly arranged transfers:
- Open a document with incorrectly placed transfers.
- On the Home tab, click on "Replace", which is located in the "Editing" toolbar. By the way, the same action you can produce by pressing the combination of hot keys Ctrl + H.
- In the window that appears, we will need its extended version, so press the "More" button.
- In the additional menu that appears, click on the "Special" button.
- In the list that opens, select the character with which you plan to work. In this case, it " Soft transfer"Or" Inspetent Defisc ".
- The "Find" field will be inserted a symbolic definition of this sign. In the "Replace to" field, do not write anything, leaving it empty.
- Click on "Replace everything" to get rid of all transfers in the text. If this did not happen, then you chose an incorrect symbol. Try replacing the "non-dissolution hyphen" on the "soft transfer" or vice versa, depending on the previous choice.

This is how easily you can remove the transfer of words to the "Word", which was set manually and displays you incorrectly.
Conclusion
Now you know how to remove the word transfer in the "Word", as you can see, make it quite simple. There is, of course, the difference when the transfer is placed automatically, the program itself, and when manually, but in any case it is not a big problem. We hope this article helped you in everything.
By dialing on your own text in MS Word, most users do not use transfer signs, since the program, depending on the markup of the page and the position of the text on the sheet, transfers entire words automatically. Often the presence of these characters is not required at least if it comes to working with personal documents. But it happens that these signs are already placed, but they are not needed, and therefore they should be removed. Today we will tell about how to do it.
From time to time, many have to work with a stranger document or text downloaded (copied) from the Internet, in which the posts of transfer were previously placed. In the latter case, the alignment of these characters is most often changing - it can simply stop the coincidence with the markup and types of alignment of the contents of the page, turning into arbitrarily placed defisites. In order to correct this or get rid of unnecessary signs at all, even if their location on the pages is correct, you need to perform several simple action. It is more difficult if the transfers were arranged manually, but here there is a solution. Next, consider both situations and how to act in each of them.
Option 1: Automatically placed transfers
So, you have the text in which the transfer was placed automatically, that is, the program itself (Word it was or not - not so important). To remove these unnecessary signs from the text, follow these steps:

Option 2: manually arranged or "offset"
As mentioned above, it is especially often the problem of incorrect transfer of transfers in the text occurs when working with other people's files or text copied from the Internet and inserted into text Document. In such cases, the transfers are not always located at the end of the lines, as it happens when they are automatically aligned.
The transfer sign is static attached not to the place in the text, but to a specific word, a syllable, that is, it is enough to change the type of layout of the page, the font or its size (namely, it is often happening when inserting the text "from the side"), as mounted manually Transfer signs will change their location by camming throughout the text, and not by right side Pages as it should be. It can look like this as follows:

From the example in the screenshot you can see that the transfer signs are not at the very end of the lines. Of course, you can try to manually adjust text formatting so that everything fell into place, but it is almost impossible, or simply delete these characters manually. Yes, with a small fragment of text, it will be easy, but what if you have dozens in your document, and then hundreds of pages with incorrectly placed transfers? To solve our task, it is enough to use the search and replacement function.


Conclusion
Actually, all. Now you know how to remove the transfer in Microsoft Word., Be it versions 2003, 2007, 2010 or 2016, as well as "subscription" Office 365 and 2019. The options considered in the article. Solutions of our today's task will help you easily transform any text and make it really suitable for work and reading.
This instruction will introduce you to three ways to remove carriage returns from cells to Excel. You will also learn how to replace the string transfer symbols by other characters. All proposed solutions work in Excel 2013, 2010, 2007 and 2003.
Rifters can appear in the text for various reasons. Typically, the carriages are found in workbook, for example, when the text is copied from a web page when they already exist in the workbook received from the client, or when we add them to press the keys Alt + Enter..
Whatever the reason for their appearance, now we have the task to delete the carriage returns, as they interfere with the search for phrases and lead to a mess in the column when the text transfer mode is turned on.
All three presented methods are quite fast. Choose the one that suits you more:
Comment: Initially, the terms "Return of the carriage" and "Row Transfer" were used when working on printed machines and denoted two different operations. Curious reader can.
Computers I. software To work with the texts, they were developed taking into account the characteristics of the printed machines. That is why two different non-fired symbols are used to designate the rows. Return carriage (CARRIAGE RETURN, CR or ASCII code 13) and Line translation (Line Feed, LF or ASCII code 10). The Windows uses both characters together, and in the * Nix systems only the row translation is used.
Be careful: Excel meet both options. When importing from files .txt or .csv Data usually contain carriage returns and row translations. When the row transfer is entered manually by pressing Alt + Enter., Excel inserts only a string translation symbol. If the file. .csv Received from Linux, Unix fan or other similar system, then get ready for a meeting only with a row translation symbol.
Remove carriage returns manually
Pros: This method is the fastest.
Minuses: No extra pluns
This is how you can delete string transfers using the tool " Find and replace»:

Remove string transfers using Excel formulas
Pros: Available to use consecutive or nested formulas for complex text check in the processed cell. For example, you can delete carriage returns, and then find extra initial or final gaps, or unnecessary gaps between words.
In some cases, the crossing of the strings must be deleted to further use the text as arguments of functions, without making changes to the original cells. The result can be used, for example, as an argument function. View (Lookup).
Minuses: It will be necessary to create auxiliary column and perform many additional steps.

Remove string transfers using a VBA macro
Pros: Create once - use again and again with any working book.
Minuses: Requires at least the basic knowledge of VBA.
The VBA macro from the following example removes the carriage returns from all cells on the active sheet.
SUB RemoVecarriagereturns () Dim MyRange AS Range Application.screenUpdating \u003d False Application.Calculation \u003d XLCalculationManual for Each MyRange in ActiveSheet.usedrange IF 0< InStr(MyRange, Chr(10)) Then MyRange = Replace(MyRange, Chr(10), "") End If Next Application.ScreenUpdating = True Application.Calculation = xlCalculationAutomatic End Sub
If you are not too closely familiar with VBA, I recommend learning the article about