In our age technology, when various techniques are available to each person, all sorts of devices are available, it's not a problem with a photo at all. This can be like a fast photo, without sharpening attention on quality and professional shooting, when it is studied and, if necessary, each centimeter of the picture is adjusted. Fortunately, together with the ability to photograph, widely access today and, which are directly involved in the image processing. As you know, one of the most popular applications of this orientation is Adobe Photoshop. Using this program, you can easily achieve all kinds of effects that make the picture quality higher than it is.
You can perform this action in several ways, and now we will consider them alternately. Let's start with the most simple method:
- We open the desired image in Photoshop and determine the area that ultimately want to see blurry.
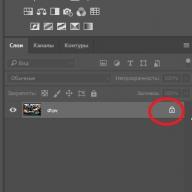
- Do not forget that we work not with an original picture, create an additional layer so that in case of failure, do not spoil the source.
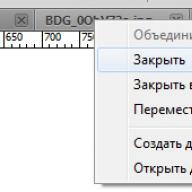
- Now proceed directly to the process: on the left vertical panel in Photoshop, right-click on the "Fast allocation" tool and select "oval area" there.
- With this tool, highlight the area in the picture, which should remain untouched, say, face.
- Open the "Select" section, the line "Modification" - "Rastune". After that, you will have a new window with a single parameter - a choice of blur radius. However, you can not know the exact number of pixels, so it is necessary to act here by samples.Try to push away from the value of 50 pixels and see what happens.
Method of the second
There is another way to create blurred edges in Photoshop, for many it is preferable and more convenient for the first one. In this case, the "Fast Mask" tool is used, which can be found almost at the bottom of the vertical panel of the program, on the left side. By the way, there is an alternative to get into a quick mask mode: press on your keyboard letter Q.

After that, open the "Filter" section on the toolbar and select the Blur line there. The window will open, in which, with the help of the slider, you can adjust the degree of blur of the edges. Thus, it is seen the advantage of this method over the first: here you do not act on your own, but you clearly see what the radius should be specified. Click OK.

Now, to see the result of your work, on the keyboard simultaneously select the ++ L keys. Next, delete the selected area by means of the button. And last - get rid of the running line, for which you should press + d.
As you can see, the ways are completely simple, however, they provide such an effect as blur of edges in Photoshop.
Good day time, my dear friends. Christ is risen! How are you? How is your mood? I have great! Felt May. But moving to the article. Previously, periodically I saw a very interesting effect in the photos when the edges are a little blurred, but the photo itself remains untouched. That's why I also decided to make the same effect on some images.
And today I will show you how to make blurry edges in Photoshop. And experiment I will be over an old spider man from the film of the same name. You can certainly choose the "Blur" tool and just paint the edge of the image. But as for me this method is not very, so I will use others.


That's how we blurred the edges of the image. And we have left no more than a minute. But as we see, the blur has clear boundaries. Some love to leave so, and some prefer a smooth transition.
Tip: In fact, you can not make two allocations using clad alto. You can make one selection only in the place, to where the blur will go. And after that it is necessary to invert the selection. To do this, click the key combination SHIFT + CTRL + I Or select the "Selection" menu - "Inversion". Then you will automatically create a selected frame.
Smooth blur
In order for us to be not a sharp transition, we need to do the first two points from the previous way, but then the move will change a bit.


note ! The magnitude of the radius of blur in Gaussia and the decisive depends on the size of the image itself. Here I focused on specifically this size. Experiment.
Other ways of blur
You do not need to use a Gaussian filter, because there are many other filters of ravism. Let me show you on the example of one more, and then you already try everything yourself.

I think it turned out great. The picture has become more interesting. You can see other filters yourself from the same group, and see how they work and what effects give.
Well, it seems to be all that I wanted to tell you about it. Yes. Such a small and simple lesson). But if you want to master photoshop completely, I strongly recommend you to fully explore one class video course. Thanks to him, you can explore photoshop in the shortest possible time, if certainly you will not be lazy.
Well, I finish today. Waiting for you comments on the topic. And by the way, be sure to subscribe to blog updates, then you will always know about the release of new articles on the subject you need. Also, I also advise you to walk on the blog, as it is a lot of articles and for sure you will find something interesting for yourself. Good luck to you. Bye Bye!
Sincerely, Dmitry Kostin.
Today you will learn how to get the effect of blurred edges in Photoshop. This lesson will be useful to users starting their acquaintance with a popular photo editor.
So, the blur of the edges in Photoshop is achieved in several stages:
Stage 1.
Open the source picture in the program. 
Stage 2.
On the right there is a vertical toolbar. It contains the so-called oval area tool, which is in hidden mode. To activate it, right-click on the "Rectangular Area" tools and select the necessary tool in the tool list. 
Stage 3.
Now highlight the desired plot in the photo, which will definitely not be subject to change. 
Stage 4.
The next action you need to grow edges, which are outside the selected area. To do this, right-click on the image and select the "Decale" button. 
Stage 5.
A small dialog box appears in which it is necessary to set the decisive radius. The more saturated you want to achieve the effect of blur, the greater the radius indicator should be. 
Stage 6.
In the horizontal toolbar, open the "Select" tab and select "Inversion". As you can see, the angles of the image that need to be blurred is now highlighted. 
Stage 7.
On the keyboard, press the Ctrl + Delete keyboard key, which will remove unnecessary edges. 
Step 8.
To remove the selection, press the Ctrl + D keyboard. 
The image is ready! Do not forget to save it to the computer.
Want to focus on the facility in the frame?
Wake up the edge of the picture in the "home photo studio"!
Only three simple steps separate you from the perfect result:
- Choose
photo - Process
edges of the picture - Save
result
Just download:
Bloss the edges of the photo for 3 steps using a convenient photo editor in Russian!
In portrait or subject shooting, it is important to draw attention to the center of the composition. If the background is monophonic, no problems will arise. But when the background is bright, replete details, he begins to take a look at himself. Avoiding this allows the blurring of the edge - a simple procedure, due to which only the central object retains clarity. From the article you will learn how to create a similar effect in the "Home Photo Study" photo editor.
Making blur step-by-step
Often photoshop use for such tasks. However, this is a rather complicated editor, to figure out in which it will not work with the go. Fortunately, blur the edges of the photo without using photoshop can be! The "Home Photo Studio" program offers several simple ways to create the effect of blurred edges. Let's look at what instruments can be used and how to work with them.
Step 1. Installation of software. To begin with, it follows from our site. Install the program on your computer and run it.
Step 2. Getting started. In the window that appears, select the first item: "Open photo". Now find the picture on the folder on the computer to be processed. It will boot into the program workspace.

Step 3. Blur edge. You can apply the desired effect in the program in several ways. Let's look at them. The most flexible and convenient tool - "Blur background". The function allows you to carefully circle an important scope of the picture and automatically blurs everything that remains outside the contour.

To begin with, it should be carefully and accurately describe the object or the area that will have to remain without blur. The contour must be closed. If you failed to return exactly at the starting point, double-click near it, and the selection will be closed.

Decide how to blur the edges of the picture: You can adjust the intensity of the background of the background and borders, impose additional effects like "watercolors" or "sepia", and also choose which part of the image will be used: to the background, selected area or to all photos.

Another convenient tool -. You will find it on the panel on the left (icon in the form of a droplet). Adjust the size of the brush, rigidity, transparency and degree of blur. Now just paint those areas that need to apply the effect. Immediately rate the result in the preview window.

With the help of these two tools, it is easy to cut a photo. Want to make a light blur around the edges, you want - completely handle the background. Choose only to you.
Other steering tools
The "home photo studio" offers other options with which you can, putting an emphasis on the central snapshot object.
1. Masks. In the top menu, select "Decor". In the drop-down list, find "masks". The program will offer a whole catalog of a variety of edges for processing edges. Choose a suitable form, the background type (monotonous, translucent, toning), color. Apply the mask and evaluate the result.

2. Vignetting.To gently arrange the edges so that all the attention of the viewer was riveted to the main objects in the picture, the vignetting tool will help. This is a slight dimming along the contour, which directs the view to the center of the frame. The effect is especially successful on portrait pictures.
In the top menu, select "Design", find the item "Vignetting". Adjust the shape, darkening intensity, depth and strength of blurring. Apply the effect.

You met the main tools that will help make the edges of the photo blurred. Use the option that will most match the idea. With the "home photo studio" to make it very simple and convenient. Now the pictures will become even deeper, more attractive and professional!
Author Eergey Undalov asked a question in the section Other languages \u200b\u200band technologies
How to blur the edges of the layer in photoshop? (except the blur tool naturally) and received the best answer
Answer from Wit Sirot [Newbies]
Clear - Ctrl - click on the layer icon - is formed by the layer contour - then you go to the select-\u003e modify-\u003e Feather in the menu - we enter the grinding radius, click OK then copy this layer turn off the previous one and get the result.
P.S. Be play by Feather's utilities - to obtain the desired result.
Interesting about photoshop -
Answer from Dima Sokolov[newcomer]
blur around the edges
Answer from Alexey Kutsakov[master]
right mouse button, clarify the edge (CS3)
Answer from Vitaly Lesin[guru]
Magic wand highlighting a tracker. Blur selection. Delete.
Answer from Andrei Boychuk[active]
There are more prof. The method (in CS3) highlight the area. At the top click the "Allocation" tab. You choose the already mentioned decisive, the dedicated area will change. (allocation itself). The number of points is set depending on the resolution of the picture. In principle, 5 is the average option. But here they are picking up. Next after decisive. Selection has changed. Quick the filter tab. Select blur, then smart blur and exhibit a slider by about 60 and 80 percent. (There look at your picture as best). Then the blurred area without canceling the selection copy. Further in history. Cancel all actions other than initial allocation. When the image returns to the source. And the selection will take a chance to the decisive. Insert the previously copied. and in the layers tab in the layer overlay parameters you can play with transparency opacity. The edges of the layer can be manually blurring the blur drip from the toolbar.
Answer from 3 response[guru]
Hey! Here is a selection of topics with the answers to your question: how to blur the edges of the layer in photoshop? (except the tool blur naturally)