Newspaper for photoshop
(Photoshop: photo in the newspaper).
With this lesson " Newspaper for photoshop"You can make your friends a wonderful comic gift.
The idea of \u200b\u200bthis joke is to insert a photo of friends to a real newspaper.
Imagine - you send a newspaper image to your friends, where in the front of the first page "Printed" article in which their photo and several lines about them. How much time do you think they will look for this newspaper?
To do this, we will need to find a suitable newspaper for photoshop, desirable from the region of residence of your friends and the photo itself, which we will insert in the newspaper. In the newspaper, we, except for the photo, replace the date and text under the photo.
I found a Sevastopol newspaper on the Internet, because my friends live there.
And that's what we get in the end:

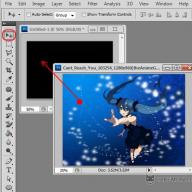
Open the image of the newspaper in Photoshop.
Photos of my friends will open in Photoshop immediately as a smart object. To do this, press the file in the program - open as a smart object ... and choose our photo. We are doing this with two goals: first, in order to change the sizes, our photo does not lose clarity, and secondly, so that we can flexibly use filters.
This can be done differently: we open a photo in Photoshop, clicking in the palette of the layer on the layer with the right mouse button (PCM) and select "convert to a smart object".
At the bottom of the layer miniatures appears the smart object icon.


By dragging our photo to the "Newspaper" document: Select the movement tool and holding the left mouse button (LKM), pull the image on our newspaper.

Go to editing - free transforming or press the CTRL + T key combination. And customize the photo below the picture in the newspaper.

We make an active layer with our photo and turn off the visibility of the layer. Select the selection tool is a rectangular area (fast key m) and highlight a photo frame in the newspaper, in place of which we insert a photo.


We include layer visibility and press the Ctrl + G key combination. Thus, we created a group into which only one layer is included with our photo, and then you will lie and adjusting layers. We reveal the group by clicking on the triangle, next to the name group 1. Click Lkm on the LD group 1 (make a layer active).
Click on the layer mask icon in the layers palette.
We have a layer mask in the group, and the photo has truncated strictly for allocation and now, putting on a layer with a photo, we will be able to change its size, move it and it will not go beyond the selection.

Photography we have color and our task to make it not just black and white, but to fit the shade and saturation to the general newspaper background. To do this, go to the layer with the photo and change the overlay mode on the brightness.

The photo on the tone was almost the same as the general tone of the newspaper. But we still need to choose the exposure of the picture and make it a little lighter.
We go to the Image tab\u003e Correction\u003e Shadows / Lights. And click on the tab at the bottom of the window options additional parameters.
Parameters put approximately as in the photo below, i.e.:
The effect of the shadow increases to 100%, slightly raise the width of the tone range.
The effect of light is increasing quite a bit and raise the contrast of the middle tones. Play with these settings, achieving greater similar to the tone with other pictures in the newspaper. Press the OK button.

The native picture in the newspaper on the left looks a little not sharp. Therefore, we will look at a very little more than our photo. We go to the filter - blur - Blur in Gauss. Blur radius put a very small 0.2-0.3 pix. Click OK.

Note - Under the layer with our photo, the smart filter icons appeared. And in this advantage of smart objects. You can return to any of the filters applied at any time. Click twice by the name of the filter and you will return to the filter settings. You can turn off the visibility of the filter (eyebound) or remove it at all. And if you click on the icon to the right of the filter twice, then you can reduce the effect of the filter by reducing the opacity.

If there is a need to still correct our photo, you can use the correction layers by clicking on the middle icon at the bottom of the layer palette.
Select, for example, an exposure where to play with exposure engines, shift and gamma correction. I also applied the correction filter photo filter cold.


We get this newspaper with our photo. Now we will deal with text. Replace the number and date of the newspaper.
We make an active bottom layer 0. Select the selection tool "Rectangular region" and highlight the rectangle above the line with the number and date and size of them slightly more. Close the PCM inside the selection and select Copy to a new layer. We move this layer to the very top of the layer palette.

Select the text tool. In the menu window, put a tick in front of the string symbol. The palette will open. Click the text tool the text above the line with the number and date and type the desired text on the keyboard. We highlight it with the mouse and begin to pick up the appropriate font, the size, etc. In this case, the font came up with the parameters (see photo):
Font - "Time New Roman" - "Bold", Kehal - 12 PT. But in each case, it is necessary to select and the font color of it for your newspaper (this is, by the way, the longest and difficult part of the work).

We combine the two upper layers in the group (Ctrl + G). We choose the tool moving and the arrow down on the keyboard omit the carved clean section of the newspaper with the text on the line with the number and date. Aligning on Lineshek.

Now we will work with the text around the photo.
Create a copy of the layer 1 (layer with a dedicated newspaper fragment) - press the Ctrl + J key combination to transfer the layer to the very top in the layer panel, and the fragment itself moves to the text area next to our photo. We apply to the fragment free transformation (Ctrl + T) and stretch it until the column of the text column.

Thus, we made a patch on a column with text where you can print your text. Select the text tool, select this tool with a rectangular area around our patchwork and score our text on the keyboard.
We select a font similar to newspaper. In this case, this is an arial - narrow size in 9pt and the other parameters as in the photo below.

We combine layers layer 1 copy and text to a group by pressing Ctrl + G and by choosing the move tool, drag our patch on the text column to the right. Align in the text using the guide rules (by default they are green). For greater similar text, you can reduce a little opacity.

Duplicate group Text 1 by pressing the CTRL + J key combination. Open a group of text 1 copy and make an active layer 1 copy.
Press the Ctrl + T key combination (free transformation) and stretch our patch on the number of lines that you will write.

Select the text tool, turn on the visibility of the text layer and, while on it, we allocate the printed text. We are imprinted instead the continuation of the new text.
The font parameters remain unchanged.

Our newspaper for photoshop Ready! Now we can send it to your friends by supplying the type of type: "I did not suspect that you, my friends, are so popular in your city!". And grin slowly until they break all the city newspapers in search of this note.
This lesson is completed.
Pleasant creative success
Download lesson in PDF format and source code to it:
The photo with an average resolution will suit the way I will describe below.
To begin with, create a new 2x2 pixel in a photoshop in photoshop on a white background. For convenience, we increase the display of the document in the window, pressing the alt key and scrolling the mouse fluid, take the pencil tool of black color, make the diameter of the brush 1 PKS and make such a picture:
Create a similar document 2x2 PKS, but already on a transparent background:

Then create the same drawings, but 4x4 PCS and black squares will be 2x2 PKS.
For all drawings, repeat the action "Edit -\u003e Determine the pattern ..."
The effect of the newspaper mesh is used mainly to black and white photos. In Photoshop, there are many ways to convert color photography to black and white. The simplest of them is to press the Ctrl + Shift + U keys, but simple - does not mean the best. In this case, I propose to use the mixing of the channels. I click the Image tab -\u003e Correction -\u003e Channel Mixing (Image -\u003e Adjustments -\u003e Channel Mixer), in the window that appears, we put a daw on the "monochrome" and change the position of the slider.

Then open the layer palette (key F7), click at the bottom of the panel by the "Add Layer Style" button, select "Pattern".
We choose the "black with white 4x4 PKS" pattern, the overlap mode is overlapping, also to taste and, depending on the permission of the pattern, select the scale and transparency. I have these values \u200b\u200b100%

The result of using these settings can be seen on the left side of the photo below.
But if you apply other settings, then the result will be different. For example, for the basis of the pattern to take a black-transparent drawing 2x2 PKS with settings: overlay mode - darkening of the base, opacity 59%, the scale of 221% is shown in the right side of the photo. 

Thus, combining patterns and their transparency, overlay modes, scale, and other parameters, you can achieve various results for one photo, from "coffee" to low-contrast muddy pictures from a boulevard newspaper.
In this lesson you will learn how with the help of a multitude of fonts, figures, textures and brushes, create a text effect in the form of cut fragments of the newspaper in Photoshop. Let's start!
To create this effect, I was inspired by layer styles available on the GraphRiver website.
1. Create background and text layers
Step 1
Create a new document with a size of 1000 x 1000 pixels, at the bottom of the layer panel click on the button Create. new FILL Or. Adjustment. Layer. (Create a new fill or adjusting layer), choose Solid Color (Color) and set the color on # F6F6F6.
Step 2.
We write text. Each letter should be on a separate layer. For each layer, we use your font and size. Color must be one for everyone - # 565656.
Each letter is added to the group (in the title we write the same letter), then each word group in a separate group.

Step 3.
After that, next to each letter to the left or right, we must add additional letters that the final result looks more realistic, since the newspapers usually do not use text with a large distance between the characters.

2. Add Figures and Text Blocks
Step 1
Take Rectangle. Tool. (U) (rectangle) and under any group of letters draw a line.
If you add additional parts to the text, the text layer and layers with the details add to the new group inside the group with the letter.
As a result, we will have a structure with invested in each other folders. This will allow the layer panel in order and not get confused during operation.

Step 2.
To add a block of text under any letter, take Type Tool. (T) (text), click and pull the left mouse button to create a frame under the desired letter, then go Type - Paste Lorem. IPSUM. (Text - insert Lorem IPSUM).
Translator Note: Lorem. IPSUM. - This is the so-called aggregate text, which is inserted into the design. Most often it is used in print and web design.
Configure the appearance of the text and select any font and size.

Step 3.
If you want to add text blocks under other letters, you remove part of the text so that it does not repeat.

Step 4.
We can also add dark rectangles under the letters. To do this, use Rectangle. Tool. (U) (rectangle). Pour rectangles with color # 565656, and the text - #ececec.

3. Add masks
Step 1
We take Lasso Tool (L) (Lasso), choose a group with the letter and draw a selection around the main letter that is in the name of the group.
Try to draw a selection in the shape of a cut-off block of paper.
Here we will use the letters that we added next to the main. This will give the effect of realism.

Step 2.
After creating the selection, at the bottom of the layer panel click on the button Add. Layer. Mask. (Add a layer mask).

Step 3.
We repeat the first two steps and add a mask for other groups with letters. If necessary, you can edit the mask at any time, so do not worry if you have no beautiful allocation from the first time.

4. Add paper texture
Step 1
We place the grain texture of the paper at the bottom of the group with the first letter and, if necessary, adjust the size.

Step 2.
We change the mixing mode of the layer or group over the paper texture on Linear Burn. (Linear darck).

Step 3.
Duplicate (Ctrl + J) layer with a paper texture and add a copy to the next group with the letter. We repeat the process until all shreds fill the texture.

Step 4.
If after adding the mask you want to move the contents of the group, then first you need to disconnect the mask from the layer by clicking on the chain icon between them. Then move the layers and after that we again associate the mask and layer.

5. Add mint paper texture
Step 1
In the upper part of the group with the first letter, insert the paper texture 1, correct its size and change the mixing mode to Multiply. (Multiplication).

Step 2.
Duplicate the texture and add it to the rest of the groups.

6. Create a brush in the form of torn edges
Take Brush. Tool. (B) (brush) and open the panel Window. - Brush. (Window - brush).
Choose a chalk chalk size of 23 pixels and customize it:
Brush. Tip. Shape (Cluster print form)

Shape Dynamics. (Shape Dynamics)

7. Create a working contour from the selection
Step 1
Close the Ctrl key and click on the miniature group masks with the first letter to load its selection.

Step 2.
Open the panel Window. - Paths. (Window - contours) and at the bottom Press the button Make work Path. from. selection (Create a working contour from the selected area).

8. Perform a circuit stroke
Step 1
Make sure the tool Brush. Tool. (B) (brush) active and chosen created above. Then check that the group's mask is highlighted with the first letter and set the color of the foreground on black.

Step 2.
Click the Enter key to automatically circulate the circuit with the circuit and add the effect of torn edges.

Step 3.
We repeat the process for other letters.
Having finished, take Direct. Selection Tool. (A) (partial selection) and last press the ENTER key to remove the circuit.

9. Add white dangling edges
Step 1
So that the result looks more realistic, we will add white edges along the contour of the paper shoes.
Insert paper texture 2 under a group with the first letter. At the same time, make sure that the layer is under the group, and not inside it.

Step 2.
Close the alt key, grab the group mask and move it on the layer with a paper texture 2 to copy.

Step 3.
Take Move. Tool. (V) (moving) and with the arrow on the keyboard to the right and down shift the paper texture 2 so that it looks out from under the fragment of the paper.

Step 4.
We repeat actions with the addition of texture for other letters.

10. Add shadow
Step 1
Double-click on paper texture 2, which we added for the first letter, and apply a layer style Drop. Shadow. (Shadow) with the following parameters:
- Opacity (Opacity): 35%
- Distance (Offset): 3
- Size (Size): 7

Step 2.
Right-click on the layer we applied the shadow, choose Copy. Layer. Style. (Copy the layer style), select all the other layers with a paper texture 2, click on it right mouse button and choose Paste Layer. Style. (Insert a layer style).

11. Add a translucent effect
Step 1
To add the effect of translucent paper, at the top of the group with the letter add a block with the text Lorem IPSUM.

Step 2.
Go Edit. - TRANSFORM - Flip. Horizontal (Editing - transformation - reflect horizontally) and reduce Opacity (opacity) layer to 10%.
We repeat the process for other letters.

12. Transform fragments with letters
Step 1
Before transformation of fragments, we will add the red and blue fill for some letters and pieces of paper so that the result looks more attractive. For red, use the shade # D66161, and for blue - # 6A8EBC.

Step 2.
We highlight a group with the letter and layer with a paper texture 2, click Ctrl + T to activate the mode of free transformation.
If you immediately try to edit a fragment with the letter, the transformation will occur a little strange way. This arises due to the fact that the paper texture is quite large, and the reference point, relative to which the transformation occurs, is not in the center of the letter.
To fix it, clamp the ALT key and move the reference point to the center of the letter.

Step 3.
We move, turn and adjust the size of the letter. Having finished, click the Enter key to apply the transformation.

Step 4.
We repeat the process to transform the remaining letters.

13. Add background
Step 1
Above the layer Solid Color (Color) Add a copy of the paper texture 2, adjust its size and reduce opacity to 50%.

Step 2.
Keep in mind that you can configure fonts at any time, sizes and edit the masks of each letter.

Congratulations, we finished!
At the beginning of the lesson, we created a lot of text layers using different fonts and sizes. Then grouped all the letters and added several paper textures.
At the end, we changed the color of some elements and applied the transformation so that the result looks more realistic.
Feel free to leave comments, suggestions and share results.
(After clicking on the link - the browser will give you the error "Forbidden ...". Do not closing the browser windows, in the address bar "Go to the link again - the archive download will start.)
Step 1
Create a new document size 1024 × 780 px, with a resolution of 72DPI, RGB 8 Bit. Download the archive with the materials and mark your workfile with a grunge texture - dsc_0371.jpg (simply drag the image from the folder to your working paper). Since the image does not completely overlaps the canvas, stretch it up to the desired size, pulling on the corner marker and holding the key Shift.

Now you can combine the background layer and layer with the texture, highlighting them on the layer panel and pressing Ctrl + E.

Step 2.
Select a tool, check that you have mode installed. Shape / Figure On the top of the settings panel, and draw this rectangle white:

Load the selection of the rectangle by clicking on its icon on the layers panel with a pinch key Ctrl:

Then apply the filter Add Noise (Filter\u003e Noise\u003e Add Noise / Filter\u003e Noise\u003e Add Noise) To the selected area with the following settings (in the appeared window with a question about the layer raster, press OK):


Step 3.
Click twice the same layer on the layers panel to add a layer style. Inner Shadow / Inner Shadowwith the following settings:


Step 4.
Open the folder with the materials to the lesson and install the file with the brushes (UBersuper-folded-paper.abr) by clicking on it twice. Then create a new layer (Ctrl + SHIFT + N), Take the tool Brush / Brush Tool (B), Choose a brush shown in the figure, and make it a fingerprint over your rectangle (brush color - black). Before making an imprint of the brush, load the selection of the layer with the rectangle.

If necessary, increase the size of the brush so that it completely overlaps the white rectangle

Step 5.
Create another new layer and again with the tool Rectangle Tool (U) / Rectangle tool Draw a narrow strip color # 12Adc8, as shown in the picture:

Change the mixing mode of this layer with a strip on Linear Burn / Linear darck:

Now take the tool Line Tool (U) / Line tool And draw the black lines as shown in the picture:

Place on your working canvas images from the folder with the materials or take the photos or pictures you like. Place them as follows:

Change the mixing mode of each layer with a picture on MultiPly / Multiplication:

Step 6.
Take the tool and add the desired text. To add the text exactly to the rectangular column as follows: Take the Tool Rectangle Tool (U) / Rectangle tool And draw a rectangle of the desired form in PATH mode. Then take the tool Horizontal Type Tool (T) / Horizontal Text Tool, click inside the resulting circuit and insert the text copied in advance (Ctrl + V).

Step 7.
Now let's add the name of the newspaper. In this case, the author chose the name "Le Monde" ("Mir"). You can either put an image titled from the folder with the materials or write your GothicrusMedium or English Ggothic 17th font

Step 8.
Add more different logos, inscriptions and images to your liking. The author turned out the following:

Step 8.
Load the selection of the layer with the rectangle, which we created at the very beginning (Ctrl + click on the layer icon on the layer panel). Take the tool Gradient Tool (G) / Gradient tool, Gradient type - linear, gray (# A3A3A3) to transparent, create a new layer (Ctrl + SHIFT + N)and draw a gradient at the bottom of the rectangle from below, as shown in the figure:

Change the layer mixing mode with a gradient on Difference / Differenceand reduce it Opacity (OPACITY)up to 55%

Now select all the layers except the background layer with the texture, duplicate them (right click on the layers on the layers panel\u003e Duplicate Layers.) and drain the received copies in one layer (Ctrl + E).

Select the resulting layer, activate the transformation mode (Ctrl + T) And turn the top newspaper to a small angle:

Step 9.
Add the combined layer with a newspaper two layer style by clicking on it twice on the layers panel:
Drop Shadow / Shadowand Bevel and Emboss / Embossing

Here is what you will have:

Step 10.
Duplicate (Ctrl + J)the resulting layer with a newspaper is several times and turn copies in transformation mode (Ctrl + T) On a small angle relative to the top newspaper.

And at the end, add a correction layer Color Balance / Color Balance (Layer\u003e New Adjustment Layer\u003e Color Balance / Layer\u003e New Corrective Layer\u003e Color Balance) And set the following settings for it:

Final result!

When small business faces the need to organize his own IT infrastructure, the issue of organizing its own technical support service is certainly arises. The optimal solution for companies of this size is complex