09.11.2018 09.11.2018
When work in photoshop is ready to save it.
Depending on what task you save the file you need to select the format. In this article, we will look at how to save and what file format to choose.
What format to save the file?
PSD.. This is the standard format of the photoshop file. In it, you save your file so that you can continue to continue at any time. In PSD format, you will not be able to show your friends (parents, girls, etc.) photo or graphics that you draw. This format can be opened only by photoshop.
Jpg.. The format is great for photos and other graphic images. Before saving in Photoshop, you can optimize the saved JPG file - it means you can adjust the image quality so that the file size suits you. The format opens on any computers and phones. A good solution to show photos to relatives, send schedule for work, save the background for the site, etc.
PNG.. Used mainly designers for graphics on sites, online advertising (banners), graphics for mobile applications, etc. The format is notable for supporting transparency in the image. If you need to save an object on a transparent background - save in PNG.
GIF.. This format is used if you need to save the animation. For example, an animated banner, smiley, short video or sticker. Recall all the famous gifs that walk through the Internet is just that format.
How to save in psd
Set the file name and select PSD format (usually selected by default).

Be sure to make sure the checkbox is on the parameter Layers. Otherwise, everything and the benefits will not be used from such a saving file.
How to save in jpg
- Follow the command File - Save.
- Select Format Jpg..

After that, a window appears where you can configure the parameters of the stored file.

Here you can adjust the quality of the photo by exposing the value Quality From 1 to 12.
Install the checkbox on the View parameter and will be seen how the quality of the photo changes when you change the parameter Quality.
In addition, you immediately see how much the file will weigh when you save it. The smaller the file, the faster you can send it over the Internet, it will be loaded faster from another user. Remember that no one loves to wait a long time to download photos on the Internet, especially through a mobile phone.

Format variety is better to leave Progressive. Now we will not go into technical details, but this option is the most optimal.
Adjust the quality when saving is necessary so that the image is not very injured, and the file has decreased significantly.
How to save in png
Keep photos in PNG do not need. Take advantage of this format if you need to keep the picture with a transparent background.

A window appears with the settings of the stored image.

Choose PNG-24 format - it will be a high-quality image with the smallest file weighing and with all colors.
Install the tick TransparencySo that the picture was with a transparent background.
Parameters - Oblast and Built-in profile It is necessary to remove, because This is an extra and not necessary load on the file.
 Picture with a transparent background saved in Photoshop
 How to save gif
Choose GIF format.

The GIF format is seriously litto the image in colors and, accordingly, in the field of file. Maximum here is available 256 colors.
Do not forget to put a tick on the contrary TransparencySo that there is a transparent background if it is needed.
Adaptive Flower model is the best when you need to save in maximum quality.
Dizereng I set 100%, in this case gradient transitions are smoother.

If you have animation in the gif, you can configure its number of repetitions. Usually put Multi-timeSo that the animation was infinitely repeated.
Now you know how to keep in Photoshop using the most popular formats. Have questions? I invite you to comments.
I welcome you again on the expanses of my blog, dear readers and visitors. Today we will learn how to save a picture in Photoshop for different situations. We learn how to keep images on a transparent background, without loss of quality, animation and much more. Many will probably be imaginable: "What kind of garbage? When we begin to deal with a normal photoshop, and not in trifles all sorts. " I will answer you. Do not rush forward the locomotive. Examine first theory and Aza, and then the most interesting will be. Go in order and everything will be cool. Moreover, there are nuances here, starting with a drawing format, ending with the size.
Normal preservation

To save your document or rather say the pictures, you need to go back to the top menu and click where? That's right, you need to click on the file. And in the menu that opens, select "Save As". There are several basic formats in which it is recommended to save. More details we considered them. In short, I will tell you what formats for what purposes it is better to save images.
And, by the way, when you save the picture in the JPG format, you will populate the window where you will offer to choose quality. I usually put 8 for ordinary photos. In principle, the quality is higher is indistinguishable. A variety of role format does not play a special, at least you will not mind anything. You can put the basic optimized, then the final image will take a little less space.

If the image involves working with a more accurate pattern, where some important little things are shown, then put on the full 12, as it depends on how quality will change when the picture is increased. If this is the usual picture, where the accuracy and quality of a special role does not play, then you should not put more than 8.
What formats are best to save a picture
Briefly consider the most popular formats of pictures that are used for different purposes.

- If your project is not finished yet, save in format PSD.. All your progress will continue, transparency, all layers and so on. And by the way, if the project is not just a one-day, but something more large, it is better to always keep a copy in PSD. I always keep pictures of pictures that insert into the announcement to the article, as the topic is the same. Just changing the picture inside and title.
- If you have completed your project and want to save your end result (for example, I have been treated with a photo or made a collage), then keep in JPG (JPEG). The most optimal for the photo. In the overwhelming majority of cases, we will save it in it.
- If you made an animation (for example, animated banners), then you are only suitable GIF.Since only it can consist of several images at the same time. But despite the huge plus, this expansion has a fat minus. The fact is that it is not able to maintain pictures with the number of colors more than 256. And this is how you probably guessed, very little, given the fact that the usual JPG photo is able to contain more than 16 million colors. A little difference? But for low-color animated banners - it will be what it is necessary.
- If your image implies a transparent background, i.e. On the picture only a specific object without a white background (or), then your format PNG.. The fact is that if you save any picture with a transparent background in photoshop with a JPG extension, then it just snaps up with white. And upon subsequent insertion of the picture to the editor, no transparency will no longer.
- If you want to save a picture in photoshop without loss of quality, then it is best to do this in format TIFF.. It is here that the entire color palette and pixels are preserved. This format is used for printing during the printout of raster images just so due to the fact that the quality does not lame. The only minus becomes the fact that he occupies indecent much space on the hard disk.
- And of course it was impossible not to mention that Photoshop is able to create graphics in format PDF.that will allow you to open it not as an image, but as a document.
I would also like to see that GIF, like PNG supports the background transparency, but unlike the latter it does not support translucency. Either Sun1 or nothing.
Of course, here you can see many other extensions, but believe me, they do not cost your attention.
Saving for Web.
In addition to normal file exports, you can save the image to lad out on the Internet. With this method, it will be more optimized for the Internet, which will accelerate its discovery and will be more convenient. So if you want to insert pictures on the site, it is better to pre-save them for the Internet.


And if you want to save a picture in photoshop with a transparent background for the Web, then select PNG-24 format. Be sure to make sure that the "Transparency" clause is a tick, otherwise your image will be with a white background, which will replace the entire emptiness. As you already know, the PNG extension can work without a background.

To save animation a lot of strength is also not needed. Simply select the GIF save format and, if necessary, put full-toll, i.e. All 256 colors, if you think it is needed. Do not touch the remaining settings, leave everything without dehering so as not to take unnecessary space.
Before saving you yourself can see how it was and what happened for comparison. This is a very convenient thing, because you can play with the sliders and settings and look in real time, as far as the quality of the photo changes, and what settings are the most optimal. Select the option 2 options and then you will see the original and optimized image at the same time.
Try to do all manipulations from beginning to end yourself. It is very simple. Also, do it for each of the destinations.
Well, if you want more details to explore photoshop, then I can offer you wonderful video courseThanks to which you will study Photoshop for a couple of weeks. Believe me, it's not at all difficult if you give a program for 1-2 hours a day. All lessons are made in video format and are designed for beginners, so you will not be uncomfortable and you will understand everything from the first time. Believe it, it is really worth the course!
Well, at this today's lesson comes to an end. I am very happy if this article was useful for you. By the way, if you want to receive updates on my blog, you will definitely subscribe, and then you will be aware of the most recent news, contests and just useful lessons for you. Good luck to you and see you in the following articles. Bye Bye.
Sincerely, Dmitry Kostin
Working with a graphic editor Adobe Photoshop. For 5 years now, I was surprised to find out that not everyone knows about the importance and the need to save the images properly. Turning to the Internet, I really did not find relevant and correct informationon this topic. For this reason, I figured out the question and I want to tell you how to save images properly.
Who needs to know and why?
Everyone - who works with a graphic editor, not necessarily Adobe Photoshop. Illustrator, artist, graphic designer, web designer, interface designer, photographer, student, schoolboy - learning how to save the correct image correctly, reducing the file size, you save not only your own, but also someone else's time.
What time is it talking about?
To begin with, clarify one thing:
Using the Internet, you lose time - a lot of time
Loading page on the Internet is not instant and takes time, but for many years of staying on the Internet you are used to not noticing it. Suppose average page loading speed 3 secondswhere 2 of them comes to download images. Illustrations, interface elements, photos, advertising banners, PDF presentation or even a picture with a cute cat, depending on the size of the file, you will need time that the browser brought the image to the screen.
Do not deceive yourself with "megabytes per second"
Most likely your Internet provider promises you 100 Mbps - This is a brilliant advertising stroke (read as: deception) generated many delusions, including in the topic of site loading rates. I measured the connection speed with the server located in Moscow, the result:
But the download speed of the page from the site is significantly lower:
How many images are you viewed in the day?
Dozens? Hundreds? I as an active Internet user browsing several hundred depicted per day, most of them are high permission. If you reduce the weight of these images and, accordingly, increase the download speed, at least on 1 second,multiplying 500 images per day,then get about 8 minutes a day and 4 hours a month.
4 hours a month I expect when the picture will boot
All you need to know about the preservation of images
With rare exceptions, there is no need to maintain the final result by the same method as PSD,in this case, the file is preserved additional and excess information From the date of creation and title of the graphics editor to the weather and the camera model.
Harmful habit is to install quality in value 100 but in comparison with 80 varies visible qualityalmost equal to zero, but the difference in weight feeling.

To place an image on the site, transfer by mail, save in the cloud, sending in messenger, etc. - must be used Save for Web.


JPEG or PNG?
JPEG - for images with lots of colors and sophisticated figures: illustrations, paintings, photos.
PNG - for vector images or images containing text, simple geometric shapes that have transparency and small number of colors: logos, screenshots, stickers, icons.
What quality (Quality) choose?
For most images, the optimal value will be 80 For some simple images where a clear transition between colors is not important. You can put a value 60 .
Optimized (Optimized)
The function includes an additional color conversion algorithm, recommended include everIn addition to cases, when the most smallest details are important (for example, Pixel Art).
Convert to SRGB (Convert to SRGB)
Converting image colors to the corresponding SRGB table.
SRGB is the standard for the Internet
IMAGE SIZE)
The most common screen resolution is: 1366 × 768. - for computer and 720 × 1280. - For smartphone. Have this in mind and do not save the images more than 1920 in width.
Metadata (Metadata)
Excess information I talked about. No need to specify additional features about the image that only increase the size of the file.
When was the last time you watched the detailed information of the downloaded image?
Using this method, I managed to reduce the weight of the image twice.
Of course, there are rare exceptions when you can use detailed information or increased detailing, but in most cases these rules will be appropriate and save hundreds of hours.
Thank you, Vladislav.
Preparation of any digital image read by the Adobe Photoshop graphic editor, whether it is a PSD file, TIF-image or "big" JPEG pictures, to publication on the site, forum or social networks, as well as forwarding by email. In other words, "Jepeg" for the Internet. The rhyme turned out.
Of course, the formats of images that can read Photoshop are hardly exhausted by three. And what is nice, most can be translated into JPEG. Regardless of the source format in Photoshop, there are two ways "Jeeping". The ability to choose is more pleasant. Both ways vary. External differences are found to be found in the unarmed look, differences in the appointment ("How can I follow?") I will allocate specially.
In this lesson, I will present two step-by-step instructions with the necessary theoretical "enclosures". It is designed to show you how to optimally save your virtual drawing, collage or photo in a widespread JPEG format. The latter is most effective for images with smooth flower transitions.
To consolidate and expand the knowledge gained, as well as in order to work out the skill, I prepared the appropriate exercises. I suggest you to perform them, and then publish your results in the comments to the present lesson. Try your skill in the "field"!
First method
1 step
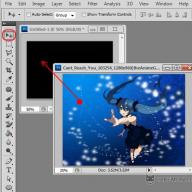
I open the original image in Photoshop. In my case, this is a file with the name "example.psd" containing the drawn ball.
I click on the keyboard the combination of the "Ctrl", "SHIFT" keys and keys indicated by the Latin letter "S" either choose in the "File" menu ("File")\u003e "Save As ..." ("Save As ..."). A dialog box appears with the "Save As" header.
2 step

I choose the location of the future jpeg image. In the "File Name" field, I enter a new picture name, if necessary. In the "File Type" drop-down list, select "jpeg (* .jpg, * .jpeg, * .jpe)" format.
The parameters below leave unchanged below, making sure that the JPEG image is embedded in the future as a color profile, the standard SRGB is selected and selected. If so, then I turn to the 4th step.
If, instead of SRGB, another color profile is specified, for example, ProphotorgB or AdoberGB, then before starting in the procedure lesson, I will translate the original image in the SRGB color space for the purposes of uniformly displaying colors on most devices. I will do it as follows.
3 Step

Click on the keyboard the "ESC" key to close the "Save As" window.
I choose in the Main Menu "Image" ("Image")\u003e "Mode" ("Mode"). If the "tick" is installed opposite "8 bit \\ channel" ("8Bits \\ Channel"), then I choose the "16 bit \\ channel" ("16Bits \\ Channel"). An increase in color depth is desirable that the conversion from one color profile to another passed carefully. Visually on the source and final images, the change in color depth is hardly reflected.
Then I choose in the "Edit" menu in the main menu)\u003e "Convert to Profile" ("Convert to Profile"). A dialog box appears with the title "Convert to profile".
In my case, the original color profile ("Source Space"), which describes the colors in the figure, is called "Adobe RGB (1998)". I choose in the drop-down list "Target Profile" ("Destination Space") the value "SRGB IEC61966-2.1". Checking the conversion parameters - they are located below: The "Tool" parameter ("Engine") has the value "Adobe (ACE)", "Method (Rendering)" - "Relative Colorimetric" ("Relative Colorimetric") "Tick" opposite the "Use Black Point Compensation" parameter ("Use Black Point Compensation"), "Tick" is missing opposite the "Move Image to Save View" ("Flatten Image To Preserve Appearance").
If you have increased the depth of color (I have done it a little earlier), then the "Use Dither" parameter) will be inactive. If in the open image is only one layer (when you open JPEG-pictures or "simple" TIF images, usually, it is also), then the parameter "reduces the image to save the view" is also inactive.
I click the "Done" button ("OK"). The "Convert to Profile" window disappears.
4 Step

In the main window of the program, a new dialog box appears with the JPEG parameters header ("JPEG Options"). The "Quality" parameter ("Quality" allows you to specify the ratio of the quality of the output image and the volume that the picture will occupy in the computer's memory. Thus, payment for the reduction of volume is the degradation of the quality of the original image. The smaller the value of the "quality" parameter, the less the volume of the JPEG image.
In the example under consideration, I will stop at a value equal to 6.
To evaluate the quality of the picture before saving, install next to the Preview parameter ("Preview") "Tick".
5 step

Install the value of the second parameter - "Formatting" ("Format Options") - equal to "standard optimized" ("Baseline Optimized"). The volume of the future JPEG image has decreased, and the image quality remains the same.
6 step

Clicking the JPEG ("JPEG Options" window) button "Finish" ("OK") and check the result.
Compare the volumes of the original PSD drawing (~ 3000 Kb) and the final JPEG image (82 Kb). Thus, the JPEG file turned about 36 times less than the original image at visually equal quality. Conveniently!
Please note that the size of the final JPEG image remained the same, as in the original PSD figure it is equal to 2480 pixels × 2480 pixels.
Second way
1 step

I open the original image in Photoshop.
Click on the keyboard the combination of the "Ctrl", "Alt", "SHIFT" keys and keys indicated by the Latin letter "S" or select the "File"\u003e "Save for Web ..." in the main menu ("Save for Web ...").
A new dialog box will appear with the title monopho.
2 step

3 Step

I set the value of the "Quality" parameter ("Quality") to the maximum.
4 Step

Reduce the size of the image using the Image Size parameter ("Image Size").
This is an optional operation, but it helps to significantly reduce the volume of the future JPEG image, most often, with minimal losses in quality. On the one hand, the decrease in the size will lead to a natural decrease in volume and, on the other hand, to a decrease in the detail. The last, in turn, limits my opportunities in printing the final JPEG image. If I do not plan to print the latter, I will forget about the constraints.
In this example, I enter in the "Width" field ("width" value 600. The value will automatically change in the "Height" field ("Height"). Also, the size of the output image will automatically change relative to the size of the source pattern specified in the Percent field ("Percent"). Changes occur automatically and the percentage field is in an active state if the parameters of the "Width" and "height" are related to what the corresponding icon is indicated to the right of these fields.
In the preview window on the left I will appreciate the size and quality of the image. And the approximate volume of the latter can be found in the number specified, usually, in kilobytes (KB) or megabytes (MB) under the left corner of the window.
5 step

I set the "tick" next to the "Optimized" parameter ("optimized").
6 step

If I want to reduce the volume of the output image, then reduce the value of the "Quality" parameter ("Quality"). I recommend to adhere to the values \u200b\u200bwithin 45-90.
In this case, I will choose a value of 75.
As a result, the average, at the speed of accessing the Internet equal to one megabit (1 mbits), the time of loading my drawing from the Internet will be one second. It is indicated under the value of the volume of the future JPEG image.
At the same time, visually the picture turned out to be quite acceptable quality, the transitions of the tones are fairly smooth.
7 step

I set the "tick" next to the "Convert to SRGB" ("Convert to SRGB") and select the "Color display" value ("Monitor Color") in the drop-down list below.
8 step

Finally, I install the "tick" next to the "Built-in Color Profile" parameter ("Embed Color Profile").
Actions on the 7th and 8th steps are desirable so that the future of the JPEG image is approximately the same displayed on various devices.
9 Step

In the "Save optimized image" dialog box that appears with the header ("Save Optimized AS"), select the location of the JPEG image and set it the name if necessary. Click in the active window "Save" button. Both windows disappear. Now I can estimate the result.
I closes the original image. In the appeared dialogue window with a proposal to save the changes, I choose "no" ("NO").
An image obtained by the second way is convenient to apply for publication on the Internet. And the image obtained by the first way can be in addition to publishing the Internet to print. In view of the fact that the size of the image has not changed, it was not interpolation, which means its quality a priori above the image quality obtained in the second way.
For details on interpolation and its influence on the quality degradation of the digital image, I will tell in the lesson "What is interpolation?"

To secure the knowledge gained, I suggest you not only save in JPEG format several your own photos, but also perform the exercises attached to this lesson. The latter cover the tasks with which you may encounter a photo.
After completing all the operations on the image (photo), it must be kept to my hard disk by choosing a place, format and giving any name.
Today we will talk about how to keep ready-made work in Photoshop.
The first one needs to decide before starting the saving procedure is a format.
Common formats are only three. it JPEG., PNG. and GIF..
Let's start by S. JPEG.. This format is universal and is suitable for saving any photos and images that do not have a transparent background.
The feature of the format is that when the opening and editing may occur so-called JPEG ArtifactsThe reason for which is the loss of a certain number of pixels of intermediate shades.
It follows from this that this format is suitable for those images that will be used "as is", that is, they will not be edited anymore.
In contrast to the previous format, PNG. When re-edited (use in other works) does not lose as (almost).
The latest representative of formats - GIF.. In terms of quality, this is the worst format, as it has a limit on the number of colors.
Let's practic a little.
To call the save function, you must go to the menu "File" and find item "Save as"or use hot keys Ctrl + SHIFT + S.


This is a universal procedure for all formats except. GIF..

Substrate
Ka we already know format JPEG. Does not support transparency, so when saving objects on a transparent background, Photoshop proposes to replace transparency on some color. The default is white.
Image Parameters
Here is the picture quality.
Variety of format
Basic (Standard) Displays the image to the screen line, that is, in the usual way.
Basic optimized Uses Huffman algorithm to compress. What it is, I will not explain, look at the network yourself, it does not apply to the lesson. I just say that in our case it will make it possible to slightly reduce the file size, which today is not sucking relevant.
Progressive Allows you to improve the image quality step by step as it is downloaded on the web page.
In practice, the first and third variety is most often used. If not quite clear what all this kitchen is needed, choose Basic ("Standard").
Saving in PNG.
When saving to this format, a window with settings is also displayed.

Compression
This setting allows you to significantly compress the final PNG. File without loss of quality. In the screenshot, compression is configured.
In the pictures below you can see the degree of compression. The first screen with a compressed image, the second - with uncompressed.


As you can see, the difference is significant, so it makes sense to put a tank in front "The smallest / slow".
Oblast
Setting "Remove selection" Allows you to show the file on the web page only after it fully boots, and "Obediently" Displays an image with gradual improvement in quality.
I use the settings as on the first screenshot.
Saving Gif.
To save the file (animation) in the format GIF. needed in the menu "File" Select item "Save for Web".

In the settings window that opens, it does not have to change anything, as they are optimal. The only moment - when saving the animation, you must set the number of repetitions of playback.

I hope that having studied this lesson, you made up the most complete picture of the preservation of images in Photoshop.