You do not know how to increase the size of the picture? This is a very simple task, since everything you need is already installed on your computer. Read this manual, and you will learn how to change the size of the photo using 5 simple tools.
Method 1. How to resize images in Microsoft Paint
- Find and run MS Paint. It is pre-installed on all versions of the operating system. Windows. Start\u003e All Programs\u003e Standard\u003e Paint:
- Take the image to the Paint window or use Menu\u003e Open (Ctrl + O).
- In the main menu of the program, find the "Resize" item and select it:
- The image change and image proportions panel opens. You can specify the value in pixels. Do not forget to check the checkbox " Save proportions" Otherwise, the image will be deformed:
- To increase the size of the picture, click the "OK" button and save the photo.
Advice:
- If it fails to set the desired photos, without stretching it, you can use the "Pruning" tool to remove unnecessary edges. How to do this, described in paragraph 3;
- To open the photo faster, click on it right-click and select the item item from the context menu Open with Paint»;
- It is best to save the image in the same format as the original.
Method 2. How to resize images in MS Photo Gallery
- If Microsoft Photo Gallery is not installed on your computer ( Start\u003e Photo Gallery), you need to download and install it as part of Windows Essentials 2012;
- Run MS Photo Gallery and find your graphic file;
- Click on it right-click and select "Change size ...":
- Choose a ready preset: " Small 640 pixels"," Middle 1024 "," Big 1280 ", etc.
- Click " Resize and save" After you increase the size of the picture, the image will be placed in the same folder, it will also remain the original.
Advice:
- If you need to specify the exact image size, in the drop-down menu, select " Custom"And set the size for the most part of the photo;
- To change the size of several photos at the same time, select them by holding down the Ctrl key.
Method 3. How to change the size of the image in Photoscape
You can increase the size of the picture in Photoshop. Or use for this PhotoScape.
- Upload photoscape and install it. Run the program;
- Click the "Editor" tab and find the photo you want to change:
- At the bottom of the image there is a "Resize" button, click on it.
- Set a new photo size. Make sure the option " Keep the ratio of side»Enabled and click" OK ":
- Save the edited image.
Advice:
- If you need to change the size of multiple images, use the tab " Batch editor" Add a folder and change the size of all photos in it;
- If you do not know the exact size, you can set the "percentage" from the source size.
Method 4. How to resize images in IrfanView
- Install IrfanView - a great tool for viewing and increasing the size of the picture;
- Add a photo by having threw it in the program window, or by clicking the first button in the toolbar:
- Click the "Image" tab, select " Size / proportion» ( Ctrl + R.);
- Install the new size in pixels, centimeters, inches, or as a percentage of the original image:
- Save the image.
Advice:
- You can use standard dimensions: 640 per 480 pixels, 800 per 600 pixels, 1024 per 768 pixels, etc.;
- To save high quality photos, make sure that the value of at least 300 is set for the DPI parameter.
Method 5. How to change image size online
- To enlarge the size of the picture online, go to the PicResize site.
- Click the " Browse."To choose a photo. Click " Continue.»:
- Select the percentage of the original image, for example, 50% less. The tool displays the image size at the output. Alternatively, you can enter the exact size by selecting in the drop-down menu item " Custom Size»:
To understand what processes are laid in the image size change mechanism, read the construction material of any raster image. If briefly, these are small colored squares, from which, from the mosaic, the picture is formed.
Speaking of size, we say about resolution. It is recorded as the amount of pixels in one row in width and one column in height and is written as follows: 655 × 382. Such sizes are the following art:
Therefore, changing the image sizes, we must change the values \u200b\u200bof these pixels in width and / or altitude.
In case of decrease in sizeFor example, our example will be changed to 300 × 175, the picture will already consist of 300 pixels in width and 175 pixels in height. No narrowing happened. Photoshop recalculated the pixels in the image and calculated from which you can get rid of.

But this process is not reversible. If you need to return everything back or do even more, the new process will start - an increase.
In case of increasing size, Photoshop calculates which pixels is not enough and adds them on the basis of complex processing algorithms. This process cannot be high-quality, so when an image is increased, the quality is lost. The picture loses in the definition of parts, it becomes blurred. For clarity, an example above I increase to the source size. Compare:

Thus, with an increase, the quality will depend highly on the initial image size and from course to which you need to "pea".
Image Size Dialog
So, the most basic way to change the image size is to use the menu command:
Image - Image size (Image - Image Size).
Hot Key: Alt + Ctrl + i.
The dialog box opens:

This dialog box allows, firstly, to obtain information about the current image sizes, and secondly, actually change them.
Dimension (Pixel Dimensions)
To change the size of the image Change values Widths and heights. By default, they are measured in pixels, but from the drop-down list you can choose interest.
Pay attention to the bracket and the icon in the form of a chain. This means that when changing width or height, the second value will automatically change in the same proportions as the original image. It is necessary that it does not work out compressed or elongated. To enable / disable such a function, check "Save proportions" (Constrain Proportions).
Print Size size (Document Size)
I mentioned about this group of settings, speaking about the printer. Resolution (Resolution) changes the size of the pixels and affects the print quality. For printers, feel boldly put in the range of 200-300 pixels per inch.
Width and height values \u200b\u200btell us about what paper sizes can be printed image. By changing numbers, it will change the image size. Please note that there is a function of preserving proportions.
Scale Styles (Scale Styles)
Determines whether the program will scalize any layer styles applied to the image. It is recommended to leave this check box installed, otherwise, for example, the shadow you added can ultimately be more or less than the picture itself.
Interpolation
This is your key to resolution change without influence on image quality. Interpolation (Resample Image) is a process at which Photoshop responds to the size change command, adding or subtracting pixels. The problem is that during interpolation, the program "builds assumptions", and this can spoil the image quality.
When you first start the program, setting up Interpolation Included, and is responsible for increasing or decreasing the number of pixels in the image. These processes reduce image quality, since the program either creates pixels or chooses which of them to remove accordingly. Disconnecting, you protect the quality by securing the size in pixels.
When you install the checkbox InterpolationYou need to select a method from the drop-down list below. Why can this be required? Sometimes you need the help of photoshop in creating a larger or smaller image than the original.
For example, if you have an image with a resolution 200 pixels per inch, the size of which when printing is 4 × 6, and the size of the printed option must be 5 × 7 and it is desirable to keep the resolution in 200 pixels per inch. To do this, you can install this check box.
The variants of the drop-down list located under the Interpolation flag are determined to which the form of mathematical calculations resorts photoshop to add or remove pixels. Since higher quality image means more work, the better the image, the more time it is necessary for the program to perform the aforementioned process.
Here are the options for you are offered, sorted by quality (from the worst for the better) and speed (from the fastest to the slower itself):
- For neighboring pixels (retains clear edges) (Nearest Neighbor). Although this method as a result gives the lowest image quality, it can be useful because it creates the smallest files. It is useful if you pass files via the Internet, and you or the recipient have a slow connection. This method works focusing on the colors of the surrounding pixels, and copying them. He is known for creating uneven edges, so you should apply it only to images with sharp edges, such as illustrations that were not smoothed.
- Bilinear (Bilinear). If you choose this method, Photoshop will guess the color of new pixels, choosing something average between the color of pixels, located directly above and below, as well as to the left and right from the added. The result of this method is slightly better than when choosing an option. According to neighboring pixels And it is still quite quick, but you better use instead of a bilinear one of the following three methods.
- Biobubic (the best for smooth gradients) (Bicubic). This method allows you to determine the colors of new pixels, averaging the colors of pixels directly above and under the new, as well as two pixels on the left and right from it. This method takes longer than previous two, but creates a smoother transition in areas where one color is replaced by another.
- Biobubic, ironing (Best for Zoom) (Bicubic Smoother). Close to the previous method according to the method of creating new pixels. When using this method, the pixels are blocked slightly so that you can impose new ones on old, giving the image a smoother and natural look. It is recommended to apply this method to increase images.
- Biobubic, clearer (best for reducing) (Bicubic Sharper). This method is also similar to the method Biobubic (the best for smooth gradients) According to the method of creating new pixels, however, instead of breaking whole pixels to improve the imposition of new and old as the previous method, it softens only the edges of pixels. It is recommended to apply this method to reduce images.
Good day! If you have, hundreds of megabytes in a small folder with pictures? Or are pictures sent by mail more than 10 minutes, even with a decent speed of the Internet? Or so, to send photos of photos on the USB flash drive need half an hour? Welcome to the right place, in the article I will tell you in what program and how to reduce the size of the JPG file without loss of quality.
Squeeze an image - a simple science. You can reduce all the pictures in one folder with a scope, at a time, this is called batch processing. Or handle each image separately. About these methods and talk.
How to reduce the size of the JPG file - a bit of the desired theory
Regarding the JPG format (and its type of JPEG), there are 3 ways to change the size of files. The size of PNG, BMP, GIF and other graphic formats can be adjusted only by the first method.
- Reducing the resolution of the picture (number of pixels) without loss of quality;
- Reduced quality without decreasing permission;
- Simultaneous decline and permission, and quality.
Any photo - a set of pixels. In modern cameras, their number exceeds 2-4 thousand horizontally and vertical. This is a lot, from such permission and "grow" megabytes. Does the image quality improve improve? There is practically no, especially in unprofessional photographers during everyday shooting. Since changing the resolution of photography can be almost painless for quality, many use exactly this way in order to reduce the image.
I will definitely tell you about the most convenient ways, you will just need to choose the right one for you.

Squeezing the image 2 times (by 50%, in terms of graphic editors), we reduce its area (and volume!) 4 times, school geometry in practice.
It is logical to reduce the number of points to reduce the size of the photo - and not notice changes in quality.
Alternative for JPG files, leave the image resolution source, but allow the computer to reduce quality. Some blur, smoothing or fuzzy are quite admissible. We can assume that the quality of compression in graphics editors is approximately:
- 100% - the compression of the pattern is absent;
- 90% - Default setting in many programs - minimum compression;
- 80% - deeper degree: Files are compressed quite strongly;
- 70% - still acceptable loss of quality, but within reason;
- 50% and below - a cardinal decline in the appearance of the drawing, a noticeable look.
How to squeeze an image: workshop in graphic editors
We will experiment with this "still life": a private telephone photo, which does not claim for artistic, rather - a class "scary to show", but for the family archive it is suitable.
Technical details: JPG format, resolution 2560 per 1920 points, the weight of the source file is unacceptable 2.44 MB. Before compressing a photo, we recommend copying it into a separate folder so as not to lose the drawing during the compression process.

Source File: 2.44 MB, with extension 2560 × 1920 pixels
Image compression in Paint
In vain, this standard graphic editor from the Windows set is considered a non-test tool. First, it is very interesting and useful to train "kettles" Azam PC literacy, secondly, it is everywhere and always - and when a more powerful program for working with graphics is not installed on the computer, it will be helped with more than once.

Opening the source in Paint: The number of points is shaking, but their number does not mean beauty or quality. Scale: 100%.
To open the image in Paint, you need to click on the right-click file and select "Edit".
This editor does not allow you to manually configure the JPG compression level, but, in sensations, it sets it about 80%. It is enough to recover a file to obtain 1.83 MB instead of the initial 2.44 MB. On the eye, the level of quality remains practically the same.
The image squeezed to 1.83 MB after powering in Paint for 2-3 clicks and 10 seconds.
In the Paint Arsenal there is a way to reduce the size of the picture in pixels. This is a button "Resize" (Resize). When it is pressed, the dialog box is offered, where it is proposed to introduce new dimensions horizontally / vertical as a percentage of the initial number of points.
Choose 50 to 50: 2 times less than the length and widths mean the area smaller than 4 times. By the way, permission must be changed equally on both measurements, otherwise the picture is deformed.

Function "Change image resolution" Standard in most graphic editors, from primitive Paint to Montstrucan Photoshop.
The result is 616 kilobytes. Low enough for a family archive, but is excellent for publication on sites. Without a magnifying glass, the difference with the source is barely noticeable.
616 kilobytes with a resolution of 1290 × 960 px.
Note that 0.6 megabytes turned out not only as a result of a change in permission, and with the help of a "combined" method - the image size in Paint is also adjusted and reduced the quality of JPG by about 85%. Change the value of the COMPRESS parameter in the desired side is not possible. Painte does it on the machine.
Reduce image size in Photoshop
This most powerful editor can be used for the tasks described. But this is how to carry a package with products not in a passenger car, but to call KAMAZ. Photoshop - excessively powerful application for such a simple goal, how to reduce the weight of the photo.
On the opening of this program and saving a file in it will take much more time than the compression itself. However, that our instruction is complete, we describe and how to squeeze a picture in Photoshop.
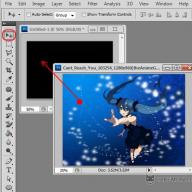
Opening the file in the Photoshop editor, follows select the section "Image", click on it to the "Image Size". As shown in the picture below.

A dialog box opens where you can manually set the height and width of the pattern. OK button - Save the file. The same dialogue is called hot keys "Ctrl + Alt + I", rapid maintenance, the combination of keys- "Ctrl + S".

The second way to reduce the file size Pictures or photos, it is to apply quality while saving. That which you consider suitable for you. Let's show on the example how to do it.

You must open the window with settings for saving the image, in the desired quality and format. I will continue to torment my photo with the pins. Let me remind you, the size of the file is exactly 2.44 MB, let's see what can be squeezed from it.
Choose from above - 4 options. Look at quality changes with compression, you can move the images before viewing it.
Pay attention to the left at the top - the source, then go already with compression.
If you look at the second option, the quality has not changed, and the weight of the image has decreased to 1.6 MB, when the quality is selected 72. A fully suitable picture for storing or sending by mail.
Pad saving You can also set the size of the image. Which you need. And click Save, select the path for recording and everything is ready.

The best programs for compression. Batch processing
Paint is always on hand, but too primitive. Photoshop redundantly bulky and bad. What programs will fit better to compress JPG? Good viewers-winners, they are - image managers! These are advantage - support for batch compression: simultaneous processing of all or several selected files in any folder instead of manual change in drawings one by one.
ACDSEE, XnView and IrfanView: Only a three of the many programs for compressing the pictures with all the scope. Free, but quite workable version there are even through commercial "Eisidi". If the program is not Russified, the COMPRESS word should be remembered - "compression". We will analyze batch compression technology on the example of the XnView graphics browser.
Opening one of the files in the target folder, click on it twice. A windower window will open with all image premises.

Viewer and XNView editor says 9 files occupy almost 20 MB. Straits!

In the arsenal of viewers there are both the "JPEG" compression function without reducing permission.
Image compression in online services
Although have a program for resizing a graphic file at hand, it is convenient and correct, you can use numerous online services for this task.
The principle of operation is fully similar to the work of classical PC applications: either compression, or resizing, or - both actions immediately. All parameters are customizable.
The disadvantage of online-techniques - in the need to send an initially large file: this process takes some time. Web services for compression are usually free, but you need to download the result back to the PC.
Tract time is justified if the number of reduced files does not exceed several pieces per month. Specific recommendations? Please, those online services that use yourself.
Tinyjpg.com - Zabugorny Service
Not bad surcharge service, without unnecessary settings. The service will do everything for you, just specify the place on the PC to load the pictures, after which the compression process will start automatically.

Warning immediately, on the site for unregistered users there are limitations on compression - 20 images with a maximum volume of 5 MB.
Upon completion of the process, it is possible to download all the files to one file or one by one as it will be convenient.
Imgonline.com.ua - comfortable and understandable
If you use this service, you can change the size of the image itself, as well as squeeze the file itself with the installation of the desired quality. What quality is acceptable, I wrote at the beginning of the article.

One of the free online services.
Both services allow not only to play with sizes and quality, but also edit pictures. There is a detailed help system. With which I advise you to get acquainted before use.
In other operating systems, including mobile, principles and settings of compress technology are the same.
Pictures processing in Mac OS
Let's look at the process of working with images on Mac, for example, the drawings will excellently extends the standard application "View": Installing additional for nothing, even for batch processing. The program "View" on Mac He knows how to change the size of several photos at once.
Choose one, or several images, open them in view, then choose Tools\u003e Configure Sizeand fill the desired values. And save.

Conclusion
We recommend experimenting with the compression of the pictures yourself - at the same time pre-copying them into the test folder in order not to lose important photos. After 3-4 attempts, you will understand how to reduce the size of the image in an optimal way, with the most suitable compression parameters, width and height.
- Install and use every day any quality graphic file manager.
- Forget about Photoshop: This is too powerful and a bad editor for such simple tasks.
- Use online services only when there are no other ways at hand - but for single files to use Paint'om.
Disclaimer: No dog in the course of artistic and program experiments did not suffer. :)
How to reduce the weight of photos or any other picture very quickly, without climbing photoshop in Debres? There is a simple program! And which you do not need to install, as it is in almost all computers with the Windows operating system. Do not want to understand the program? Reduce photos on the online WEBRESIZER.com service in detail about what you read below!
It is necessary to make the weight of images for the reason that the site pages on which they are posted will be loaded for a long time, and therefore those who have the speed of the Internet is not very fast, I will close them earlier than their contents will be seen. There will be many failures and, accordingly, a decrease in positions in extradition.
In each blog article, we use photos to illustrate. Each of them pumped on hosting and occupies space. Add plugins, texts, dozens of editors to them - a blog can weigh as a cast iron bridge. Not everyone knows Photoshop, and for such a simple operation it is not needed.
We reduce weight photos or pictures in Picture Manager
To reduce the weight of photos for several years, I use the program included in the Microsoft Office package, the image processing manager. It is called. If you have a Word text editor, then this program should be. With it, you can quickly reduce the weight of both one photo and immediately group of images.
We go into the program. Path to Microsoft Office Picture Manager: "start" — "all programs" — "Microsoft Office" — "Microsoft Office Pictures Manager". Or even easier - click on the desired image, then right-click on it and select "to open with". Several programs will be proposed, including Picture Manager.
Open the image in the program:

In the upper left corner, click the tab "file" — "Add a drawing label".
In the window that opens, we find a folder in which one photo is stored or several. Press "Add". All photos from this folder are downloaded to the program.
Important: If you blog on the Internet, you must always remember the optimization of pictures. The optimal weight of the pictures for the blog is 50 kb. and less.
How to reduce the weight of one photo
We highlight the desired photo by clicking.
In the top toolbar, go to the tab "picture" and choose the option "Squeeze drawings":
A column will appear on the right side of the screen. "Squeeze drawings":
In field "Squeeze for" Select the appropriate size. Down below ( "Expected Common Size") See which weight you will arrange. I usually choose for "Web pages". As you can see, the original photo in my example weighed 1.82 MB. After compression, the photo will weigh 76.2 kb, which is enough to illustrate articles of my blog: and the quality is preserved, and the weight is small.
Selecting the desired compression parameter, click Ok.
Now the photo needs to be saved. It is better to leave the original - the full version, and the compressed photo is saved by a separate file. In the top toolbar, go to "file" — "save as". In the window that opens, select the path to which folder to save the photo, give a name (different from the original), select the format (JPEG) and click on "Save". Thus, we had two photos: original and compressed copy.
If you do not need the original, then after you have chosen the compression parameter and pressed Ok, in the top of the toolbar go to "file" — "Save" (Without as) - a reduced image will be saved over the original, and only one photo will remain on the hard disk.
How to reduce weight of several photos
Everything is absolutely the same, only at the beginning when the photo from the folder is loaded into the program, we allocate all photos, and not one, holding shift.. And when saving, click on "Save everything" - Compressed copies are saved over the original, so if you need to save the folder with the original size, before you download the program, create a copy of the folder in the explorer.
How to compress a photo even faster
If Microsoft Office Picture Manager is on your computer, then when you open any photo in the explorer, several programs are offered. I just click the right mouse over the photo, which is going to reduce. A window appears: 
I choose "to open with" — Microsoft Office Picture Manager - The photo is immediately opened in the program. I turn into the tab "picture" — "Squeeze drawings" - I choose for "Web pages" — Ok. Then "Save" or "save as". It takes very little time. Everything, the weight of the image is compressed several times!
Reduce photo online
To reduce the weight of the photo online We will use the service webresizer.com.which will reduce not only images in JPEG format (ordinary pictures, photos), but also gif (animation), PNG (transparent background). The WEBRESIZER.com service has a detailed, phased instruction setting, how to compress photos to any size and quality online, so that even a beginner user will figure out. 
If you need to increase the space on the disk of the device or simply change the weight of the image, you need to know how to reduce the size of the JPG file.
This photo format is the most common.
JPG compression is supported by all devices and allows you to save the information of the picture without loss and distortion.
The weight of the JPG file can be found in the photo properties, and the volume of the picture can be easily changed using editors and online services.
Method number 1. Reducing the size of the picture in the Paint.Net program
Paint is the simplest standard program for editing raster and vector images. Available for all users of Windows operating systems.
Basic tools available in Appendix:
- adding inscriptions;
- pouring elements;
- trimming, insert;
- copying fragments and so on.
After changing the width and height of the photo, the size changes.
Follow the instructions to reduce the image of the Paint:
- Click on the desired picture with the right mouse button and select Edit. The photo will automatically open in the PAINT program in edit mode;
- On the main toolbar, locate the Size and click on it. The dialog box opens. To reduce the scope of the destination file, you need to change the size to a smaller one.
You can edit with percent or pixels. Saving, you will reduce the scope of the picture.
Remember! After changing the width parameter, it is necessary to change in proportion to the height. Otherwise, the picture can become too stretched and disproportionate.
Method number 2. Changing the size in photoshop
The size of the file photo can also be reduced in a professional program for editing raster images - Photoshop. Follow the instructions:
- Open the application and import the desired graphic file for further work;
- Find the Image tab on the main toolbar, click on it. In the drop-down list, select Image Size, as shown in the figure below;
- Change the dimension parameters of the image (width and height), also make sure it is a tick near the checkbox compliance with the proportions of the photo;
- Try to reduce the photo by 10-15 percent. Thus, reduce its final weight.
Method number 3. Using MS Office Package Programs
In the test processor, the Word of 2010 and earlier versions there is a function of compression of pictures. In the newest versions of the program, this feature was removed.
Add a picture to the document page, then in the tab that appears, select "Open with" and then the MS Picture Manager application.
In the window that opens, click on the "Image" laying and select "Squeeze the picture". The higher the degree of compression, the lower the size of the destination file will be.
Save the resulting changes.
Important! After compression, the quality of the illustration may worsen.
Method number 4. Use online services
Excellent web service to work with the photo is the IrfanView.com resource. It allows you to work with a huge number of different formats of pictures.
To reduce the size, you can open the image menu and edit its height and width.
Also in the Size Resizing window, you can select additional parameters for better compression: increasing the sharpness, field filter, special keys to reduce / increase the size and change the resolution of the picture.
Reduce size can also save the save parameter. The optimal option for their settings is indicated in the figure below.
This window appears in the process of saving the final image.
Method number 5. Reduce size on Mac devices
Mac OS users have a free application to work with pictures and photos called iPhoto.
If the program is not installed on your device, download it from the official store. This is completely free.
The utility makes it easy to work with the images of all the formats common to date.
- Click the Events tab twice;
- Select the desired picture;
- In the Settings window, configure the size of the photo: you can adjust the width, height and resolution. The lower these parameters, the following, respectively, below the file size;
- Save the image.
Thematic videos:
In this video I show 2 easiest ways - how to reduce the size of the file (image) JPG
Reduce the size of the JPEG file (JPG)
In this video, you will learn how to reduce the size of the JPEG (JPG) image format using simple programs.
How to reduce the size of the JPG file, change the size of the photo
In this video, we will learn how to reduce the size of the JPG file, resize