Instruction
Consider the easiest option of removing the inscription from the photo. Suppose that the inscription on a smooth, evenly painted surface, in particular on a black bus stop. The background under the inscription is uniform, therefore, without being causing a sly, we will make two simple manipulations. The first manipulation. Find the pipette in the tool palette and poke it in some point of the background closer to the inscription to determine the color you need. Action Second - Select the brush tool on the tool palette, select the desired size and softness, the color is not needed, it is already defined. Skin the inscription cluster brush strokes. Make sure that the strokes are merged with the background. If in some part of the image brush strokes become noticeable, you need to correct the color of the brush again with a pipette. In less than a minute you can inscription without a trace.
But this is only a single and simple case of cleaning the inscription from the photo. Images are much more likely there are images with a translucent inscription superimposed. Sometimes the authors are thus trying to prevent their work from copying, these are their full right, we will not learn to delete copywrites. But sometimes such inscriptions are just like this, let's try to remove one of them.

I warn you right away, this work is not easy, to some extent even jewelry. To remove the inscription you will need a stamp and attending brush, and the other is hidden on the toolbar behind the icons with the image of printing and the patch, respectively. The smaller the diameter and transparency of the working tool when working with a stamp, the more qualitative will be deleted. Hold the ALT key and click on the background next to the inscription, remembering the photo fragment, which you will clone with a stamp. Move the mouse cursor on the inscription and, holding the left mouse button, shallow strokes start to remove the inscription, choosing more suitable areas of the background as needed. With the relative homogeneity of the background, you can use the attending brush, but more complex pattern requires careful and painstaking work with the stamp.

Often beautiful photos spoil inscriptions. However, this defect can be corrected using Photoshop. It has many different tools, thanks to which you can erase the text on any image. Make it can even a beginner who does not have professional skills. Tell me how to remove the inscription from the picture in Photoshop.
Archive brush
The removal process will depend on what kind of text need to be removed. So, if the inscription is located somewhere below and the letters of a small size, then it will be very simple to remove them.
To do this, you need to adhere to the following algorithm:
- Run the Photoshop program and download the photo to it that you need to fix.
- Next, select the "Archive Brush" tool and make the image cropping, cutting out the fragment where the digit is located or the inscription.
- The disadvantage of such a way is that after removing the text, the picture will become less, but often it does not affect its quality.
Use multiple tools
Important!
If the text in the photo is located in the center or at a large part of the image, it is easy to cut it no longer work.

To remove the inscription in this case, other ways can be used. Tell me how to remove the inscription in the photo in another way, and write your own.
The work is as follows:
- Take any tool with which you can make a selection. It is more convenient to use "Lasso", preferably rectangular shape.
- Using the selected tool to circle the area around the text. At the same time it is necessary to have a selection as close as possible to the letters. In this case, the result will be neat.
- After the desired area is highlighted, click right-click by selecting the "Fill" item in the opened menu.
- Then, in the window opposite the inscription "Content", select the item "Taking into account the contents" and press the OK or Enter key on the keyboard. After that, the inscription should aby.
This method of deleting text is perfect in cases where the background in the photo is more or less homogeneous. But often, shortcomings and lubrications appear on the site of the remote text.

They are easy to remove the inscription from the picture in Photoshop using the "Restoring Brush" tool:
- In the tool settings, you need to choose a rigidity of about 20-25% to make the transition more smooth.
- Set the desired size of the brush.
To remove the points or irregularities in the photos that remained after the text, you need to press the ALT key and holding it down, click on the left mouse button along the place in the figure that the shortcomings will be replaced.

Try as the donor area to choose such places that are very similar to the one that needs to be corrected.
Now you know how to remove the inscription in Photoshop from the picture and add your own.

Algorithm of actions:
- Open the image with which you need to work in Photoshop.
- On the toolbar, select "Stamp". It is better to use a soft brush to work.
- Creating a duplicate background layer. To do this, simply drag the latter down the window with the layers on the "Create a new layer" icon. Or simply click Ctrl + J key combination.
- Place the mouse cursor in the area that is most similar to the background where the text is located. The selected area will become the source with which the text will be deleted.
- After releasing the Alt key, just click the left mouse button on the text. It will be replaced by the source. When performing work, you need to pay attention to the lighting in the photo.
- Continue the work until the entire text is removed.
Tip!
The light in the source site should be located in the same direction as in the area that needs to be corrected.
To get a qualitative result, you should not rush. If the text takes too much space in the photo, it may be necessary to take a lot of time for its complete deletion.
There is a spectacular photo, but it fails to use it because of the interfering inscription? You can get out of the position using the functions of Photoshop. There are several ways as in Photoshop to remove the inscription from the picture. Even a person who has never used the program will be able to apply them.
Fill
This is the easiest option, how to remove the inscription in photoshop from the picture. It will work if the text is located on a relatively homogeneous, not detailed background. He should not have sharp transitions between tones. Sky, Blurred Forest, Wall - Inscriptions with similar "backs" are easily removed by filling.
Step-by-step instruction:
- In the left pane, choose Lasso. When you click on the button, three types of Lasso is displayed, it is enough to click on the first.
- Cut the mouse or stylus graphic tablet The area on which the inscription is located. It is better to do it as close as possible to the contour of the letters themselves.
- Will appear dotted line, meaning that the text is highlighted. You must click on the right-click and select "Run Fill" from the pop-up menu.
- An additional window will appear. In it, in the top of the settings, you need to set the option "Taking into account the contents". So the program will pour a dedicated area not just a color. She will try to recreate the texture and color gamut, which is presented in the nearest background.

If you use the "Fill" on the homogeneous parts of the image, the result will be spectacular. It will not be noticeable that the image passed through additional manipulations.
Note!
If you delete a wrapper with copyright pictures, and then use it for commercial purposes, you can get under the trial. It is not necessary to use the tips to theft of content in this article.
Regenerating brush
This method allows you to remove the inscription from the picture in Photoshop, similar to the previous one. The difference is only that the tool "restoring brush" is more suitable for images with high detail. If competently approach the process, it turns out to restore the texture of the branches of the trees, a complex pattern, etc.

Algorithm of actions:
- Select the appropriate tool on the panel.
- From several variations of the brush, you must select point, as it restores the image more careful.
- In the top panel, in front of the "Type" option, you need to set "taking into account the contents". The size of the brush is selected under the letters. Well, if it approximately corresponds to the thickness of the font line.
- It should be neat, one to highlight the letters with a brush, clamping left button Mice. Enough to release the button, and the dedicated area will automatically restore.

For reference!
The selection area will look darker for several tones.
Removal of layers
This method is useful if the image is in PSD. This is the format of the files of the photoshop itself.

Deleting text with the help of rasterization is made in a couple of clicks:
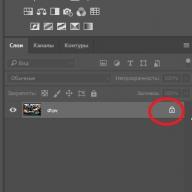
- Open file. On the right side view the list of layers. Perhaps the inscription added by the author is located on a separate layer. So often it happens.
- Select a layer on which the text is located. Click "Delete".
The technique will not work with JPG format files and the like.
It happens that you want to add your own text instead of remote.

How to remove the inscription from the picture and write your own in Photoshop:
- Take advantage of any of the above methods to delete text.
- Click on the "Text" tool. This is an icon with a big letter T in the left vertical panel.
- Click on the place of the image on which you want to see the text. A graph will appear. In it you need to introduce an inscription.
In the future, the inscription can be modified. In the right window, the user can increase or decrease the size, change the font, color and position.
Tip!
Photo with the inscription is better saved in PSD format. Then in the future you can delete the text, simply allocation of it in the program.
So thanks to the most simple features Photoshop can be high qualityly restore the image or add your inscription. In rare cases, if the text takes too much space, the effect of fill or the restoring brush may be too low-quality. But in this case, it is not necessary to despair: the raster will help cope with the problem.
The need to remove the inscription from the image may occur both when processing a snapshot with an automatically affixed date and during the restoration of the old scanned photo. For this purpose, Photoshop tools are suitable such as Clone Stamp, Patch or Spot Healing Brush.
You will need
- - pHOTOSHOP program;
- - Image.
Instruction
Some photos would be allowed to be called approximately flawless. "Approximately" - since when viewing in the background, a sudden inscription is found, firmly distracting from the main heroes of the image. The best method of objecting competent accents of photography will be removing the inscriptions in graphic editor Photoshop.
Instruction
1. We will see the easiest option to clean the inscription from the photo. It is possible that the inscription is executed on a smooth, evenly painted surface, in particular on the black wall of the bus stop. The background under the inscription is uniform, consequently, without causing insidiously, we will make two primitive manipulations. The first manipulation. Discover the pipette tool in the tool palette and poke it in any point of the background closer to the inscription, in order to determine the color you need. Step action - Choose a brush on the tool palette, pick up the necessary size and softness, the color is not needed to customize, it is closely determined. Skin the inscription cluster brush strokes. Make sure that the touches are entirely merged with the background. If in some part of the image brush strokes become invisible, then it is necessary to appreciate the color of the brush again with a pipette. Smaller than a minute you will be able to remove the inscription without a trace.

2. But this is just a single and most primitive case of cleaning the inscription from the photo. Significantly there are images with a translucent inscription with superimposed photo. Occasionally, the authors are thus trying to prevent their work from copying, these are their full right, we will not learn to delete copyright. But occasionally such inscriptions are easy to do so, try to remove one of them.
3. I warn you right away, this work is not easy, to some extent even jewelry. To remove the inscription you will need a stamp and attending brush, and the other is hidden on the toolbar behind the icons with the image of printing and the patch, respectively. The smaller the diameter and transparency of the working tool when working with the stamp, the more good-quality removes. Hold down the ALT key and click on the background next to the inscription, remembering the photo fragment, the one that you will clone with a stamp. Move the mouse cursor on the inscription and, holding the left mouse button, shallow strokes start cleaning the inscription, choosing more suitable areas of the background as needed. With relative homogeneity, the background is allowed to use the attending brush, but more difficult drawing requires careful and caring work with a stamp.
4. If you work in a dyewoman neat, then the words will not remain in the literal sense of the word not a trace. But still do not forget, the inscription on the photo is set with some kind of definite purpose, say with the goal of copyright protection. And even if you managed to fully remove the author's sign, you do not get the right to apply the image.

Occasionally it happens that you have a very needed beautiful theme photo that you have found on the Internet - but for some reason, this photo is crossed by a watermark in the form of a translucent text that resembles each copyright to a photo and preventing illegal use. Nevertheless, you can get rid of such a translucent text in order to apply a photograph for its intended purpose.

Instruction
1. To do this, download the photo in Adobe Photoshop. And tidy allocate all silhouettes of text on a watermark. To highlight, use the mask, Pen Tool or Lasso Tool. Later, the selection will be done, duplicate it on the newest layer by clicking on the highlighted area of \u200b\u200bthe right mouse button and preferring the Layer Via Copy option. You can also easily duplicate the layer by clicking the Duplicate Layer option.
2. Change the mixing mode of the layers - in case of various transparency tiers of text, you may come various modes. Pick the mixing mode (Blending Mode), in which the text will be entirely absent in the image - say, Multiply.
3. The text will disappear, and the colors in its place will make the most compliance with those that are required to be in genuine photos in these places. However, in some areas, the colors may differ in this case - in this case, select the necessary area and duplicate it on the newest layer, later, combine this layer with the bottom, preferring the option in the Merge Down layers palette.
4. On the toolbar, select the SMUDGE option and the soft brush to diligently in the place of color transitions in order to make them inconspicuous.
5. We will warm up a separate text layer and erase those fragments of the inscriptions that match the colors with a photo later the metamorphosis of the layer overlay mode. The remaining fragments that differ in color from the initial photography, re-process, changing the mixing modes of the layers as long as the result does not suit you.
6. Use the Burn and Dodge tools to darken and lighten some image fragments.
Video on the topic
Ordinary and familiar to everyone photos Does not invariably satisfy the owners - every time I want to place your image on the seashore either on the streets of a beautiful city. Even if in reality you do not have such a possibility, you can replace background his photos In Adobe Photoshop, pleased with his back all scenery. Make it is allowed in two different ways.

Instruction
1. Open a needed photo in Photoshop and to start a duplicate layer Background (Duplicate Layer). Unlock background Layer, double-clicking on the lock icon on the left of the layer icon. If the contour of the figure on photos Pretty smooth, and does not have too difficult and multifaceted silhouettes, select on the Magnetic Lasso Tool toolbar.
2. Click the left mouse button at every point of the silhouette of the figure on photos And start diligently lead the line along the contour. The nodes of the highlighted silhouette will be mechanically attracted to the silhouette, investigately for the use of this tool is necessary, so that the figure was contrasting with respect to background y
3. From time to time, adjust the line direction by clicking the mouse. Combine the ends of the line by closing the selection silhouette, and later, click the CTRL + SHIFT + I key combination, or open the SELECT menu and select the Inverse function.
4. Selection is inverted, and now you are pretty pressing Delete in order background disappeared, and only a human figure is left at your disposal, which is allowed to place on any other background . If you notice the remaining background Owls, erase them with eraser (eraser tool).
5. The Magnetic Lasso Tool tool is not suitable for use in cases where the image has a difficult silhouette - let's say when you need to highlight from the main background And in conjunction with the figure fluttering hair or a lush hairstyle. In this case, select on the Background Eraser Tool toolbar - an eraser allowed to wash background Wheel image. Tolerance parameter Set 25% and pick up the superior brush size.
6. Tidy erase eraser background Around the shape, highlighting difficult silhouettes. Fully eliminated background Piece, copy the figure of a person to the newest layer and use it for the photo moment.
Video on the topic
There are cases when photo which could decorate your photo album or blog spoils on it inscription . Of course, allowed to search for a different photo. And easily removed the inscription.

You will need
- Photography Editor "Photoshop"
- Photograph with which it is necessary to remove the inscription
Instruction
1. Open a photo in "Photoshop". This is allowed to do through the "File" menu, item "Open" ("Open"). You can apply the keyboard key "Ctrl + O".
2. Select the "Clone Stamp Tool" tool in the "Tools" panel ("Tools"). This default palette is located on the left side of the program window. You can use the "burn key" "S".
3. Specify the source of cloning. Hover the cursor to the photo site, free from the inscription, but next to it and when the "ALT" button is pressed on the keyboard, right-click. In this case, the cursor pointer will change its view on the circle with the crosshair.
4. Hover the cursor to the part of the inscription, which is closer to each to the cloning source specified earlier, release the "ALT" button. Click the left mouse button. Part of the inscription painted. Try to paint the rest of the inscription by closing the left mouse button. The cross, the one that occurs next to the pointer shows the cursor shows where the pixels are copied from which you close the inscription. If the result looks unnaturally, cancel last action Through the "History" palette ("History"). This palette is in the middle right of the program window. Move the cursor pointer to the action above the last and right-click. Select the newest source of cloning and fill the abdation balance.
5. Single photos. Use the "Save" command or "Save As" ("Save" or "Sissing How") menu "File".
Helpful advice
During the operation, it is allowed to reconfigure the "Clone Stamp Tool" tool parameters ("Stamp"). To access the settings, click the left button on the triangle near the "Brush" panel ("Brush"), which is located by default in the upper left part of the program window, under the main menu. The "Clone Stamp Tool" tool ("stamp") is allowed to adjust the two parameters: "Master Diameter" ("Diameter") and "Hardness" ("Stiffness"). Both parameters are configured using sliders. Also allowed to enter the numeric values \u200b\u200bof the parameters in the field above the sliders. If the inscription you want to delete is located on monthly background, Increase the brush diameter. Then work will go rapidly. If the inscription is on the background with most small, different color details, select a brush of small diameter and change the cloning source more often. This will increase the time of work, but will allow you to achieve an excellent result. For comfort of working with small parts of the photo Increase the scale of the photo. To do this, drag the left slider in the Navigator palette ("Navigator"). You can primitively enter the numeric value from the keyboard in the field located on the left of the palette slider. The scarlet rectangle in the Navigator palette shows the photo area that is visible in the open document window. Change this area is allowed by moving the scarlet rectangle.
If the label inscriptions on the desktop operating windows systems Continuously have a monochrome background of the fill and look like as if the labels are continuously isolated, the reason for this can be hidden in the wrong settings of the OS. There are several settings of such settings that may affect the lack of transparency of the background. There are several in the system.

Instruction
1. Run the component of the "System Properties" of your operating system - Right-click the "My Computer" shortcut on the desktop and select the "Properties" string in the context menu. An alternative method of starting this component - use the combination of "key keys" WIN + PAUSE.
2. Click the "Parameters" button, placed on the Add tab in the component window. Buttons with this inscription there are several - you needed that of them, which is placed in the section "Speed".
3. Place the mark next to the inscription "Special Results", if this installation is not noticed yet. In the list of results, placed below, Laying and set a label in the checkbox "Damage by shadows icons on the desktop". Click the "OK" button in order to fix the metamorphosis made.
4. If this method cannot be removed under the inscriptions of shortcuts, then when using Windows XP, it is allowed to prefer the "Properties" item in the context menu that appears later with the right mouse button along the desktop space free from the labels.
5. Open the Desktop Elements window by clicking the "Desktop Settings" button on the Desktop tab.
6. Click the "Web" tab of the window that opened the window and remove the check box to "fix the desktop items". Later, remove all labels in the checkboxes of the List located below the "Web Page" inscription.
7. Press the "OK" buttons in both open windows with the settings of the screen properties in order to fix the metamorphosis.
8. Make sure that the system does not apply the mode of increased contrast if the background fill under the labels is still present. Access to the appropriate setting is allowed to get through the control panel - the reference to it is placed in the main windows menu On the "Start" button. By running the panel, click the inscription "Special Probabilities".
9. Click the "Configuration of the Contrast and Screen Color" link, placed in the "Select Task" section. After that, remove the mark next to the inscription "High contrast" and fix the metamorphosis by pressing the "OK" button.
Video on the topic
When creating collages, it is often necessary to replace the rear plan Images or move the rod item on newest background. Adobe Photoshop offers several methods for this operation.

Instruction
1. If the main fragment of a dirty difficult form may be easier to highlight the background around it. Press Q, in order to go to the rapid mask editing mode, or use this option on the toolbar. Rough brush of black color Slide the background, the one is going to remove. You will see that the image is covered with a transparent film of red - a protective mask.
2. If you are inappropriately crushed a rod fragment, put the front color plan And white and spend the brush on the site from which you want to remove the mask. When the background is painted, click again Q, in order to return to the typical mode. You will make sure that it has occurred around the main element.
3. There is a different method. Stick on the Magnetic Lasso Too toolbar ("Magnetic Lasso"). Click on the Silhouette of the object and drive the abstract cursor. If the color element is merged with the background, in difficult places click on the object, in order tool distinguished the shades. It is allowed to increase the frequency value ("Frequency") - the frequency of the arrangement of the nodules, in order to rather determine the form of the object. In order to cancel the false step, click Backspace.
4. It is permitted to apply a different tool from the Lasso group - Lasso Tool. The accuracy of the selection will depend only on you - this tool has no difficult settings. Hold the left mouse button and circle an object.
5. The PEN tool ("Pen") is not easy to use, but with its imaginary is allowed to do the incomplete stroke. Click on the border at the border between the object and the background and circle the rod fragment of the broken line of short segments.
6. After that, select on the DIRECT SELECTION TOOL on the toolbar) and click on the stroke. Pick up the control knot and, moving it, change the selection silhouette. Aggregate "Feather" again and right-click on the stroke silhouette. Select the Make Selection command.
7. Later, how you allocated an object by any of these tools, invert the selection of Ctrl + Shift + i and click Delete or Backspace in order to remove the background.
Need to remove images inscription It may appear both when processing a snapshot with a mechanically affixed date and during the restoration of a dilapidated scanned photo. For this purpose, photoshop tools such as Clone Stamp, Patch or Spot Healing Brush are suitable.

You will need
- - PHOTOSHOP;
- - Image.
Instruction
1. Open the PC picture inscription Yu in Photoshop, using the Open Open menu File. If the letters are either the numbers that need to be removed from the image are located on a one-color smooth background without noise and invoices, they will not need special efforts. Applying a combination of SHIFT + Ctrl + N, add the newest layer over the picture and, turning on the Brush tool, squeeze the background color signs.
2. In order not to make a mistake with the choice of shade, click on the example of the main color in the lower area of \u200b\u200bthe tool palette. Hover the cursor to the image fragment located next to inscription Yu, and click on it.
3. In the removal of small inscriptions from multicolor backgrounds, the Median filter can be fed. Make a copy of the CTRL + J key combination and apply Median to the resulting layer by opening the settings using the MEDIAN option NOISE group Filter. Adjust the filter radius so so that the lines constituting inscription , disappeared. At the same time, the silhouettes of the rest of the drawing are thoroughly vague, but at your disposal the initial version of the picture remains, it is allowed to correct.
4. By applying the Hide option All Group Layer Mask Layer menu, remove the results of using the filter under the mask. Increase the image scale and fill the mask in the field of inscription on white.
5. If there is a suitable area in the picture, which is allowed to close inscription Either its fragment, apply to a layer with a copy of the initial image tool Patch Tool. Turning on the Source option in the settings, circle a detected fragment and drag it into the letters. If the border of the superimposed patchwork crossbars with the lines forming inscription The picture will result in a result of like spreading watercolor, from the fact that the patch in this area will adapt to the color of the font.
6. PHOTOSHOP CS5 is allowed to try to remove inscription Using the Spot Healing Brush tool. To use it, add a transparent layer to the file and if the Content-Aware option is disabled in the tool settings, turn it on. When using the Sample All Layers option, squeeze inscription Selected brush on a new layer. In more early versions Photoshop. The Spot Healing Brush tool does not invariably correctly edit huge sections of the image.
7. If part of the inscription is not deleted using other tools, turn on the Clone Stamp Tool, increase the scale of viewing the picture and close inscription Pixels copied with the surrounding sections of the image. Clone Stamp is smarter to use not to the initial picture, but to a transparent layer lying above it. Make it will help you the Sample All Layers option included in the instrument settings.
8. Detect the image area whose fragment is allowed to close the adjacent segment of the inscription, and click on it by closing Alt on the keyboard. After releasing the button, fill the letters. To acquire a good-quality result on hard backgrounds, work with a brush of a small diameter and more often determine the cloning source.
9. Save the corrected image to the JPG file will help you the Save As menu of the File menu.
Adobe Photoshop graphic editor provides charming probability to work with text. All inscriptions are allowed to place on their own taste: prefer the size, genre, font color, apply different results. So that the inscriptions differed in originality, you need to know the abstracts of work with the text.

You will need
- Adobe Photoshop.
Instruction
1. Make a newest canvas in Photoshop Editor or open the close-up image. Select the "Text" button on the toolbar toolbar or press the [T] keypad keypad to create a horizontal inscription. To enter the vertical text, select the "Vertical Text" tool, it is indicated as [? T].
2. By default, the "Text" tool creates the newest layer on which the inscription will be introduced. Also, when you select this tool, the text formatting panel occurs. If you consider it from left to right, then the first button [T] with two arrows is, it changes the direction of the inscription. Further fields with drop-down lists are followed, preferably preferred with their support: the font genre, its signs, size, smoothing method. You can set the necessary parameters or before entering text, or closely later, but then you need to highlight your inscription.
3. In order to set the parameters for aligning text on canvas, use the following three buttons with the designation of strings. The editor provides for the likelihood of alignment of the label to the left and right edge, as well as in the center.
4. In order to prefer the color of the font, click the button in the form of a rectangle, soaked in some color. So you will open an additional window in which it is permitted either to prefer the required shade on the palette, or set personal parameters in RGB, CMYK, HSB mode or LAB.
5. The button with the letter "T" above the arc gives the probability to prefer the method of distorting text. Click on it in order to open a new dialog box. In the drop-down list of the genre field, select the superior display of the inscription: arch, arc, and so on, set the parameters to distort the text using the main axes of coordinates.
6. Also, the text is allowed to apply all sorts of results available for ordinary image. Open the "Genres" tab and select the appropriation method that suggests you. Either set these settings independently, double-clicking the left mouse button on the layer name on the navigation pane. In the window that opens, you will be able to impose results such as shadow, glow, texture, embossing and others.
Video on the topic
Note!
In order to convert an inscription in an ordinary image, use the "Rastrier text" command.
Helpful advice
The right click on the layer with the inscription causes the drop-down menus with the basic text processing features. It also uses the option of checking spelling.