Photoshop is not a program for creating drawings, but still sometimes there is a need to portray drawing elements.
In this lesson, I will show you how to make a dotted line in Photoshop.
There is no special tool for creating dotted lines in the program, so we will create it yourself. This tool will be a brush.
First you need to create one item, that is, the dotted.
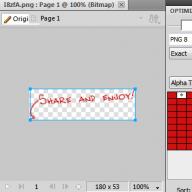
Create new document Any size, preferably smaller and poured white background. This is important, otherwise nothing will work.
Take the tool "Rectangle" And set it up, as shown in the pictures below:


Dotted sizes Choose your needs.
Then click anywhere in the white canvas and, in the dialog box that opens, click OK.

Our figure will appear on the canvas. Do not worry if it is very small in relation to the canvas - it does not matter.


Give the name of the brush and click OK.

The tool is ready, let's spend a test drive.
Choose tool "Brush" And in the brushes palette we are looking for our dotted.


Then click F5 And in the window that opens, you set up a brush.
First of all, we are interested in intervals. We carry out the corresponding slider and pull it until the gaps appear between the strokes.

Let's try to draw a line.
Since we are most likely needed directly, then we shifted the guide from the line (horizontal or vertical, which wish).

Then we put the brush the first point on the guide and, without releasing the mouse button, clamp Shift. And put the second point.
Hide and show guides by keys Ctrl + H..

If you have a hard hand, then you can spend the line and without a key Shift..
For vertical lines, you need to make another setting.
Press key again F5 And we see such a tool:

With it, we can rotate the dotted line for any angle. For the vertical line it will be 90 degrees. It is not difficult to guess that the dotted lines can be carried out in any directions.


So it is not good way. We learned to draw dotted lines in Photoshop.
In Photoshop, there is no "right" way of drawing lines - every artist and designer with time finds its own methods and chooses the tools that are comfortable. Regardless of whether you use the "line", "pen" or "brush" tool, you can approach the creative project different ways And at the same time get the same results. In that practical manual We will tell you how to draw straight lines in Photoshop using many drawing tools are available in this program.
"Line" tool
To find the "Line" tool, press and hold the mouse button above the "Rectangle" tool on the main toolbar. The menu will be open to select the tool shape. If you enable any tools of figures, you can also select the "LINE" tool in the upper parameter menu.
Why is the "line" tool is considered figure? In fact, the "line" tool simply creates thin rectangles that look like lines, because the colors of Fill Fill and the Stroke contour are the same. If you want the line to be empty inside (like a rectangle), just turn off the fill.
Using the "LINE" tool, it is easy to draw straight lines. Just click at any point of the image and drag the line in the desired direction. If you want to draw strictly horizontal or vertical line, hold the SHIFT key when dragging, and Photoshop will take care of everything else.
Having learned to draw straight lines in Photoshop, you can experiment with advanced parameters and create dotted lines from points or strokes. To find these settings, click the "Stroke Options" icon on the left side of the parameters panel, and then select "More Options". Here you can specify and save custom settings, turn on the dotted line and select the length of the strokes and spaces.
Tool "Brush"
The "Brush" tool also allows you to draw straight lines, and, unlike the "LINE tool", allows you to create your own styles of brushes. The "Brush" tool is located on the main toolbar, it is located separately from the form tools.
To create perfect straight lines in any direction, hold the SHIFT key when drawing using the Brush tool. To create a figure of multiple lines, draw a line while holding the shift, release the mouse button, press the Shift button again, and then start drawing a new segment from the end point of the last line.
Like the "Line" tool, Brush has many stroke parameters that can be changed on the top panel of parameters, including hardness, opacity and brushing style. We recommend setting up these parameters before starting to draw strokes, because the changes will not be applied to all brush strokes that you have already done.
Tool "Pen"
Finally, the PEN tool is extremely useful for drawing straight and curved lines. To select the PEN tool, click on the pen in the shape of the pen on the main toolbar, then click on the image on the image to set the starting point, and once again to set the end point. Photoshop will automatically create a straight line between two points, regardless of where they are located in the image. If you hold the SHIFT key when setting these points, you can create linear segments with inclination angles of 45 and 90 degrees.
Lifehak How to create a line dotted in Photoshop - Each second PC user is familiar with Photoshop. For many users - this is an exclusively program for editing photo cards, however fotoshop.it is possible to depict drawing elements.
If there is a need to create a dotted line, then you should use a good and loyal assistant to the retoucher - brush. The first action is to create one element - dotted. You should open a new amount of random size and perform the fill in white. This is a necessary step to obtain the desired result. Then choose the tool " Rectangle"And set the parameters as recommended in the images below:


The size of the dotted line can be configured as you need. Following, with the help of clicking on a white sheet, a dialog box opens, where the action is confirmed. The built figure of a rectangle appears on the screen. Do not panic if its size is too small in relation to the sheet. This is not critical. Then in the menu " Editing» - « Determine the brush»You need to enter a name and confirm the action by clicking OK.


Thus, a tool was built " Dotted line"And you can try to create a dotted
line.
1)
Choose " Brush"And among the palettes we find the created tool.
2)
Press key F5and determine the intervals between dotted. (With the help of a special slider, adjust the distance).
3)
A good helper will be the guide line (horizontal, vertical).

After you should put a brush to the beginning of the guide, and using the button Shift., not releasing the mouse, continue the dotted. You can hide or show orthogonality by pressing a combination Ctrl + H.. If you do not doubt your skills, you can carry out the guide without using Shift.. To build vertical axes, you must perform a number of actions: Press the key F5and see the image like in the picture.
Author Oleg asked a question in the section Other languages \u200b\u200band technologies
How to make a dotted line in photoshop? And got the best answer
Answer from Dagpress-Media [Guru]
Select a pencil tool. Double-click on the second largest brush in the brush palette. Intervals (spacing) to a value of ~ 250%. Now just swipe your pencil line and you will receive a dotted. To make a straight line, hold the Shift key while you spend the line. Another way: Click at the starting point, then press the SHIFT key at the end point of your line. Photoshop will create a dotted line between these two points. To obtain a variety of dasheds, you can change the size of the brush and increase the interval. Also, you can download a set of square brushes.
Link to lesson.ru / 2011/11 / Blog-Post_2336.html
Answer from People @ Mila[guru]
In Korel, this is done through Abris (Pen Abris). Maybe in Photoshop, something like that.
Answer from Fiery.[guru]
you can draw in an illustrator, copy and paste into Photoshop
Answer from Akimov Gleb[guru]
And the CS6 is already supported by this feature, you can immediately choose the finished dotted stroke.
I remind you that the brush or pencil must already be configured. After selecting the tool, click OK, and points will appear on the circuit. Points made by brush are obtained somewhat lubricated, so after applying points it does not interfere with the applied contour edge filter (Sharpen edges), settings to choose individually.
Here is an example of a drawing obtained using the above-described televitations:
The following brush settings were applied:
Text: Type - Parades Kehel (Size) 3 PKS, Hardness (Hardness) 100%, Interval (Spaction) 180%
Underclocking: Type - Brush, Kehel (Size) 3 PKS, Stiff (Hardness) 100%, Interval (Spaction) 205%
Frame: Type - Pencil, Kehel (Size) 6 PKS, Hardness (Hardness) 100%, Interval (Spaction) 180%
Well, with the frames from the points it seems to have figured out.
Creating a framework of dashed lines
Rectangular frames, i.e. Consisting of vertical and horizontal lines, do not cause any problems.
You can draw them with a rectangular brush from the default set of photoshop. Open the brushes control panel and download them, as shown in Figure:


Such a brush can be held horizontal line. But the vertical will not work, or rather, it will turn out, but ugly:

To create a vertical intermittent line, you need to turn a brush imprint by 90 or 270 degrees:

Now you can safely draw and vertical intermittent line:

But if I need a dotted in a circle or on any curve, then this method is no longer suitable. If you ask the world mind, he, the mind, will advise not to engage in nonsense with a puncture in Photoshop, and use the Adobe Illustrator, create a layer with the desired line in it, and transfer it to photoshop. I illustrator I do not use, and I need to create a circular dottee in Photoshop. It turned out the way there is, and quite simple. It took me ten minutes to its invention.
We choose a round brush, set the diameter of the imprint of 9 pixels, the interval is 170%. Create a circuit, perform a circuit stroke, as in the case of points.
Next, click the right mouse button along the contour, select the item "Education Dedicated Area" (Make Selection) with a radius of the Grooming 0. Here is an enlarged fragment of the picture:

Then we go on the Selection tab -\u003e Modification -\u003e Border (Select -\u003e Modify -\u003e Border), set one or two pixels width.

Now it is necessary to invert the selected area by pressing the CTRL + SHIFT + I key combination. We remove excess by pressing the Delete key.
I got a pretty such dotted circle:

Someone remained, of course, small artifacts, but you can fix them for several clicks with elastic band.
Thus, the dotted is to draw on any circuit, for example, to circulate