Work with layers in Adobe Photoshop.
Sofya Skilida, teacher of information technologies of the Academy of Vocational Education (St. Petersburg)
Layers - this is perhaps the most necessary means of working with images in Photoshop, which allows you to break the image into parts and work with each of them, regardless of the rest. The layer can be compared with a transparent film superimposed on the image. Moreover, the transparency of the film is absolute: no number of layers distort the image located on the lowest one. In this article, we consider ways to split the image on the layers, as well as read the types of layers and the peculiarities of their application.
Creating a layer
To work with the layers of the image is used palette Layers (Layers). To create a blank layer, click on the button pure sheet. In this case, the layer will be created above the initial one. If you click on the same button with the Ctrl pressed key, the layer will be created under the starting layer (Fig. 1).

Copying images on layers
In order to place the image on a layer of another image, you can use in several ways.
Using tools Move
Pre-lay the tabs of both documents next to each other by selecting the Mode Locate all vertically (Tile All Vertically) or Locate everything in the grid(Tile All in Grid). Both commands are in the menu. Window (Window) -\u003e Arrange (Arrange). And then tool Move (Move) Drag the image from one window to another. To move the fragment, it should be pre-highlighted (Fig. 2).

As a result of these actions in the palette Layers (Layers) will automatically add a new layer on which the combined fragment will be.
Insert through the clipboard
To create a layer, you can use the clipboard in which the image is placed or part of it by executing the command Editing (Edit) -\u003e Copy (Copy) or CTRL + C key combination (Mac OS - Command + C). But to insert a fragment from the clipboard use a whole set of commands, depending on which result you want to get.
Team Insert
This command returns an image to a new document layer from the clipboard, automatically aligning it in the center of the canvas. The command is in the menu Editing (EDIT) and has a keyboard equivalent Ctrl + V (in Mac OS - Command + V).
Teams of special insert
For a special insertion, three commands are used in the menu. Editing (Edit) -\u003e Special insert Paste Special).
Team Insert instead (Paste in Place) allows you to insert into the relative area of \u200b\u200bthe insertion, from which it was copied. In other words, if in the original document, the image fragment is in the left corner, then when inserting it will be placed in the same angle of the target document.
So, in fig. 3. but Magic Mouse image is located in the lower left corner of the document. If you select it, copy to the clipboard, and then open another document and make an insert with the command Insert instead (Paste in Place), the image will be placed in the lower left corner of the open document. In fig. 3. b. Presented the result of the insert. In the palette Layers (Layers) automatically added a new layer with the image of the mouse (Fig. 3 in).


Team Insert In (Paste Into) allows you to insert the contents of the clipboard into the selected area on the image. So, in fig. four but An image of water copied to the clipboard is shown. And in fig. four b. This image is inserted into the highlighted area of \u200b\u200bthe glass.
Pay attention to the mask appeared in the layer line with the image of water, which is automatically created to hide parts that go beyond the selection frame - they are designated in black (Fig. 4 in). This is a layer mask, it allows you to save the entire image on the layer without removing hidden parts.
Team Insert outside(Paste Outside) Inserts an image from the buffer around the selected area, cutting off everything that falls into it. Therefore, to get the collage, presented in Fig. 5, it is necessary to pre-highlight the image of the statue, after which insert a photo of the landscape from the clipboard using the command Insert outside (Paste Outside).

Fig. 5. The result of the command insert outside the statue applied to the selected area
Use of commands Cut into a new layer and Copy to a new layer
These commands are used to place an image fragment on a new layer. It is necessary to select a fragment, and then inside the selection to click on the right mouse button and select the command from the context menu. Copy to a new layer (Layer Via Copy) or Cut into a new layer (Layer Via Cut) - depending on whether you want to leave the original fragment on the original layer or not. In fig. 6. butthe selection of the team is shown Copy to a new layer (Layer Via Copy), and Fig. 6. b. Demonstrates the result of this command. As a result of its execution, as if nothing happens, if you do not pay attention to the palette Layers (Layers). But the palette clearly shows us that the selected object is placed on a new transparent layer, which is located at the top level, and the original background layer remains unchanged.


Comment
Both commands will be contained in the list of the context menu only if active is one of the allocation tools!
Both teams have keyboard equivalents. To copy, the Ctrl + J key combination is used (in Mac OS - Command + J), and for cutting - SHIFT + CTRL + J (in Mac OS - SHIFT + COMMAND + J).
Using the Team Place
Team Place (Place) is in the menu File (File) and is designed to introduce on a layer vector Images, such as logos, schemes, diagrams, etc., which were created in the vector graphic editor. This command allows you to preserve the vector nature of the isobrotium, to which you can apply transformation commands without lowering its quality. Such objects are called smart objects, work with them was considered in computer No. 6'2012.
The layer on which the smart object is placed is indicated by the icon (Fig. 7), which suggests you that you work with a vector object.

Fast placement of multiple images in one document
If you want to collect multiple photos in one document, you can use the command File (File) -\u003e Scenarios (Scripts) -\u003e → Upload files to stackLoad Files Into Stack. As a result, a dialog box appears in which you want to select image files by clicking the button. Overview (Browse). Then the input of all selected files will be placed on separate layers of a new document.
Masks of layers
The mask is a halftone or full-color image that hides the part of the layer to which it is imposed. For halftone masks, black, white and gray color indicate the transparency of the mask. Black color indicates opaque sections of a mask (through them the layer is not visible); White - completely transparent plots of mask, and through the gray layer is partially visible. Here is a mask imposed on top on the layer, and is called a layer-mask. Pay attention - these designations are conditional. If necessary, colors can be changed in places. Then white will show opaque areas, black - transparent. However, in order not to get confused with the notation, the default does not change.
Attention!
The mask is not applicable to the background layer. Before creating a layer mask, you must convert the background layer in the usual one.
Photoshop allows you to work with several types of masks: raster, vector and clipping.
Raster masks
Raster masks are created based on the selected area. It is necessary to highlight the image fragment, then at the bottom of the palette Layers (Layers) Click the add-on button. As a result, a part of the layer, which is not included in the selection area, will hide behind the mask (Fig. 8).

Once you create a layer mask in the palette Layers (Layers), its miniature will be displayed not only on the layer, but also in the palette Channels (Channels) and Properties (Properties). The properties palette provides access to additional settings Mask parameters: density, decisive, refinement of the edge and inversion of mask colors. Moreover, the properties palette allows you to work not only with raster masks, which are created based on the selection, but also with vector modes based on the vector circuit.
Vector Mask Layer
Creating a vector mask should start with the creation of a circuit by any vector tool, for example Arbitrary Figure Custom Shape). And draw the figure should be in mode Circuit (Path)! After creating a vector figure, you must press the Mask button on the properties panel (Fig. 9).

Comment
In addition to using the buttonMask (MASK), as well as in the case of a raster mask, click on the add mask button in the paletteLayers (Layers), but when the Ctrl key is pressed (in Mac OS - Command)!
Further setting of the mask occurs in the palette Properties (Properties) - Fig. 10.
If you wish, you can cover the contour, for example, with a brush, and under the layer with a mask put another layer (Fig. 11).


Clipping masks
In contrast to the layers of layers, the clipping mask is not created on the basis of the selection or vector circuit, but based on the image on the layer. Then all the layers located above the clipping mask will be masked by this image. To create a valve mask, you can execute the command Create a clipping mask (Create Clipping Mask) from the palette menu Layers (Layers) or press the ALT + CTRL + G key combination (in Mac OS - Option + Command + G). You can also hover the mouse pointer key Alt. (In Mac OS Option) on the border of two layers, and when the pointer is swapped on a square with a curved arrow, click the mouse. In any case, a clipping group consisting of two layers will be created. The image of the lower layer from this pair will turn into a clipping mask, and on the upper layer the designation appears in the form of a curved arrow. The lower layer is otherwise called the base layer of the clipping group. So, in fig. 12 The image of the dress is a clipping mask for the top layer with a photo of yellow roses.

Types of layers
The most common and frequently used is the usual layers with which you can do almost all: change the overlay mode, apply layer effects to them, various blocking options, change the fill and opacity, to carry out correction, pass images through filters, etc. But we should not forget about other types of layers that make your work with Photoshop much more convenient.
Background
The background layer has special properties. This is the only layer that cannot contain transparent pixels and is always located below other layers. If conventional layers we compare with transparent films with images deposited on them, then the background layer is a sheet of paper under them.
For the background layer, it is impossible to change the overlay mode, opacity, fill. It is impossible to apply a single layer effect to it (while the layer is blocked), and in addition, it cannot be moved by the tool Move (Move).
All images you shoot with a camera or create as a result of scanning, have a single background layer.
To gain access to the change in the properties of the background layer, you must convert it to a regular layer. For this, enough in the palette Layers (Layers) to make a double click and press the OK button in the automatically opened window New layer New Layer. Then the lock icon will disappear from the string of the layer, and its name will change on Layer 0.provided that you did not specify another name in the new layer creation window.
To reverse conversion of a regular layer in the background, you must execute the command Layers (Layer) → New (New) → Convert to the background (Background from Layer).
Correcting
Corrective layers are very convenient for experiments with tone and color correction Images. There are many tools, and knowingly unknown, which one will be able to cope in this situation. Therefore, you can apply several correction options to the image, placing them on different corrective layers, and then choose the optimal result. You can always hide or remove the adjusting layer with an undesirable result without making changes to the original image.
To create a correction layer, a button in the form of a black and white circle on the palette is used. Layers (Layers), which discloses a list containing the names of the corrections: Levels (Levels), Curves (Curves), Color balance(Color Balance), etc. As a result, a palette appears Properties (Properties), in which the layer parameters setting (Fig. 13).

By default, the corrective layers create masks associated with them. If you cannot produce any selection before creating a correction layer, then the correction will apply to the entire layer below. The mask in this case will be white. If you pre-select a fragment, a mask will be applied to the correction layer, which will allow the correction of parts of the layer underlying below (Fig. 14).

Fig. 14. An example of using the correction layer. Left - Source Image
The correction layer acts on all the layers that are under it. If you want to make a correction only one layer below, without affecting the rest, then you must create a clipping group from the corrective layer and the corrected image. The base layer should be assigned a layer with an image.
Pill
To apply the color, gradient or pattern on the object, you can use three layer effects: Color overlay (Color Overlay) Overlay gradient (Gradient Overlay) or Pattern overlay (Pattern Overlay). For these purposes, you can also select a repainted object, create a new layer, paint the separation area with a homogeneous color, gradient or pattern, and then define the most suitable overlay mode for this case.
But you can do otherwise: for repainting an object, create a layer-fill. As an adjusting, this layer is created with a transparent mask, editing which can be protected from the effect of the casting layer a repainted object (Fig. 15).

Fig. 15. An example of using the casting layers for repainting an object and application texture. Left - Source Image
To create an injection layer, select a layer with a repainted object, and then click on the button. For the fill layer, the three first points of the drop-down list are used.
Textic
To add to the inscription image, four tools are used: Horizontal text (HORIZONTAL TYPE), Vertical text (VERTICAL TYPE), Horizontal text-mask (Horizontal Type Mask) and Vertical text-maskVERTICAL TYPE MASK). But you can do with one tool Horizontal text (Horizontal Type), because of the horizontal text it is easy to get a vertical, simply by pressing the button on the tool properties panel. And from the inscription you can instantly go to the selection by clicking on the text layer thumbnail with the Ctrl key (in Mac OS - Command).
After entering the text, it is necessary to confirm the input that can be made in several ways:
To edit a text layer, you must select a tool Horizontal text(Horizontal Type) and just click the mouse inside the inscription. The text layer is automatically activated, and inside the inscription will appear input cursor (Fig. 16 but). Enter editing mode can be different. To do this, it is enough to perform a double click on a text layer thumbnail in the palette Layers (Layers). In this case, the text will be highlighted as in text editor (Fig. 16 b.).

Fig. 16. Embods to enter text editing mode: A - A click on the inscription in the document window with an active tool horizontal text; B - Double-click on a text layer thumbnail in the palette layers

Attention!
You need to do a double click on the text layer miniature. Otherwise, you will open the styles window or enter the renaming mode.
In addition to the short text Photoshop allows you to work with block text consisting of several paragraphs. In addition, the text can be administered inside the closed vector figure or contour (Fig. 17).
The article is prepared on the materials of the book "Photoshop CS6. The most necessary "Sofia Svidna: http://www.bhv.ru/books/book.php?id\u003d190413.
"Layers" is a fundamental concept in adobe program Photoshop. Often, newcomers are faced with various kinds of problems precisely because of misunderstanding the mechanism of working with layers. Today we will consider the action from which, as a rule, work with the image begins, namely: how to create a new layer in Photoshop.
Four ways to create a new layer in Photoshop
In the Photoshop program there are four ways to add a new (from scratch) layer in open File. Consider them in more detail. But first check the presence of the "Layers" palette in the palette area. If it is not there, come in: Main menu → Window (Window) → Layers (Layers) or F7 key on the keyboard. Now you can work further.
1. Keyboard combination
The easiest I. fast way Create a new layer is a key combination: Ctrl + SHIFT + N, after clicking which the New Layer dialog box opens.

Let's look at it in more detail.
Name
In the "Name" line, you must enter a value that carries a semantic load. Get used to from the very beginning to order, otherwise later you will spend a lot of time to search for a specific layer in several dozen nothing speaking names. However, if you are planning only one layer, except for the background, then you can, of course, leave the default value. In any case, it can always be changed. To do this, on the "Layers" palette, you must double-click the left mouse button by the name of the layer requiring renaming. The current name is highlighted in blue and the ability to enter the required value will appear.
A few words about the background layer
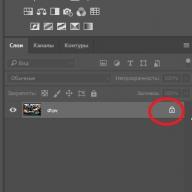
Basically, only one "background layer" (background) with the image of the lock (arrow No. 1) appears on the PHOTOSHOP program on the "Layers" palette (Layers).

This layer has a number of limitations: there are no overlay modes, it is impossible to change the opacity and fill, it cannot have transparent areas, etc. And most importantly - this layer cannot be removed! Pay attention to the drawing on top of all the settings are inactive.
Its purpose is to save the initial copy of the document so that you can always return to the sources and in the process of transformations not to lose irrevocably original! It is for this reason that it is not recommended to remove blocking from the background layer. If you need to make changes on the layer itself, it can always be copied. To do this, we highlight the background layer and the "Create a new layer" icon (New Layer) (Arrow No. 2). Or the Ctrl + J key combination, an exact copy of the background layer will appear, but already with full functionality.
If necessary (not recommended) from the background layer, you can still remove the blocking. To do this, you must transfer the image of the lock (it is the lock, and not the entire layer) on the icon trash basket To the right of the "Create a new layer" button (Arrow No. 3).
Use the previous layer to create a clipping mask
The following line is "use the previous layer to create a clipping mask" (Use Previous Layer to Create Clipping Mask). This means that if there are transparent areas on the underlying layer, then putting the bird in this line, you will leave the same place with transparent and on the created layer.
Color
There is a possibility of a line with the name of the layer in the "Layers" panels to be isolated by color for faster.
Opacity
The opacity, which is understandable from the title, is responsible for the degree of opacity of the layer.
Overlay mode and fill with neutral color
The overlay mode is essentially mixing the layers. From the selected method, it will depend as the pixels of the underlying layer will interact with the pixels of the layer being created. For example, in multiplication mode (Multiply), multiplying the brightness of the pixels of the upper and lower layers. At the same time, the interaction is t. N. neutral color. That is, the color that does not interact on the bottom layer. For this regime - This is white. This means that if there is a white color on the upper image, then the pixels will not change under it and as a result will remain the same as they were. While all the other pixels of the lower image are proved with the top pixels and change their color. So, when creating a new layer, it is possible to pour it neutral for this in color.
After filling out all the necessary fields, click OK. A new line appeared on the layer palette with the title and other settings that you can always change.

But you can create a layer using a key combination, without a dialog box. In this case, you need to add the ALT key. That is, the key combination will be viewed: Ctrl + Shift + Alt + N. The layer will have the usual overlay mode, 100% opacity and fill.
2. Adding a layer through the main menu
Not the fastest, but the same functional way to add a new layer is to go along the path: Main menu → Layers → New (NEW) → Layers ... (Layers ...). An already familiar dialog box "New Layer" will open.
All newly created layers are created above active. Sometimes it is necessary to create a layer below it. This option is possible in the third method.
In addition to the highlighting of the active layer on the "Layers" palette, its name is prescribed in the document cap. 
3. Button on the palette of the layer
Another way to add a new layer is the "Create New Layer" button at the bottom of the Layers palette. 
Clicking is created by an empty layer with default name. When you first create a layer in this file, the name will be "layer 1". 
In the future, the number increases in ascending order. It is advisable to immediately rename the layer, give it a "speaking name". Having selecting the newly created layer, if necessary, you can change the overlay mode, opacity and other settings. But it is much more convenient to set all these settings during the creation of the layer. To do this, press the above button with the Alt pinch key. At the same time, the "New Layer" dialog box will appear again, with which you already know how to work!
If you want to create a layer below active, press the "Create New Layer" button with a ctrl pinch key. But you need to remember that the new background layer cannot create a new one! First you need to remove the lock (not recommended!).
4. Using the layer palette menu
And the last way to create a new layer is through the Layers palette menu. 
In the drop-down list, select the "new layer ..." (New Layer).
Conclusion
We looked at four various methods, How to create a new layer in Photoshop. Now you know how to create a layer above or below the active layer, create a layer using key combinations or buttons on the layers palette, as well as create layers on the fly or using the New Layer dialog box.
See you on the pages of the following lessons!
Sincerely, Marina Ruble.
Work with layers in photoshop(Lessons for beginners)
Working with layers is fundamental in Photoshop. Each image consists of layers. The top is the most visible, and the underlying layers are blocked from under the lower or through transparent areas of the upper, or due to the layer mixing mode, the color solution of the whole image may vary. The state of the layers, their location, interaction (mixing mode), prohibitions for certain actions, transparency and some other layers can be viewed in the layers palette. The palette of the layers is a window called through the window-layers command and looks like this:

Each layer has its name, the miniature of the image of the layer. Glazik icon Meaning the visibility of the layer. If the eye is "turn off", we will remove the visibility of a separate layer. It is sometimes necessary for the convenience of work.
In the upper part of the layers palette, the mixing mode of the active layer with the previous one, by default it is NORMAL (normal), but we can change it. Also at the top of the palette, we see opacity (opacity) and the fill (Fill) of the active layer. Reducing the indicators of transparency and fill, we are more and more visible to the layer.
Basic actions with layers:
1. Make an active layer. To do this, just click on it with the mouse, it is highlighted in blue. It is on the active layer that all transformations are underway.
2. We can remove the layer by dragging it with the mouse to the basket located at the bottom of the palette of the layers,
3. Change places in places. Grab the layer and drag it to the right place in the palette of the layers.
4. Duplicate the layer - create the same new layer using Ctrl + J or right-click and select "Duplicate Layer"
5. Create a new transparent layer. To do this, the icon is used at the bottom of the layers window,
6. Apply the gradient, pour color, apply the style, pour the pattern, adjust using curves, levels, create a layer mask and other functions are available using special icons in the lower part of the palette.
About this later.
7. Combine layers in groups. For this serves an icon,
8. Tie the layers. In order to move together several layers, you need to make these layers active and "tie them" using the icon
9. Create a new layer under active. Click on the creation icon of the new layer while pressing the Ctrl key
There are also layers blocking:
You will find them under the mixing mode.
1. Lock saves the transparency of pixels, i.e. When activated blocking it is impossible to write anything or draw on transparent layer pixels
2. The second in the form of brushes - retains the colors of pixels, i.e. Ban on drawing, use of erats and other changes with opaque pixels.
3. The third left blocking in the form of a bouncer arrows forbids moving the layer,
4. Full blockage - prohibits any changes to the layer.
Source: photoforum.do.am/forum/4-2-1
*****
Learning to work with layers in Photoshop

I am sure that the success and speed of work in Photoshop depends on: 


- Skills work with layers
- You can not remove it
- You can not make it translucent.
- You can not apply the overlay mode to it.
- Do not make it partially opaque.
Layers in Photoshop, perhaps the most basic and basic topic. If there were no layers, there would be no photoshop. And without photoshop, maybe there would be no layers. The longest menu by the number of commands - Layers menu (Layers). I think that if you figure it out with most of the possibilities of manipulating the layers in Photoshop, you may be more or less confident that you can understand the program.
Layers in photoshop can be represented as virtual invisible surfaces. On each surface can be placed graphics. Thus, some graph will be on the upper layer, some in the middle, and some at the bottom.
The concept of "layer" in the photoshop program has exactly the same physical meaning as in life is a layer or a layer, which is an integral part of something.
You can see the document layers in the layers panel. Take this picture on which the layers are not yet fulfilled.
It consists of 4 layers.
********************************
To the left of each layer is a thumbnail (icon) pictures with an image. Click on a miniature (icon) with the left mouse button with a pressed CTRL loads the selection of the object.
Next to the eye icon, which can be turned off and turned on. For example, clicking on the eye with the left mouse button, we will turn off the visibility of this layer. A layer with a disconnected eye becomes invisible on the document.
To return the visibility of the layer, the left mouse button to click on the place where the eye was.
Layer which in this moment In work, must be active, i.e. painted in blue color. To do this, click on it with the left mouse button.
***************************************
Layers can easily move and build in the desired order. To do this, it is enough to click on them with the mouse and drag upstairs or down.
*******************************************
You can remove the layer in three ways (removed layer must be active):
1 - Click on the layer with the right mouse button, in the appeared window to select "Remove Layer" and in the window that opens.
2 - Click on the layer with the left mouse button and, clamping the pulmonary layer button down on the basket icon.
3 - on the top panel: Layers - Delete - layer.
4 - and the easiest way to remove the active layer is a simple click on the "basket" at the bottom of the layers.
******************************************
You can add a new layer like this:
1 - At the bottom in the layer panel, click on the "Create a New Layer" icon.
2 - on the top panel: layers - new - layer.
3 - keyboard combination on the keyboard SHIFT + Ctrl + N, i.e. Pressing the SHIFT and CTRL keys, click on the N key.
***************************************
To make a copy (duplicate) layer, you need
1 - Click on the working layer right mouse button and select "Create a duplicate layer"
2 - on the top panel: layers - create a duplicate layer.
3 - keyboard shortcut on the keyboard Ctrl + J, i.e. Closed ctrl key, Press the J. key
**************************************
In the layer panel, it is possible to change the opacity of the working layer. To do this, click on the blue square with a small elder, the panel with the slider will appear (highlighted in yellow), moving it left opacity reduces
The fill of the layer is changing in the same way.
****************************************
And when the work is completed, you need to combine all the layers. To do this, click on the right mouse button on the active layer and in the dropping window to select "Run Melting". All layers are combined into one layer called "Background" with a lock on the right.
*********************************
This layer - the background becomes blocked, i.e. Many operations on it are not available.
It happens when opening a picture in Photoshop.
Unlock (remove the lock) so:
1 - The easiest way to turn the background layer in the usual - double click on the layer on the layer panel (click just below or left the layer name) and click OK in the dropping window. After the background layer becomes a regular layer, all operations with a layer become available. Including the creation of a translucent layer.
2 - clamp "lock" with the left mouse button and drag to "basket"
On the other functions in the layer panel, I will tell you the next time.
Layers - heart of the program,
Masks of Layers - Soul Program
© ketrine iceman
Such an epigraph is not accidental. Layers (Layers) photoshop programs can make you a real ASA on working with various images. Having learned to work with layers, you can no longer be necessary without them. It seems to me that one of the main advantages of working with layers is the possibility of flexible image editing with the possibility of rollback to earlier versions. Even in a few years. But not only this is good layers. Work in the layers is the topic of a separate book, not articles. In the meantime, just get acquainted with the palette of the layers. (Or the panel, as sometimes writes. Definition of the palette in the context of the program's work it seems more accurate).
The term layer came to the PhotoShop program from printing. On the mounting table, the films with text, logo, photo, and then glued these films. Or in hand-drawn animation on transparent films were phases of movement of heroes imposed on the background. Approximately this can be represented as layers are arranged.
The number of layers in Photoshop is limited to 8000. The right, I do not know if anyone had such experiments with such quantities, but for me the norm is 3-10 layers with normal photo correction. When photomontizes, of course, the layer will be much more. Obviously, the more layers, the greater the file size, which means for large (in size) files may not be enough random access memoryand processing will be slow. Even in the new version of the CS6 program. Of course, it depends on the power of this particular computer. I have long been working with panoramas, the size of the files of which is 2-4 gigabytes. And even with RAM in 16 GB, I sometimes see the slowdown in the work of my McA.
Operations with layers are diverse: copying both the layer and its parts; Changing the order of the layer; combining the layers in the group; Application to a layer or group of correction and adding different effects; Association, or how often the gluing layers among themselves say.
For the first time, layers appeared in Photoshop in the 3rd version and then did not have such flexibility as now. But still, it was a revolution in image processing. For example, after the introduction of text in Photoshop 4 (simply 4, not CS4), the letters tightly struggled with the image. Therefore, I had to work or a copy of the layer or with a copy of the image.
Today the program supports work with such types of layers: Pixel - Actually, the image itself, vector, test, corrections and smart objects. Attention! Despite the fact that Photoshop can save files in TIFF format with layers, should not be done. First, TIFF with layers understand only Photoshop, in the second, sometimes with such files arise between intergenerate conflicts. The file created on the MAC is not opened on the PC, and the revolution. And Elshley You will bring a multilayer file in TIFF format to print, the high probability that the printing machine program cannot read it. Therefore, when working with multi-layer images, use native photoshop format - PSD (PSB for large files). And in service offices give single-layer files in TIFF. Displaying PSD file in image viewing programs depends on Photoshop settings. In the File Handing section, you must select Maximize PSD and PSB File Compatibility (Maximum PSD and PSB Compatibility and PSB) and mark the desired item. NEVER (Never), Always (always), ASK (ask, when measured). In the case of Always Photoshop, will create an additional layer combining others to display in programs that do not understand the PSD format. In Photoshop, this layer will not be displayed. But in this case, the file size will increase. And up to 2 times. For example, instead of 500 MB will weigh 1 GB. Decide that you are more suitable for you. One of the leading American experts of the Dick McKleland program once called this option as follows: "Double the size of my file, because I am a boy." Personally, I have long noted for myself the item Never. And on Bridge view, these settings do not affect.

Go to the Layers palette (layers).
If the palette of the layer is not displayed on the screen, go to windows menu and mark the Layers item (windows\u003e layers). If no image is open, the layer palette will be empty.
Photoshop "sees" the layers as if from above - from the top to the bottom, using all visible layers.
And we look at the palette of the layers of the front, which helps us work with layers and navigate them.
Initially, the photo, opened in Photoshop, has a single layer - background. To this layer, various functions and attributes of the layer cannot be applied. So that the functions and attributes of the layers can be applied to the background layer, it is very easy to turn into normal. To do this, you need a double click of the mouse click on the layer background. Photoshop will offer this layer name Layer 0. Obviously, you can ask him any name.
Consider now the device palette of Photoshop layers, and their various types.

A. - There is some number of comrades in the layer palette menu. Part of the items just duplicates the Layer menu

If you select Palel Options in the palette menu ... (palette options), a window appears in which you can change different types Display, layer information, such as changing the size of the layer icon.

Let's return to our illustration.
B. - search for layers by name (Name); Effects (EFFECT), more precisely on the styles of the layer; overlay mode (MODE); attribute (attribute), that is, we see the layer, hidden, layer with a mask, etc.; Color (Color), if layers are marked with color. New in CS6.
At the same time, the layers can be filtered and by type (new in CS6) by pressing a specific button:
C. - pixel, actually the image itself
D. - Corrective
E. - Textic
F. - layers with figures
G. - Smart objects
H. - Disable search and filtering
I. - Selecting the layer overlay mode (mix). Depending on the type of imposition, it is determined how this layer is mixed with the underlying or underlying layers. Very important program option. When correction of photos, fortunately, only a small part of these modes is used.
J. - Full or partial layer lock:
- W. - blocking transparency, those to draw or retouch in transparent areas
- X. - Full prohibition of drawing or retouching. (It is impossible to work with any tool that uses brushes).
- Y. - blocking of moving (movement) layer
- Z. - Full layer blocking. Those simultaneous inclusion of the above options.
- Oo. - layer opacity. Do not confuse with transparency. For example, when the opacity is 70% layer is transparent by 30%
- FF. - Fill. Affects the opacity of the layer, but does not affect the opacity of the layer styles

K. - Vector layer of figures
L. - Styles (effects) of the layer
M. - layer of text
N. - layer display. Clicking the button in the form of the eye hides the layer (does not delete), the re-inclusion in the empty field on the place of the eye displays the layer
O. - Correction layers. The view of the pictogram shows the type of correction layer
P. - Communication (LINK). Related layers are moved equally, without a violation of their mutual position.
Q. - Add styles (effects) of the layer, such as shadows, volume to test or figures. If not tolerant, you can create a frame for your favorite photo. And when you turn to the Ermazh, proudly say that I don't need a frame.

R. - Add layer mask. If the mask is, clicking on this button adds a vector mask.
S. - Creating a layer of correction, for example, such as levels (LEVELS), curves (Curves), Channel Mixer, Black and White Image (Black & White), Photo Filters (Photo Filter) and others.

T. - Create a new group. When a lot of layers in the palette, for the convenience of work and save space in the palette, layers are easy to merge into groups.
U. - Creating a new layer.
V. - Deleting layer
CC. - The correction layer only affects one layer, lying directly under it, and not all the underlying layers. Will be included or directly when creating a layer of correction, or after. Layer menu\u003e Create Clipping Mask (create clipping mask), keyboard reduction OPTIONS + CMD + G (Mac), Alt + Ctrl + G (Windows)

LL - layer blocking icons
BB. - Blending Options activity icons (new in CS6). It used to be nemonas, you used this command or not. I, remember that in reality the picture looked a little different, often called the Blending Options command to check, the command was used or not. For me personally, this is a very important tip.

Zz. - Layer communication icons and masks. Click on the chain breaks the connection and the mask can be moved separately from the layer.
Mm. - layer mask icons. When the mask is edited, the mask pictogram is painted in gray and black tones in the editorial regions.
If you right-click on the layers palette, the context menu will appear. It should be remembered that the type of context menu will be different, depending on the place of the cursor in the palette of the layer and type of layer. In this example, click the right mouse button was on the pixel layer icon.

From the context menu, for example, it is convenient to change the color label layer, the size of the layer icon, the display of the partially filled layer (as full document or only opaque pixels).

New in CS6.
Photoshop CS6 has several changes in working with layers, and modifying not only the palette of the layers, but also directly work with the layers.
There are new features of the simultaneous editing of several layers. For example, in Photoshop CS5, several layers could be transformed simultaneously. And in Photoshop CS6 you can simultaneously copy the selected layers (keyboard reduction Cmd + J (Mac), Ctrl + J (Windows). In addition, several active layers can simultaneously change the overlay modes (Blending Modes), blocking types, opacity (opacity), fill (Fill) and a layer color label. (In order to simultaneously select a few layers, it should be done likewise selecting files or folders of your operating system).
Even in Photoshop CS4, the Adjustments palette was added (correction), which made it possible to quickly select the desired command. Before this palette appears, the correction layers needed to add or from the layer palette (layers), or from the Layer menu, and then configure in separate windows. However, when adding a new correction layer in the Adjustments panel, it appeared its settings, and to add another layer of correction using this palette, it was necessary to highlight the usual layer in the layers palette. Now in Photoshop CS6 there is no more inconvenience. A new version The palette of the correction layers (adjustments) is intended solely to create new such layers, and the correction parameters are now transferred to the new Properties palette. Such an approach will make lovers to use the mouse: it's just a palette of the buttons to create a layer of correction. Personally, this change was not touched by absolutely, because to generate these layers I asked for a long time keyboard reductions. And ask them in new versions of the program. I want to note that the creation layer creation button was not canceled (see the illustration above, the button indicated by the letter R).
That's how the Adjustments palette looked like in Photoshop CS5,

and in Photoshop CS6.

And so looks the palettes Properties and Masks in Photoshop CS6

Of course, new functions are fine, but I'm sorry that the wizard of Merlin is frustrated from the palette. Yes, yes, do not be surprised. If you press the OPTION key and click on the property item in the Layer Palette menu, in versions Photoshop. To the version of CS5 inclusive, a little sleepy appeared on Erane, and it seems a slightly sacred wizard:

Or maybe it only did he disappear? Or he threw it? Sorry…
(Layer) is the most important PHOTOSHOP palette. Layers can be represented as a stack of transparent films, with fragments deposited on them. If they are imposed on each other, then one single picture will be.
For an example, I made a collage of several cliparts on an ambulance hand: the sky like a background; grass; bee; chamomile; . Each element is located on a separate layer, but together it looks like one thing:
In fact, the image was formed by projections of each layer, which schematically be represented as follows:

That is, under the numbers from 1 to 5, these are the same layers. Each of them has some kind of element having its location. Mentally, having struck these films, you will get a final image. The palette of the layers of photoshop at the same time looks like this:

Note!
At the very bottom, the palette is the lowest layer (No. 1), then it falls on it 2, and on it, respectively, No. 3 and so on. The topmost layer on the palette is the most upper in the document. This is a very simple and strict hierarchy.
The role of the layers cannot be overestimated. This is a fundamental tool without which it would not be the photoshop itself. In addition to the palette itself, a whole tab in the main menu of the program is highlighted for layers. "Layers". Opening it, you will see a large number of teams, some of which forming separate subcategories. All together are ways to create and control the layers of photoshop. This once again emphasizes the special significance of the tool. But it is not necessary to scare, in fact, there is nothing complicated here, everything is intuitive. And soon you will understand that it is so!
When this program was not yet, people enjoyed simple applications, such as Paint.. Open it, it is preinstalled in standard programs if you are a Windows user, and try to close the photo! Something is not effective, right? For such purposes, a single-layer editor is absolutely not suitable.
Now, when it became possible to edit and create images on separate layers, a completely new era was opened on working with graphics. This is a truly grand instrument and, studying photoshop, you just need to learn how to use the palette of the layers. This article contains all the information necessary for the full and comprehensive study of the layers in Photoshop.
How to open a palette of layers
By default, the palette of the layers in Photoshop is open on the right side of the screen in. But if for any reason the palette of the layers disappeared, then it can be re-displayed by executing the command:
Window - Cream (Hot key F7)
On the palette initially there is always at least one layer. Remember that any open document in the program is always at least one layer. One thing is not different.
The background is marked with a lock icon, which tells us about a limited circle of action with this layer. For example, you cannot delete it, apply overlay modes or make transparent. To exit this mode, make a double click on the layer, a dialog box appears in which, click OK. .
2. Ordinary layer
This is a standard layer that you will create in 90 cases out of 100, since it contains basic work with the image. If we speak a scientific, this layer works with. And since everything consists of pixels, it turns out that any action with them will be carried out on this form of the layer.
3. Text layer
Each time, adding to the project an inscription with help, photoshop will create a text layer. This is a classic example, that is, it consists not from pixels, but from mathematical formulas. If these are two different types of images, it means it is logical that, creating text, it cannot be along with a pixel type. Here is a photoshop and an automatic makes a new layer.
4. Smart Objects
The smart object on the palette is marked with a small file icon (noted the arrow in the figure).
5. Corrective layer
This is a separate caste of complex and powerful layers. Each corrective layer has its own separate palette with the settings. With the help of them, you can work with color correction, exposure, light and shadows, white balance, brightness, contrast and many with what else.
All corrective layers are collected under the command of the same name in the Layer tab of the main menu.
6. Fill layer
Allows you to pour a layer with a solid color, pattern or gradient.
7. Figure layer
Another representative of the vector type of images is the figures. Using, Photoshop automatically makes a new layer. The reason is all the same - you can not unite two different types of images.
Why do I need layers?
So, you realized that the layers are important that they have many varieties. But why all this is necessary, what is specifically the benefits of this tool, why are layers need?
It can be said that all work in Photoshop occurs somehow or otherwise on the layers, so speaking about what they need, the answer will be simple - for everything. To add at least some specifics, I will give examples of some basic actions.
1. You can add to one image of others, combine them with each other, creating, the so-called collage. .
For example, on the palette of two pictures already turned out to be a simple collage.

2. You can change the size of the object on the layer so that the remaining layers remain unchanged.
To do this, select the desired layer and with Ctrl + T, adjust the required size.
In the same example, the bee size can be reduced. Please note that the picture with a green background and the log remained for the same size.
3. You can move the contents of the layer to any place.
Note
Outside the working area of \u200b\u200bthe document, there is also a space where you can also move the contents of the layer.

4. You can add opacity for the layer, which will create a translucent effect through the object.
For example, install opacity by 50%. Pay attention to the bee that the contents of the underlying layer are now visible through it.
5. In Photoshop, there are layer overlay modes. These modes cause photoshop otherwise process pixels that are on the intersection of two layers.
There are many types of modes, each with its pixel processing algorithm.
6. You can add a correction layer, which for example will change the entire color gamut composition.

This is just a drop in the sea that I could show as examples of using the layers in Photoshop. I hope that at least it helped create general view About the instrument.
How to create a new layer
There is nothing easier than creating a new layer in Photoshop.
There are several ways to add an ordinary, and some features to create other types of layers.
Method 1
Press the button right on the palette Create a new layer.

Method 2
Through the menu command:
Layer - new - layer ... (Hot key SHIFT + Ctrl + N)

Method 3.
Through the command New layer In the palette menu (opens by clicking on the button in the upper right corner of the palette).

Method 4.
When adding new images to an open document, be it by dragging out of another tab, use teams place"Copy - insert" or simply dragging pictures from a computer, then ALWAYS Such a picture automatically creates a new layer for itself.
Features of creating layers of other types
1. When you use to add an inscription to your project, Photoshop will automatically create its own layer for this text. As mentioned above, this is due to the features of two different types of images: vector and raster. Also applies to and layers Figures.
2. As for the fill layer and the corrective layer, they are also created automatically when the user selects the corresponding menu command:

- Open the image in Photoshop using the menu command: File - Open Like Smart ObjectThe image will appear in a new tab with an appropriate layer thumbnail icon.
- Turn any ordinary layer into a smart object. To do this, right-click and select the command. Convert to smart object.
PSD and layers
You should already know that Photoshop has its own special extension in which the program saves working projects. Briefly, it allows you to restore layers when loading a project and continue working on them. On the Internet, full-fully PSD files for all occasions: ready-made text effects, collages, photo frames, layouts, and the like. By purchasing such files, the user can refix content independently and save the image already in a beneficial option for itself, for example, insert your photo into the photo frame.
By default, Photoshop saves all files to PSD - pay your attention at this point! To save, for example, in the usual JPEG, you need to select this format from the drop-down list. File type.
Noticed the error in the text - select it and press Ctrl + Enter. Thank you!