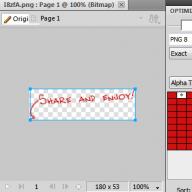
The image is created by using the toolbar. Painting .
Image creation algorithm:1.
It is necessary to display two sheets on the screen (in order to create image elements and group them). Image scale? 45%;
2.
Using button Rectangle On the panel Painting Blacks up the top rectangle on the floor of the sheet (if when you click on this button, a frame appears Insert pattern - You must click on the ESC key). Fill it (paint) it using a button Fill " Methods of fill " tab Gradient " Boot "Billet name" Late or early sunset "" Hatch type Horizontal (The object must be dedicated);


3.
Using button Rectangle On the panel Drawing effect the lower rectangle. Pour it with the button Fill " Methods of fill "Tab Gradient " Boot "Type of hatchovka From the center "Left option.

4. We decorate the sky.
Draw stars on a white sheet (2nd). Panel Drawing e -\u003e Autofigurians -> Stars and ribbons -> 4-end star -> copy once -\u003e Insert as much as you need -\u003e drag them on the sky -\u003e pour one star using a button Fill -\u003e And, by clicking the left mouse button onto the other (selectively) of the stars, press the F4 key (repetition of the last command). The remaining stars fill with other colors (on your choice).
Draw a month. Panel Painting -> Autofigurians -> Main figures ->Month -> Fill .

5. Draw at home.
First house. Panel Painting " Autofiguri "Basic Figures" Cube " Pouring " choose a color "on the panel Painting button Shadows " eg, Style 4. .

On a white sheet draw a window. Button Rectangle "Button Line "Receive
We group the window: on the panel Painting "Button Select objects " button Painting " Group .

Copy once -\u003e Insert as much as you need -\u003e drag them to the house -\u003e pour one window using the button Fill -\u003e and, by clicking on the left mouse button onto the other (selectively) windows, press the F4 key (repetition of the last command). The remaining windows fill with other colors (on your choice). Draw an antenna and other elements.
On the wall of the house put the sign of the enterprise. On the panel Painting -\u003e Button Add object -> we choose the desired Style lettering -\u003e We recruit text -\u003e OK -\u003e on the toolbar Wordart. Choose Vertical text Wordart and we get the result.

Second house . Autofiguri Main figures-> Cross. Fill -> Methods of fill -\u003e Tab Pattern -> Bricks -> Hatching - Black -\u003e Background - Orange. Draw windows, doors (with facilities grouping). Pour them, choose the color and type of line. Place in the house. We group objects at home. Create a sign with a button Inscription . To viewed the wall, perform the following operations: on the panel Painting -> Line color - not, color fill - not. Create a firework effect: highlight the text of the inscription Bowling -> Format -> Font -> Animation tab -> Fireworks -> OK .

Third house. Autofigurians -> Main figures -> Cube, rectangles, arch. Flip -> Fill -> Methods of fill -> Texture tab -> Marble . Stairs draw using a button Lines Panels Painting , only apply the menu Hatch .

The rest of the drawing details do the same. Trees are drawn using a button Autofiguris "callouts" clouds , color and with the button Free rotation They are given the necessary provisions.

In chapter Other computer To the question how to put a vector sign over the letter F in Word 2010? Posted by the author Anna Tesla The best answer is
22 response
Hey! Here is a selection of topics with answers to your question: How to put a sign of a vector over the letter F in Word 2010?
Answer from Oksana Kostenko
May try to draw an arrow from above on top. Configure Toolbar - Drawing
Answer from VOLDEMAAR
1. The document must be compatible with the newest VERD version.
2. Insert - equation
3. Select the panel »Diacritic signs" (Photo from Evgeny Zhukov)
4. There, the arrows above the letters there are accurate ...
Topic status: closed.
-
Yours faithfully,
Dmitry Sakharov -
The Closer You Get To the Fire The More You Get Burned ...
-
Yours faithfully,
Dmitry Sakharov
P.S. Everyone must do their job!!!
Topic status: closed.
Sometimes, when typing, you may need symbols that are not on the keyboard - the signs of the accent or copywrites, degrees, etc. However, this position may seem difficult to seem to those who have never used special symbols In MS Word.
Special Symbols Table MS Word
So, once on the keyboard all sorts of non-standard characters, we will try to look for them elsewhere. On the "Insert" panel in the "Symbols" group, click on the link of the same name and see the list of the most common non-standard letters, characters and icons.
Inserting special characters in MS Word
However, this is still not all - by clicking the "Other Symbols" button, you will open the extensive library in which just countless different symbols are stored for all occasions.
If it is assumed that the characters may be required in the current document often - you can even close this window, but drag into unused screen space and use as needed. In order for the character to be added to your document, select it in the table and click "Paste".

Special Symbols Table in MS Word
The characters added to the document behave like "normal" letters - you can change their size, color, copy and paste.
Keyboard abbreviations for special characters
Although the use of the symbol table is convenient in itself, if you are planning a great job in which some characters (the same stress sign) will be used often, it makes sense to further simplify the work.

Note - under the list of characters there is a small field called " Sign code", To the right of which there is a small window with a short digurinistable code, which changes all times when you select one of the characters.
Laying among the symbols of the stress sign and see his "sign code" (0301) - We will remember this number.
Now let's go to the document and try to write "the word" stressing on it - in front of that letter to which the stress drops will write its digital code:

Insert strokes into a document MS Word. Before pressing Alt + X and after pressing.
And then click on the keyboard the combination of buttons Alt + X.. Voila - our abrakadabra turned into something meaningless
Use the characters to use the symbols only at first - seemingly the somewhat of the most running combinations
Vector graphics in Microsoft Word
Type of lesson: lesson for the formation of new knowledge and skills.
Training methods for the nature of cognitive activity:
1. Similarly illustrative.
2. Reproductive.
Objectives lesson:
Training: To introduce students with a vector graphic editor and its interface; To teach create simple vector drawings using the order of layers, grouping individual objects.
Developing: Create conditions for the development of skills to work with graphics, develop creative thinking when creating drawings.
Educational: Create at the lesson atmosphere of psychological comfort, the conditions for education of independence, the ability to control their actions.
Equipment lesson:
Computers with MS Windows;
MS Word graphic editor
Projector;
Screen (interactive board);
During the classes:
Organizing time
(Purpose: Provide an external situation for working at the training lesson, psychologically prepare students for learning). Greeting, presentation, organization of attention of schoolchildren.
The theme of our lesson is "vector graphics. The simplest operations with vector objects. "
The purpose of the lesson is to consider the advantages of vector images, learn how to create simple vector drawings using the procedures of layers, grouping individual objects.
In previous lessons, we worked with the Paint graphics editor. We talked about the fact that it turns out raster images, i.e., images consisting of pixels. The main disadvantage of the bitmap is the scaling of the pattern. In today's lesson, we will look at another kind of graphics called vector. Consider her advantages and disadvantages.
Unlike raster images, vector graphic images are used to store high-precision graphic objects (drawings, schemes) for which the preservation of clear and bright contours is maintained.
Vector images are formed from elements - point, line, circle, rectangle, etc. The coordinates are set for each element, as well as color.
The advantage of vector graphics is that vector graphic images can be enlarged or reduced without loss of quality.
To create vector images, special programs are developed, such as CorelDRAW.
We will get to know today with a vector editor that is built into the MS Word-known text editor, and let's create a drawing from various elements that are called autofigurists.
Creating vectorimages in MS Word
Vector graphic editors include a graphic editor built into MS Word. Vector drawings are created from primitives: lines, curves, rectangles and other objects.
After an object has been created in the vector editor, it continues to maintain his individuality, it can be allocated, scaling, moved, etc.
Vector objects can be selected on the MS Word toolbar Painting. To display it on the screen:
View – Toolbars – Painting.
Panel Drawinglocated at the bottom Desktop.
The most commonly used primitives: Line, Arrow, oval, rectangle, inscription.They are delivered directly to the toolbar Painting.
Created drawings can be poured by color, framing lines
As well as in a raster graphic editor in MS Word, you can choose the type of line, first it is necessary to build a line, then select Type of line or Stroke type.
Vector figures can be attached to the effect of volume or shadow. These tools are also located on the toolbar. Painting.
Graphic vector editor in MS Word has a set of simple objects for drawing more complex images. These objects are located in paragraph Autofigurianson the toolbar Painting (See Fig. 27).
Autofigurians - A set of typical figures, including other base figures such as rectangles and circles, also various lines, connecting lines, curly arrows, components of structural circuits, tuning, stars and tapes.
Fig. 1. Toolbar Drawing
After selecting an object on the toolbar, it can be drawn anywhere in the editor window .
The MS Word vector editor has the ability to create a text area in which you can enter and format text. In addition, to enter inscriptions to drawings can be used Flundersvarious forms. Climshings are selected on the toolbar Painting Team Autofigurians - Folders (Fig. 28).
2. Types of doors
In the MS Word vector editor, there are grouping tools and objects of objects. Operation grouping Combines several objects into one, which allows us to perform general operations over them (moving, removal, etc.). You can break the object consisting of several, on independent objects ( ungrave).
To do this, select all the images of objects by holding the Shift key and click on the left mouse button for each object.
You can, change the procedure for displaying figures (place on the rear or foreground, place before or for text, etc.).
To perform these operations on the toolbar Painting Press the button Actionsand then select the command Group or To ungrade (for grouping and ungrouping objects) or Order (In order to place objects on the front or background), see rice
Vector drawings are saved in MS Word format and have a DOC type.
Fastening a new material.
Creativeworking on creating vector drawing
Using a vector graphic editor embedded in MS Word, draw a picture on which a house, a fairytale castle or some other image built from Autofigur.
You can portray a complicated drawing using the construction Curves lines.
An example of a house is shown in Figure 4
Fig.4.
Task execution sequence
1. Run MS. Word.. If the Drawing Toolbar is not portrayed, it can be connected: View - Toolbars - Drawing.
2. Basic features drawing - Main figures. Perform a box at home. Draw a rectangle : Autofiguri - basic figures - a rectangle.
Paint the shape: highlight autofigu Format - Auto Power - Colors and Lines. Choose fill method: Texture.
Similar way to portray an extension to the house.
3. Roofs Perform with Autofiguri - Wider triangle, apply fill to them Pattern (duch). Stove pipe pipe draw using Autofiguroes - rectangle, apply fill to it Pattern (bricks). Fence painting figure arrows: Autofiguroes - curly arrows.
Run the fill of the figure arrow.
The remaining fences figures are as follows:
1 option.
· Copy curly arrow: Edit - copy;
· Move the inserted figure to the desired location: Edit - insert;
Option 2
· Apply button ctrl. Select the figure, press the Ctrl button and drag the figure to a new place with the mouse.
· Similar to build all the elements of the fence.
4. Draw a window with curtains. Curtains execute Hand drawn curve, The second curtain is obtained by copying, and then turn the figure to the left - to the right. Pour the curtains by any color of the fill.
5. Pipe on the roof of the house is also drawn as a box of home and roof ..
6. To execute the background: Take Autofiguru - rectangle And close the drawing completely. Further Order - Move to the back. Pouring can be done using a two-color gradient.
7. Month and stars are also performed using:
Autofigurians - Stars and ribbons (stars), Main figures – Month. Pour the stars and a month in the fill of the desired color.
Summing up the lesson. Reflection.
What new have you recognized? What did you like and what difficulties did you experience in working with a graphic editor? Where can you apply the knowledge gained?
(Students answer questions and make the following conclusions: Today we learned that there are two types of computer graphics: raster and vector. I learned that there are special programs to create and edit graphic images, and also learned to create and edit vector graphic images. We liked today ... We have experienced difficulties in ... The knowledge gained can be applied ...).
1. Word objects
2.4. Insert diagrams
3.1. Drawing menu
3.2. Autofigurians
3.3. Flunders
3.4. Grouping objects
Bibliography
application
Objects 1 Word.
Insert and save pattern
Command Object (Object) On the Insert menu (Insert) in the Word program window allows you to insert a pattern that can be edited later using the program in which it was created.
To insert the pattern, set the cursor to the insertion place, specify in the Insert (Insert) menu. Figure (Picture) command and select one of the commands: Pictures (Clip Art), from the file (from SCANNER or Camera) , Organizational chart (Organization Chart). New Drawing, Autoshapes, WordArt object (Wordart), Chart (Chart).
To use some file formats, you need to install special graphics filters. All graphic filters are automatically installed only when the Word is complete. You can view which filters for drawings are installed on your computer by selecting the Insert (Insert) command (Picture) command from the File (from File). Insert Picture in the Add Picture dialog box (Insert Picture), open the File Type drop-down list (Files of Type). To view the drawings in the Dialog box dialog box, without opening the files, press the Views button on the toolbar and select or View (Preview) in the Sketch List (Thumbnails).
When saving a document containing drawings, Word automatically selects the optimal file format for each graphic image. If you wish, you can ask these parameters yourself.
Insert Pictures from the Collection
The Word 2000 includes a new collection of clips, containing a variety of drawings, photos, sound files and video clips.
To view the pictures presented in the task area, the Clips Collection Click the Start button. Mouse the mouse on the picture you are interested in. After clicking the button to the right of the selected picture, the context menu opens, allowing you to insert, copy, delete, etc. Picture.
Link Pictures on the Office Online node allows you to insert a clip from a special Microsoft server if you have access to the Internet. After clicking the link to streamline the pictures, you will be offered to systematize multimedia clips on your computer disk and show a list of collections.
The clips collection has its own reference system.
Fig. 1. Task Area Collection Clips
Inserting mathematical formulas
The formula editor is a separate program that runs from Word. Inserting the formula is carried out using the Insert\u003e Object command. In the dialog box, select Microsoft Equation 3.0. The formula input area and the floating menu of the editor of mathematical formulas, which allows you to recruit the mathematical formula of any complexity. To insert a symbol in the formula, click the button on the formula panel, and then select the character from the palette appears under the button. The formula editor contains about 120 templates.
Insert diagrams
Perceiving the information contained in the document is much easier if it includes diagrams, tables and illustrations. The Microsoft Graph (MS Graph) chart allows you to create and embed a table and chart into texts.
To embed an object (diagram) from MS Graph in Word document, you should set the cursor at the insertion position and call the command the insert menu object.
In the object insertion dialog box, in the object types list, select the Microsoft Graph chart item. After pressing the OK button, the MS Graph program opens, containing some diagram:
This window contains two windows: a table window and chart window.
The diagram created in MS Graph at any time corresponds to the data in the table. At your request, the user can change the type of diagram. To do this, select the command Type of chart in the diagram menu. In the Diagram Type dialog box that opens, specify the type of diagram (linear, circular, etc.) and click OK.
It may be necessary to change not only the type of diagram, but also the font. To change the font, you need to double-click inside the legend.
As a result, the legend format contains the font section appears on the screen.
Opening it, the user will get the opportunity to choose the headset of the font, its Kehal, inscription, etc.
Dialog boxes for formatting other chart elements are open in the same way - double-clicking on the desired element.
To insert the resulting diagram in the Word document, click in the document (outside the diagram). As a result, the diagram will be inserted into the document. Chart dimensions can be changed using markers directly in the document.
To change the diagram, you need to label it and perform a double click to open the MS Graph application. After making changes and return to the document, all changes will affect it automatically.
Fig. 3 Creating a drawing using the Drawing Toolbar
To start drawing an object, click the mouse button in the place where you want to draw an object, and move the mouse pointer, which will acquire the type of cross. Drawing will end after the mouse button is released. To draw a line at an angle, multiple 15 degrees, while dragging hold down the SHIFT key. After completion of the drawing process, the object remains dedicated, the size markers are visible around it. Created using the toolbar Drawing the figure can be moved on the mouse page. To cancel the allocation of an object, click Out of Options.
The object is drawn in a layer located above the text, and closes all other objects. The created object by default will be attached to the nearest paragraph. If you click on the Drawing panel and click the document, then this point will create an object with the default sizes. For repeated use of the toolbar button, double-click it. Created using the toolbar Drawing the figure can be moved on the mouse page. To cancel the allocation of an object, click Out of Options.
Drawing menu
We give some operations that can be performed with a graphical object using the Drawing Toolbar Drawing Menu:
grouped into one object several pre-selected objects or ungroup them;
change streamlining text;
replace autofigur to another.
For example, to level graphic objects to highlight them. On the Drawing Toolbar, press the Actions (Draw) button, then select the Align and Distribute and set the desired leveling method (see Table 2).
Autofigurines4
The menu contains the following items: Lines (Lines), connecting lines (Connectors), Basic Shapes (Basic Shapes), Figure Arrows (Block Arrows), Flowchart, Stars and Ribbons (Stars and Banners) . Using the AutoShapes menu commands reduces the time spent by the user to create a picture.
To draw a curve, select AutoShapes in the Autoshapes menu, Lines (Lines) Curve button (CURVE). If when constructing hold down the shift key, we will get a figure with equal size across several axes: a circle, cube, etc. To add text to autofigur (except for autofigur: Lines, connecting lines and polyline) Click it and start entering the text. Autofiguri - can be used to create edging around the text. Connecting lines are used to connect two objects.
Autofiguru can be used as a hyperlink.
Flunders
Install the pointer where the call line should be started, and then move it to the place where the text of the tuning should be started. Enter the text of the callout. After entering the text entry, set the cursor out of the call and click the mouse button. The size of the callouts can be changed by dragging over its markers. The position of the callout can be changed by dragging it when the mouse button is pressed after the pointer takes the form of a four-sided arrow.
Fig. 4. Auto Pure 24-Ultimate Star and Handling
Grouping objects
You can group several objects so that Word considers them as a whole. For example, you can set modes of flowing in text as a single whole grouped objects (drawings) or pattern and signatures to it. Select multiple objects by holding down the Shift key. Right-click the selected objects and select the command group, group in the context menu.
Sizes and scale design
Fig. 6 Dialog box that allows you to resize and scale pattern
Fig. 7 Location of size markers in the picture
Hold down the mouse button down, move the frame in the desired direction. If you move the size chamber marker located on a vertical or horizontal side, then the scale of the pattern will vary accordingly by vertical or horizontally, if in the corner of the figure, then the size of the entire figure will change proportionally. After completing the size of the drawing, click outside the picture.
BIBLIOGRAPHY:
Main literature:
Computing systems, networks and telecommunications / Ed. A.P. Pyatibratova. - M.: Finance and Statistics, 1998.
Game B. Work in the Internet. - Per. from English - M.: Binom. - 1996.
Langer M. Microsoft Office Excel 2003 for Windows. - NT Press - 2005.
Millhollon M., Murray K. Word 2002. Effective work. - Peter. - 2003.
Basics of informatics: studies. Manual / A.N. Morozhevich, N.N. Beef, etc.; Ed. A.N. Morozhevich. - MN: New Knowledge, 2006.
Periodicals:
1. Dmitry Gorilovsky "Word 2000 for myself / Excel 2000 for myself", Magazine "ComputerR" №16 dated April 27, 2002
Internet resources:
1. autoaf / docs_office_word10.htm
3. Obuk \u200b\u200b/ 2008/05/17 / Otlichnyjj-Uchebnik-Word.html
1 The object is the information inserted into the Word document (about the figure, spreadsheet, etc.) created by any application.
2 raster pattern files have an extension. BMP, .png, jpg, .tif, .pcx i.gif.
4 Under the autofigurists in Word imply a set of figures of varying degrees of complexity
1. Word objects
2. Insert into the document raster and vector drawings
2.1. Insert and save pattern
2.2. Insert Pictures from the Collection
2.3. Insert mathematical form
2.4. Insert diagrams
3. Creating a drawing using the Drawing toolbar
3.1. Drawing menu
3.2. Autofigurians
3.3. Flunders
3.4. Grouping objects
3.5. Insert and move lettering
3.6. Shift graphic object, change, replacement of one autofiguris another
3.7. Creating and changing the direction of the shadow of the graphic object
3.8. Context menu when working with autofigur
3.9. Modes of viewing graphic objects
4. Editing and Formatting Figure
4.1. Changing the color of the fill and line
4.2. Sizes and scale design
4.3. Change the scale of the graphic object using the mouse
Bibliography
application
Objects 1 Word.
If there is an inserted object in the Word document (or any other application), the Word (or another application) is called the client application, and the application that created the object is called an application server, or an application source, or an initial program. The main features of objects (with a specific setting of parameters) are: the ability to call from the Word environment of the source program to edit an object.
The ability to display in the object representing a part of any file, the latest changes made by the original program, regardless of Word.
The ability to place an object anywhere on the page.
The possibility of various options for the flow around objects by conventional text.
The possibility of accommodating on the page of objects and ordinary text as it were in different planes, one under another, like cards with drawings and texts on the table, and these cards with pictures and texts (if you continue the analogy) are either opaque or transparent.
Objects can be created and edited both in the source windows (for example, Paint, PowerPoint, Word, Excel) and in the Word window (for example, WordArt), in which the menu and / or toolbars are changed. Objects can be created from ready-made files. For all objects, the insertion rules, transition to editing and many formatting tools in Word Environment are the same. They will be considered primarily. As for the creation of the originals of the originals in the original programs in the source programs, then only Word graphic facilities will be paid here.
Insert in document raster and vector drawings
Pictures give a document greater visibility and expressiveness, help better understand the text. In Microsoft Office applications, you can insert raster and vector drawings of most graphic formats. Raster drawings2 are created when working with a digital video camera, with the Microsoft Paint program, when scanning graphics and photos. They consist of a large number of points. With increasing pattern, the dimensions of each point of the drawing increase. On the straight lines appear gear segments.
Vector drawings are created by lines, curves and other objects. They are better scaled. Vector images are created when using the Drawing toolbar described below.
Any drawn or inserted pattern that can be edited is considered to be a graphical object. Graphic objects are autofigurines, lines and Wordart objects. Figures include scanned images, point pictures (raster graphics), photos. In some cases, to edit the pattern using the toolbar, the drawing toolbar should be ungristed and transformed into a graphic object.