To understand what is specifically drawn on a diagram or drawing, you need to know the decoding of those icons that are on it. This recognition is also called drawing reading. And to facilitate this lesson, almost all elements have their own conventional icons. Almost, because the standards have not been updated for a long time and some elements are drawn by everyone as best they can. But, for the most part, the conventions in electrical diagrams is in the regulations.
Symbols in electrical circuits: lamps, transformers, measuring instruments, main element base
Normative base
There are about a dozen types of electrical circuits, the number various elements, which can be found there, is in the tens, if not hundreds. To facilitate the recognition of these elements, uniform symbols have been introduced in electrical circuits. All rules are written in GOSTs. There are a lot of these standards, but the main information is in the following standards:

Studying GOSTs is a useful thing, but it takes time, which not everyone has enough of. Therefore, in the article we present symbols in electrical circuits - the main element base for creating drawings and wiring diagrams, circuit diagrams of devices.
Some experts, having carefully looked at the circuit, can say what it is and how it works. Some may even issue possible problems that may occur during operation. It's simple - they know the circuitry and the element base well, and are also well versed in the symbols of the circuit elements. Such a skill has been developed over the years, and, for "dummies", it is important to remember the most common ones first.

Electrical panels, cabinets, boxes
On the power supply diagrams of a house or apartment, there will necessarily be a designation or a cabinet. In apartments, the terminal device is mainly installed there, since the wiring does not go further. In houses, they can design the installation of a branching electrical cabinet - if a route goes from it to illuminate other buildings located at some distance from the house - a bathhouse, a guest house. These other designations are in the next picture.

If we talk about images of the "stuffing" of electrical panels, it is also standardized. There are symbols for RCDs, circuit breakers, buttons, current and voltage transformers, and some other elements. They are shown in the following table (there are two pages in the table, scroll by clicking on the word "Next")
| Number | Name | Image on the diagram |
|---|---|---|
| 1 | Circuit breaker (automatic) |  |
| 2 | Knife switch (load switch) |  |
| 3 | Thermal relay (overheating protection) |  |
| 4 | RCD (residual current device) |  |
| 5 | Differential automaton (difavtomat) |  |
| 6 | Fuse | |
| 7 | Switch (knife switch) with fuse |  |
| 8 | Circuit breaker with built-in thermal relay (for motor protection) |  |
| 9 | Current transformer |  |
| 10 | voltage transformer |  |
| 11 | electricity meter |  |
| 12 | A frequency converter |  |
| 13 | Button with automatic opening of contacts after pressing |  |
| 14 | Button with contact opening when pressed again |  |
| 15 | Button with a special switch to disable (stop, for example) |  |
Element base for wiring diagrams
When drawing up or reading a diagram, the designations of wires, terminals, grounding, zero, etc. will also come in handy. This is what a novice electrician simply needs or in order to understand what is shown in the drawing and in what sequence its elements are connected.
| Number | Name | Designation electrical elements on the diagrams |
|---|---|---|
| 1 | Phase conductor |  |
| 2 | Neutral (zero working) N |  |
| 3 | Protective conductor ("earth") PE |  |
| 4 | Combined protective and neutral conductors PEN |  |
| 5 | Electric communication line, busbars | |
| 6 | Bus (if it needs to be selected) |  |
| 7 | Busbar taps (made by soldering) |  |
An example of the use of the above graphics is in the following diagram. Thanks to the letter designations, everything is clear even without graphics, but duplication of information in the diagrams has never been superfluous.

Picture of sockets
On the wiring diagram, the installation locations of sockets and switches should be marked. There are many types of sockets - for 220 V, for 380 V, hidden and open type of installation, with a different number of "seats", waterproof, etc. To give the designation of each is too long and useless. It is important to remember how the main groups are depicted, and the number of contact groups is determined by the strokes.

Designation of sockets in the drawings
Sockets for single-phase network 220 V are indicated on the diagrams in the form of a semicircle with one or more segments sticking up. The number of segments is the number of sockets on one housing (illustrated in the photo below). If only one plug can be plugged into the outlet, one segment is drawn up, if two, two, etc.

If you look at the images carefully, you will notice that conditional image, which is on the right, does not have the horizontal bar that separates the two halves of the icon. This feature indicates that the socket is flush-mounted, that is, it is necessary to make a hole in the wall under it, install a socket box, etc. The option on the right is for surface mounting. A non-conductive substrate is attached to the wall, and the socket itself is attached to it.
Also note that the lower part of the left schematic is crossed out. vertical line. This indicates the presence of a protective contact, to which grounding is applied. The installation of sockets with grounding is mandatory when turning on a complex household appliances type washing or, oven, etc.

You can’t confuse the symbol of a three-phase socket (for 380 V) with anything. The number of segments sticking up is equal to the number of conductors that are to this device connected - three phases, zero and earth. Total five.
It happens that the lower part of the image is painted over with black (dark). This means that the outlet is waterproof. These are placed on the street, in rooms with high humidity (baths, pools, etc.).
Switch display
The schematic designation of switches looks like a small circle with one or more L- or T-shaped branches. Branches in the form of the letter "G" designate an open-mounted switch, with the form of the letter "T" - flush-mounted. The number of taps displays the number of keys on this device.

In addition to the usual ones, they can stand - to be able to turn on / off one light source from several points. Two letters "G" are added to the same small circle from opposite sides. This is the designation of a single-key pass-through switch.

Unlike conventional switches, in these, when using two-button models, one more bar is added parallel to the top one.
Lamps and fixtures
Lamps have their own designations. Moreover, fluorescent lamps (fluorescent) and incandescent lamps differ. The diagrams even show the shape and size of the fixtures. In this case, you just need to remember how each type of lamp looks on the diagram.

Radioelements
When reading circuit diagrams of devices, you need to know the symbols for diodes, resistors, and other similar elements.

Knowing the conditional graphic elements will help you read almost any diagram - some kind of device or electrical wiring. The ratings of the required parts are sometimes affixed next to the image, but in large multi-element diagrams they are written in a separate table. It contains the letter designations of the circuit elements and the denominations.
Letter designations
In addition to the fact that the elements on the diagrams have conditional graphic names, they have letter designations, which are also standardized (GOST 7624-55).
| Name of electrical circuit element | Letter designation | |
|---|---|---|
| 1 | Switch, controller, switch | IN |
| 2 | Electric generator | G |
| 3 | Diode | D |
| 4 | Rectifier | Vp |
| 5 | Sound alarm (bell, siren) | Sv |
| 6 | Button | Kn |
| 7 | incandescent lamp | L |
| 8 | Electrical engine | M |
| 9 | Fuse | Etc |
| 10 | Contactor, magnetic switch | TO |
| 11 | Relay | R |
| 12 | Transformer (autotransformer) | Tr |
| 13 | plug connector | W |
| 14 | Electromagnet | Em |
| 15 | Resistor | R |
| 16 | Capacitor | WITH |
| 17 | Inductor | L |
| 18 | Control button | Ku |
| 19 | Terminal switch | Kv |
| 20 | Throttle | dr |
| 21 | Telephone | T |
| 22 | Microphone | Mk |
| 23 | Speaker | Gr |
| 24 | Battery (galvanic cell) | B |
| 25 | Main engine | Dg |
| 26 | Cooling pump motor | Before |
Please note that in most cases Russian letters are used, but the resistor, capacitor and inductor are indicated in Latin letters.
There is one subtlety in the designation of the relay. They are different type, respectively marked:
- current relay - RT;
- power - RM;
- voltage - PH;
- time - RV;
- resistance - RS;
- index - RU;
- intermediate - RP;
- gas - RG;
- with time delay - RTV.
Basically, these are only the most conventional symbols in electrical circuits. But most of the drawings and plans you can now understand. If you need to know images of rarer elements, study GOSTs.
Reading electrical diagrams is a necessary skill for representing the operation of electrical networks, nodes, as well as various equipment. Not a single specialist will proceed with the installation of equipment until he has familiarized himself with the regulatory accompanying documents.
Schematic diagrams allow the designer to convey a complete report about the product in a compressed form to the user, using conditionally graphic symbols(UGO). To avoid confusion and waste when assembling according to drawings, alphanumeric designations are listed in single system design documentation (ESKD). All circuit diagrams are developed and applied in full accordance with GOSTs (21.614, 2.722-68, 2.763-68, 2.729-68, 2.755-87). The GOST describes the elements, provides a decoding of the values.
Reading blueprints
The circuit diagram shows all the elements, parts and networks that make up the drawing, electrical and mechanical connections. Reveals the full functionality of the system. All elements of any electrical circuit correspond to the designations positioned in GOST.
A list of documents is attached to the drawing, in which all elements and their parameters are prescribed. Components are specified in alphabetical order, taking into account digital sorting. The list of documents (specification) is indicated on the drawing itself, or is taken out as separate sheets.
The order of studying the drawings
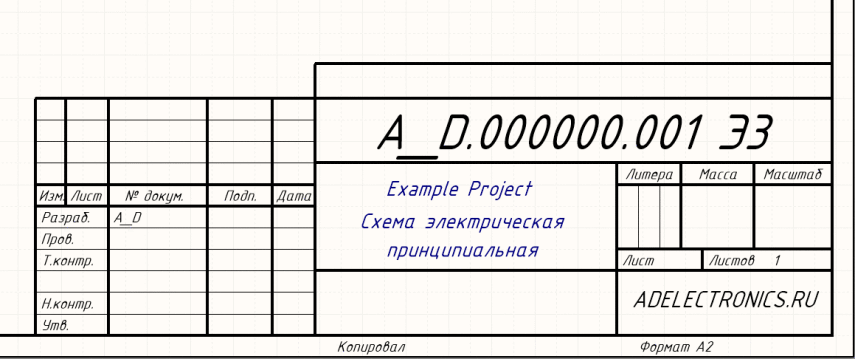
First, the drawing type is determined. According to GOST 2.702-75, each graphic document corresponds to the individual code. All electrical drawings have the letter "E" and the corresponding digital value from 0 to 7. The code "E3" corresponds to the electrical circuit diagram.
Reading the circuit diagram:
- Visually get acquainted with the presented drawing, pay attention to the indicated notes and technical requirements.
- Find on the schematic image all the components indicated in the list of the document;
- Determine the power source of the system and the type of current (single-phase, three-phase);
- Find the main nodes, and determine their power source;
- Familiarize yourself with the elements and devices of protection;
- To study the control method indicated on the document, its tasks and algorithm of actions. Understand the sequence of actions of the device when starting, stopping, short circuit;
- Analyze the operation of each section of the chain, determine the main components, auxiliary elements, study the technical documentation of the listed parts;
- Based on the studied data of the document, draw a conclusion about the processes occurring in each link of the chain shown in the drawing.
Knowing the sequence of actions, alphanumeric symbols, you can read any electrical circuit.

Graphic symbols
The circuit diagram has two varieties - single-line and full. On a single-line drawing, only a power wire with all elements is drawn, if the main network does not differ in individual additions from the standard one. Two or three slashes applied to the wire line indicate single-phase or three-phase network, respectively. The entire network is drawn in full and generally accepted symbols are affixed in electrical circuits.
Single line electrical circuit diagram, single-phase network

Types and meaning of lines
- Thin and thick solid lines - in the drawings depict the lines of electrical, group communication, lines on the elements of the UGO.
- Dashed line - indicates the shielding of the wire or devices; denotes a mechanical connection (motor - gearbox).
- A thin dash-dotted line - is intended to highlight groups of several components that make up parts of a device, or a control system.
- Dash-dotted with two dots - the line is disconnecting. Shows a breakdown of important elements. Indicates an object remote from the device that is associated with a mechanical or electrical system.


Network connecting lines are shown in full, but according to the standards, they are allowed to be cut off if they interfere with the normal understanding of the circuit. The break is indicated by arrows, next to it indicate the main parameters and characteristics electrical circuits.
A bold dot on the lines indicates a connection, a soldering of wires.
Electromechanical components
Schematic representation of electromechanical links and contacts

A - UGO coils of an electromechanical element (magnetic starter, relay)
B - thermal relay
C - device coil with mechanical blocking
D - contacts making (1), breaking (2), switching (3)
E - button
F - designation of a switch (knife switch) on the electrical circuit of the UGO of some measuring instruments. Full list of these elements is given in GOST 2.729 68 and 2.730 73.
Elements of electrical circuits, devices

| Number in the picture | Description | Number in the picture | Description |
|---|---|---|---|
| 1 | Electricity meter | 8 | electrolytic capacitor |
| 2 | Ammeter | 9 | Diode |
| 3 | Voltmeter | 10 | Light-emitting diode |
| 4 | temperature sensor | 11 | Diode optocoupler |
| 5 | Resistor | 12 | Image of npn transistor |
| 6 | Rheostat (variable resistor) | 13 | Fuse |
| 7 | Capacitor |
UGO time relays, buttons, switches, limit switches are often used in the development of electric drive circuits.

Schematic representation of a fuse. When reading an electrical circuit, you should carefully consider all the lines and parameters of the drawing so as not to confuse the purpose of the element. For example, a fuse and a resistor have minor differences. In the diagrams, the power line is depicted passing through the fuse, the resistor is drawn without internal elements.

The image of the circuit breaker in the full diagram
Contact switching device. Serves automatic protection electrical network from accidents, short circuit. Operated mechanically or electrically.

Circuit breaker on a single line diagram

The transformer is a steel core with two windings. There are single and three-phase, step-up and step-down. It is also divided into dry and oil, depending on the method of cooling. Power varies from 0.1 MVA to 630 MVA (in Russia).
UGO transformers
![]()
Designation of current transformers on a complete (a) and single-line (c) circuit
![]()
Graphic designation of electrical machines (EM)
Electric motors, depending on the type, are capable of more than just consuming energy. When developing industrial systems, motors are used that, when there is no load, generate energy into the network, thereby reducing costs.
A - Three-phase electric motors:
1 - Asynchronous with squirrel-cage rotor
2 - Asynchronous with squirrel-cage rotor, two-speed
3 - Asynchronous with a phase rotor
4 - Synchronous electric motors; generators.
B - DC commutator motors:
1 - with excitation of the winding from a permanent magnet
2 - Electric machine with excitation coil
In conjunction with electric motors, the diagrams show magnetic starters, soft starters, a frequency converter. These devices are used to start electric motors, the smooth operation of the system. The last two elements protect the network from "drawdown" of voltage in the network.
UGO magnetic starter in the diagram

Switches perform the function of switching equipment. Disable and enable certain sections of the network, as needed.
Graphic symbols in the electrical circuits of mechanical switches

Conditional graphic designations of sockets and switches in electrical circuits. They are included in the developed drawings of the electrification of houses, apartments, and industries.


Bell on the electrical diagram according to UGO standards with the indicated size

UGO dimensions in electrical diagrams
On the diagrams, the parameters of the elements included in the drawing are applied. Prescribed full information about the element, capacitance, if it is a capacitor, Rated voltage, the resistance for the resistor. This is done for convenience, so as not to make a mistake during installation, not to waste time calculating and selecting the components of the device.
Sometimes the nominal data does not indicate, in this case the element parameters do not matter, you can select and install a link with a minimum value.
The accepted dimensions of the UGO are prescribed in the GOSTs of the ESKD standard.
 |
 |
 |
 |
 |
|
 |
 |
Dimensions in ESKD
The sizes of graphic and alphabetic images in the drawing, the thickness of the lines should not differ, but it is permissible to change them proportionally in the drawing. If in the symbols on various electrical circuits of GOST, there are elements that do not have information about the dimensions, then these components are performed in sizes corresponding to standard image UGO of the whole scheme.
UGO elements that are part of the main product (device) are allowed to draw smaller size compared to other elements.
Along with the UGO, for a more accurate definition of the name and purpose of the elements, a letter designation is applied to the diagrams. This designation is used for references in text documents and for application to the object. With the help of a letter designation, the name of the element is determined, if this is not clear from the drawing, technical parameters, quantity.
Additionally, one or more numbers are indicated with the letter designation, usually they explain the parameters. An additional letter code indicating the denomination, model, additional data is prescribed in the accompanying documents, or is displayed in the table on the drawing.
To learn how to read electrical circuits, it is not necessary to know by heart all the letter designations, graphic images of various elements, it is enough to navigate in the relevant ESKD GOSTs. The standard includes 64 GOST documents, which reveal the main provisions, rules, requirements and designations.
The main designations used on the diagrams according to the ESKD standard are given in Tables 1 and 2.
Table 1
|
First letter of the code (mandatory) |
Group of element types | Element Type Examples |
| A | Devices | Amplifiers, telecontrol devices, lasers, masers |
| B | Loudspeakers, microphones, thermoelectric sensing elements, ionizing radiation detectors, sound pickups, selsyns | |
| C | Capacitors | |
| D | Integrated analog digital circuits, logic elements, memory devices, delay devices | |
| E | Elements are different | Lighting devices, heating devices |
| F | Discrete flow and voltage protection elements, fuses, arresters | |
| G | Generators, power supplies, quartz oscillators | Batteries, accumulators, electrochemical and electrothermal sources |
| H | Indicating and signaling devices | Sound and light signaling devices, indicators |
| K | Relays, contactors, starters | Current and voltage relays, electrothermal relays, time relays, contactors, magnetic starters |
| L | Chokes for fluorescent lighting | |
| M | Engines | DC and AC motors |
| P | Indicating, recording and measuring instruments, counters, clocks | |
| Q | Disconnectors, short circuiters, circuit breakers (power) | |
| R | Resistors | Variable resistors, potentiometers, varistors, thermistors |
| S | Switching devices in control, signaling and measuring circuits | Switches, switches, switches triggered by various influences |
| T | Current and voltage transformers, stabilizers | |
| U | Converters of electrical quantities into electrical, communication devices | Modulators, demodulators, discriminators, inverters, frequency converters, rectifiers |
| V | Electronic tubes, diodes, transistors, thyristors, zener diodes | |
| W | Microwave lines and elements, antennas | Waveguides, dipoles, antennas |
| X | Contact connections | Pins, sockets, collapsible connections, current collectors |
| Y | Electromagnetic clutches, brakes, cartridges | |
| Z | Terminal devices, filters, limiters | Modeling lines, quartz filters |
The main two-letter designations are given in Table 2
| First letter of the code (mandatory) | Group of element types | Element Type Examples | Two letter code |
| A | Device (general designation) | ||
| B | Converters of non-electrical quantities into electrical quantities (except generators and power supplies) or vice versa analog or multi-digit converters or sensors for indicating or measuring | Speaker | BA |
| Magnetostrictive element | BB | ||
| Detector of ionizing elements | BD | ||
| Selsyn - receiver | BE | ||
| Phone (capsule) | bf | ||
| Selsyn - sensor | BC | ||
| Thermal sensor | BK | ||
| Photocell | BL | ||
| Microphone | BM | ||
| Pressure meter | BP | ||
| Piezo element | BQ | ||
| Speed sensor (tachogenerator) | BR | ||
| Pickup | BS | ||
| Speed sensor | BV | ||
| C | Capacitors | ||
| D | Integrated circuits, microassemblies | Circuit integrated analog | DA |
| Integrated circuit, digital, logic element | DD | ||
| Information storage device | D.S. | ||
| delay device | DT | ||
| E | Elements are different | A heating element | EK |
| Lighting lamp | EL | ||
| Igniter | ET | ||
| F | Surge arresters, fuses, protective devices | Discrete instantaneous current protection element | FA |
| Discrete current protection element of inertial action | FP | ||
| fuse | FU | ||
| Discrete voltage protection element, arrester | FV | ||
| G | Generators, power supplies | Battery | GB |
| H | Indicator and signal elements | Sound alarm device | HA |
| Symbolic indicator | HG | ||
| Light signaling device | HL | ||
| K | Relays, contactors, starters |
Current relay | KA |
| Relay index | KH | ||
| Relay electrothermal | KK | ||
| Contactor, magnetic starter | KM | ||
| Time relay | KT | ||
| Voltage relay | KV | ||
| L | Inductors, chokes | Fluorescent lighting choke | LL |
| M | Engines | - | - |
| P | Instruments, measuring equipment | Ammeter | PA |
| Pulse counter | PC | ||
| Frequency meter | PF | ||
| Note. PE combination not allowed | Active energy meter | PI | |
| Reactive Energy Meter | PK | ||
| Ohmmeter | PR | ||
| Recording device | PS | ||
| Clock, action time meter | PT | ||
| Voltmeter | PV | ||
| Wattmeter | PW | ||
| Q | Switches and disconnectors in power circuits | Automatic switch | QF |
| short circuit | QK | ||
| Disconnector | QS | ||
| R | Resistors | Thermistor | RK |
| Potentiometer | RP | ||
| Measuring shunt | RS | ||
| Varistor | EN | ||
| S | Switching devices in control, signaling and measuring circuits. Note. The designation SF is used for devices without power circuit contacts. |
Breaker or switch | SA |
| push button switch | SB | ||
| Automatic switch | SF | ||
| Switches triggered by various influences: - from the level |
SL | ||
| - from pressure | SP | ||
| - from the position (travel) | SQ | ||
| - on the frequency of rotation | SR | ||
| - on temperature | SK | ||
| T | Transformers, autotransformers | Current transformer | TA |
| Electromagnetic Stabilizer | TS | ||
| voltage transformer | TV | ||
| U | Communication devices. Electrical to electrical converters |
Modulator | UB |
| Demodulator | UR | ||
| Discriminator | UI | ||
| Frequency converter, inverter, frequency generator, rectifier | USD | ||
| V | Electrovacuum devices, semiconductor | diode, zener diode | VD |
| Electrovacuum device | VL | ||
| Transistor | VT | ||
| Thyristor | VS | ||
| W | Lines and elements of microwave antennas | coupler | W.E. |
| short circuit | WK | ||
| Valve | WS | ||
| Transformer, heterogeneity, phase shifter | wt | ||
| Attenuator | WU | ||
| Antenna | WA | ||
| X | Contact connections | Current collector, sliding contact | XA |
| Pin | XP | ||
| Nest | XS | ||
| Collapsible connection | XT | ||
| High frequency connector | XW | ||
| Y | Mechanical devices with electromagnetic drive | Electromagnet | YA |
| Brake with electromagnetic drive | YB | ||
| Coupling with electromagnetic drive | YC | ||
| Electromagnetic chuck or plate | YH | ||
| Z | Terminal devices Filters. Limiters | limiter | ZL |
| Quartz filter | ZQ |
Related videos
In this article, we will consider the designation of radio elements in the diagrams.
Where to start reading diagrams?
In order to learn how to read diagrams, first of all, we must study what this or that radio element looks like in the diagram. In principle, there is nothing complicated about this. The whole point is that if there are 33 letters in the Russian alphabet, then in order to learn the designations of radio elements, you will have to try hard.
Until now, the whole world cannot agree on how to designate this or that radio element or device. Therefore, keep this in mind when you collect bourgeois schemes. In our article, we will consider our Russian GOST version of the designation of radioelements
Learning a simple circuit
Okay, more to the point. Let's look at a simple electrical circuit of the power supply, which used to flash in any Soviet paper publication:
If you have been holding a soldering iron in your hands for more than a day, then everything will immediately become clear to you at a glance. But among my readers there are those who are faced with such drawings for the first time. Therefore, this article is mainly for them.
Well, let's analyze it.
Basically, all diagrams are read from left to right, just like you read a book. Any different scheme can be represented as a separate block, to which we supply something and from which we remove something. Here we have a power supply circuit, to which we supply 220 volts from the outlet of your house, and a constant voltage comes out from our block. That is, you must understand what is the main function of your circuit. You can read it in the description for it.
How radio elements are connected in a circuit
So, it seems that we have decided on the task of this scheme. Straight lines are wires, or printed conductors, along which electric current will run. Their task is to connect radio elements.

The point where three or more conductors join is called node. We can say that in this place the wiring is soldered:

If you look closely at the circuit, you can see the intersection of two conductors

Such an intersection will often flash in the diagrams. Remember once and for all: at this point the wires do not connect and they must be isolated from each other. In modern circuits, you can most often see this option, which already visually shows that there is no connection between them:

Here, as it were, one wire goes around the other from above, and they do not contact each other in any way.
If there was a connection between them, then we would see this picture:

The letter designation of radio elements in the scheme
Let's take a look at our diagram again.
As you can see, the scheme consists of some obscure icons. Let's take a look at one of them. Let it be the R2 icon.

So, let's deal with the inscriptions first. R means . Since he is not the only one in our scheme, the developer of this scheme gave him the serial number “2”. There are 7 of them in the scheme. Radio elements are generally numbered from left to right and top to bottom. A rectangle with a dash inside already clearly shows that this is a fixed resistor with a power dissipation of 0.25 watts. Also next to it is written 10K, which means its face value is 10 Kiloom. Well, something like this...
How are the other radioelements designated?
To designate radio elements, single-letter and multi-letter codes are used. Single letter codes are group to which the element belongs. Here are the main groups of radio elements:
A - This various devices(e.g. amplifiers)
IN - converters of non-electric quantities into electrical ones and vice versa. This may include various microphones, piezoelectric elements, speakers, etc. Generators and power supplies here do not apply.
WITH – capacitors
D – integrated circuits and various modules
E - different elements that do not fall into any group
F – arresters, fuses, protective devices
H – indicating and signaling devices, e.g. sound and light indication devices
K – relays and starters
L – inductors and chokes
M – engines
R – instruments and measuring equipment
Q - switches and disconnectors in power circuits. That is, in circuits where a large voltage and a large current “walk”
R - resistors
S - switching devices in control, signaling and measurement circuits
T – transformers and autotransformers
U - Converters of electrical quantities into electrical, communication devices
V – semiconductor devices
W – microwave lines and elements, antennas
X - contact connections
Y – mechanical devices with electromagnetic drive
Z – terminal devices, filters, limiters
To clarify the element, after the one-letter code comes the second letter, which already means element type. Below are the main types of elements along with the group letter:
BD – ionizing radiation detector
BE – synchro-receiver
BL – photocell
BQ – piezoelectric element
BR – speed sensor
BS - pickup
BV - speed sensor
BA - loudspeaker
BB – magnetostrictive element
BK – thermal sensor
BM - microphone
BP - pressure meter
BC – synchro sensor
DA – integrated analog circuit
DD – integrated digital circuit, logic element
D.S. - information storage device
DT - delay device
EL - lighting lamp
EK - a heating element
FA – instantaneous current protection element
FP – current protection element of inertial action
FU - fuse
FV – voltage protection element
GB - battery
HG – symbolic indicator
HL - light signaling device
HA - sound alarm device
KV – voltage relay
KA – current relay
KK – electrothermal relay
KM - magnetic switch
KT – time relay
PC – pulse counter
PF – frequency meter
PI – active energy meter
PR - ohmmeter
PS - recording device
PV - voltmeter
PW - wattmeter
PA - ammeter
PK – reactive energy meter
PT - watch
QF
QS - disconnector
RK – thermistor
RP - potentiometer
RS – measuring shunt
EN – varistor
SA – switch or switch
SB - push button switch
SF - Automatic switch
SK – temperature switches
SL – level switches
SP – pressure switches
SQ – position-operated switches
SR – switches triggered by rotational speed
TV – voltage transformer
TA - current transformer
UB – modulator
UI – discriminator
UR – demodulator
USD – frequency converter, inverter, frequency generator, rectifier
VD - diode, zener diode
VL - electrovacuum device
VS – thyristor
VT –
WA – antenna
wt - phase shifter
WU - attenuator
XA – current collector, sliding contact
XP - pin
XS - nest
XT - collapsible connection
XW – high frequency connector
YA – electromagnet
YB – brake with electromagnetic drive
YC – clutch with electromagnetic drive
YH – electromagnetic plate
ZQ – quartz filter
Graphic designation of radio elements in the circuit
I will try to give the most popular designations of the elements used in the diagrams:
Resistors and their types

A) general designation
b) power dissipation 0.125 W
V) power dissipation 0.25 W
G) power dissipation 0.5 W
d) power dissipation 1 W
e) power dissipation 2 W
and) power dissipation 5 W
h) power dissipation 10 W
And) power dissipation 50 W
Resistors variable

Thermistors

Strain gauges

Varistors

Shunt

Capacitors

a) the general designation of the capacitor
b) varicond
V) polar capacitor
G) trimmer capacitor
d) variable capacitor
Acoustics

a) head phone
b) loudspeaker (speaker)
V) general designation of a microphone
Diodes

A) diode bridge
b) the general designation of the diode
V) zener diode
G) double-sided zener diode
d) bidirectional diode
e) Schottky diode
and) tunnel diode
h) reversed diode
And) varicap
To) Light-emitting diode
l) photodiode
m) emitting diode in an optocoupler
n) a radiation-receiving diode in an optocoupler
Meters of electrical quantities

A) ammeter
b) voltmeter
V) voltammeter
G) ohmmeter
d) frequency meter
e) wattmeter
and) faradometer
h) oscilloscope
Inductors

A) coreless inductor
b) core inductor
V) trimmer inductor
transformers

A) the general designation of the transformer
b) transformer with output from the winding
V) current transformer
G) transformer with two secondary windings (maybe more)
d) three-phase transformer
Switching devices

A) closing
b) opening
V) opening with return (button)
G) closing with return (button)
d) switching
e) reed switch
Electromagnetic relay with different groups of contacts

Circuit breakers

A) general designation
b) the side that remains energized when the fuse blows is highlighted
V) inertial
G) fast acting
d) thermal coil
e) switch-disconnector with fuse
Thyristors

bipolar transistor

unijunction transistor

Conventional graphic designations of switching products - switches, toggle switches, electrical relays are built on the basis of contact signs: closing (Fig. 1, b), opening (c, d) and switching (d, f). Contacts that immediately close or open two circuits are designated as shown in fig. 1, (w, and And).
For the initial position of the closing contacts on electronic circuits ah, the open state of the switched electronic circuit is accepted, opening - closed, switching - the position in which one of the circuits is closed, the other is open (the exception is the contact with the neutral position). UGO of all contacts is allowed to be depicted only in mirror or rotated by 90 ° positions.
The standardized UGO system also provides for the reflection of such design features as the non-simultaneity of operation of the 1st or several contacts in the group, the absence or presence of their fixation in one of the positions.

Rice. 1

Rice. 2
So, if it is necessary to show that the contact closes or opens earlier than others, the sign of its moving part is supplemented with a small stroke directed towards the operation (Fig. 2, a, b), and if later, with a stroke directed to the reverse side (Fig. 2, c, d).
The absence of fixation in the closed or open positions (self-return) is indicated by a small triangle, the top of which is oriented towards the initial position of the movable part of the contact (Fig. 2, e, f), and fixation is indicated by a circle on the sign of its fixed part (Fig. 2, g, i).
The last two UGOs on electronic circuits are used in cases where it is necessary to show a type of switching product, the contacts of which usually do not possess these qualities.
The conventional graphic designation of switches on electronic circuits (Fig. 3) is built on the basis of the signs of normally open and normally closed contacts. With all this, it is meant that the contacts are fixed in both positions, that is, they do not have a self-return.

Rice. 3.
The letter code of products of this group is determined by the switched circuit and the design of the circuit breaker. If the latter is placed in the control, signaling, measurement circuit, it is denoted by the Latin letter S, and if it is in the power circuit, by the letter Q. The control method is reflected in the 2nd letter of the code: push-button switches and toggle switches are denoted by the letter B (SB), automatic - by the letter F (SF), all others - by the letter A (SA).
If there are several contacts in the switch, the signs of their moving parts on the electronic circuits are placed in parallel and connected by a mechanical connection line. As an example, in fig. 3 shows the conventional graphic designation of the switch SA2, containing one break and two make contacts, and SA3, consisting of 2 make contacts, and one of which (in the figure - right) closes later than the other.
Switches Q1 and Q2 are used to switch power circuits. Contacts Q2 are mechanically connected to any control, as evidenced by a segment of the dashed strip. When depicting contacts in different parts of the circuit, their belonging to one switching product is usually reflected in an alphanumeric reference designation (SA 4. 1, SA4.2, SA4.3).

Rice. 4.
Similarly, on the basis of the sign of the switching contact, conventional graphic symbols of on-off toggle switches are built on electrical circuits (Fig. 4, SA1, SA4). If the toggle switch is fixed not only in the latter, but also in the middle (neutral) position, the sign of the moving part of the contact will interfere between the signs of the fixed parts, the possibility of turning it in both directions is shown by a dot (SA2 in Fig. 4). The same is done in this case, if you need to show on the diagram a toggle switch, fixed exclusively in the middle position (see Fig. 4, SA3).
A distinctive feature of the UGO of push-button switches and toggle switches is the button sign connected to the designation of the moving part of the contact by a mechanical connection line (Fig. 5). With all this, if the conditional graphic designation is built on the basis of the main contact sign (see Fig. 1), then this means that the switch (toggle switch) is not fixed in the pressed position (when the button is released, it returns to its initial position).

Rice. 5.

If it is necessary to show fixation, they use signs of contacts with fixation specially created for this purpose (Fig. 6). Return to the initial position when another button of the toggle switch is pressed is shown in this case by the sign of the locking mechanism, attaching it to the symbol of the movable part of the contact from the side opposite to the button symbol (see Fig. 6, SB1.1, SB 1.2). If the return occurs when the button is pressed again, the symbol of the locking mechanism is depicted instead of the mechanical connection band (SB2).
Multi-position toggle switches (for example, biscuit) are designated, as shown in fig. 7. Here SA1 (for 6 positions and 1 direction) and SA2 (for 4 positions and 2 directions) are toggle switches with leads from moving contacts, SA3 (for 3 positions and 3 directions) - without leads from them. The conditional graphic designation of individual contact groups is depicted in the diagrams in a similar position, belonging to the same toggle switch is usually shown in positional designation (see Fig. 7, SA1.1, SA1.2).

Rice. 7.

For the image of multi-position toggle switches with complex switching, GOST provides several methods. Two of them are shown in Fig. 8. Toggle switch SA1 - 5 positions (they are indicated by numbers; letters a-d are entered only for explanation). In position 1, chains a and b, d and e are connected to each other, in positions 2, 3, 4 - chains b and d, a and c, a and e, respectively, in position 5 - chains a and b, c and d.
Toggle switch SA2 - 4 positions. In the first of them, chains a and b are closed (the points located below them say about this), in the 2nd - chains c and d, in the 3rd - c and d, in the fourth - b and d.
Zorin A. Yu.
School for electrician
Electronic drawings and diagrams
The ability to read electrical circuits, the ability to recognize various conventional graphic symbols of switching devices and network elements indicated on the drawing of a house will allow you to understand the arrangement of wiring on your own.
A diagram understandable to the user gives him the answer to the question of which wires to connect to certain terminals of the electrical appliance. But to read a drawing, it is not enough to remember the symbols of various electrical devices, you also need to understand what they do, what functions they perform in order to capture the relationship between them, which is necessary in order to understand the operation of the entire system.
A lot of time is devoted to the study of the entire range of electrical devices in special educational institutions, and there is no way in one article to contain the designation of all these devices, with a detailed description of them. functionality and characteristic relationships with other devices.
Therefore, you need to start by studying simple circuits, which includes a small set of elements.

Conductors, lines, cables
The most common component of any electrical network is the designation of wires. In the diagrams, it is indicated by a line. But you need to remember that one segment in the drawing can mean:
- one wire, which is the electrical connection between the contacts;
- two-wire single-phase, or four-wire three-phase group electrical communication line;
- electrical cable, which includes a whole set of power and signal groups of electrical connections.
As you can see, already at the stage of studying seemingly simple wires, there are complex and varied designations of their varieties and interactions.
 Image of junction boxes, shields
 This fragment from table No. 6 of GOST 2.721-74 shows various designations of elements, both simple single-core connections and their intersections, and conductor bundles with branches.
 Image of wires, lamps and plugs
 It makes no sense to start memorizing all these icons. They themselves will be deposited in the mind after studying various drawings, in which from time to time you will have to look into this table.
Network components
A set of elements, consisting of a lamp, a switch, a socket, is sufficient for the functioning of a living room, it provides lighting and power for electrical appliances.
By learning their designation, you can easily understand the arrangement of wiring in your room, or even design your own wiring plan, taking into account immediate needs.
 Designation of a single-gang switch, a two-gang switch and a pass-through switch
 Looking at table No. 1 of GOST 21.608-84, one may be surprised at the variety of electrical products available in everyday life. While at home and reading this article, you should look around and find in your room the electrical components that correspond to those indicated in the table. For example, a socket is indicated in the diagram by a semicircle.


There are many varieties of them (only phase and zero, with an additional ground contact, double, block with switches, hidden, etc.), so each has its own graphic designation, as well as many types of switches.
 Example wiring diagram small apartment
 A little practice to remember
Having highlighted the found elements, it is advisable to try to draw them, even according to the rules indicated in table No. 2. This exercise will help you remember the selected components.
Having the outline of graphic symbols, you can connect them with lines, and get a wiring diagram in the room. Since the wires are hidden in the wall covering, the installation drawing cannot be drawn, but the wiring diagram will be correct.
 Example of a simple circuit
 The oblique lines indicate the number of conductors in the line. The arrows indicate the outputs to the shield with circuit breakers and RCDs. Line of blue color means connecting with a two-wire cable to the distribution box, from which three wires go to the switch and the lamp.
Black shows three-wire wiring with protective conductor PE. This figure is for illustration purposes only. To design complex electrical systems, you need to take a whole course of a higher specialized educational institution.
But, having learned a few common symbols, you can freehand draw the wiring of a room, garage, or an entire house, and work on it, embodying it in reality.
RCD, automatic devices, electrical panel
To complete the picture, you also need to find out the designation of junction boxes, circuit breaker, RCD, counter.

The image shows that the single-pole circuit breaker differs from the bipolar one by the presence of oblique lines on the designation of the connection wires.
Protective systems
To be able to understand the arrangement of all the wiring of a country house (not only the power grid), you also need to study the means of lightning protection, zero, phase, motion sensor icon and other signaling means of the POS (fire and security alarm).
 scheme of lightning protection of a country house with a wire lightning rod installed on the roof
 The figure shows the scheme of lightning protection of a country house with a wire lightning rod installed on the roof:
- wire lightning rod;
- input of air overhead lines and grounding of overhead line hooks on the wall;
- conductive wire;
- ground loop.
Alarm sensors have their own specific designation, in the passports of some manufacturers they may differ. The most typical symbols represent the PIC tools described below.
This figure shows the plan of the cottage with the depicted wiring diagram various sensors fire and security alarm.
 An example of a cottage plan
 This article shows that part of the designations that relates to the arrangement of a house or apartment. For a more complete acquaintance with the graphic symbols of electrical engineering and other industries, you need to study GOST and various reference books.
And once again it is worth recalling that it is not enough to learn the icons, you need to understand the principle of operation of the designated elements in electrics.


