Almost all home devices, ranging from phones to laptops, are equipped with their own microphone for communication. Particularly zealous fans of programs such as Skype or Mail Agent even buy stationary microphones to improve communication with subscribers. Stand-alone devices, wireless headsets, built-in mechanisms - today the microphone can take on the most bizarre forms. However, like all devices, it can break unexpectedly, which is why it will be useful for everyone to learn how to make a microphone out of headphones.
In most cases, the owners simply dispose of the failed electrical appliance and go to buy a new one. But in this matter there is no need to rush, because everyone can assemble a microphone from ordinary headphones. To turn your phone headphones into a high-quality microphone for your computer, you will need to prepare suitable materials, namely:
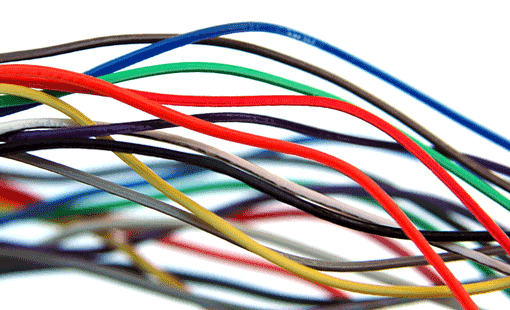
- headphones of any company, the simplest complete headphones from the phone will do;
- 3.5 mm plug, better known as "jack";

- high-quality wires for connections (carefully examine their integrity, do not damage the insulating material);
- soldering iron of sufficient power;
- a sufficient amount of solder, rosin.
You can choose one of two options. You can use the headphones directly, or you can turn them into a full-fledged headset. The procedure will not take you much time and will not cause difficulties.
First way
Making a microphone out of old headphones is the most economical way out of the situation. Upon completion of the work, you will be able to get not only a new device, but also breathe life into useless "trash". First you have to do soldering work.


If you strictly followed the instructions and did not overdo it with solder, which could cause a short circuit in the soldering points, then when you connect the headset to the laptop, you will hear slight clicks. This means that the microphone is working normally.
Second way
This is a much less costly and cost effective way to build a microphone at home. To do this, you will need a phone, a computerBluetooth adapter and headphones included.

Connect your mobile device to your computer via a Bluetooth connection. Plug a headset into your phone jack and you'll have a working microphone. This method will allow you to quickly restore the lost connection, but it is not recommended to use it on an ongoing basis.
This scheme is used as a temporary replacement when there is no time or money to purchase a good microphone.

Such a system is unstable, because the Bluetooth connection can be interrupted at the most unexpected moment. Added to this is the need to constantly monitor the battery charge in the phone. Connecting it to the outlet will add wires, which can make it difficult to use.
As you can see, from ordinary phone headphones, which are included with most models, you can make an excellent headset for communication. Of course, it will never replace a real microphone. Do-it-yourself devices can significantly inferior in quality transmitted sound to factory counterparts. However, with quality parts on hand, you can try to build a real microphone.
You can not only play around with voice search on Google (there are a lot of extensions for the Chrome browser for this, they are almost all the same, they use the same thing, but it seemed to me the most convenient extension “Voice search 2.02 - a microphone icon appears in all input forms by clicking on which can be said or dictated rather, for example, a search query as in the picture) but already with speech recognition somehow, but still work.
From Siri on Apple, I didn’t manage to achieve some kind of reciprocity, to the extent that it could be “used” for something serious, all the same, “imprisonment” for English affects, and I already know the addresses of the nearest dumplings. In any case, Google remains the leader in speech recognition, voices, it's a pity there is no way to use it programmatically and in Russian.
So the main weak point of microphones is sensitivity, and then of course the price.
Here is an example of how you can get around these two restrictions and for very little money, and if you have the details listed below, then for free, get a fairly sensitive home-made microphone. A photo of how to do it yourself, a description of the work and a microphone diagram below.
Made by me homemade microphone has high sensitivity and is able to perceive even the ticking of the clock at a distance of several meters. It also allows you to record high-quality sound using a computer. The recording quality also depends on the capabilities of the sound card in the system unit. In the design of the microphone unit, components of end-of-life electronics are used to the maximum.
An electret microphone can be taken from any old radio (in extreme cases, from a mobile phone). I used two microphones at once (+), which made it possible to significantly expand the sound perception diagram. The signal from the microphones, amplified by the low-noise transistor VT1, is fed to the operational amplifier DA1 (see Fig. drawing - microphone diagram). The output of the amplifier can be connected to ordinary headphones or fed further to devices that record and process the signal (desktop computer, laptop, etc.).
Drawing 1. Microphone diagram
The microphone amplifier is powered by the battery of any old mobile phone. Its battery life is tens of hours. You can use a free USB port on your computer to charge the battery. The amplifier can be left constantly connected to the port, since the charging current is small. I took the wire with the USB connector from the mouse. The connector at the output of the amplifier used 03.5 mm, - as for headphones - from any player, the volume control - too, and the rest of the details, including the SA1 power switch, - any small-sized ones.
All components should be placed on a small fiberglass board (photo 1 - above). I glued a small piece of foam rubber to the battery, and laid the board on top (photo 2). All this was well pulled off with electrical tape and tried on the regulator knob (photo 3). Then, to eliminate interference and interference, such a “sandwich” was placed in a tin screen, which was soldered to a common wire (photo 4, 5).
Microphones must be fixed in a piece of dense soft material. After that, in a piece of foam rubber (which, for example, is used for washing a car), I cut out a niche and inserted the entire block into it (photo b, 7), and pulled a fabric cover over it (photo 8). It is only necessary to provide slots for the plug, switch and volume control.
 1 PC. handmade felt homemade fabric flowers craft feltro…
14.05 rub.
Free shipping★★ ★★ ★★ ★★ ★★ (4.80) | Orders (268)
DIY microphone amplifiers.
Amplifier for computer microphone with phantom power.
I got myself on the computer such a program as Skype. But here's one bad luck: you need to keep the microphone near your mouth so that the interlocutor can hear you well. I decided that the sensitivity of the microphone was not enough. And I decided to make an amplifier amplifier.
An Internet search turned up dozens of amplifier circuits. But they all needed a separate power source. I wanted to make an amplifier without an additional source, powered by the sound card itself. That would not have to change batteries or pull additional wires.
Before you fight the enemy, you need to know him by sight. Therefore, I have accumulated information on the Internet about the microphone device: https://oldoctober.com/en/microphone. The article tells how to make a computer microphone with your own hands. At the same time, I borrowed the idea itself: there is no need to break the finished device for my experiments, if you can do it yourself. A brief retelling of the article boils down to the fact that a computer microphone is an electret capsule. An electret capsule is, from an electrical point of view, an open-source field-effect transistor. This transistor is powered from the sound card through a resistor, which is also a signal current-to-voltage converter. Two clarifications to the article. Firstly, there is no resistor in the drain circuit in the capsule, I saw it myself when I took it apart. Secondly, the connection of the resistor and capacitor is done in the cable, not in the sound card. That is, one output is used to power the microphone, and the second - to receive the signal. That is, it turns out something like this scheme

Here, the left side of the picture is an electret capsule (microphone), the right side is a computer sound card.
Many sources write that the microphone is powered by a voltage of 5V. This is not true. In my sound card, this voltage was 2.65V. When the microphone power output was shorted to ground, the current was about 1.5mA. That is, the resistor has a resistance of about 1.7 kOhm. It was from such a source that it was required to power the amplifier.
As a result of experiments with microcap, such a scheme was born.

The capsule is powered through resistors R1, R2. Capacitor C1 is used to prevent negative feedback at signal frequencies. The capsule is supplied with a supply voltage equal to the voltage drop across the p-n junction. The signal from the capsule is isolated on the resistor R1 and fed to the base of the transistor VT1 for amplification. The transistor is connected according to the scheme with a common emitter with a load on the resistors R2 and the resistor in the sound card. Negative DC feedback through R1, R2 provides a relatively constant current through the transistor.
The whole structure was assembled by surface mounting directly on the microphone capsule. Compared to a microphone without an amplifier, the signal increased by about 10 times (22dB).

The whole structure was wrapped first with paper for insulation, and then with foil for shielding. The foil has contact with the primer body.
Microphone amplifier with single-wire power supply.
A microphone with a preamp placed in the case requires power wires to be connected to the device (in addition to a shielded signal wire). From a constructive point of view, this is not very convenient. The number of connecting wires can be reduced by applying the supply voltage through the same wire that carries the signal, i.e. the center conductor of the cable. It is this method of power supply that is used in the amplifier brought to the attention of readers. Its schematic diagram is shown in the figure.

The amplifier is designed to operate from an electret microphone of any type (for example, MKE-3). Power is supplied to the microphone through resistor R1. The sound signal from the microphone is fed to the base of the transistor VT1 through the coupling capacitor C1. The required bias at the base of this transistor (about 0.5 V) is set by the voltage divider R2R3. The amplified audio frequency voltage is allocated to the load resistor R5 and then goes to the base of the transistor VT2, which is included in the composite emitter follower, assembled on transistors VT2 and VT3. The emitter of the latter is connected to the upper contact of the XP1 connector (amplifier output), to which the central conductor of the connecting shielded cable is connected, the braid of which is connected to a common wire. Note that the presence of an emitter follower at the output of the preamplifier significantly reduces the level of interference at the microphone input.
Two more parts are mounted near the input connector of the device to which the microphone is connected: a load resistor R6, through which power is supplied, and an isolation capacitor C3, which serves to separate the audio signal from the DC component of the supply voltage.
The circuitry solution used in this amplifier provides automatic installation and stabilization of its operation mode. Let's see how this happens. After turning on the power, the voltage at the upper terminal of the XP1 connector increases to approximately 6 V. At the same time, the voltage at the base of the transistor VT1 reaches the opening threshold of 0.5 V and current begins to flow through the transistor. The voltage drop that occurs in this case across the resistor R5 causes the compound emitter follower transistor to open. As a result, the total current of the amplifier increases, and with it the voltage drop across the resistor R6 increases, after which the mode stabilizes.
Since the current gain of the composite emitter follower (it is equal to the product of the current gain of transistors VT2 and VT3) can reach several thousand, the stabilization of the mode is very tough. The amplifier as a whole works like a zener diode, fixing the output voltage at 6 V, regardless of the supply voltage. However, when using a power source with a different voltage, it is necessary to select the divider resistors R2R3 so that the voltage on the upper pin of the XP1 connector is equal to half the supply voltage. Curiously, the mode is practically impossible to change by adjusting the resistance of the load resistor R5. The voltage drop across it is always equal to the total opening voltage of the transistors of the composite emitter follower (about 1 V), and changes in its resistance only lead to a change in the current through the transistor VT1. The same applies to the resistor R6.
Even more interesting is the operation of the amplifier in AC amplification mode. The audio frequency voltage from the lower output of the resistor R5 is transmitted by an emitter follower with very little attenuation to the upper output - the output of the amplifier. In this case, the current through the resistor is constant and almost does not fluctuate with sound frequency. In other words, the only amplifying stage is loaded on the current generator, i.e. for very high resistance. The input impedance of the follower is also very high, and as a result the gain is very high. With a quiet conversation in front of a microphone, the amplitude of the output voltage can reach several volts. The R4C2 chain does not pass the variable component of the audio frequency signal to the power supply circuit of the microphone and voltage divider.
A single-stage amplifier is not at all inclined to self-excitation, therefore the location of the parts on the board does not really matter, it is advisable to place the input and output at different ends of the board.
Establishment is reduced to the selection of divider resistors R2R3 until half the supply voltage is obtained at the output. It is also useful to choose the resistor R1, focusing on the best sound of the signal taken from the microphone. If the input impedance of the radio with which this amplifier is used is less than 100 kOhm, the capacitance of the capacitor C3 should be increased accordingly.
Connecting a dynamic microphone to the microphone input of a computer sound card.
The microphone input of the sound card is intended for connecting an electret microphone. Pin assignment of the microphone input connector is shown in Fig. 1. The audio signal is input to the sound card through the TIP pin. The power of the electret microphone is supplied through the resistor R to the RING pin. The TIP and RING pins are connected together in the microphone cable.

Rice. one
Almost all $2-$4 multimedia microphones are suitable only for speech recognition, telephony, etc. Although these microphones usually have high sensitivity, they have a high level of non-linear distortion, insufficient overload capacity, and also a circular radiation pattern ( that is, they perceive signals equally well from any direction). Therefore, to record vocals at home, it is necessary to use a highly directional dynamic microphone, which allows you to minimize extraneous noise from the system unit fan and other sources.
A dynamic microphone can be connected directly to the microphone input of a sound card. The signal wire of the microphone cable must be soldered to the TIP contact, the shield to the GND contact, and the RING contact must be left free. If the microphone has two signal contacts - HOT and COLD, then connect the HOT contact to the TIP contact, and connect the COLD contact to GND. Since the sensitivity of a dynamic microphone is low compared to an electret microphone, a sufficient recording level is obtained only when the microphone is located at a distance of 3-5 centimeters from the performer's lips. This is not always acceptable as some types of microphones will "spit" despite the built-in windscreen. Such microphones must be placed farther from the performer, and to obtain a sufficient recording level, use a preamplifier. The diagram of the simplest preamplifier powered by the microphone input connector is shown in Fig. 2.

Rice. 2
This circuit works decently for me with the following ratings: R1, R3 - 100 kOhm, R2 - 470 kOhm, C1, C2 - 47 microfarads, VT1 - kt3102am (can be replaced with kt368, kt312, kt315).
The circuit is based on a classic transistor cascade with a common emitter. The load of the cascade is the resistor R of the sound card (Fig. 1). The gain depends on the parameters of the transistor VT1, the value of the feedback resistor R2 and the value of the resistor R of the sound card. Capacitor C1 is required for DC decoupling. Resistor R1 is used to eliminate clicks when connecting a microphone "on the go", if desired, you can exclude it.
On closer examination, it turned out that there was a constant voltage of about 2 V on the TIP pin of the microphone input of my SB LIVE 5.1. It was not possible to investigate the reason, and whether this is typical only for my copy of the sound card or for everyone. But it is absolutely certain that the performance of the circuit practically does not change when elements C2, R3 are excluded.
The advantage of this scheme is its simplicity. The disadvantages include large non-linear distortion - about 1% (1 kHz) at 1 mV at the input. It is possible to reduce non-linear distortion to 0.1% using an additional 100 Ohm resistor connected between the emitter of the transistor VT1 and the GND bus, while the gain decreases from 40 dB to 30 dB. The changes are shown in Fig. 3.

Rice. 3
Higher performance can be obtained using an external self-powered microphone amplifier connected to the line-in of the sound card. For example - assembled according to the scheme with a symmetrical input.
DIY microphone amplifier.
Probably, for many of you, there was a need to record sound on a computer, for example, when dubbing videos or creating clips. The use of Chinese inexpensive consumer goods is absolutely undesirable, firstly, because of the rather low sensitivity, and secondly, the quality of sound recording
it turns out *dirty*, sometimes even your own voice becomes unrecognizable.
High frequencies have a significant and unjustified blockage, and their durability leaves much to be desired.
A high-quality microphone, - alas, we can not afford it!
But, there is a way out! Many have old, still Soviet dynamic microphones, such as MD-52 or similar ones. Yes, even if they are not available, these copies can be bought for * mere pennies *. Do not try to connect such microphones directly to the sound card directly - the AF voltage at the output is too low. Therefore, we use the simplest microphone amplifier, on the widespread K538UN3 chip, its cost is less than 50 rubles. But we used an old chip soldered from an ancient cassette recorder. Directly, the microcircuit itself is connected according to a typical, common switching scheme, with a maximum gain. The amplifier is powered directly from the computer, the supply voltage is 12 V, although the operability is maintained even at - 5V, in this case, power can be taken from the USB connector.
Microphone amplifier. Scheme.

Electrolytic capacitors - any, for a voltage of 16V. The value of the capacitance of capacitors can be changed within small limits. The device can be assembled using a simple, hinged installation.
No tuning, the amplifier does not require and does not need shielding design. But, the use of shielded cables is desirable and not too long. Sample tests showed a relatively low level of self-noise, fairly high sensitivity and very decent sound quality, even on built-in computer sound cards such as AC97. The dynamic range is about 40 dB. To record sound on a computer, we used the Sound Forge program.
Well, a few more schemes for articles in the appendage.


Pure sound to you!
In this article I will tell you how to make a microphone, because a truly sensitive microphone can only be made with your own hands, more precisely, by remaking a standard microphone. Of course, many can argue with this statement, but not those who approached this issue seriously. Very often, people spend a huge amount of time setting up a microphone and finding the best combinations of a PC sound card and a microphone itself. In addition, if you have a laptop, then in most cases the sound systems in such computers also leave much to be desired. Well then, let's get down to business.
How to make a microphone yourself
In the design of the microphone unit, we will use elements of electronics that have already served their time. Take an electret microphone from any old tape recorder or radio. If there are none at home, then a microphone from a mobile phone will do. You can even use two microphones at once, this will allow you to significantly expand the direction of the sound. The signal from the microphone or microphones must be amplified by a low-noise transistor of the VT1 type, then the signal will be fed to an operational amplifier of the DA1 type. The output of this amplifier can be connected both to ordinary headphones and further to processing or recording devices (for example, a laptop or a desktop computer). We will power the amplifier from the battery of an old mobile phone. They (mobile phone batteries) are good because the battery life of a microphone from such a battery will be tens of hours. And to charge the battery, use any USB port on your computer. Now about the amplifier. It is quite possible to leave it included in the port all the time, since the charging current in this case will be very small. The wire with the USB connector can be taken from the mouse. At the output of the amplifier, it is best to use a 3.5 mm jack - the same as for the headphones from the player. The volume control is also suitable from the headphones, and the rest of the details, for example, the SA1 power switch, must be made up of any small-sized ones.
DIY microphone: finishing touches
Now we place the microphone components on a small board made of fiberglass. Next, glue a small piece of foam rubber onto the battery, and then lay the board on top. Now we tighten it all up with electrical tape and try on the regulator knob. After that, to eliminate interference and interference, we place our design in a tin screen, soldering it to a common wire. Please note that the microphone or microphones must be fixed in a piece of soft but dense material. Then we cut out a niche in a piece of foam rubber and insert the entire block into it, and from above we pull a fabric cover over it. By the way, foam rubber can also be used the one that is used for washing a car. Well, that's almost all - it remains only to make slots for the plug, as well as the volume control and switch. I note that such a microphone will be much better than any factory products, excluding, of course, professional equipment. But the fact is that for such equipment you will have to pay more than tens of thousands of rubles, and the cost of our product is a maximum of a thousand, given that we assembled it almost entirely from old parts. So, if you are not engaged in professional recording and you need a microphone for your personal purposes, then such a home-made design will come in handy.
You will need
- - shielded audio cable;
- - high-impedance earpiece;
- - low-resistance scientist (can be from a voice recorder or player);
- - radio broadcast speaker;
- - sound transformer;
- - soldering iron;
- - rosin;
- - tin;
- - electrical tape;
Instruction
The microphone can be made from a high-impedance earpiece, which is used in head phones. To do this, use a shielded cable to connect it to the appropriate connector of the amplifier or mixing console. Such a microphone is quite suitable for broadcasting or recording speech. But for recording or amplifying a piece of music, the quality will be insufficient. If you want a high quality wideband microphone, make one from a "radio dot" broadcast speaker.
Take the radio broadcast speaker and open its case. Inside, in addition to the speaker itself, you will also see an output speaker and a transformer, as well as a variable resistance resistor. You don't need the resistor right now, so unsolder it from the circuit and remove it from the case. Connect the speaker to the transformer directly.
Unsolder the plug and wire from the high-resistance winding of the transformer and in their place connect a shielded wire with the appropriate connector to plug into the microphone jack of a recording or amplifying device.
Such a microphone can be improved somewhat. For example, you can escape it. Paste the inside surface of the broadcast speaker cabinet with staniole or foil paper. You can use, for example, foil from cigarette packs. Make electrical contact between this shield and the audio cable shield, for example with a screw and a contact strip. This will get rid of interference from external electromagnetic fields.
You can also improve the sound quality of such a microphone. Connect an adjustable RC filter in series with the high-resistance winding of the transformer. This filter consists of a 510 pF capacitor and a 1 mΩ variable resistor connected in parallel. Fasten the resistor on the front panel of the radio in place of the previously removed volume control. Solder the filter and, connecting it to the amplifier, select the filter resistance for the best sound quality.
In a matching transformer circuit, you can use any low-impedance speaker, as well as an output transformer from any tube receiver. Instead of a speaker, you can use low-impedance headphones, including those from a telephone set or player. If you take a miniature earpiece from the player, then the whole structure can be made portable by placing the earpiece itself in a metal tube and shaping it as a corded microphone. In this case, place the step-up transformer in close proximity to the amplifier. All connections in this design must be made with shielded wire.


