Images:
FAQ:
Instructions for installing the firmware:
Rules:
- Carefully and clearly follow the instructions, all steps must be carried out strictly as indicated and with the attached files or links- If you have questions, please use the "" section, asking a question through "")
continuation of the rules ...
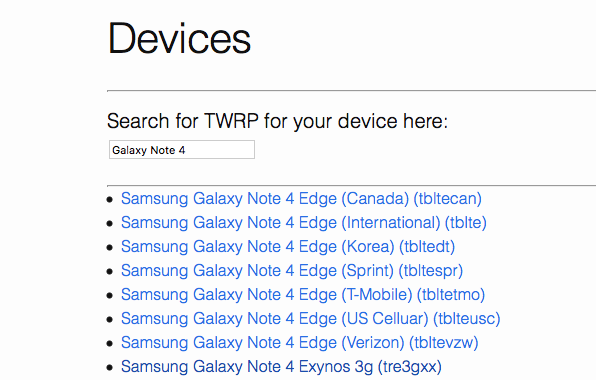
You can install recovery only on the model that is indicated in the description, the model must match up to each digit and letter
- Everything that you do with your smartphone, you do at your own peril and risk! Accordingly, the author is not responsible for a negative result!
- Charge your smartphone at least 50%
- Do not interact with the device during the direct installation process! (e.g. do not press buttons, etc.)
- If in doubt, read again!
- If you didn’t succeed, repeat the firmware again by reading the instructions again!
The recovery installation was checked on the files specified in the sources for download, you can use other files at your own risk!
Preparing for installation:
1. Download the necessary files to the computerRecovery in format .tar or .tar.md5
Archive with the Odin program
Drivers for samsung phones (Samsung USB Driver for Mobile Phones)
2. Disable unnecessary on the computer:
If you have Kies installed, then you have 2 options:
- Remove Kies
- Go to the application manager (ctrl + alt + del) and complete all the processes where Kies is written
If you have an antivirus, disable it.
3. Install the necessary programs:
Install Samsung USB Driver for Mobile Phones drivers
Unzip Odin PC (Extract Here)
Installation:
4. Transfer the device to Download Mode:Turn it off completely, everything should go out.
Hold simultaneously the three keys “Power + Volume Down + Home”
A warning appears, you need to click "Volume Up"
5. Install recovery:
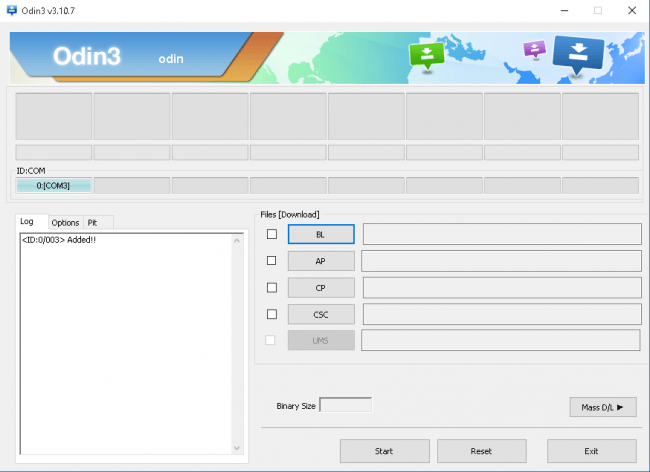
Run Odin3 (.exe), it should be in the folder of the same name
Leave a checkmark only on the “F. Reset Time »
Click on the PDA field and find the recovery file in the format .md5 or .tar (for example twrp-x.x.x.x-i9300.tar)
Connect the phone with the original cable to the computer, the first ID: COM field lights up in blue
If all the previous points are done, click "Start"
After successful completion, you will see the inscription "PASS!"
Disconnect the phone from the computer
6. Done!
For verification, you can download a new recovery:
Hold simultaneously the three keys “Power + Volume Up + Home” until the initial screen saver-inscription “Samsung + model name on a black background” appears\u003e We are waiting for download
Today we will talk about how to install custom recovery on your device line Samsung Galaxy. I will only talk about TWRP recovery, since it has a huge number of advantages over its counterparts. The developers of this project also offer a simple and convenient installation method, which involves the use of the Odin utility. You do not even need to have superuser rights (Root). This manual is suitable for all smartphones and tablets from Samsung: Galaxy S5, S6, Note 4, Note 5 and any other models.
It is worth noting that after installing custom recovery, you will not be able to install official Samsung updates downloaded “over the air”. Do backup your data on mobile deviceso that in case of problems do not lose them forever. I recommend that you save your contacts in the cloud of your Google account, and photos, videos and documents on your computer.
What you need to do before installing TWRP recovery through Odin:
Check before you start the installation if you have not forgotten anything. Each of the above steps is very important.
How to install TWRP recovery on any Samsung Galaxy smartphone or tablet:
Done! To enter TWRP recovery, you need to hold down the “Volume up”, “Home” and “Power” buttons in the off state of the device, and release the buttons after the logo appears.
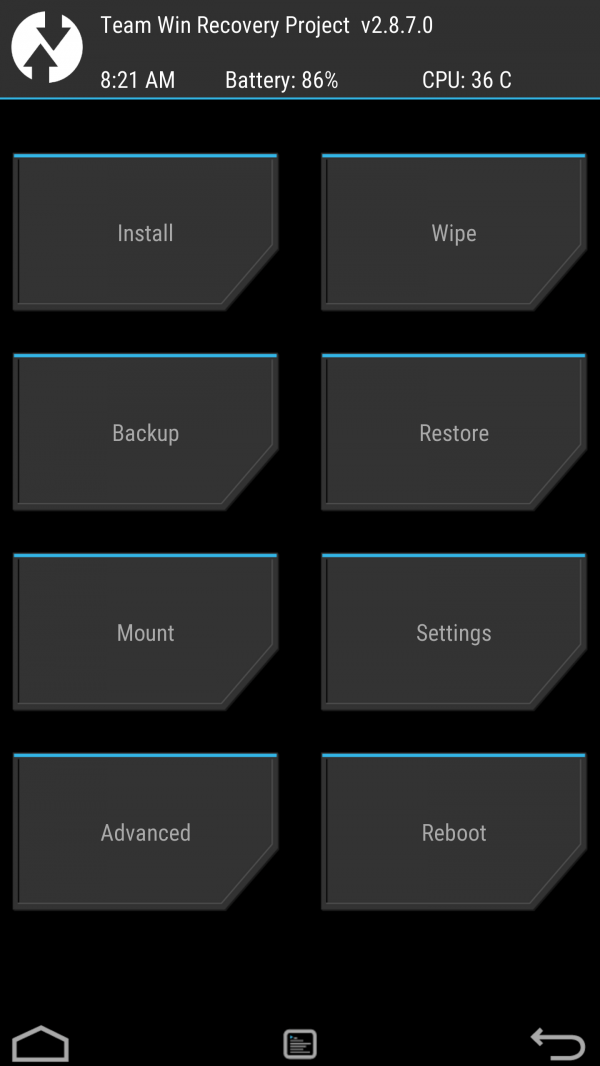
Now you can use the new recovery to install custom firmware, backup and restore installed firmware, and much more. Through TWRP, you can also clear cache memory, reset to factory settings, or even clear internal memory devices.


