I welcome you to my site dedicated to servicing portable personal computers and others mobile devices. This project will be of interest to both beginners and specialists in this field. The main objective of this project was to collect in one place information on how to disassemble laptops from different manufacturers. How to clean a laptop, how to change thermal grease. After all, many times had to do this with their laptop, laptop neighbor or friend. The material is accompanied by detailed and understandable instructions, photos or video material. Now you don’t have to spend time looking for instructions on the Internet to disassemble the laptop of the model you are interested in, everything can easily be found here.
How to disassemble an Asus laptop
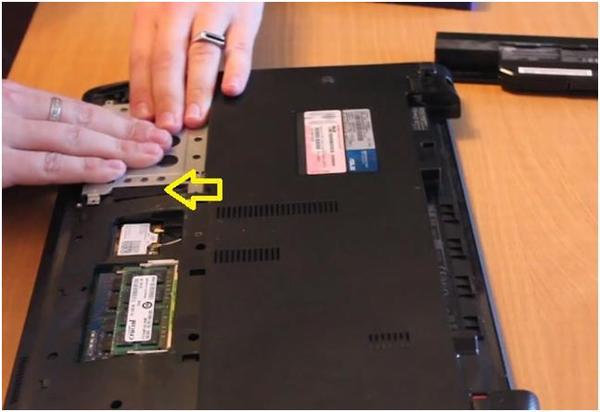
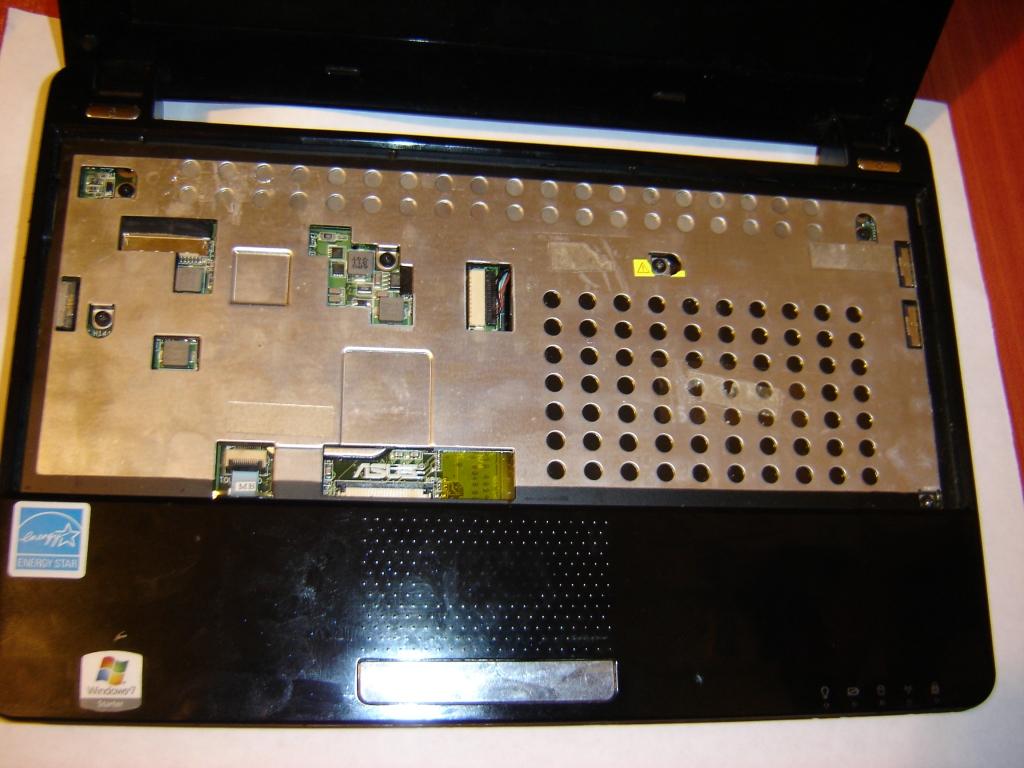
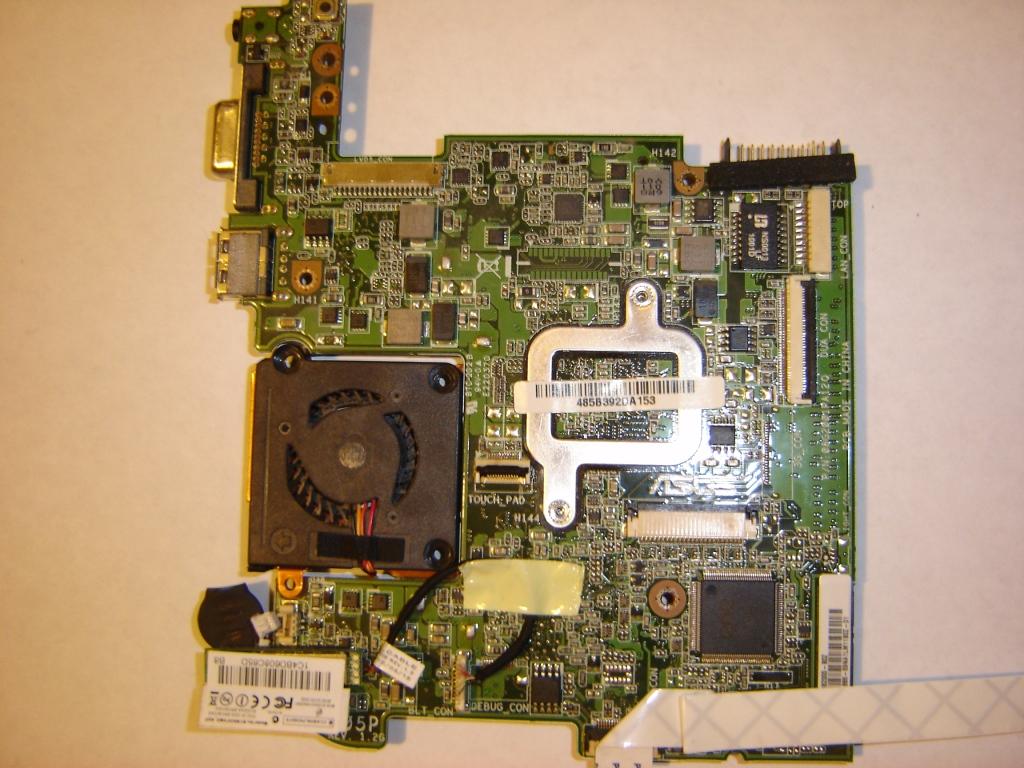
Disassembly asus laptop R503U, dust cleaning and thermal paste replacement. According to tradition, before disassembling the laptop, we de-energize it by removing the battery. Then, unscrew the two screws, and remove the cover from the bottom of the Asus R503U laptop case. Under the cover you will see a Wi-Fi module, laptop RAM and a hard drive. All this we must remove and take out. HDD […]
Updated: August 24, 2016 - 01:53
How to clean laptop ASUS K75VJ and replace thermal grease? As always, we turn the laptop over with the bottom cover at the top. We take out the battery from it. We unscrew three screws to remove a huge hatch from the bottom cover of the laptop case. How to do this is shown in the bottom photos. It is necessary to unscrew all the screws that are marked in the photo. Take out the DVD drive in that [...]
Updated: August 22, 2016 - 13:55
We disassemble and clean the Asus N71J laptop. I want to upset you a bit, to access the cooling system of this laptop, you have to disassemble it almost completely. But there is a positive point, for fans to unscrew the cogs and screws. Unscrew them will have a fair amount. Our first step is to remove the battery from the laptop. Nothing complicated here. We take the latches to the side and take out [...]
Updated: August 21, 2016 - 13:41
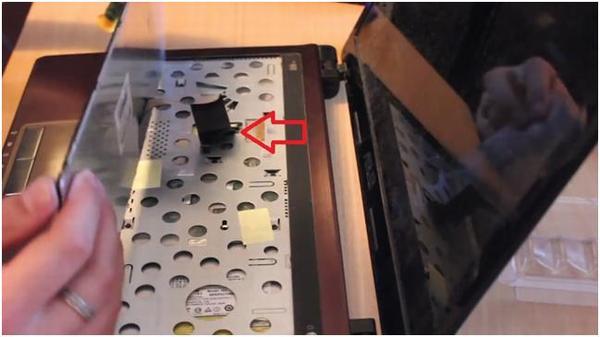
How to disassemble a laptop Asus UL30A, to clean it and replace thermal grease? Externally, this laptop looks like this. To safely disassemble the laptop, we remove the battery from the case. Moving the battery latches in opposite directions, as shown in the photo, remove the battery in the direction where the big red arrow points. Everything is shown in detail in the photo. To the cooling system [...]
Updated: August 10, 2016 - 04:58
Cleaning your ASUS X51L laptop with thermal paste replacement. Just in case, I took some pictures of the stickers that were present on this laptopwhich we will take apart and clean today. Turning the laptop upside down, we notice the battery in the lower left corner. It is not of the usual oblong appearance, but almost square. And the size of this battery is not very large. Putting it [...]
Updated: June 11, 2016 - 02:52
This article is about dusting your laptop. As a patient, my laptop is ASUS X53S.
Cleaning the laptop from dust should not be neglected, as the computer will have low performance and in the worst case, it may fail.
So, the first thing we do is disconnect the battery.
This is done very simply, we turn the laptop over and at the edges we push back the latches that hold the battery.
Then we take a Phillips screwdriver and turn off the screws. There are several of them. One holds a DVD-ROM, the rest is the top cover and they also need to be unscrewed.
![]()
We get a DVD-ROM, it can also be blown away from dust.
Then we close the laptop, gently turn it over and begin disassembling.
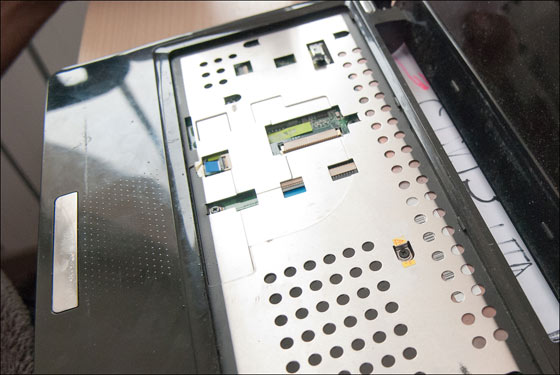
In principle, here you need to unscrew all the bolts around the perimeter. The figure shows only one bolt, the rest are not visible, but they also need to be unscrewed.


After unscrewing the bolts holding hDD, you need to pull the handle and get it.
The figure in orange shows the seats for the bolts, and they need to be unscrewed.

Naturally, all dust must also be blown out on the lid.

Now we need to turn off the cooling system on the motherboard.
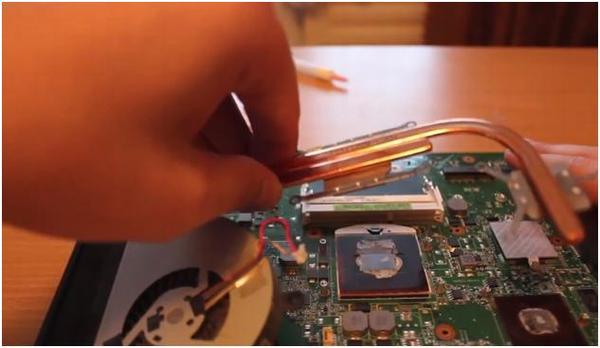
First you need to turn off the power on the motherboard. For you need to carefully disconnect this plug.

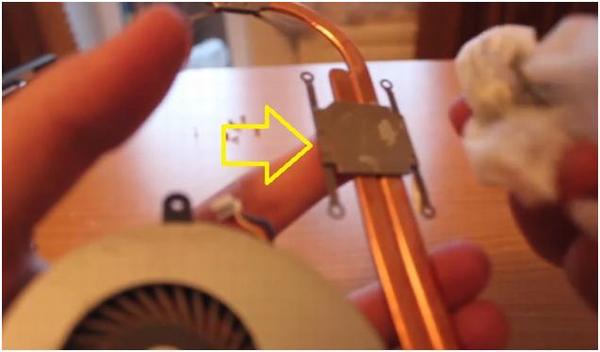
For this, there are numbers printed on the cooling system itself. We begin to unscrew them, but not completely, so that the cooling system moves away. So run through the numbers.
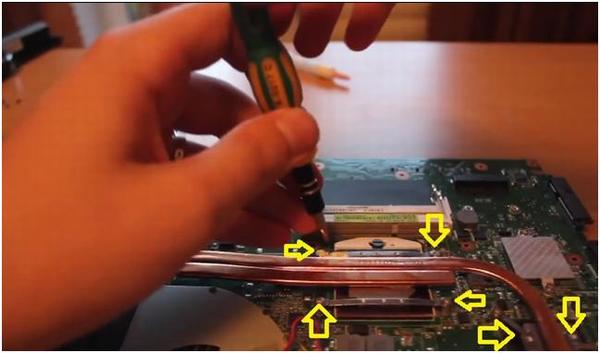
Then we unscrew the bolts completely, going by the numbers. And very carefully disconnect the cooling system.
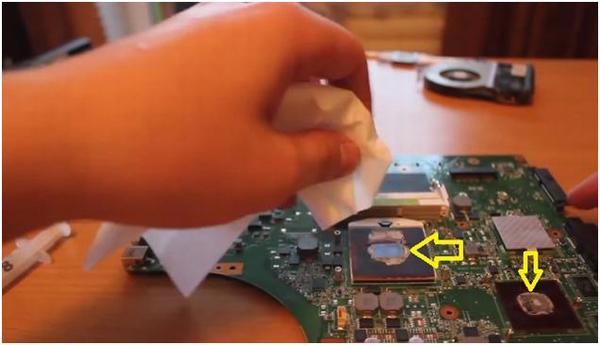
Now we clean the motherboard and cooling system from the old thermal paste. You can use a dry cloth.
And while we lay the motherboard aside.
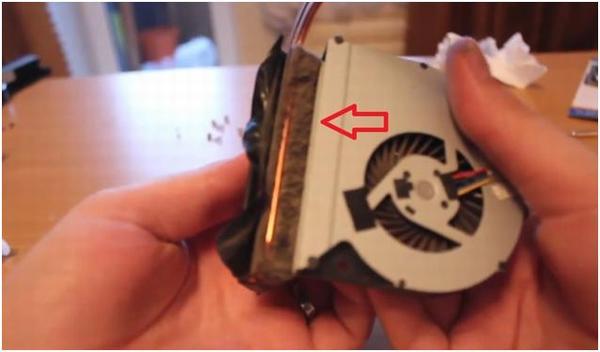
Then you need to clean the fan from dirt. To do this, turn two parts a little to the side. We clean it from dirt.
Now you need to apply thermal grease to the surface of the processor and to the surface of the graphics chip. It is very important not to overdo it with thermal grease. Distribute it evenly.

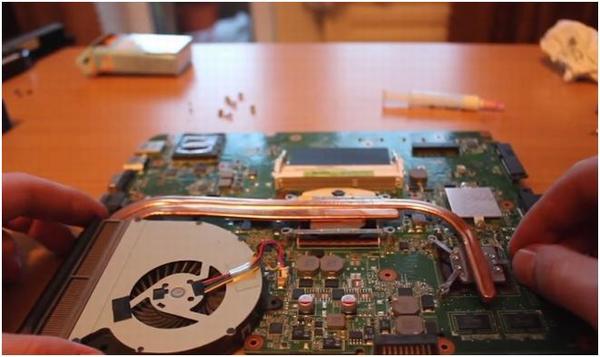
Then we collect everything in reverse order also very carefully. We twist the cooling system by the numbers on it. Do not twist much.
Turn on the laptop, everything works fine. There is sound, the touchpad works, the buttons on the keyboard work.
If you have anything unclear, watch the video below.
Description of fault:
After two years of flawless laptop operation asus Eee PC 1005 PE (and he worked "day and night," because almost all family members used it, and even the cat did not miss the chance to lie down on the keyboard), I somehow drew attention to the subtle and periodically repeating sound coming from the left parts of the body, rustling, rustling. At the beginning, this did not cause concern, but over time I began to hear it constantly.
After some time, the sound became louder, friction was periodically added to the rustle. Work has not yet interfered.
But time passed, the sound became more distinct, and it was perfectly clear that cooler noise, since all these "phenomena" were observed at the time of its inclusion. Moreover, with a slight tapping, tilting the laptop to the right and left, back and forth, the sound changed the tone, but did not disappear.
Further more. Rattle and strong friction already simply interfered with work and led us astray. I realized - it’s not worth pulling further, an autopsy is necessary.
And now I will show how to disassemble an Asus laptop, almost to the last screw (after all, the coolers in this model were placed by the manufacturers at the very bottom, under all the boards), we will fix the defect and put everything back together (it took me one evening to complete the procedure). I did not have to change the cooler, I limited myself to cleaning off the compressed dust and good lubrication - a few drops of engine oil on the axle and bushing.
Below I present a photo report " disassembly of asus laptop, in order to replace the cooler or its repair, as well as the mandatory cleaning of the laptop from dust "with brief comments.
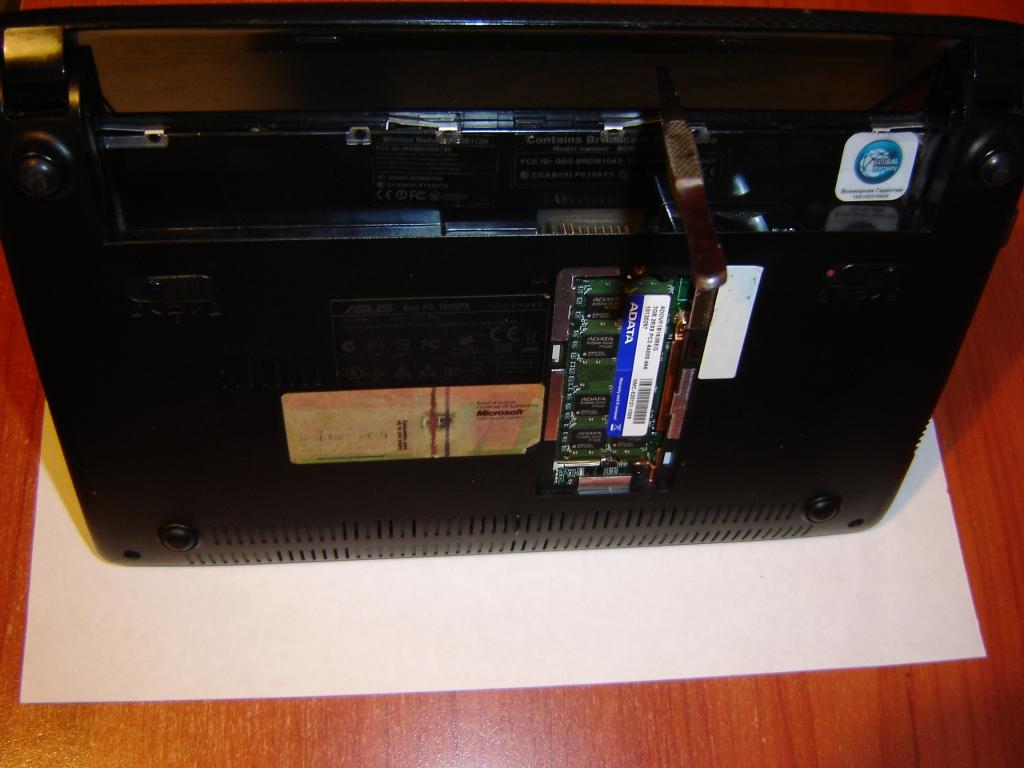
Turn off the laptop and remove the battery.
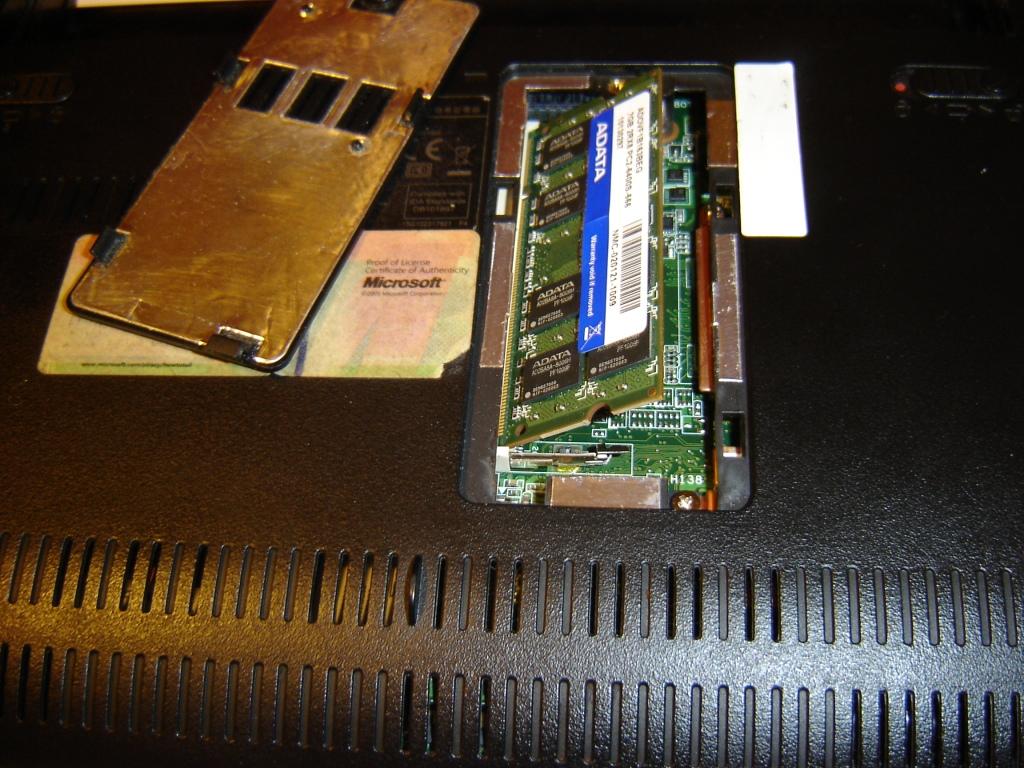
Remove the memory chip by first unscrewing the cover.
With tweezers, lift the latches holding the keyboard, i.e. lift the latch and place a small folded piece of paper.

It is undesirable to squeeze out the latches strongly - they should spring back to the initial position when you will collect everything back.
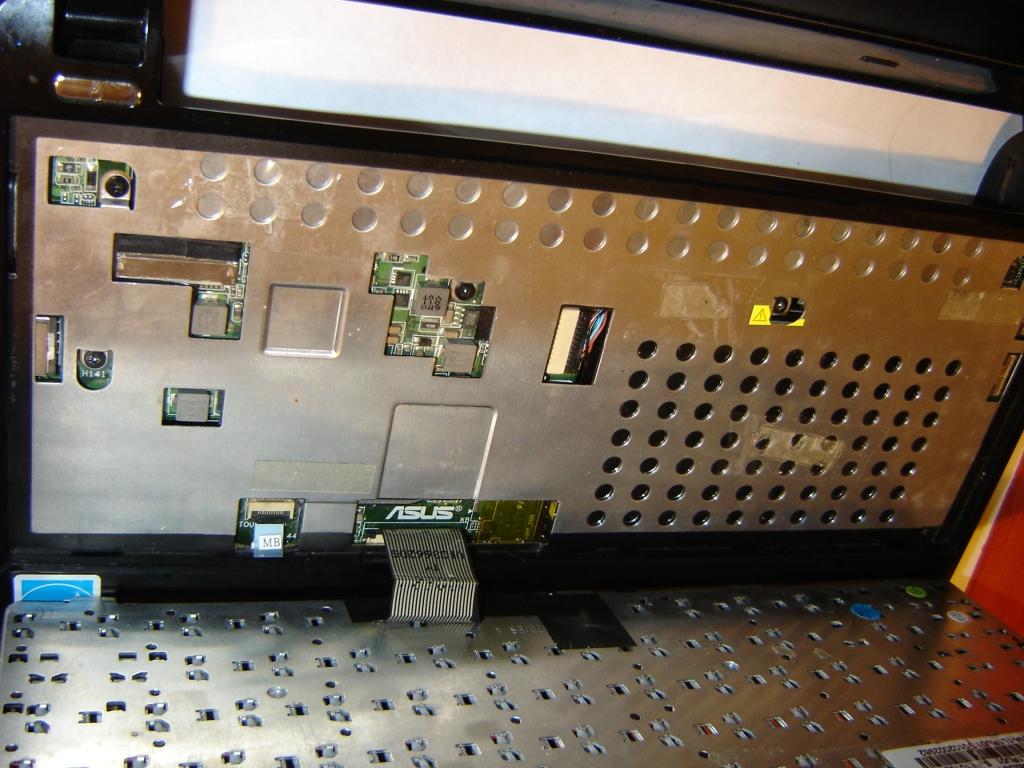
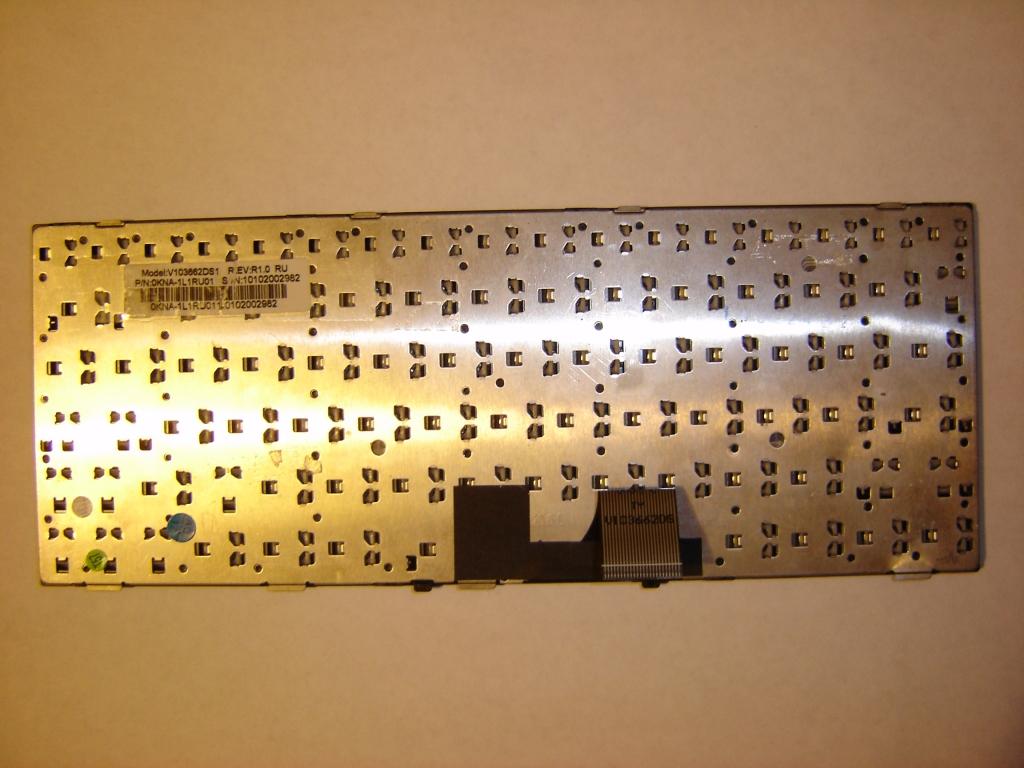
After the latches are raised, you can begin to remove the keyboard. Here you need to be extremely careful, because the train is very short. At this stage, the main difficulty is as follows: the keyboard is glued to the case with double-sided tape (in the photo you can see traces of glue left from it). Adhesive tape is extremely sticky, holds very firmly, the keyboard will have to be torn off in the full sense of the word. When using a thin ruler or a plastic card, poking it into the gap between the keyboard and the case, somehow you need to tear off the adhesive tape, carefully turning the ruler around its axis, then one way or the other. I don’t know how, but it needs to be done.
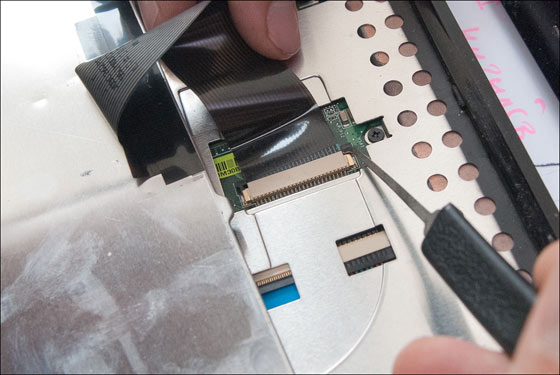
After that, you need to remove the keyboard cable from the connector on the board. The connector is in two parts: first, the latch moves back, then the cable is removed. After you unfasten the latch without bending the cable, carefully remove it from the connector.
Attention - the most crucial moment: when removing the cable from the connector, mentally imagine how you will insert it back, try to remember at what angle you deviated the keyboard from the case, how to hold the cable with tweezers, and how the laptop is on the table.
Easy to disassemble - hard to assemble!
Then everything is intuitive: unscrew the screws - put them in one pile, remove the top panel, unfasten the connectors; unscrew the following screws - put them in another pile, remove the boards; etc. Record the sequence of actions.


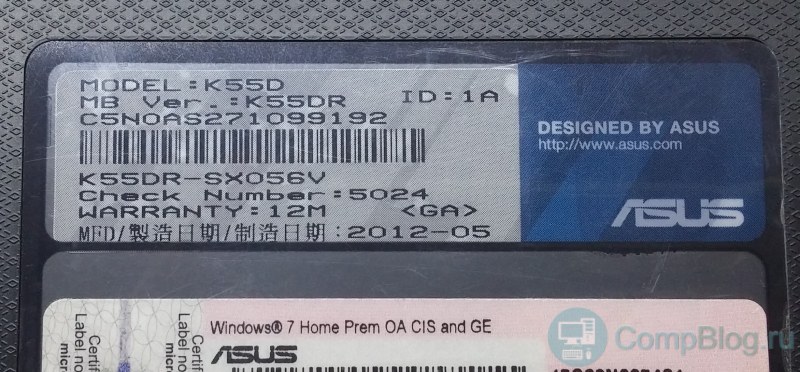
Hello! Today, the ASUS K55DR laptop came into my hands with a typical problem for many laptops - overheating under heavy load.
In 95% of such cases, disassembling the laptop and replacing the thermal paste in it helps.
This will be the article in which, among other things, you will find detailed video instructions for disassembling this laptop.
ASUS K55DR laptop is warming - what is the reason?
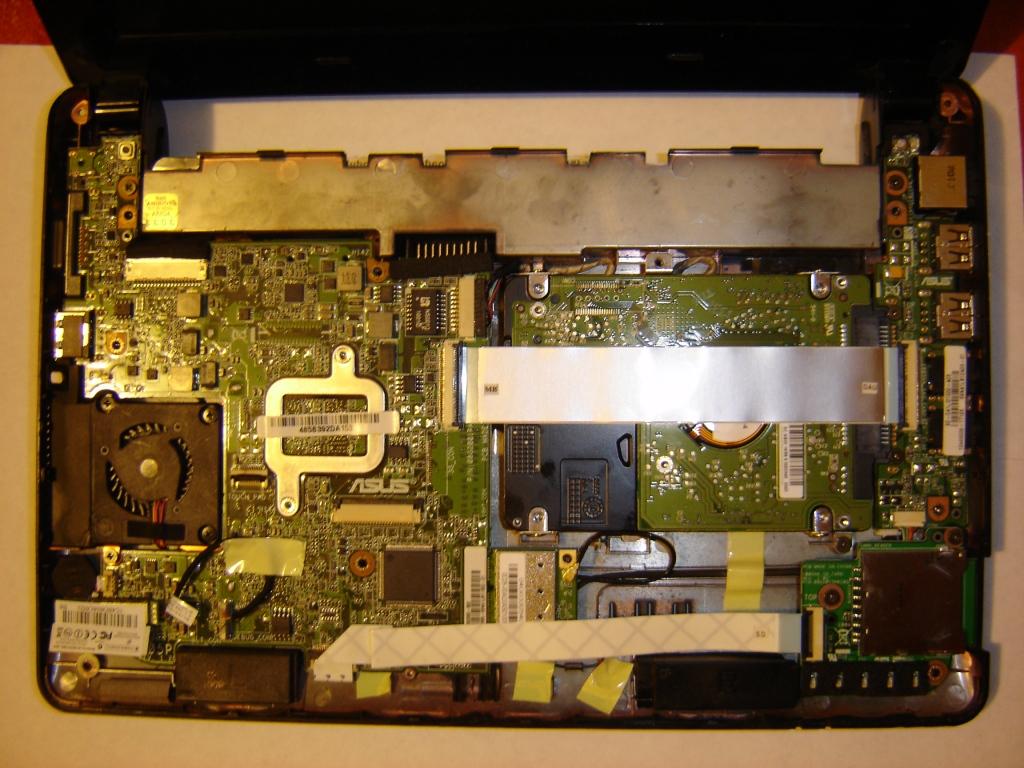
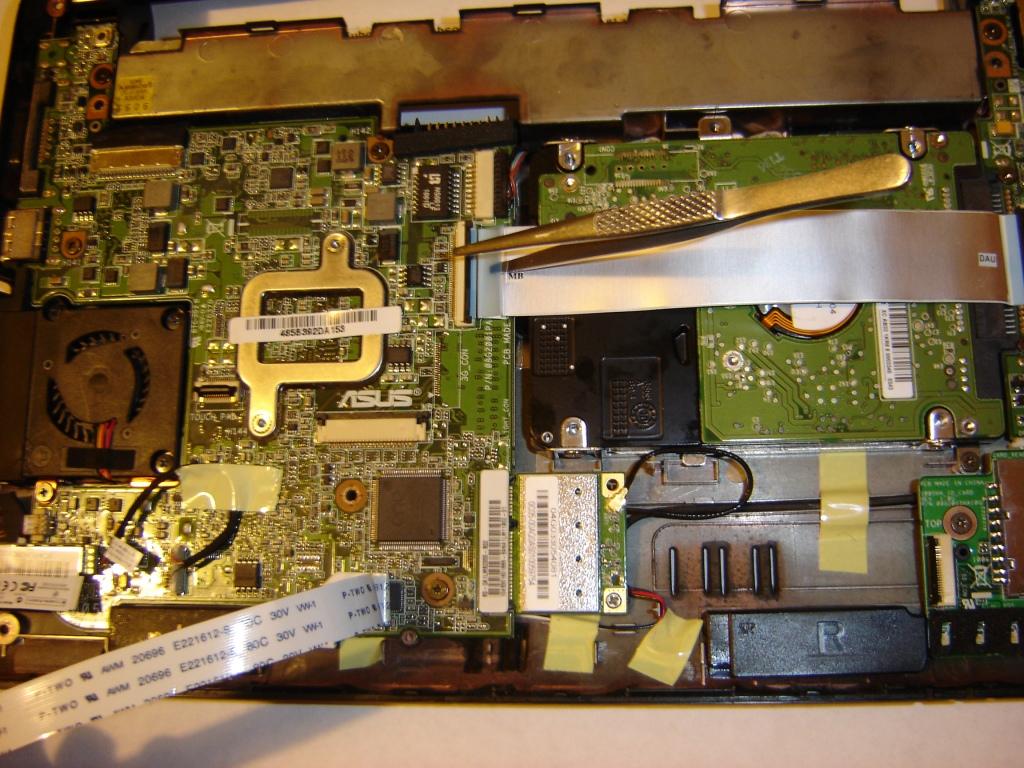
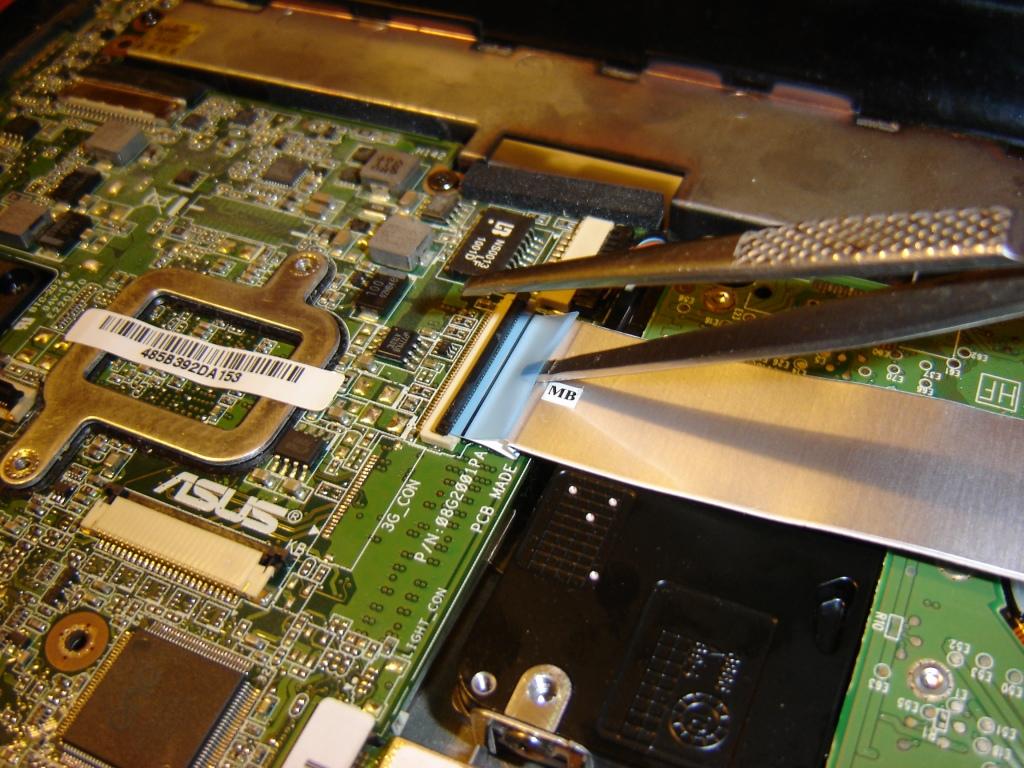
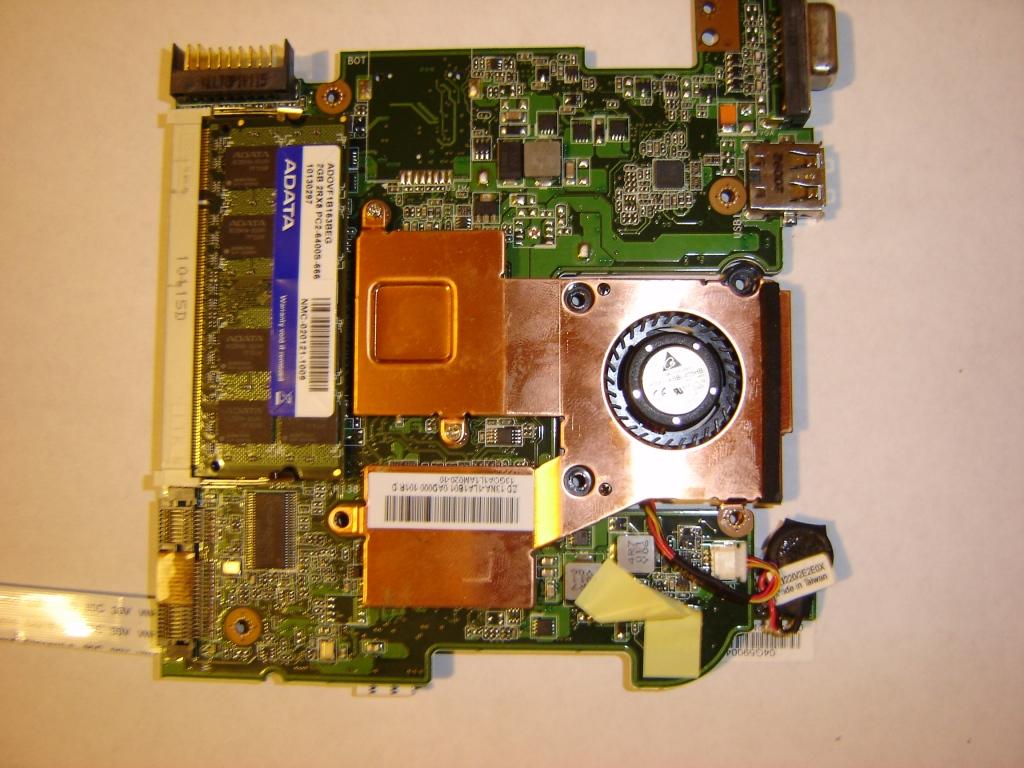
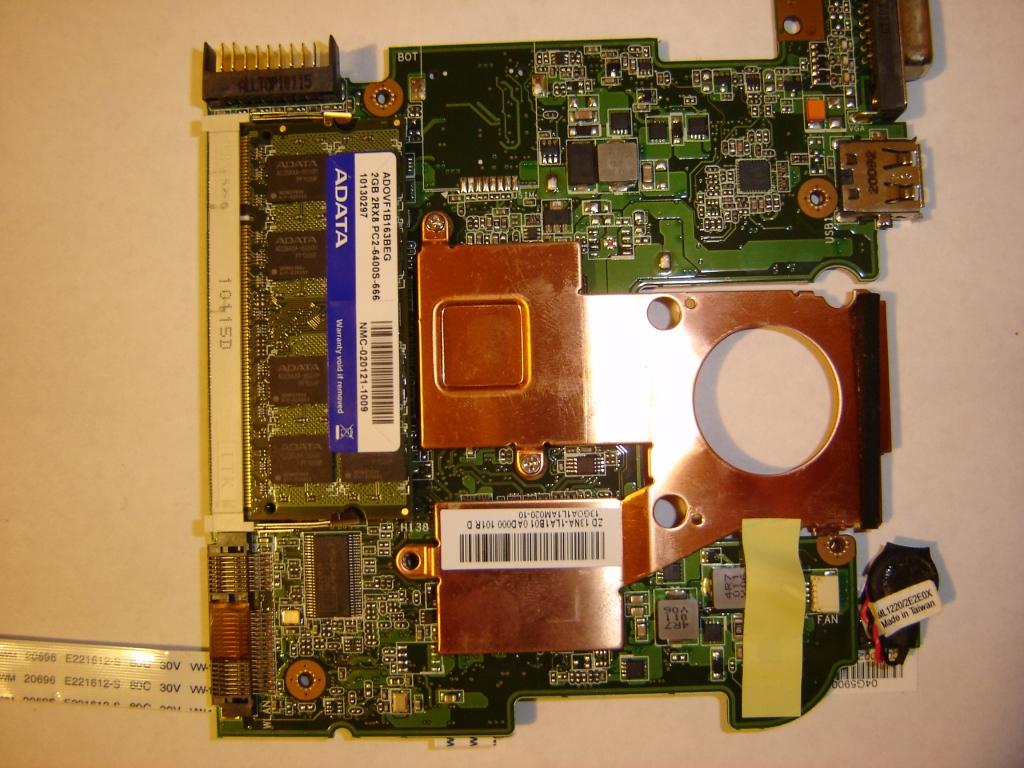
Below is a photo motherboard laptop ASUS K55DR(click to enlarge). The heat passing through the copper tubes is dissipated on the radiator, which, in theory, should be blown by a fan, and thus remove heat from the processor and video card.
But, over time, dust accumulates in the laptop, and hot air, instead of freely leaving the laptop, starts to “chase” inside the case, causing overheating.
You can read more about the problem of overheating in my article about.
How to disassemble, clean and change thermal grease on a laptop ASUS K55D.
In general, I wrote this article as an addition to the video on my YouTube channel . It is better to see it once, scrolling a little higher than reading the text instruction 100 times. 🙂
But, nevertheless, here I will briefly describe the process disassembling a laptop ASUS K55D:
- We take out the battery.
- We remove the keyboard, unscrew 5 screws under it and pull out 2 cables
- We unscrew the DVD-ROM screw there, and take it out.
- Turn the laptop over, unscrew the cover of RAM and HDD.
- We take out the hard drive, RAM, wifi module.
- We turn off all visible screws, not forgetting about 3 screws under the DVD-ROM.
- We turn the laptop over again, and, with the pick, we open the laptop case along the perimeter.
- We remove the top panel of the laptop. She is easily removed
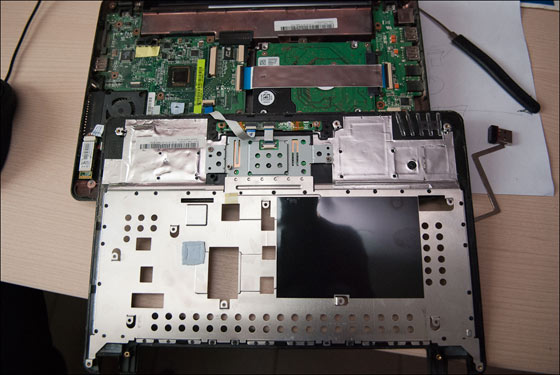
- We take out the loops (4 pcs), and unscrew 2 screws on the motherboard and on the fan.
- We take out the motherboard by prying the latch on the right.
- We turn off the cooling system, clean it from dust and old thermal grease.
- We apply new thermal grease, put the cooling back.
- Putting it in the reverse order
- PROFIT !!!
And finally, it looks like this aSUS K55D motherboard on the back side. Suddenly someone comes in handy. 🙂 
By the way, here you will find detailed instructions.
Simple repair of a laptop or netbook can be carried out independently at home. Simply, most users (even those who can disassemble the system unit of their home computer) are afraid to open a netbook (laptop).
Related topic proper computer maintenance
The reason for the fear of opening the case of these compact devices is understandable. What if I damage or break something there?
Well then. Now your doubts will be dispelled. You will clearly see the real story in pictures minor repair asus netbook (dust removal and lubrication of the cooler, which began to make noise during operation).
The unprecedented heat of the past summer caused a lot of trouble to owners of computer equipment. She will surely be remembered by many of us :-(
Someone could not stand it at this high temperature home computer, someone had a laptop, but someone probably had more serious problems, like the failure of a variety of communication network equipment at the enterprise.
Here is a real cognitive story about repairing a netbook Shevtsova - how to open the case and disassemble the netbook acus:
The summer heat didn’t pass me either, and in the middle of August, my one who served faithfully netbook ASUS eee pc 1101ha he began to yell strainedly with his only cooler, which stopped humming only after a tangible tap on the netbook body with a finger.
But after a while he began to groan again noisily. This did not affect the performance of the netbook, but, of course, it caused certain inconveniences when working, as a result of which, after almost a month, I still decided to try to fix the malfunction with my own hands.
How to disassemble an asus laptop
Notebook opening and
ASUS netbooks on the example of eee pc
Having not found on the Internet a detailed answer to the question of how to painlessly open my mobile friend, it was decided to find a description of the process of disassembling any of ASUS laptops or netbooks, and having already studied it, proceed to opening the case of the netbook ASUS eee pc.
So, within half an hour, several articles on a similar topic were studied, after which a computer operating table was prepared:
As you can see in the photo, I already twisted eight screws from the back of the ASUS netbook and removed the protective cover of the RAM expansion slot.
What we have in the form of tools:
8 in 1 screwdriver
- Oriflame screwdriver with tape measure
- A set of master keys bought on the market for a penny
- A short screwdriver from a simple set
In general, all these tools are always at hand, and some of them were not needed by the patient during our operation, and the other part, which is not in this photo, will be discussed below.
How to disassemble a laptop
Applies to almost all models of netbooks (not only ASUS)After the screws were unscrewed, removed from the housing rAM and the battery, an attempt was made to remove the case itself.
An attempt to remove the case was unsuccessful. It became clear that first you would have to remove the front of the netbook, but before that, the keyboard:

At netbooks and laptops keyboard is removable quite simply, you just need to press on top of a few "locks" around its perimeter.
There are four of them, and all of them are in its upper part:

Scuffs on the keyboard are actually just stickers with the usual letter layout. But in order to completely remove the keyboard, we need to disconnect also the cable.
It does not hold in the usual way, but on a special latch (for reliability), which prevents it from moving away from the connector. Clasp without extra effort pushed on both sides using one of the prepared master keys:
After that, the most interesting action is to unscrew the last screw protected by a sticker with a warning about loss of warranty in case of violation of its integrity, and try to remove the front side of the netbook’s working surface (the principle is similar for laptops):
This part of the netbook case is removed at the same time as if simple and at the same time complicated and responsible, as there is a risk of breaking thin plastic.
In general, it is difficult to advise something here, except to take the thinnest of the master keys available, find the gap between the back and front of the case, and gradually go around all the "locks", prying them in turn.
Gradually consolidating the success achieved by fixing the resulting gap with something suitable in size. In the end we get the long-awaited picture disassembled asus netbook case:
Locks are simply looked for if you have done such things at least once: in those places where it seems that plastic is about to break - there’s a “lock” :)
You can also use an old SIM card from a mobile phone. Somewhere on the corner you stick it into the gap between the covers and with a flick of the wrist, snap off all the “locks” around the perimeter.
With simple manipulations, he succumbs to, and the process goes on. For example, here is one of them, right in the center:

Do not forget that here, as in the case with the keyboard, we will see another loop, which this time comes from the touchpad (the analog of the mouse on laptops and netbooks is the square under the keys).
As you can see, small laptop or netbook repair at home It turns out to be not so difficult.
This cable is also fastened in a special way, only this time the latch rises up, and does not move forward as before (here it is already raised):

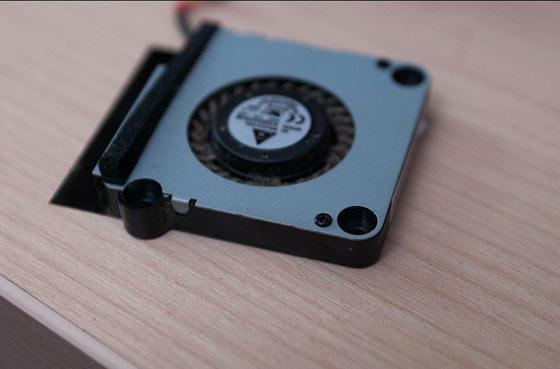
And now we finally got to the cooler (fan), and at the same time to all the other removable parts of the netbook.
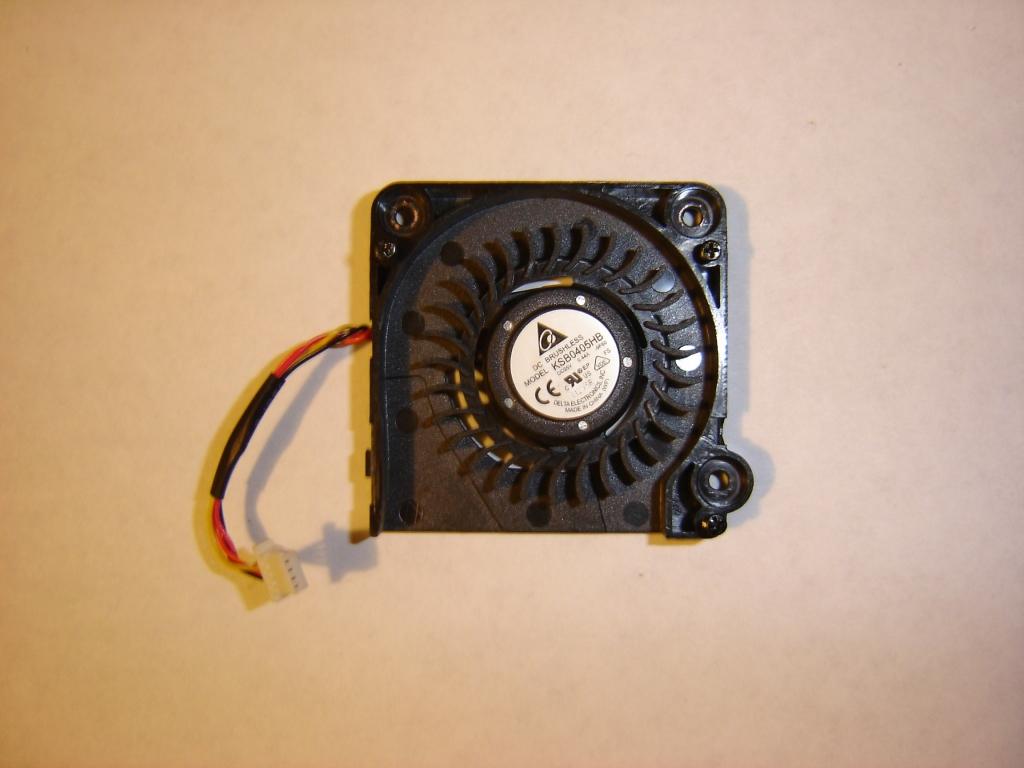
To remove this fan does not present any problem - you need to unscrew the two screws and disconnect it from the motherboard, to which it is attached using a regular (without fasteners) connector:

And here is our hero of the occasion, because of which I had to disassemble the whole netbook asus eee pc ... after all, this particular cooler did not want to work quietly.
In principle, changing a fan (cooler) on a netbook yourself can be done without problems. If you find exactly the same in the store. But now we will bring back to life the old.
And here it suddenly turns out that the cooler itself is still packed in a certain case, which is closed with two “clock” bolts, which it is impossible to unscrew with our tools.
We need to get to the fan. How to clean the cooler from dust and lubricate the fan in a laptop yourself look further.
A regular stationery knife comes to the rescue, with the help of it the bolts are removed, and when opened, a small strip of foam is torn along the line of the protective iron casing.
In the photo below you can see its tip, looking in the upper right corner of the piece of iron, and the casing itself, which is attached to one of the sides of the plastic case, also bends:
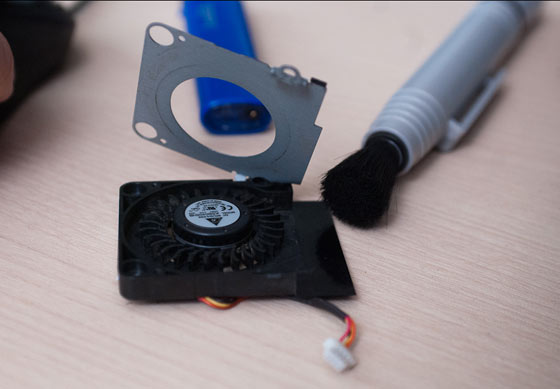
In this photo, the cooler is already clean, and the brush for cleaning the lens glasses of the camera helped in this.
If you do not have such a brush at hand, then you can build a likeness of this little thing from folded in several layers of thick paper, cut from one part with strips.
It will turn out something like an impromptu brush, which in its properties will even surpass the analogue, since in the process of cleaning the fan, more rigid bristles are required rather than in brushes for cleaning the camera lenses.
How to lubricate a laptop cooler
The top of the cooler is best removed before cleaning. It is mounted on magnetic interaction and nothing more. However...
This, however, is enough for a few minutes of misunderstanding for those who do this for the first time, as if it would be painless to remove it to eliminate impurities and lubricate the mechanism itself.
Lubricate only the hub on which the fan blades rotate. The photo clearly shows where it is subsequently inserted:

Now you know how to produce repair asus coolers and how to lubricate laptop cooler alone at home.
Disassemble a laptop or netbook for this you can without problems :)
The vast majority of not only ASUS laptops and netbooks, but also other companies such as aser, samsung, lenovo, etc.
blog comments powered by DisqusSecrets and subtleties of working on a computer