Instruction manual
Determine the nature of the malfunction by its symptoms. For example, if the player does not turn on at all, the power supply is faulty; if it turns on, but does not show “signs of life” (the tray does not extend, there is no video signal, etc.) - the signal processing board is “to blame”; and if everything works, but data from disks is not read, the problem lies in the mechanical part.
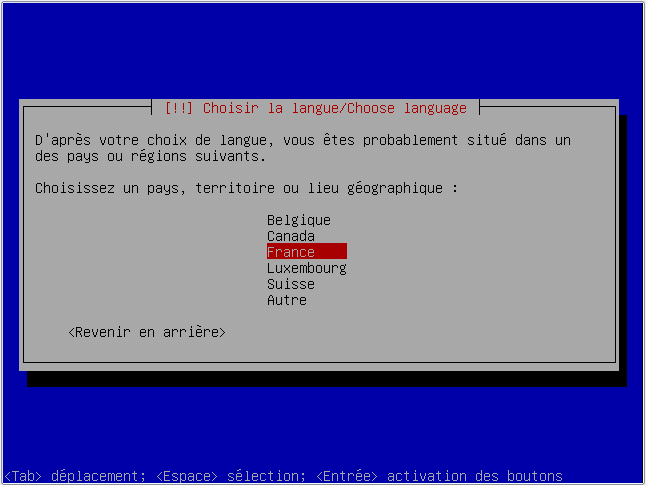
The boot menu may be different on your computer, that’s what it gives me. Here we can determine the order in which the computer tries to start the elements. If you are really stuck, feel free to contact the site forums for help. You are first asked in your language, and usually, if everything is going well, you should see this screen.

Please note that here we do not have a mouse, we move exclusively with the keyboard, this is normal. This is just a utility for checking the correct operation of your RAM if you suspect that it has a problem. Other options: designed for specific purposes, there is no need. . As you can see, all this is not important, but at least you know where you are putting your feet.
Disconnect the player from the network, TV and all other devices. Keep it off for an hour to discharge all capacitors. After that, remove the cover from the player. First of all, pay attention to electrolytic capacitors. If some of them are swollen, replace them with exactly the same ones (both in capacitance and voltage), observing the polarity. Close the player and check the device. If nothing has changed, turn it off again and wait one hour before the next autopsy.
After choosing the installation program will conduct some checks, it will not last long if all this is done. 
If necessary, enter the name that you want to transfer to your computer. Usually, a pseudo-desktop or a pseudo-laptop, if it is a laptop, but you can put what you want.
Central moment of installation! 
You no longer need to give confirmation for the used hard drive and finally, to install where you summarize everything. For others, the breakdown time has arrived !: Devil. 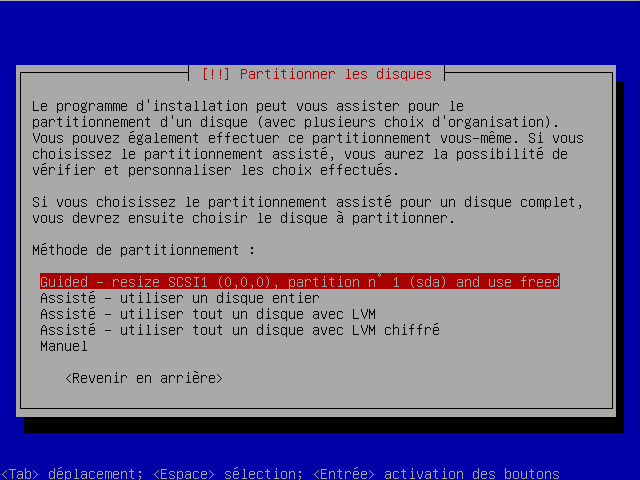
However, this method is not always offered for a number of reasons and is offered a second time with its encrypted version.
If the replacement of the capacitors did not resolve the problem, find on the online auctions a faulty player of the same model, which is sold “for parts”. It must be spoiled, not the component that needs to be replaced, but any other. Purchase the device, and then install in your player a working unit, taken from the "donor". Carefully ensure that after replacing all connectors are correctly connected and all screws are installed.
After you enter manual mode, you are offered a number of options. ![]()
Help for splitting: you will find more information about splitting. Then a line break occurs, then a list hard drives on a computer and a list of file systems on each drive.
Here I only have hDD, in which there is only one section, as evidenced by the only file system. However, a second file system can be installed, in other words, a second partition, such as a disk recovery partition, for example. 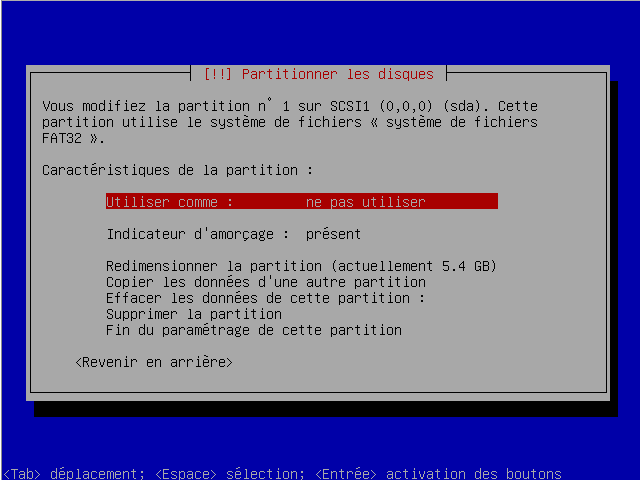
In this case, we must first resize the selected partition to make room for other partitions that we want to create, so we can directly select “Resize Partition”.
If the power supply fails, but the same could not be found, use the lowest-power computer unit that can be found. It will not fit inside the player, so place it outside. Between the green and black wires, install a regular switch - with them you will turn the player on and off. On the signal processing board it is usually signed which voltages are to be supplied to where. The power supply has a black wire - common, on red there is +5 V, on yellow +12 V, and on orange +3.3 V. Do not allow short circuits, especially at the last of these outputs - it is not equipped with protection.
A warning message appears. 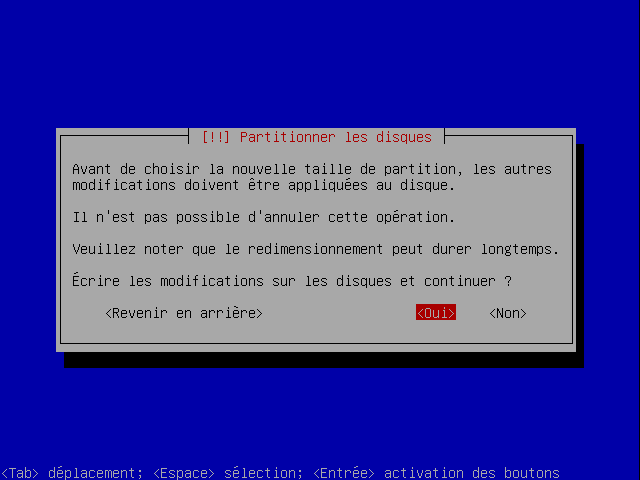
Now you can specify the size you want for this section. 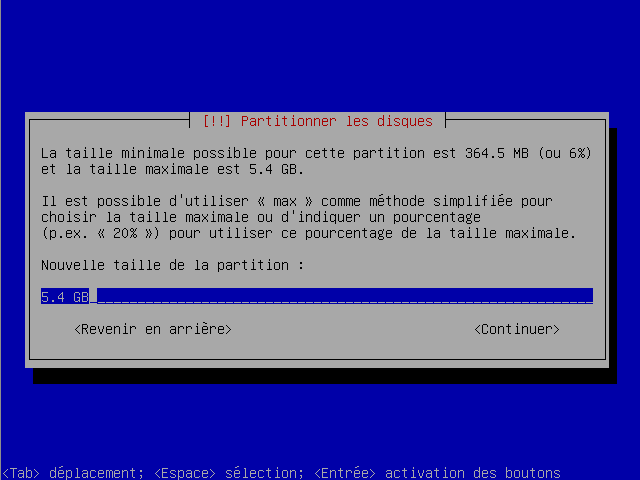
You can specify the size of the desired partition directly or as a percentage of the hard drive. In addition, it is better to leave a margin for installing new programs, for example.
As soon as we finish, we will return to our manual split menu with the new product. 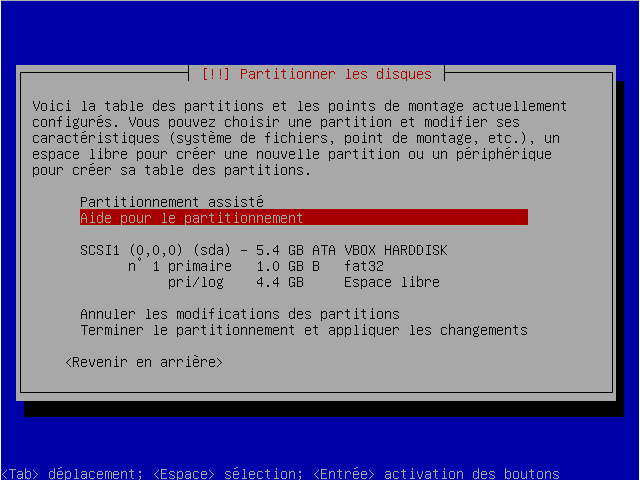
Therefore, select this new space. 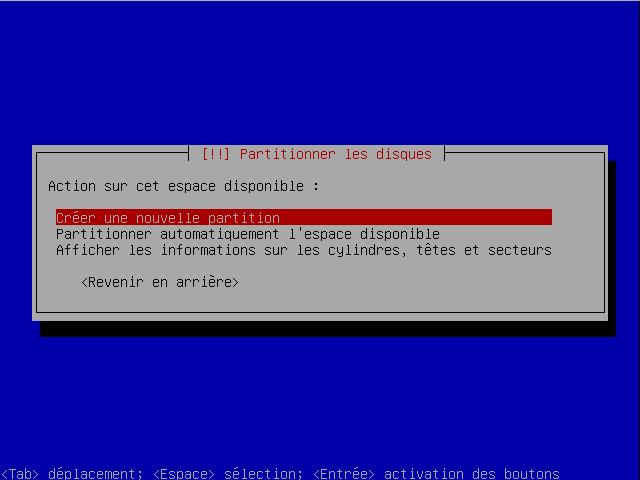
If you are creating a new section, you are asked again what size you want, you are asked to choose between the main or logical section, and finally, if you want to place this section at the end or at the beginning of the section, the available space. Which ultimately is of little importance.
Assemble the player in the reverse order and start using it.
DVD players today are still very popular, despite the fact that more and more people prefer to watch movies online on computers. But like any technique, DVD players tend to break. Users often encounter such a situation when the player cannot detect the disk and cannot read information from it with, it would seem, its full health. Any owner of a DVD player can handle this problem.
You will then be reviewed about a situation where you can still make changes. 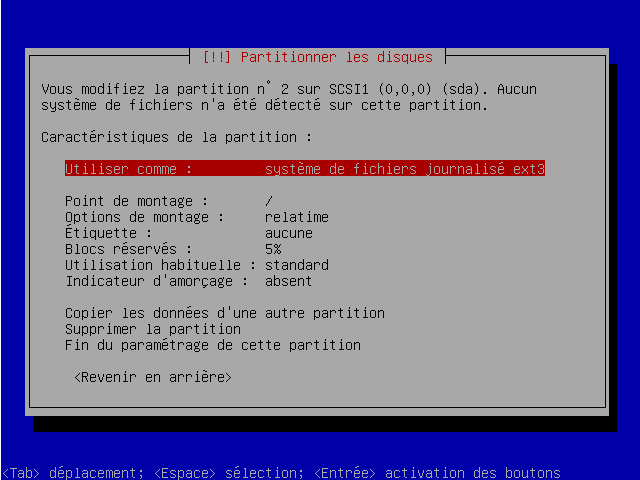
Refresh the operation to create a placeholder for your documents. And finally, “End the break and apply the changes.” You will see a summary of the changes made so far.
Step 3: “real” installation
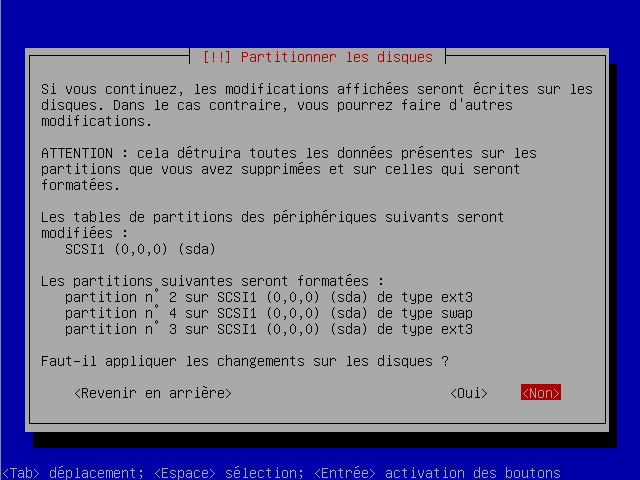
Check your settings well, there is still time to return, but after that it will no longer be possible. Once you are confident, select "Yes."
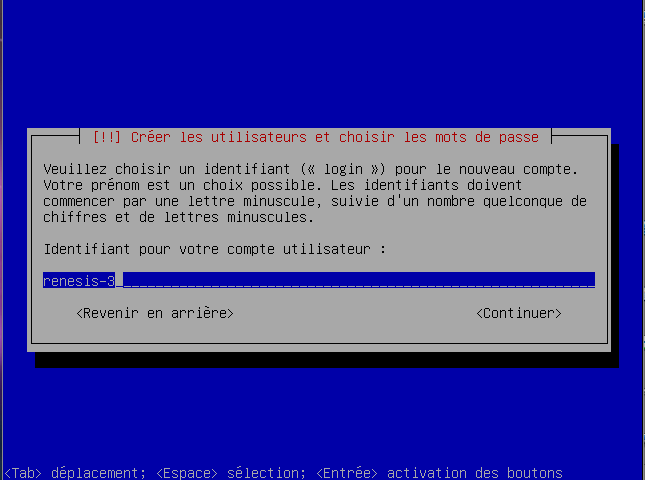
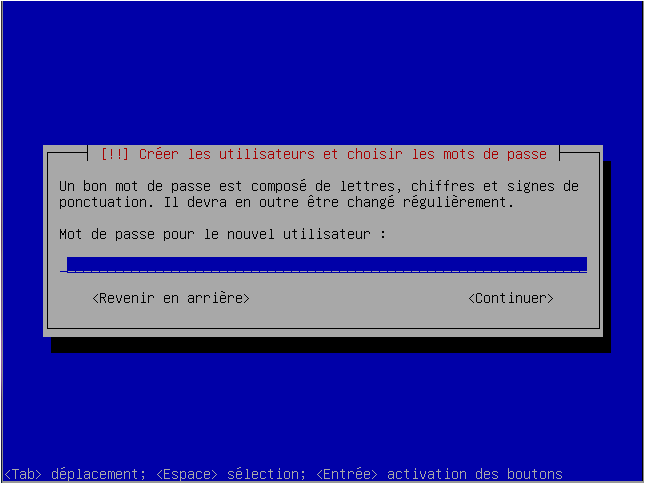
Choosing usernames and password
We are all together, and after installing the first set of packages, you will be asked to enter your username and password in accordance with the following images.It all started with a simple and not quite computer device almost a year ago.
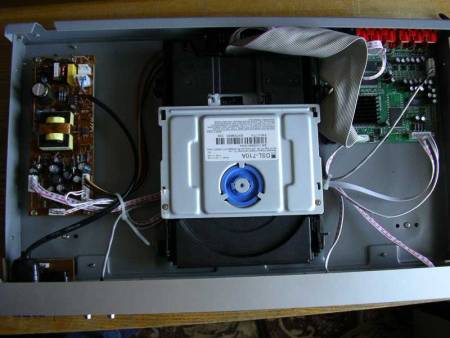
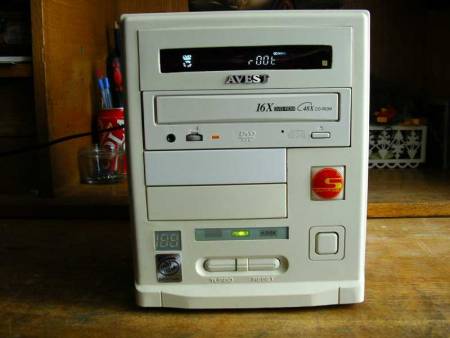
This miracle is called, as you know, a DVD player with the unfamiliar name “AVEST”.
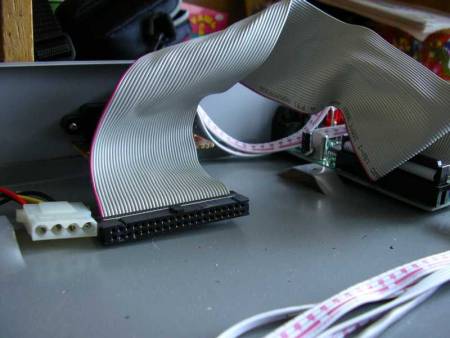
Once upon a time, in 2002 this “miracle” produced (I quote) the Federal Subsidiary State Unitary Enterprise Far East Radioelectronic Plant “AVEST” FSUE Komsomolsk-on-Amur Aviation Production Association named after Yu.A. Gagarin (there is even an instruction manual for this device, and the unitary word was reprinted, as it is written). But there came a crash for him after two falls from the height of the TV with his “face” to the floor, naturally, some authorities refused to work, this is a drive and a display. When I got to me, I was almost unsoldered into spare parts, but one pleasant find dawned on me, the drive had a regular IDE connector and a standard computer power connector.

Finally, you are asked a far-fetched question about the proxy server. Throw it, it does not concern us, it is for specific use. 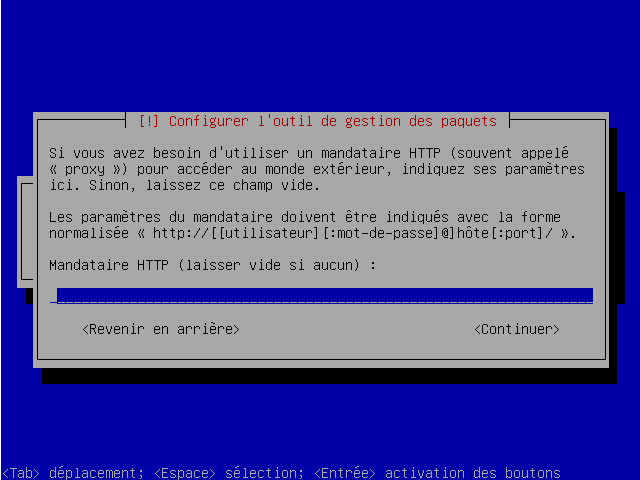
And the second and last set of packages will be installed, which is the main one, you can drink coffee, go out a little and so on.
For those who chose manual separation and created a section dedicated to documents, you will be asked if you want to encrypt it, and if so, select a password. However, there are still some small updates and installations that can be left on good grounds.
Putting a regular CD-ROM inside and loading a regular Video CD into it, I got a wonderful video with sound on the TV. The only thing left is to put the DVD drive, which I did. After making sure that everything works fine, and only a couple of wires fell off the display, which they easily put in place, launched the entire structure without problems. Honestly, having the Xoro 400 PRO at home, this half-killed design in the room did not fit either in color or in its beauty.
Language updates and support
To do this, the easiest and most effective is to navigate through the console. This updates the repository list and then the installed packages. You will be asked to enter your password, which is normal. Once this is done, most likely you will be asked to restart your computer.
Then we will improve linguistic support. Therefore, to fix this, we will improve linguistic support. Leave the installation, then close the windows. Knock you out. On the login screen, click “Language” and select “French” and click “Change Language”. Then enter the login and password, and the window will appear: Click "Set as default."
At this time, they brought me an AT case as unnecessary, and putting it all nearby ...

... it dawned on me again and work began.

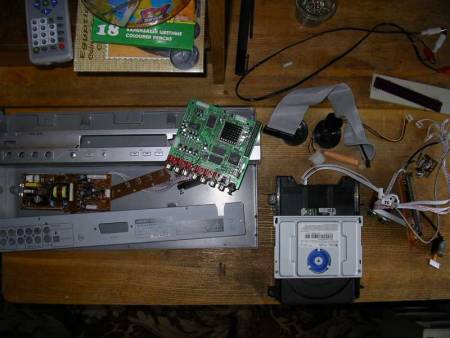
Here's what happened in draft form.
Reduce font size and menu
Now French is the default language, recognize that it is better to understand. Open this file and enter next line. Move and move to see effects. You can also decrease the value for even smaller fonts. Click Panel. For each panel, select a size in pixels, and the trick will play.
To do this, you need to return to the console and enter this command. But in order to take full advantage of this, it is necessary to have extremely expensive high-tech and video equipment. The first models appear that are able to register, but are still rare and very expensive. However, definition is not everything. To enjoy the details of the soundtrack, it is important to have a home theater system, even if the high-definition formats do not bring anything more than their standard versions.
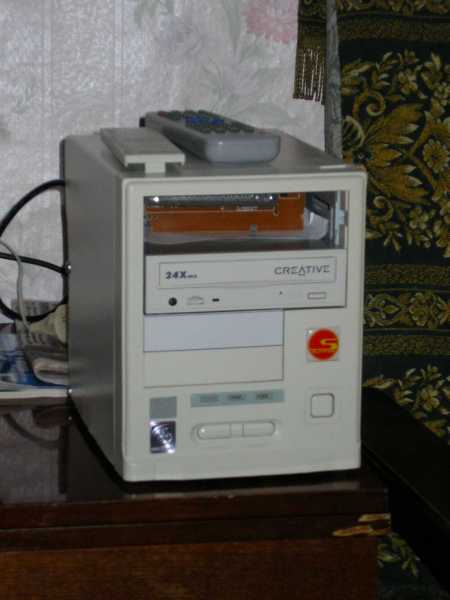
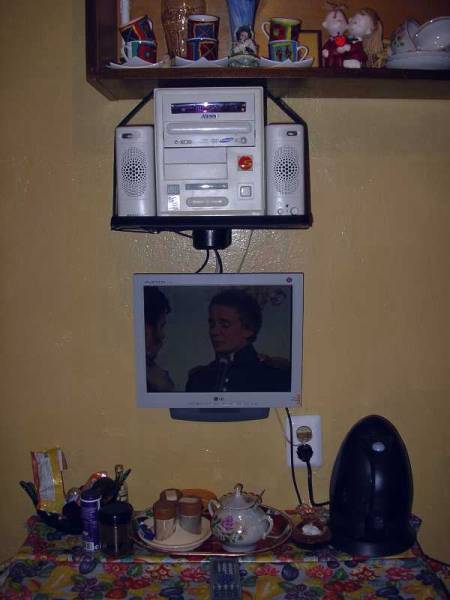
The only thing left is the display. After carefully sawing a rectangular hole for the plastic window of the display, taken in advance from the DVD player and securing the display with a conventional gun, fusing the GluStik, I got something similar to the Barebone, but with the filling of the DVD player.
This did not stop there, having bought Aver Media TV Box 9 from some acquaintances for 3,000 rubles. and others, the LG Flatron L1515S liquid crystal display for 4,500 (then it was worth it), bought a shelf for wall mounting the TV, moved the platform on which I put everything up from the standard mounting closer to the wall.
Finished the good old Scart. The problem is that most manufacturers do not provide the correct cable and are satisfied with the composite cable that transmits the image in standard resolution. You don’t need to lay too much on it or succumb to the “24-karat gold connectors” cable found in some stores. We can find about fifteen euros.
Almost all models also have analog audio output and optical digital output for connecting the player to a home theater system. Coaxial digital output, on the other hand, is not ubiquitous. There are fewer models for reading content from a peripheral environment.
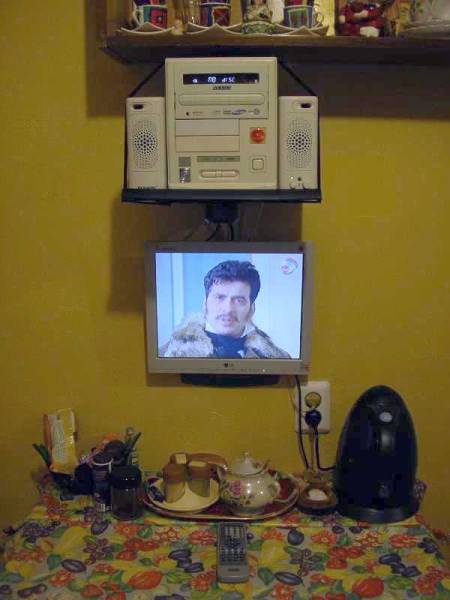
I fixed all this crazy device over the dining table in the kitchen as a gift for the new year to my wife. Oh yeah, the speakers with a USB power connector were just given to me for experiments, I had to solder in the “mother” USB connector in “Avest - Barebone” and take the 5 volt power supply from the inside, which in principle was not difficult. Now this kind of media center (TV, DVD, Mp3, Photo) brings joy to my family so far. By the way, the AVEST remote control is completely in Russian, simple and convenient, but I didn’t do the control buttons on the player’s case, as unnecessary. I started only the “RESET” button on the case as an ejection of the DVD-ROM drive tray, just in case, and the “Power” button is natural for turning on the power to the structure.
Compatible media and formats
Decks also do not read the entire contents. And again, the reader may well be compatible with the format, but only reads it from one medium. However, this feature has not yet been fully developed. Equipment manufacturers and movie publishers promise to make an effort. However, it should be borne in mind that each laptop model is different in internal assembly. Moreover, the procedure is similar to the vast majority of models. What is missing in this guide, you can easily find the logic.
First of all, let's see what we are talking about. Remember that if you do not know what you are doing, contact a specialist. Such a thing will not cost you more and, of course, less than turning yourself into a mother’s home care, especially if your laptop is no longer a guarantee.
After pressing the “Power” button on the Aver Media remote, the monitor itself wakes up from sleep mode, the rest is up to a small amount - click and get.
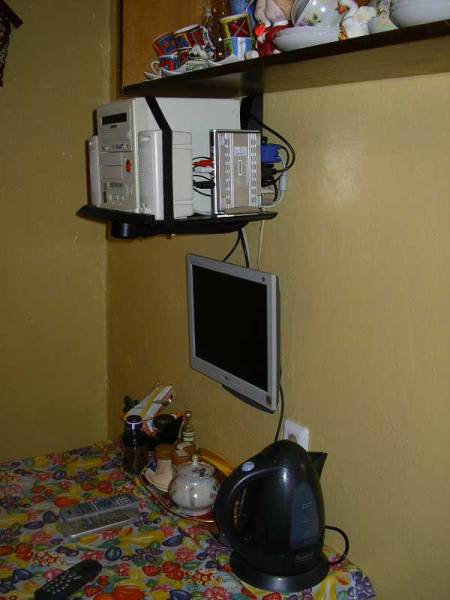
Very often I repair computers in the kitchen. TV BOX 9 has pass-through VGA and audio inputs, while you put the system you can in the window and watch TV.
Probably, I supported the domestic manufacturer with such a rework.
Also remember that since you removed the first screw and you cut off the first part, the warranty has generally disappeared. The procedure is very instinctive, just follow the logic if you have minimal usability with the equipment. However, keep in mind that replacing a player is practical and quick. If this is not so, then you are mistaken.
Before we see how, let's see who. Which player can you replace? Simple, we need to enter the control panel, manage devices and see under optical drives. If this is not the case, as soon as the serial number of the reader is disassembled, we can see it on it on the manufacturer's label.
I understand that all this "rubbish" does not apply to the computer, but it simplifies the production of such a media center, there is nothing to "hang" and "buggy" for, there are no OSes, no viruses, it’s nice, however.
And the Avest enterprise system administrator laughed at such a rework for a very long time :)
Thank you for your attention.
Andrew
chuk3 (at) yandex.ru
5
/12.2006
Via quick search On the Internet, we can search for an identical model or search for common functions. Not compatible with each other, so you must be sure that you are buying.
- Brand of products.
- There may be problems with the firmware.
- It is best to use a reader with the same hook in the same series.
Or remove the plastic panel closer to the monitor and unscrew the three or four screws securing it. To do this, you usually need to release the locks on the sides. . If you do not have this quick procedure, the phone offers the same opportunity, but at the back. You will need to unscrew the back panel. Just find the screw that holds the reader firm, unscrew it and the lever to pull it out.


