Have you ever encountered such a situation - the computer starts to malfunction or turns off completely? What is the problem? It turns out that you don’t always need to contact a service center. Try using specialized software. The use of programs is useful not only in cases of malfunctions. Let's look at the best programs for identifying computer hardware and when to use them.
Why do you need such software?
Have you ever encountered situations where you need to know some PC specifications? And this is not the only reason to use such software. Iron detection software is useful if:
- Drivers are updated;
- To find out the temperature of the HDD or CPU;
- When the system slows down and freezes.
Sometimes it is necessary to know the hardware model or version. Users do not remember such parameters. They may not be in the documentation. Let's consider what software is needed in such situations.
Speccy
Official website of the program: filehippo.com/download_speccy. On the main page there will be a link from which we download the “exe” file with the program. Installation is simple and will not cause any difficulties even for beginners. Shows information about RAM, sound devices, CPU and motherboard temperatures. Works on all versions of Windows.

The utility window displays equipment models and small icons indicating the temperature. By double-clicking on them, see the changes that have occurred in five minutes. The utility will not be released by the developers as a professional monitoring tool, but you can find out when it’s time to change the thermal paste on your video card using the program.
Speccy characteristics:
- Shows detailed information about the characteristics of the PC and its devices;
- Uses system tools for diagnostics.
Program for determining computer hardware Aida64
Download the program from the official Internet project: aida64.com/downloads/latesta64xe.
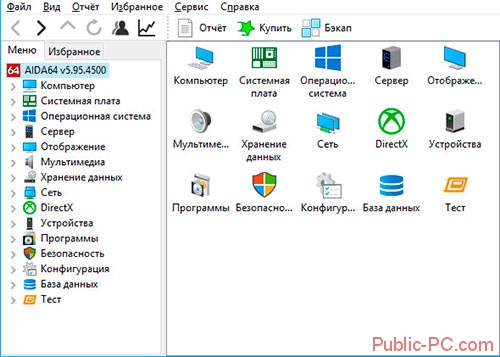
Previously called Everest, but was renamed by the developers to AIDU. Shows detailed information about the system and what is installed. Aida64 is configured for advanced diagnostics of PC operation. Has tests for RAM, CPU, video, HDD.
Important! When checking out your computer, or before purchasing a new one, take a stress test. If the device worked for at least fifteen minutes and no blue screen appeared, everything is fine.
Characteristics of AIDA 64:
- Shows information in real time;
- Generates a detailed report;
- Completely in Russian.
Aida can:
- Edit programs in startup. It is because of them that the PC begins to work slower;
- A section displaying all connected devices. This will help determine its model and find the correct driver. Shows a link from where to download it.
HWInfo
Official website of the utility: www.hwinfo.com. Among the features, we note the ability to download the program installer, and the presence of a portable version. Once launched, HWInfo displays general information about the PC.

Small but powerful program. If you look at the temperature sensors, then in addition to the current indicators, the program will show the maximum permissible parameters for the equipment. If they are close to the maximum, think about it. Works with all versions of Windows.
Important! It is convenient to update drivers, since the utility publishes a link to the manufacturer’s website.
GPU-Z
If your video card is malfunctioning, pay attention to this application. It supports most existing video adapters. Shows information about frequency, RAM resource usage, load. Determines memory timings and BIOS version of the motherboard. Download it from the site cpuz.ru/gpuz_download.htm

Peculiarities:
- Works only with a video card;
- The main feature is monitoring of the main quantities of the device;
- Minimum settings.
CPU Thermometer
Download it from cputhermometer.com

Suitable for those who know what normal CPU temperature is. Performs one function - shows the percentage of processor cores loaded. Minimizes to the system tray and launches along with the OS.
CPU-Z
Official website of the program: cpuid.com/softwares/cpu-z.html

The utility will measure the CPU temperature, evaluate its efficiency and resistance to overloads. The creators have introduced many important features into the application. In addition to testing, the utility receives information about the motherboard, each stick of RAM and GPU. Creates a report exported to txt or html format.
Peculiarities:
- Shows CPU temperature;
- Detailed information about hardware;
- Benchmark (solution to a problem to determine performance) CPU;
- Works on Windows and Android.
Monitor your temperature with Core Temp
Download the program from: alcpu.com/CoreTemp/

Receives information from PC temperature sensors. Checks whether the system is using a lot of CPU. A special feature of the program is the overheat protection function. She will report this and take certain actions. Will put the PC into sleep mode, or turn it on (can be configured as desired).
Shows CPU core values, frequency and voltage on the chip. It differs from similar programs in the ability to display the maximum heating temperature depending on the processor model. Even if you are a novice user, by looking at the minimum and maximum values you will understand whether the temperature readings are normal.
Advantages:
- Consumes few system resources;
- Clear interface;
- Protects the system from overheating;
- Ability to search for new drivers;
- BIOS update;
- Advanced diagnostic settings;
- Free.
Open Hardware Monitor
Located at: openhardwaremonitor.org/downloads/

Dwaremonitor connects to sensors on the motherboard, so it shows accurate and detailed information. The window displays the current and maximum temperature readings. By looking at the values, it will become clear whether the equipment has a tendency to overheat.
Main characteristics:
- Reports an increase in temperature;
- The results are recorded in a log;
- Support for all existing processors, information about which comes from special online databases;
- Compatible with all versions of Windows.
SpeedFan
The utility is located on the website speedfan.ru.softonic.com/

Displays the temperature of the CPU, SMAPT drive and other parts of the PC. A distinctive feature is the regulation of the cooler rotation speed. This is what it will be used for. SpeedFan prevents overheating and helps reduce noise levels.
Important! To get the settings right, try different options. The main thing is to monitor the temperature.
Peculiarities:
- Information about the temperature is shown in the system tray (near the clock);
- The number of fan revolutions is set in the menu.
Conclusion
Of the programs listed above, use Core Temp and Hardware Monitor in combination. The first will protect against overheating. The second will show detailed information about other parameters. To reduce noise or optimize cooling, use SpeedFan. AIDA and CPU-Z are suitable for testing hardware. Compared to their analogues, they show the most truthful results. If you don't like complex software, use the minimalist CPU Thermometer.
A computer consists of many interconnected components. Thanks to the work of each of them, the system functions normally. Sometimes problems arise or the computer becomes outdated, in which case you have to select and update certain components. Special programs will help you test your PC for malfunctions and stability, several of which we will consider in this article.
The PCMark program is suitable for testing office computers that actively work with text and graphics editors, browsers and various simple applications. There are several types of analysis, each of which scans using built-in tools, for example, launching a web browser with animation or performing calculations in a table. This kind of test allows you to determine how well the processor and video card cope with the everyday tasks of an office worker.

The developers provide the most detailed test results, where not only average performance indicators are displayed, but also corresponding graphs of load, temperature and frequency of components are present. For gamers, PCMark has only one of four analysis options - it launches a complex location and moves smoothly through it.
Dacris Benchmarks
Dacris Benchmarks is a simple but very useful program for testing each computer device individually. The capabilities of this software include various checks of the processor, RAM, hard drive and video card. Test results are displayed instantly, and then saved and available for viewing at any time.

In addition, the main window displays basic information about the components installed in the computer. A comprehensive test deserves special attention, in which each device is tested in several stages, so the results are as reliable as possible. Dacris Benchmarks is distributed for a fee, but the trial version is available for download on the developer's official website completely free of charge.
Prime95
If you are only interested in checking the performance and health of the processor, then Prime95 is an ideal option. It contains several different CPU tests, including a stress test. The user does not require any additional skills or knowledge; it is enough to set the basic settings and wait for the process to complete.

The process itself is displayed in the main window of the program with real-time events, and the results are displayed in a separate window, where everything is described in detail. This program is especially popular among those who overclock the CPU, since its tests are as accurate as possible.
Victoria
Victoria is intended solely for analyzing the physical state of the disk. Its functionality includes surface testing, actions with damaged sectors, in-depth analysis, passport reading, surface testing and many more different features. The downside is the complex controls, which may be beyond the capabilities of inexperienced users.

Disadvantages also include the lack of Russian language, cessation of support from the developer, an inconvenient interface, and test results are not always correct. Victoria is distributed free of charge and is available for download on the official website of the developer.
AIDA64
One of the most famous programs on our list is AIDA64. Ever since the old version, it has been wildly popular among users. This software is ideal for monitoring all computer components and conducting various tests. The main advantage of AIDA64 over its competitors is the availability of the most complete information about the computer.

As for tests and troubleshooting, there are several simple analyzes of disk, GPGPU, monitor, system stability, cache and memory. With all these tests you can find out detailed information about the status of the required devices.
FurMark
If you need to conduct a detailed analysis of a video card, FurMark is ideal for this. Its capabilities include a stress test, various benchmarks and a GPU Shark tool that displays detailed information about the graphics adapter installed in the computer.

There is also a CPU Burner, which allows you to check the processor for maximum heating. The analysis is performed by gradually increasing the load. All test results are saved in the database and will always be available for viewing.
Passmark Performance Test
Passmark Performance Test is designed specifically for comprehensive testing of computer components. The program analyzes each device using several algorithms, for example, the processor is checked for power in floating-point calculations, when calculating physics, when encoding and data compression. There is an analysis of one processor core, which allows you to get more accurate testing results.

As for the rest of the PC hardware, many operations are also performed on them, which make it possible to calculate the maximum power and performance under different conditions. The program contains a library where all test results are saved. The main window also displays basic information for each component. The beautiful, modern interface of Passmark Performance Test attracts even more attention to the program.
Novabench
If you want to quickly get an assessment of the state of the system, without checking each part individually, then Novabench is exactly the program for you. She takes turns conducting individual tests, after which she goes to a new window where the evaluation results are displayed.

If you want to save the obtained values somewhere, then you need to use the export function, since Novabench does not have a built-in library with saved results. At the same time, this software, like most on this list, provides the user with basic information about the system, down to the BIOS version.
SiSoftware Sandra
SiSoftware Sandra includes many utilities that help diagnose computer components. There is a set of benchmark tests, each of them must be run separately. You will always get different results because, for example, the processor is fast at arithmetic operations, but it has difficulty playing multimedia data. This division will help to carry out a more thorough check and identify the strengths and weaknesses of the device.

In addition to checking your computer, SiSoftware Sandra allows you to configure some system parameters, for example, change fonts, manage installed drivers, plug-ins and software. This program is distributed for a fee, so before purchasing we recommend that you familiarize yourself with the trial version, which can be downloaded on the official website.
The last one on our list is a program from Futuremark. 3DMark is the most popular computer testing software among gamers. Most likely, this is due to fair measurements of the power of video cards. However, the design of the program also hints at a gaming component. As for functionality, there are a large number of different benchmarks; they test RAM, processor and video card.

The program interface is intuitive and the testing process is simple, so inexperienced users will find it extremely easy to get used to 3DMark. Owners of weak computers will be able to undergo a good, honest test of their hardware and immediately receive results about its condition.
Conclusion
In this article, we looked at the list of programs that test and diagnose a computer. They are all somewhat similar, however, the principle of analysis is different for each representative, in addition, some of them specialize only in certain components. Therefore, we advise you to carefully study everything in order to choose the most suitable software.
Many PC owners encounter various errors and malfunctions in their computer, but cannot determine the cause of the problem. In this article, we will look at the main methods for diagnosing a computer, allowing you to independently identify and fix various problems.
Keep in mind that high-quality diagnostics of a computer can take the whole day; set aside a day in the morning specifically for this, and do not start everything in the late afternoon.
I warn you that I will write in detail as for beginners who have never disassembled a computer, in order to warn about all possible nuances that can lead to problems.
1. Disassembling and cleaning the computer
When disassembling and cleaning your computer, do not rush, do everything carefully so as not to damage anything. Place components in a pre-prepared safe place.
It is not advisable to start diagnostics before cleaning, since you will not be able to identify the cause of the malfunction if it is caused by clogged contacts or the cooling system. Additionally, diagnostics may fail to complete due to repeated failures.
Unplug the system unit from the outlet at least 15 minutes before cleaning so that the capacitors have time to discharge.
Perform disassembly in the following sequence:
- Disconnect all wires from the system unit.
- Remove both side covers.
- Disconnect the power connectors from the video card and remove it.
- Remove all memory sticks.
- Disconnect and remove cables from all drives.
- Unscrew and remove all discs.
- Disconnect all power supply cables.
- Unscrew and remove the power supply.
There is no need to remove the motherboard, processor cooler, or case fans; you can also leave the DVD drive if it works normally.
Carefully blow off the system unit and all components separately with a powerful stream of air from a vacuum cleaner without a dust bag.
Carefully remove the cover from the power supply and blow it out without touching the electrical parts and the board with your hands or metal parts, as there may be voltage in the capacitors!
If your vacuum cleaner does not work on blowing, but only on blowing, then it will be a little more difficult. Clean it well so that it pulls as hard as possible. When cleaning, it is recommended to use a soft bristled brush.

You can also use a soft brush to remove stubborn dust.

Thoroughly clean the processor cooler heatsink, having first examined where and how much it is clogged with dust, as this is one of the common causes of processor overheating and PC crashes.

Also make sure that the cooler mount is not broken, the clamp is not opened and the radiator is securely pressed to the processor.
Be careful when cleaning fans, do not let them spin too much and do not bring the vacuum cleaner attachment close if it does not have a brush, so as not to knock off the blade.
After cleaning, do not rush to put everything back together, but move on to the next steps.
2. Checking the motherboard battery
The first thing after cleaning, so as not to forget later, I check the battery charge on the motherboard, and at the same time reset the BIOS. In order to pull it out, you need to press the latch with a flat screwdriver in the direction indicated in the photo and it will pop out on its own.

After this, you need to measure its voltage with a multimeter, optimally if it is within 2.5-3 V. The initial battery voltage is 3 V.

If the battery voltage is below 2.5 V, then it is advisable to change it. The voltage of 2 V is critically low and the PC is already starting to fail, which manifests itself in resetting the BIOS settings and stopping at the beginning of the PC boot with a prompt to press F1 or some other key to continue booting.
If you don’t have a multimeter, you can take the battery with you to the store and ask them to check it there, or just buy a replacement battery in advance, it’s standard and very inexpensive.
A clear sign of a dead battery is the date and time on the computer constantly disappearing.
The battery needs to be changed in a timely manner, but if you don’t have a replacement on hand right now, then simply do not disconnect the system unit from the power supply until you change the battery. In this case, the settings should not be lost, but problems may still arise, so do not delay.
Checking the battery is a good time to completely reset the BIOS. This resets not only the BIOS settings, which can be done through the Setup menu, but also the so-called volatile CMOS memory, which stores the parameters of all devices (processor, memory, video card, etc.).
Errors inCMOSoften cause the following problems:
- computer won't turn on
- turns on every other time
- turns on and nothing happens
- turns on and off by itself
I remind you that before resetting the BIOS, the system unit must be unplugged from the outlet, otherwise the CMOS will be powered by the power supply and nothing will work.
To reset the BIOS, use a screwdriver or other metal object to close the contacts in the battery connector for 10 seconds; this is usually enough to discharge the capacitors and completely clear the CMOS.

A sign that a reset has occurred will be an erroneous date and time, which will need to be set in the BIOS the next time you boot the computer.
4. Visual inspection of components
Carefully inspect all capacitors on the motherboard for swelling or leaks, especially in the processor socket area.

Sometimes capacitors swell down instead of up, causing them to tilt as if they were just slightly bent or unevenly soldered.
If any capacitors are swollen, then you need to send the motherboard for repair as soon as possible and ask to resolder all the capacitors, including those located next to the swollen ones.
Also inspect the capacitors and other elements of the power supply; there should be no swelling, drips, or signs of burning.

Inspect the disc contacts for oxidation.

They can be cleaned with an eraser and after that be sure to replace the cable or power adapter that was used to connect this disk, since it is already damaged and most likely caused oxidation.
In general, check all the cables and connectors so that they are clean, have shiny contacts, and are tightly connected to the drives and motherboard. All cables that do not meet these requirements must be replaced.
Check that the wires from the front panel of the case to the motherboard are connected correctly.

It is important that the polarity be observed (plus to plus, minus to minus), since there is a common ground on the front panel and failure to observe the polarity will lead to a short circuit, which is why the computer may behave inappropriately (turn on every other time, turn off itself or reboot) .
Where the plus and minus in the front panel contacts is indicated on the board itself, in the paper manual for it and in the electronic version of the manual on the manufacturer’s website. The contacts of the wires from the front panel also indicate where the plus and minus are. Typically the white wire is the negative wire, and the positive connector may be indicated by a triangle on the plastic connector.

Many even experienced assemblers make a mistake here, so check.
5. Checking the power supply
If the computer did not turn on at all before cleaning, then do not rush to assemble it; first of all, you need to check the power supply. However, in any case, it won’t hurt to check the power supply; maybe it’s because of it that the computer is crashing.
Check the power supply fully assembled to avoid electric shock, short circuit, or accidental fan failure.
To test the power supply, connect the only green wire in the motherboard connector to any black one. This will signal to the power supply that it is connected to the motherboard, otherwise it will not turn on.

Then plug the power supply into the surge protector and press the button on it. Don't forget that the power supply itself may also have an on/off button.
A spinning fan should be a sign that the power supply is turned on. If the fan does not spin, it may be faulty and needs to be replaced.
In some silent power supplies, the fan may not start spinning immediately, but only under load; this is normal and can be checked while operating the PC.
Use a multimeter to measure the voltage between the contacts in the connectors for peripheral devices.

They should be approximately in the following range.
- 12 V (yellow-black) – 11.7-12.5 V
- 5 V (red-black) – 4.7-5.3 V
- 3.3 V (orange-black) – 3.1-3.5 V
If any voltage is missing or greatly exceeds the specified limits, then the power supply is faulty. It is best to replace it with a new one, but if the computer itself is inexpensive, then repairs are allowed; power supplies can be done easily and inexpensively.
The startup of the power supply and normal voltages is a good sign, but in itself does not mean that the power supply is good, since failures can occur due to voltage drops or ripples under load. But this is already determined at subsequent stages of testing.
6. Checking power contacts
Be sure to check all electrical contacts from the outlet to the system unit. The socket must be modern (suitable for a European plug), reliable and not loose, with clean elastic contacts. The same requirements apply to the surge protector and the cable from the computer's power supply.
Contact must be reliable, plugs and connectors must not dangle, spark, or be oxidized. Pay close attention to this, since poor contact is often the cause of failure of the system unit, monitor and other peripheral devices.
If you suspect the quality of the socket, surge protector, power cable of the system unit or monitor, then change them as quickly as possible to avoid computer failure. Do not delay or save on this, as repairing a PC or monitor will cost much more.
Also, poor contact is often the cause of PC malfunctions, which are accompanied by a sudden shutdown or reboot with subsequent failures on the hard drive and, as a result, disruption of the operating system.
Failures can also occur due to voltage drops or ripples in the 220 V network, especially in the private sector and remote areas of the city. In this case, failures may occur even when the computer is idle. Try measuring the voltage in the outlet immediately after the computer spontaneously turns off or restarts and watch the readings for a while. This way you can identify long-term drawdowns, from which a linear-interactive UPS with a stabilizer will save you.
7. Assembling and turning on the computer
After cleaning and inspecting the PC, carefully reassemble it and carefully check that you have connected everything you need. If the computer refused to turn on before cleaning or turned on only once, then it is advisable to connect the components one by one. If there were no such problems, then skip the next section.
7.1. Step-by-step PC assembly
First, connect the motherboard power connector and the processor power connector to the motherboard with the processor. Do not insert RAM, video card or connect disks.
Turn on the power to the PC and if everything is fine with the motherboard, the processor cooler fan should spin up. Also, if a beeper is connected to the motherboard, a beep code usually sounds indicating a lack of RAM.
Memory installation
Turn off the computer with a short or (if that doesn’t work) long press of the power button on the system unit and insert one stick of RAM into the colored slot closest to the processor. If all the slots are the same color, then just go to the one closest to the processor.
Make sure that the memory stick is inserted evenly until it stops and that the latches snap into place, otherwise it may be damaged when you turn on the PC.

If the computer starts up with one stick of memory and there is a beeping sound, then a code usually sounds indicating that there is no video card (if there is no integrated graphics). If the beep code indicates problems with the RAM, then try inserting another stick in the same place. If the problem continues or there is no other bracket, then move the bracket to another nearby slot. If there are no sounds, then everything is probably fine, continue further.
Turn off the computer and insert the second memory stick into the slot of the same color. If the motherboard has 4 slots of the same color, then follow the instructions for the motherboard so that the memory is in the slots recommended for dual-channel mode. Then turn it on again and check whether the PC turns on and what sound signals it makes.
If you have 3 or 4 memory sticks, then simply insert them one by one, turning the PC off and on each time. If the computer does not start with a certain stick or produces a memory error code, then this stick is faulty. You can also check the motherboard slots by moving the working strip into different slots.
Some motherboards have a red indicator that lights up in case of memory problems, and sometimes a segment indicator with an error code, the explanation of which is in the motherboard manual.

If the computer starts, then further memory testing occurs at another stage.
Installing a video card
It's time to test the video card by inserting it into the top PCI-E x16 slot (or AGP for older PCs). Don't forget to connect additional power to the video card with the appropriate connectors.

With a video card, the computer should start normally, without sound signals, or with a single sound signal, indicating the normal completion of the self-test.
If the PC does not turn on or emits a video card error code, then it is most likely faulty. But don't rush to conclusions, sometimes you just need to connect a monitor and keyboard.
Connecting a monitor
Turn off the PC and connect the monitor to the video card (or motherboard if there is no video card). Make sure that the connector to the video card and monitor is connected tightly; sometimes tight connectors do not go in all the way, which is the reason for the absence of an image on the screen.

Turn on the monitor and make sure that the correct signal source is selected on it (the connector to which the PC is connected, if there are several of them).

Turn on the computer and a graphical splash screen and text messages from the motherboard should appear on the screen. Usually this is a prompt to enter the BIOS using the F1 key, a message about the absence of a keyboard or boot devices, this is normal.

If the computer silently turns on, but there is nothing on the screen, there is most likely something wrong with the video card or monitor. The video card can only be checked by moving it to a working computer. The monitor can be connected to another work PC or device (laptop, player, tuner, etc.). Don't forget to select the desired signal source in the monitor settings.
Connecting a keyboard and mouse
If everything is fine with the video card and monitor, then move on. Connect the keyboard first, then the mouse, one at a time, turning the PC off and on each time. If the computer freezes after connecting a keyboard or mouse, it means they need to be replaced - it happens!
Connecting drives
If the computer starts with a keyboard and mouse, then we begin to connect the hard drives one by one. First, connect the second drive without the operating system (if you have one).
Do not forget that in addition to connecting the interface cable to the motherboard, you also need to connect the connector from the power supply to the drive.
Then turn on the computer and if it comes to BIOS messages, then everything is fine. If the PC does not turn on, freezes or turns itself off, then the controller of this disk is faulty and needs to be replaced or repaired to save the data.
Turn off the computer and connect the DVD drive (if any) with an interface cable and power supply. If problems arise after this, then the drive has a power failure and needs to be replaced; repairing it usually makes no sense.
At the end, we connect the main system drive and prepare to enter the BIOS for the initial setup before starting the operating system. We turn on the computer and if everything is fine, move on to the next step.
When you turn on your computer for the first time, go to the BIOS. Usually, the Delete key is used for this, less often others (F1, F2, F10 or Esc), which is indicated in the prompts at the beginning of the boot.

On the first tab, set the date and time, and on the “Boot” tab, select your hard drive with the operating system as the first boot device.
On older motherboards with a classic BIOS it may look like this.

On more modern ones with a UEFI graphical shell it is a little different, but the meaning is the same.

To exit the BIOS and save the settings, press F10. Don't be distracted and watch the operating system load completely to notice possible problems.
After the PC has finished booting, check whether the fans of the processor cooler, power supply and video card are working, otherwise there is no point in further testing.
Some modern video cards may not turn on the fans until a certain temperature of the video chip is reached.
If any of the case fans does not work, then it’s not a big deal, just plan to replace it in the near future, don’t be distracted by it now.
8. Error analysis
This is where diagnostics essentially begin, and everything described above was just preparation, after which many problems could go away and without it there was no point in starting testing.
8.1. Enabling Memory Dumps
If blue screens of death (BSOD) appear while your computer is running, this can make troubleshooting much easier. A prerequisite for this is the presence of memory dumps (or at least self-written error codes).
To check or enable the dump recording function, press the “Win + R” key combination on your keyboard, enter “sysdm.cpl” in the line that appears and press OK or Enter.

In the window that appears, go to the “Advanced” tab and in the “Boot and Recovery” section, click the “Options” button.

The “Record debugging information” field should be “Small memory dump”.

If so, then you should already have dumps of previous errors in the "C:\Windows\Minidump" folder.

If this option was not enabled, then dumps were not saved, enable it at least now to be able to analyze errors if they recur.
Memory dumps may not be created in time during serious failures that involve rebooting or shutting down the PC. Also, some system cleaning utilities and antivirus programs can remove them; you must disable the system cleaning function during diagnostics.
If there are dumps in the specified folder, then we proceed to their analysis.
8.2. Memory dump analysis
To analyze memory dumps in order to identify what leads to failures, there is a wonderful utility “BlueScreenView”, which you can download along with other diagnostic utilities in the “” section.

This utility shows files in which a failure occurred. These files belong to the operating system, device drivers, or some program. Accordingly, based on the file’s ownership, you can determine which device or software caused the failure.
If you cannot boot your computer in normal mode, then try booting into safe mode by holding down the “F8” key immediately after the motherboard screen saver or BIOS text messages disappear.

Go through the dumps and see which files appear most often as the culprits of the failure, they are highlighted in red. Right-click on one of these files and view its Properties.

In our case, it is easy to determine that the file belongs to the nVidia video card driver and most of the errors were caused by it.

In addition, some dumps contained the “dxgkrnl.sys” file, even from the name of which it is clear that it refers to DirectX, which is directly related to 3D graphics. This means that it is most likely that the video card is to blame for the failure, which should be subjected to thorough testing, which we will also consider.
In the same way, you can determine that the fault is caused by a sound card, network card, hard drive, or some program that penetrates deeply into the system, such as an antivirus. For example, if a disk fails, the controller driver will crash.
If you cannot determine which driver or program a particular file belongs to, then look for this information on the Internet by the file name.
If failures occur in the sound card driver, then most likely it is faulty. If it is integrated, then you can disable it through the BIOS and install another discrete one. The same can be said about the network card. However, network failures can be caused by updating the network card driver and connecting to the Internet through a router.
In any case, do not make hasty conclusions until the diagnostics are completely completed; maybe your Windows is simply faulty or a virus has entered, which can be solved by reinstalling the system.
Also in the BlueScreenView utility you can see the error codes and inscriptions that were on the blue screen. To do this, go to the “Options” menu and select the “Blue Screen in XP Style” view or press the “F8” key.

After that, switching between errors, you will see how they looked on the blue screen.

By the error code you can also find the possible cause of the problem on the Internet, but by the ownership of the files this is easier and more reliable. To return to the previous view, you can use the “F6” key.
If the errors always include different files and different error codes, then this is a sign of possible problems with the RAM, in which everything crashes. We will diagnose it first.
9. Testing RAM
Even if you think that the problem is not in the RAM, still check it first. Sometimes a place has several problems, and if the RAM fails, then diagnosing everything else is quite difficult due to frequent PC failures.
Conducting a memory test from a boot disk is a must, as it is difficult to get accurate results in the Windows operating system on a faulty PC.
In addition, “Hiren’s BootCD” contains several alternative memory tests in case “Memtest 86+” does not start and many more useful utilities for testing hard drives, video memory, etc.
You can download the “Hiren’s BootCD” image in the same place as everything else – in the “” section. If you don’t know how to properly burn such an image to a CD or DVD, refer to the article where we looked at it, here everything is done exactly the same.
Set the BIOS to boot from the DVD drive or use the Boot Menu as described in, boot from Hiren's BootCD and run Memtest 86+.

Testing can last from 30 to 60 minutes, depending on the speed and amount of RAM. One full pass must be completed and the test will go around the second round. If everything is fine with the memory, then after the first pass (Pass 1) there should be no errors (Errors 0).

After this, testing can be interrupted using the “Esc” key and the computer will reboot.
If there were errors, you will have to test each strip separately, removing all the others to determine which one is broken.
If the broken bar is still under warranty, then take a photo from the screen using a camera or smartphone and present it to the warranty department of the store or service center (although in most cases this is not necessary).
In any case, it is not advisable to use a PC with broken memory and carry out further diagnostics before replacing it, since various incomprehensible errors will appear.
10. Preparation for component tests
Everything else, except RAM, is tested under Windows. Therefore, in order to exclude the influence of the operating system on the test results, it is advisable to do, if necessary, temporarily and the most.
If this is difficult for you or you don’t have time, then you can try testing on an old system. But, if failures occur due to problems in the operating system, some driver, program, virus, antivirus (i.e. in the software part), then testing the hardware will not help determine this and you may go down the wrong path. And on a clean system, you will have the opportunity to see how the computer behaves and completely eliminate the influence of the software component.
Personally, I always do everything as expected from start to finish as described in this article. Yes, it takes a whole day, but if you ignore my advice, you can struggle for weeks without identifying the cause of the problem.
The fastest and easiest way is to test the processor, unless of course there are obvious signs that the problem is in the video card, which we will discuss below.
If your computer starts to slow down some time after turning it on, freezes when watching videos or playing games, suddenly reboots or turns off under load, then there is a possibility of the processor overheating. In fact, this is one of the most common causes of such problems.
At the cleaning and visual inspection stage, you should have made sure that the processor cooler is not clogged with dust, its fan is spinning, and the radiator is securely pressed against the processor. I also hope that you did not remove it when cleaning, as this requires replacing the thermal paste, which I will talk about later.
We will use “CPU-Z” for a stress test with warming up the processor, and “HWiNFO” to monitor its temperature. Although, it is better to use the proprietary motherboard utility for temperature monitoring, it is more accurate. For example, ASUS has “PC Probe”.
To begin with, it would be a good idea to find out the maximum allowable thermal envelope of your processor (T CASE). For example, for my Core i7-6700K it is 64 °C.

You can find out by going to the manufacturer’s website from an Internet search. This is the critical temperature in the heat spreader (under the processor cover), the maximum allowed by the manufacturer. Do not confuse this with core temperature, which is usually higher and is also displayed in some utilities. Therefore, we will focus not on the temperature of the cores according to the processor sensors, but on the overall temperature of the processor according to the readings of the motherboard.
In practice, for most older processors, the critical temperature above which failures begin is 60 °C. The most modern processors can operate at 70 °C, which is also critical for them. You can find out the actual stable temperature of your processor from tests on the Internet.
So, we launch both utilities – “CPU-Z” and “HWiNFO”, find the processor temperature sensor (CPU) in the motherboard indicators, run the test in “CPU-Z” with the “Stress CPU” button and observe the temperature.

If after 10-15 minutes of the test the temperature is 2-3 degrees below the critical temperature for your processor, then there is nothing to worry about. But, if there were failures under high load, then it is better to run this test for 30-60 minutes. If your PC freezes or reboots during testing, you should consider improving cooling.
Please note that a lot also depends on the temperature in the room; it is possible that in cooler conditions the problem will not appear, but in hotter conditions it will immediately make itself felt. So you always need cooling with a reserve.
If your CPU is overheating, check if your cooler is compatible. If not, then you need to change it; no tricks will help here. If the cooler is powerful enough, but can’t handle it a little, then you should change the thermal paste to a more effective one; at the same time, the cooler itself may be installed more successfully.
Among inexpensive but very good thermal pastes, I can recommend Artic MX-4.

It must be applied in a thin layer, having first removed the old paste with dry material and then with cotton wool soaked in alcohol.
Replacing thermal paste will give you a gain of 3-5 °C; if this is not enough, then simply install additional case fans, at least the most inexpensive ones.
14. Disk testing
This is the longest step after the RAM test, so I prefer to leave it for last. To begin with, you can conduct a speed test of all drives using the “HDTune” utility, for which I give “”. This sometimes helps to identify freezes when accessing the disk, which indicates problems with it.

Look at the SMART parameters, where the “disk health” is displayed, there should be no red lines and the overall disk status should be “OK”.

You can download a list of the main SMART parameters and what they are responsible for in the “” section.
A full surface test can be performed using the same Windows utilities. The process may take 2-4 hours depending on the size and speed of the disk (about 1 hour for every 500 MB). Upon completion of the test, there should not be a single broken block, which are highlighted in red.

The presence of such a block is an unequivocal death sentence for the disk and is a 100% guaranteed case. Save your data faster and change the disk, just don’t tell the service that you dropped your laptop
You can check the surface of both regular hard drives (HDD) and solid-state drives (SSD). The latter really don’t have any surface, but if the HDD or SSD freezes every time during the test, then most likely the electronics are faulty and need to be replaced or repaired (the latter is unlikely).
If you are unable to diagnose a disk under Windows, the computer crashes or freezes, then try doing this using the MHDD utility from the Hiren’s BootCD boot disk.
Problems with the controller (electronics) and the disk surface lead to error windows in the operating system, short-term and complete freezes of the computer. Typically these are messages about the inability to read a particular file and memory access errors.

Such errors can be mistaken for problems with the RAM, while the disk may well be to blame. Before you panic, try updating the disk controller driver or, conversely, returning the native Windows driver as described in.
15. Testing the optical drive
To check an optical drive, it is usually enough to simply burn a verification disc. For example, using the “Astroburn” program, it is in the “” section.

After burning a disc with a message about successful verification, try copying its entire contents on another computer. If the disk is readable and the drive reads other disks (except for hard-to-read ones), then everything is fine.
Some of the problems I have encountered with the drive include electronics failures that completely freeze or prevent the computer from turning on, failures of the retractable mechanism, contamination of the laser head lens, and breakage of the head as a result of improper cleaning. In most cases, everything is solved by replacing the drive; fortunately, they are inexpensive and even if they have not been used for several years, they die from dust.
16. Body check
The case also sometimes breaks, sometimes the button gets stuck, sometimes the wiring from the front panel falls off, sometimes it shorts out in the USB connector. All this can lead to unpredictable behavior of the PC and can be solved by thorough inspection, cleaning, a tester, a soldering iron and other available means.
The main thing is that nothing short-circuits, as evidenced by a non-working light bulb or connector. If in doubt, disconnect all wires from the front panel of the case and try working on the computer for a while.
17. Checking the motherboard
Often, checking a motherboard comes down to checking all components. If all components individually work normally and pass tests, the operating system is reinstalled, but the computer still crashes, the problem may be with the motherboard. And here I can’t help you; only an experienced electronics engineer can diagnose it and identify a problem with the chipset or processor socket.
The exception is the crash of a sound or network card, which can be solved by disabling them in the BIOS and installing separate expansion cards. You can resolder the capacitors in the motherboard, but, say, replacing the north bridge is usually not advisable, since it is expensive and there are no guarantees; it is better to immediately buy a new motherboard.
18. If all else fails
Of course, it’s always better to discover the problem yourself and determine the best solution, since some unscrupulous repairmen try to pull the wool over your eyes and rip off your skin.
But it may happen that you follow all the recommendations, but cannot identify the problem, this has happened to me. In this case, the problem is most often in the motherboard or in the power supply; there may be a microcrack in the PCB and it makes itself felt from time to time.
In this case, there is nothing you can do, take the entire system unit to a more or less well-established computer company. There is no need to carry components in parts if you are not sure what is wrong, the issue will never be resolved. Let them sort it out, especially if the computer is still under warranty.
Computer store specialists usually don’t worry, they have a lot of different components, they just change something and see if the problem goes away, thus quickly and easily fixing the problem. They also have enough time to conduct tests.
19. Links
Transcend JetFlash 790 8GB
Hard drive Western Digital Caviar Blue WD10EZEX 1 TB
Transcend StoreJet 25A3 TS1TSJ25A3K
Hi all! Many PC owners often catch themselves thinking that their machine is not working fast enough, or “freezes,” so to speak.
In this case, it is worth testing your “iron friend” and identifying the reason for this behavior. Today I will tell you how to check the speed of your computer. But first, let's decide why we need to do this.
Why is verification needed?
You should spend valuable time on tests for a number of reasons:
- Testing will allow you to understand which tasks your computer can perform easily and which are difficult for it.
- If you are going to purchase a new PC or laptop, then using the results of the check, you can choose the most suitable model that will meet all your needs.
- You'll know which components are slow and can replace them during the upgrade.
- You can compare the characteristics of your computer with the PC of one of your friends and find out whose PC is the most powerful.
How to do it?
Well, checking speed is a very necessary and important thing, but how can you find out the speed, how can it be measured? In order to find out the speed of your computer, you will need a PC with Windows installed on it, the usual set of applications for this OS, and my instructions, which I will describe below.
You can check using three simple methods:
- using the Windows Experience Level Index;
- using the Windows Task Manager, which should already be familiar to you;
- based on the use of special programs.
Let's look at each of them in detail.
First way
Windows has a very useful utility called " Performance Index" This application takes measurements of your PC's performance, shows you a score for each, and, of course, evaluates overall system performance. In this case, the size of the overall indicator does not exceed the smallest indicator among the elements.
In versions 7, 8 of Windows and Vista, in the Control Panel you need the “Performance Counters and Tools” section (in Windows xp you cannot check performance in this way).

If we talk about the 7th version: the maximum score is 7.9, the average is from 3.5 to 5. If the performance level index is more than five, then you don’t have to worry about anything. However, if the scores are below the “3.5” rating, then your PC should either be replaced with a new one or upgraded to the old one (which will be much cheaper).
In Vista the maximum is 5.9, and in 8 it is 9.9.
In Windows 8.1 and 10, performance testing is done using PowerShell. To open it, write “PowerShell” in the search bar on the start screen, right-click on the icon of the found utility in the search results and select “Run as administrator” in the context menu.
In Windows PowerShell, type winsat formal and press Enter. As a result of these actions you will see the following:

There is one small feature: if you are doing the test on a laptop, it must be connected to a 220V network, otherwise the program will generate an error.
The whole process may take a few minutes, and the result will be saved here:
C:\Windows\Performance\WinSAT\DataStore\...Formal.Assessment (Recent).WinSAT.xml.
You cannot test the system in Windows PowerShell without administrator rights; you can only view the performance ratings from the previous test. To do this, write down "Get-CimInstance Win32_WinSAT" and press Enter. As a result you will see:

Second way
If you want to have an extremely accurate idea of what the speed of your system is, then this method will be most convenient for you. Its main advantage over the above is that it is able to demonstrate not only how fast the computer itself is, but also how fast its individual elements are.
To determine the quality of work using this method, you must perform the following steps:
- Press the Alt, Ctrl, Delete keys simultaneously.
- Click on “Task Manager”.
- In the task manager, select the tab called “Performance”.
In “Performance” you will see how well your computer is functioning. If the level of quality of its work is insufficient, then you can try to upgrade your machine.

The graphs allow you to determine what is causing the slow operation of your PC: processor load or lack of RAM. The green line indicates excellent work, the yellow line indicates an acceptable level, but if the line is red, then urgent action must be taken.
Third way
This method involves using special programs. There are special applications that are created specifically to collect data about the state of the computer.
There's just a ton of all kinds of tests, numbers and information. With these products you can get the most comprehensive data about the performance of your PC. What kind of programs are these? Here is a list of those that I have used at least once:
Everest. It was created primarily for analyzing PC configurations, but it provides a large number of different tests.
SiSoftware Sandra. At the moment, the best option if you want to test the level of performance.
3Dmark. His main specialization is testing computer video cards. Consists of a huge number of different texturing tests, working with 3D modeling, etc. There is also a comprehensive testing option, reminiscent of a video game that is played not by you, but by the program. During its work, it evaluates the stability of the video card during heavy loads and measures the frame rate.
PCMark. This is lightweight software intended for limited use. Serves only to check performance. Allows you to perform integral testing of any PC component. The main feature is the ability to compare the performance of your own computer with the world average.
You can download these programs from the official Internet resources of their developers online.
Well, that’s all, dear friends! In the end, I would like to tell you about a training course, the effectiveness of which I was able to “test” on myself. We are talking about the course Secrets of successful computer work».
What distinguishes this course from a huge number of other similar courses is primarily the author’s high professionalism and simplicity of presentation. All the intricacies of working on a PC are explained so simply and clearly that even elderly people, who, as we know, shy away from modern technology, turn into experienced users in a couple of months of training.
I wish you to be computer literate people, and I and my blog will help you become so. Therefore, do not forget to subscribe to updates and follow the release of a new article.
Share information on social media. networks, see you!
Sincerely! Abdullin Ruslan
How to identify the components located inside the computer and view their parameters? How to check a processor or video card for performance and absence of overheating? It is enough to use testing and diagnostic software.
Alternative programs: Catzilla, Unigine Superposition, Unigine Heaven, 3D Mark 11
PCMark is, in turn, a popular tool for checking the overall performance of a computer. The tests include, but are not limited to, applications such as office worksheet operations, 2D graphics operations, Internet browsing, and video conferencing.

In the latest version, however, they abandoned the media test (SSD or HDD). Only the Basic version is free.
If you want to check how your computer copes with the task of virtual reality and serves games designed for Oculus Rift or HTC Vive glasses, VR Mark will come in handy. As with other Futuremark programs, only the Basic version is free.

The tool is equipped with three tests, of which one is basic (Orange), for VR games using DirectX 12 (Cyan) and the most demanding ones (Blue).
Alternative program: SteamVR Performance Test
CPU-Z – for hardware identification
The main and most popular program for identifying processors, motherboards (including UEFI BIOS versions), memory (including SPD) or graphics cards. We get an accurate preview of the hardware data.

You can also test the processor in mono- and multi-threaded applications, and compare the results with other processors in the database. If you want to know what exactly is on your computer and how it works, this is the first application you should install.
Thanks to CPU-Z you can easily check, for example, at what frequency and delays the RAM operates, as well as the processor clock speed in real time. It is worth noting the fact that an Android version is available.
Alternative programs: Crystal CPU ID, Speccy
GPU-Z is the main program for identifying video cards and their characteristics, including their current frequency. A basic test is available in the application, which allows you to “quickly” verify that the video card is working correctly.

It is worth noting, however, that the test in this program will not give confidence that, for example, when overclocked, the video card will work completely stably. To do this, it is worth using more advanced products, for example, a stress test in the 3D-Mark program.
Alternative program: GPU Caps Viewer
Cinebench is a benchmark tool based on the Cinema 4D engine to test CPU performance. It does this by creating a 3D scene - the test can be run using all CPU threads or just one thread. This gives a good idea of the capabilities of the processors.

Cinebench also has a built-in graphics card test that uses a complex 3D scene that, using a car chase example (made by renderbaron), measures graphics card performance in OpenGL mode.
Alternative programs: LuxMark (3D graphics rendering using CPU or GPU), CompuBench (3D graphics rendering using GPU)
OCCT 4.5.1 – stability and temperature check
Alternative programs: FurMark, Prime95 or for temperature monitoring SpeedFan, RealTemp and CoreTemp.
MemTest86 is an excellent program for checking whether your RAM is working correctly. This is one of those components whose stable operation is very important for the performance of the computer.

The program runs from a bootable USB flash drive (or CD/DVD if someone else uses them).
Alternative program: Prime95
Prime95 – stability or temperature test under load
Another great program for testing the stability or temperatures of computer components under high load. We can choose between tests that load the most, for example, RAM or CPU.
Alternative programs: OCCT, MemTest86
It is difficult to point out one, the best program for checking the performance of storage media (HDD and SSD hard drives), but if you already have to do so, then CrystalDiskMark will be your favorite. It allows you to check the performance of media, both in the case of reading/writing sequential data and for small files.

It gives a good idea of the actual performance of the node being tested. If you are interested not only in performance (but, for example, also in SMART readings, the ability to download new firmware or perform Secure Erase operations), it is worth taking an interest in the applications included with the manufacturer's drives. For example, in the case of SanDisk, the SanDisk SSD Dashboard program is available, and in the case of Samsung, Samsung Magician is available.
Alternative programs: AS, AS SSD, manufacturer's programs included