But what about the “couch” lazy people, and just beginning to learn the world of digital processing?
And you can ask Google, for example, with such a request Zhmak mouse. And what do we see? Thousands of search results with thousands of offers to download the best, there is not too little pathos - THE BESTselections of presets. Yeah, tell me, there’s a bunch of links to download a pig in a poke, links with archives with 5,000 junk presets in one archive, a bunch of trojans and intrusive ads - you won’t get away with just one can of coffee and a bunch of gray hair on the pope slag a couple of worthy presets that, when you click "make a masterpiece" application, and further refinement with pens, you can get an acceptable result.
You may ask, are there conditionally “good” preset sets for Adobe Lightroom? There are - overseas photo gurus have long been filtering everything out, from whom they have to be stolen, where they have to be bought, where they should be "taken to see trohe for sebe."
Lightroom is one of the most popular photo editing programs, and not without reason. Those who handle a large number of photos can increase efficiency and reduce the time spent on processing and editing thanks to a number of automatic functions. One of such functions that allows for a large share of efficiency and time saving is the use of presets. Using presets, you can repeatedly apply the same effects to photos, and you can even apply them to a large number of photos at once (batch mode). Lightroom comes with a small number of presets, and you can download free presets, purchase professional presets, or create your own. A great feature of Lightroom presets is that they are fully editable and flexible. You can apply a preset, and then make minor or significant adjustments to these settings to suit the needs of a particular photo. Since the results of applying presets will always vary slightly from one photograph to another, this flexibility is a key factor. There are a number of different sites where you can download free presets. This is one of these collections and will go below:
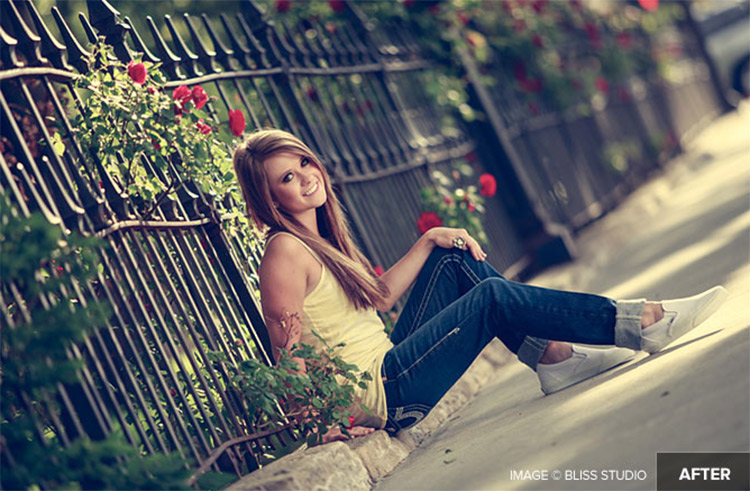
Vintage Lightroom Presets
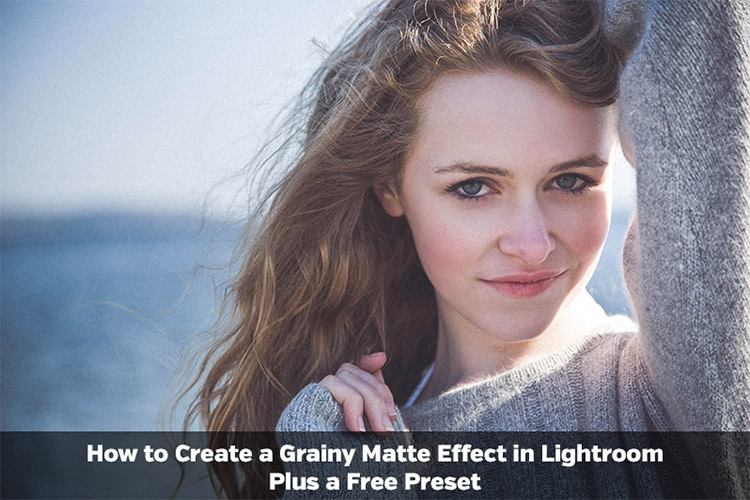
Grainy Matte Lightroom Preset
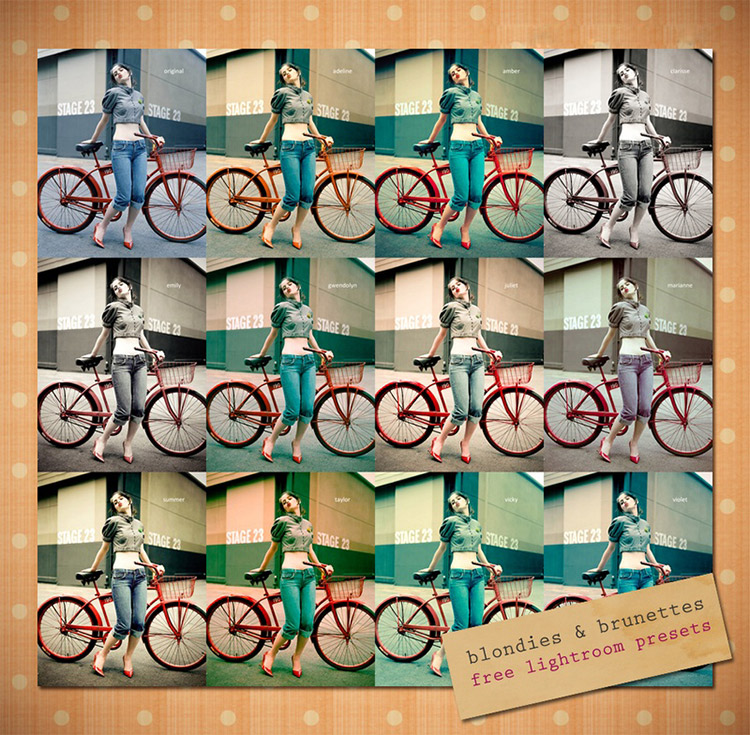
Blondies and Brunettes Lightroom Presets
onOne Signature Collection Vol. 1
onOne Signature Collection Vol. 2
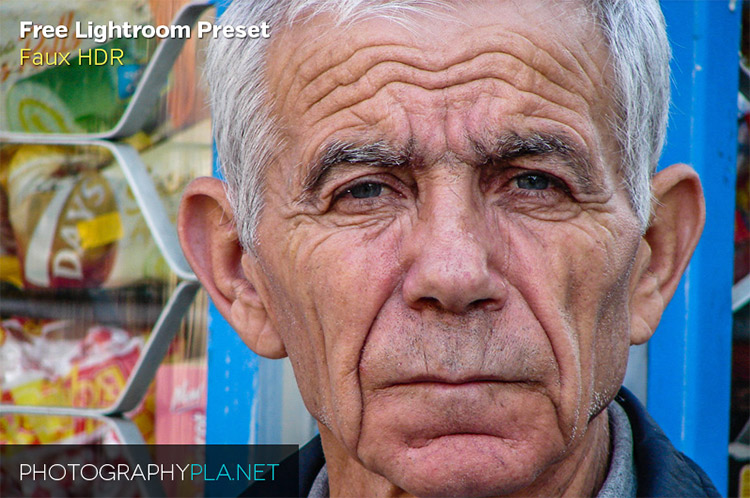
Faux HDR Lightroom Preset
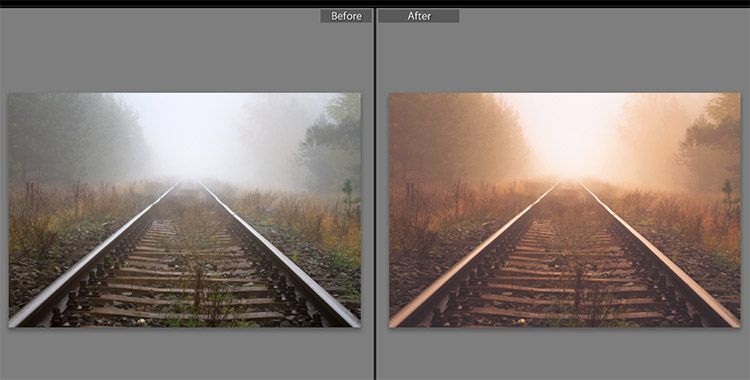
Warm Fog Lightroom Preset
Sunflare glow effect

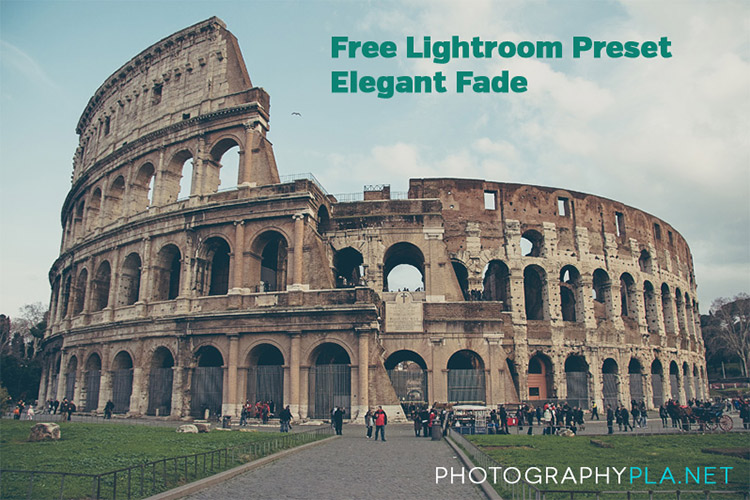
Elegant Fade Lightroom Preset
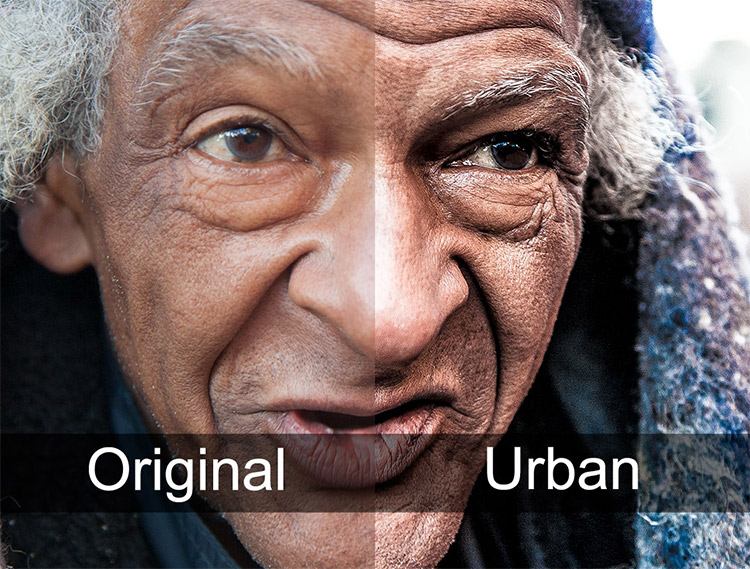
Grungy Urban Lightroom Presets
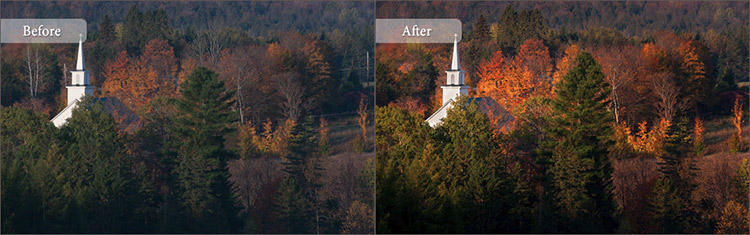
Fall Colors Lightroom Presets
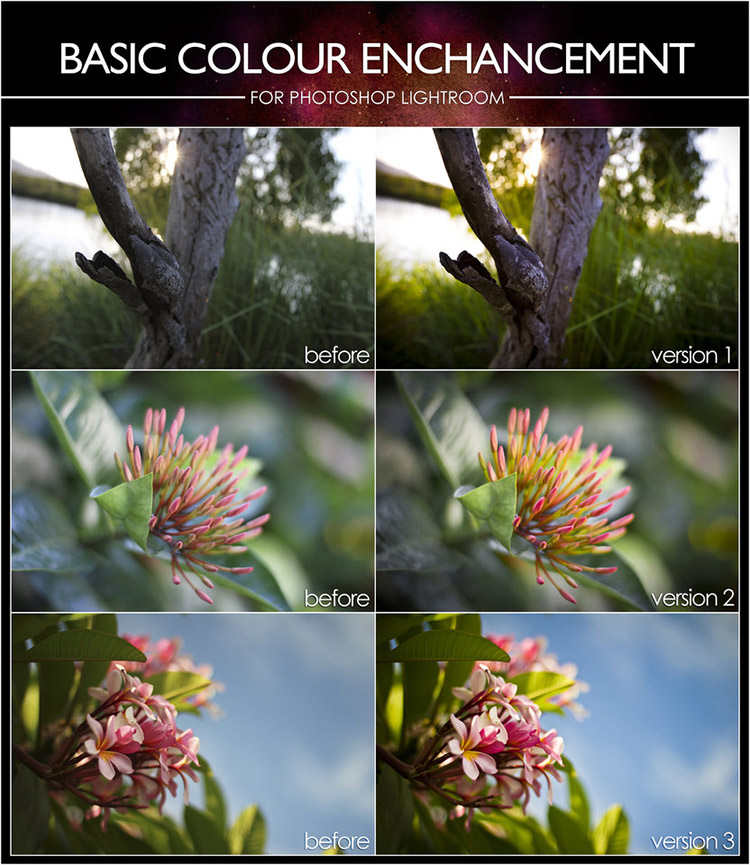
Basic Color Enhancement Lightroom Presets
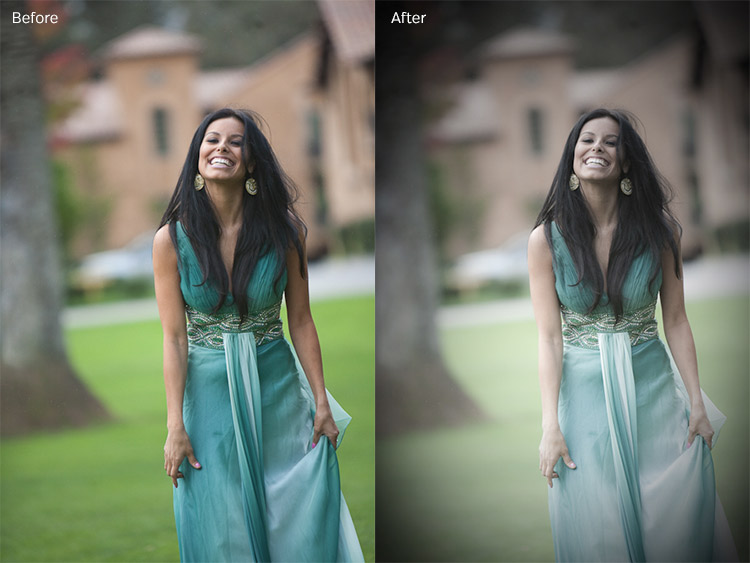
Soft and Dreamy Lightroom Preset
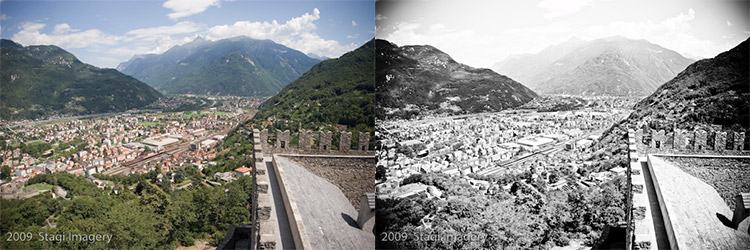
Black & White Lightroom Presets
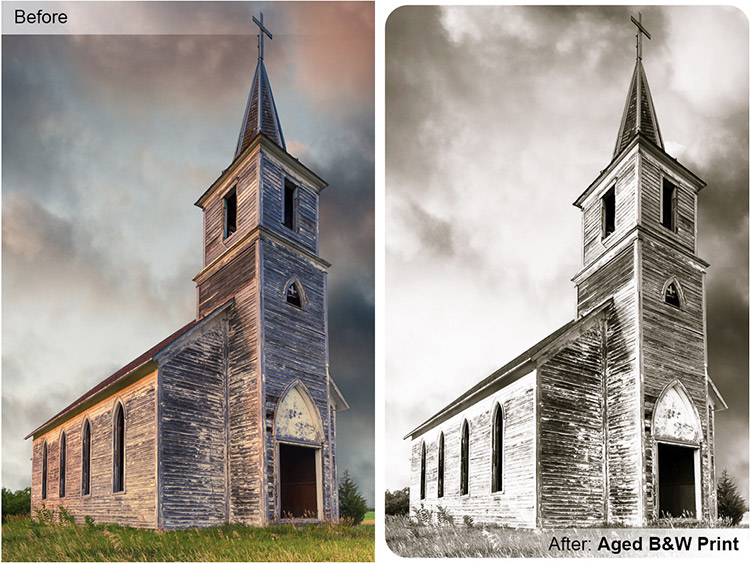
Aged Black & White Print Preset
Fashion Lightroom Presets
Caramel lightroom preset
Peach and Purple Skies Lightroom Preset
![]()
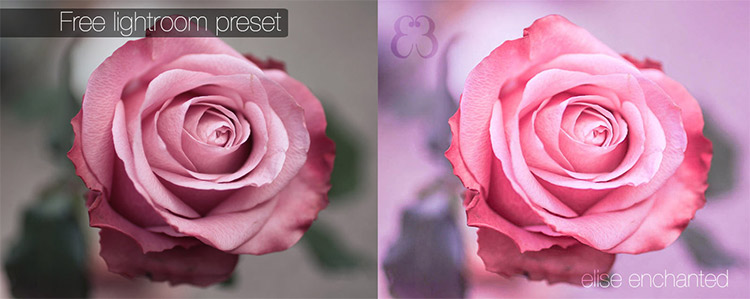
Soft Rose Lightroom Preset
Summer Lightroom Presets
![]()
Mini Enlighten Lightroom Presets

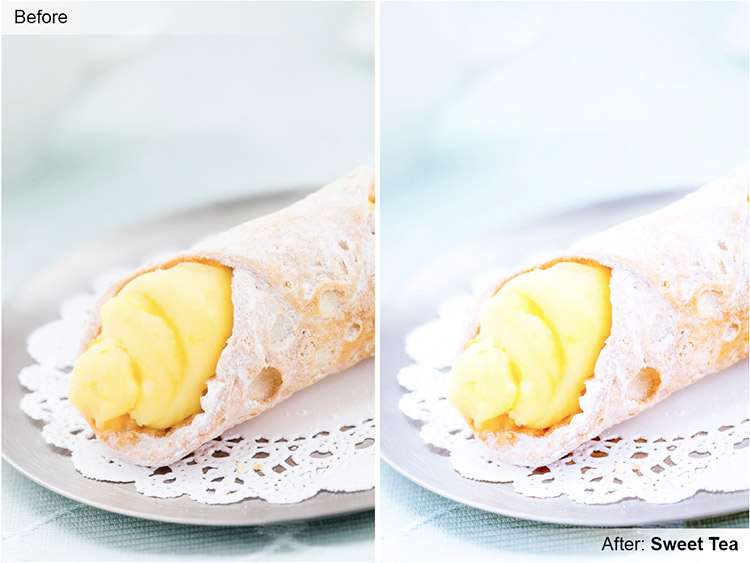
Sweet Tea Lightroom Preset
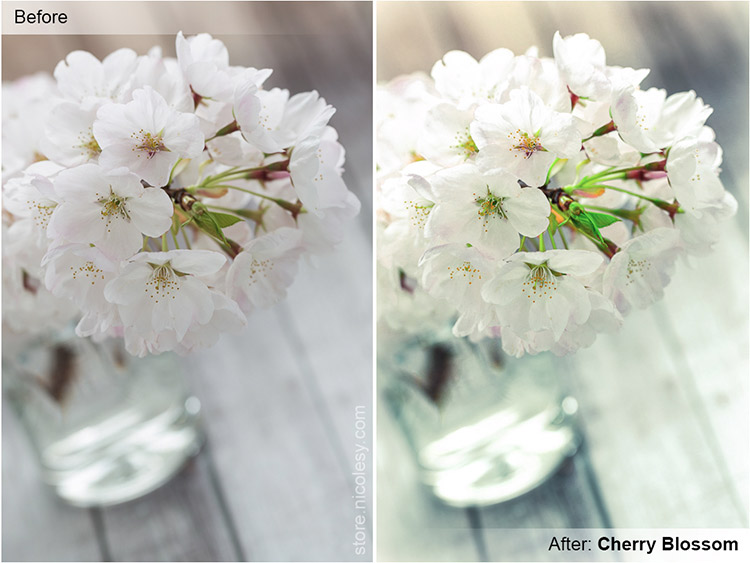
Cherry Blossom Lightroom Preset
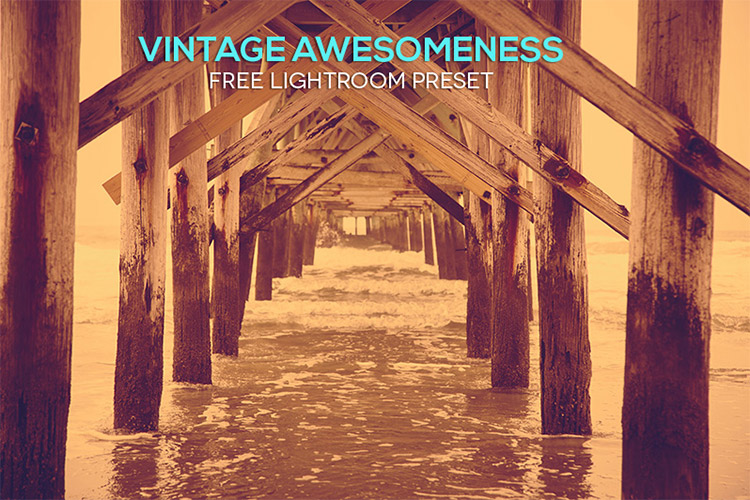
Vintage Awesomeness Lightroom Preset
Vintage Lightroom Presets
Download a selection of presetsMirror 1
Usually I write all articles binge with a continuous stream of thoughts, and it is not always possible to follow the rules. If you find an error, please select a piece of text and press Ctrl + Enter.
“Similar action collections from professional photographers in the West cost from two hundred dollars because they really save a lot of time and effort. Here you will learn how to get them for a quarter of their real price!”
Greetings, colleague!
My name is Evgeny Kartashov. I am a professional photographer from St. Petersburg.
Here I would like to talk about a more important step in working with this program - this is the automation of many operations in processing photos due to pre-prepared presets.
What are presets?
A preset is a saved set of settings, such as: white balance, exposure, curves and any others that you can apply to a photo with one click and instantly get the result.
If you see, for example, that the photo turned out to be underexposed, then you simply select the exposure enhancement preset and apply it to the photo. Further, let's say you noticed that the photo is a lot of noise. Choose a noise reduction preset - and in one click you lower the noise, and so on with all other parameters. With presets, the process of processing photos is accelerated at times.
Each photographer who has been working in Lightroom for a long time has accumulated his own collection of presets, which he constantly uses in his work. This collection has accumulated with me.
With this collection, processing most of my photos takes me no more than two minutes.
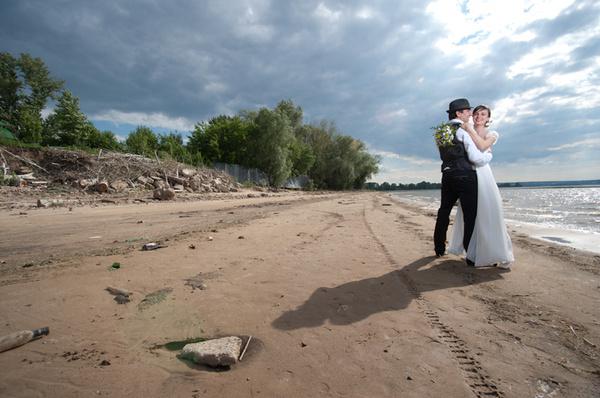
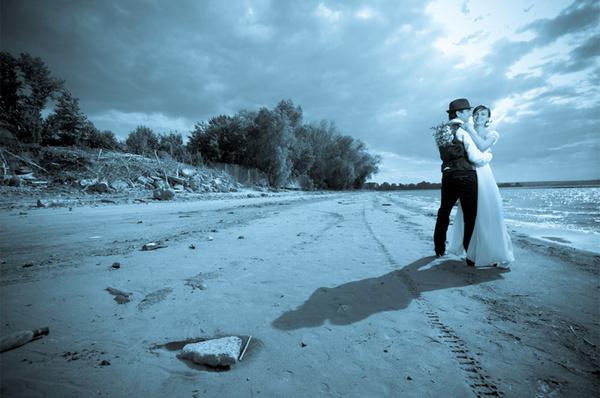
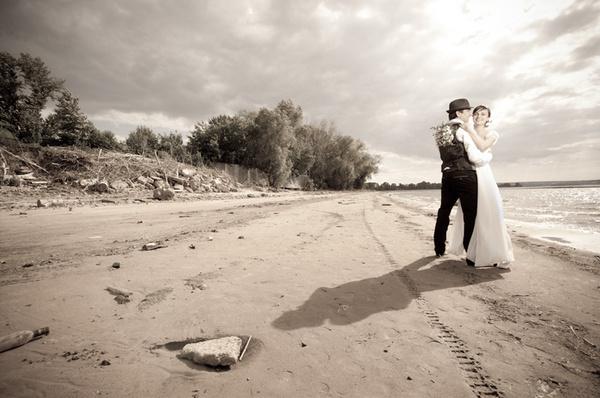
Wedding photo from a photographer from Nizhny Novgorod Vlad Barinov. It performed tone correction and color styling using presets.
My collection is designed to process photos as quickly as possible and includes 92 presets, categorized for ease of use.
Due to numerous requests from clients of my course to sell my finished collection, I decided to place it in a separate information product available for ordering.
And here is the result of my work:
New collection of presets:
92 PRESETS FOR LIGHTROOM
from Eugene Kartashov
All presets are arranged in 11 directories for ease of installation. The name of each folder corresponds to its functional purpose during processing. For example, in the 01_EXPOSURE folder there are presets for adjusting the corresponding parameter, i.e. exposure.
Translated into Russian, category names will be as follows:
00. Miscellaneous
01. Exposition
02. Toning
03. Sveta
04. Shadows
05. Contrast
06. Details
07. Vignetting
08. Saturation
09. Noise reduction
10. Sharpness and grain
Each category of presets affects strictly defined parameters without affecting the rest. This makes it possible, sequentially moving from one group of presets to another, to quickly process any images, leading them to the desired appearance.
100% processing in Lightroom. Processing time: ~ 1 minute.
An example of processing landscape photography using a set of presets. High contrast photo between foreground and background. Here a small manual editing of the photo was applied after applying the presets.
But presets are not everything ...
Presets themselves may not give you anything if you do not know how to use them correctly, so I have prepared instructions for you from eight video tutorials.
The lessons show the installation process of presets, their functional purpose, as well as working with presets, are discussed in detail with a few real examples.
Lesson 1. Installing Presets 2:28
In this tutorial, you will learn how to properly install my collection of presets in Lightroom. The process is described for both Windows-based computers and OS X (Mac OS).
Lesson 2. Assigning Preset Categories 5:18
In this lesson, you will learn how presets are organized in a set and the principles by which you need to process photos using these presets. This lesson will be the foundation for further practical work with presets.
Lesson 3. Processing Example Using Presets 8:12
Now consider the practical application of these preset sets. I specially picked up photographs of different genres so that you can see the versatility of my system. The fact is that the difference between my organization of presets is that we do not get a result with one preset, but we consistently approach the desired result, applying preset after preset.
Lesson 4. Processing Example Using Presets 7:40
Here you will learn how to work with presets to affect the light and dark colors in the photo. Here you will see the work of presets for quick creation vignettes to change saturation and reduce noise. We’ll also work with a sharpening preset.
100% processing in Lightroom. Processing time: ~ 1 minute.
The photo was taken at the celebration of the 80th anniversary of the Moskovsky Exhibition and Convention Center, St. Petersburg. Sophisticated lighting and a high pace of shooting did not allow for perfect exposure and white balance. White balance corrected manually, tonal range correction, noise reduction and sharpening are performed using presets.
Lesson 5. Landscape Processing 10:48
Not all photographers shoot portraits, many do not shoot them at all, but prefer to shoot, for example, landscapes. In this lesson, you will see how to process using landscape photography presets. Here we will deviate from the general methodology, which you should know and understand when to use it.
Lesson 6. Processing complex shots 7:56
Sometimes you have to save images taken in very adverse conditions. For example, pictures taken in low light conditions or under the light of energy-saving lamps that spoil skin color. In this video, I will show you how to process such pictures with presets.
Lesson 7. Processing wedding photos 7:42
Lightroom is a favorite program for wedding photographers. Since a lot of photos are obtained from the wedding, and each of them needs to be processed at least minimally, Lightroom here will come in handy. In this tutorial, I will show you the main points for processing wedding photos with my presets.
100% processing in Lightroom. Processing time: ~ 1 minute.
Another wedding photo from Vlad Barinov. It also performed tone correction and color styling using presets.
Lesson 8. Process Switch Presets 9:47
In this tutorial, I'll tell you about presets for switching processes. There are three photo-processing processes in Lightroom 4 - 2012, 2010 and 2003. It would seem that there are a new version process, why do developers leave old versions of processes? You will learn about this from the lesson and understand how you can use processes to speed up your work.
Among other things, you will learn how to optimize the combination of Lightroom and Photoshop to get even more impressive results.
All this awaits you in my collection:
New collection of presets:
92 PRESETS FOR LIGHTROOM
from Eugene Kartashov
This is the best way to speed up photo processing in Lightroom.
I have been using this collection of presets for the third year and processed over a thousand photos with it, saving myself dozens of hours of time.
During processing, we often repeat the same actions. For example, when processing several images from the same series, it is often required to set approximately the same parameters for all images. By automating these actions, you can save a lot of time.
Copy and sync settings
After you set the required settings for the image, you can save them - “copy” to the clipboard analog, and then “paste” it from the clipboard any number of times and apply to other images.
To copy the settings, click the Copy button at the bottom of the left panel group (or use the key combination Ctrl + Shift + C). A dialog for copying settings will open, in which you need to check the boxes with the settings that will be copied and clear the checkboxes next to those settings that we do not need. To select all the settings at once, click the Check All button to clear all the check boxes - Check None.
Copy Settings Dialog
For example, to copy the white balance and basic tone settings, select the White Balance and Basic Tone check boxes, and clear the rest of the check boxes. To copy the areas in which you retouched the dust on the matrix, select only one check box - Spot Removal.
Then click the Copy button. Now, to apply these settings to any other image, select it in the ribbon and press the key combination Ctrl + Shift + V or the Paste button at the bottom of the left panel group. All saved values \u200b\u200bwill be immediately applied to the image.
Sync Settings
Syncing settings is slightly different than copying. When copying settings, you can subsequently apply them an unlimited number of times, but each time to one image. Synchronization, by contrast, allows you to make the same group of settings the same for all selected images at once.
To synchronize settings, set the desired parameters for one image and select it in the ribbon (its settings will be applied to all other images). Then select the remaining pictures that you want to sync. To select several pictures in a row, click on the last picture while holding down the Shift key; To select images at random, click on their thumbnails while holding down the Ctrl key.
After all the pictures have been selected, click the Sync button at the bottom of the right panel group (or use the keyboard shortcut Ctrl + Shift + S). A dialog for selecting settings for synchronization will open - it is completely similar to the dialog that you saw when copying settings. Check the boxes next to the settings that should be synchronized, and click the Synchronize button. The specified settings from the main image (the one that you selected first) will be applied to all other selected images.
When processing a series of shots taken under similar lighting conditions, it makes sense to make settings for one image, synchronize settings, and then fine-tune the rest of the shots - this will save a lot of time.
It’s good practice to synchronize the white balance settings for pictures from the same series that will be printed and viewed together (for example, on one page in an album). When the pictures are viewed one at a time, a slight discrepancy in the white balance is not noticed, but it is worth placing them side by side, and the discrepancy immediately catches the eye. To synchronize only the white balance, reset all settings in the synchronization dialog box with the Check None button, and then select the White Balance check box.
Using Presets
Presets (or presets) are another powerful tool to speed up work in Lightroom. Preset is a set of settings that can be applied to the image with one click. Presets are usually used for creative image processing and the application of various effects. To work with them in the left panel group there is a Presets panel.
Lightroom has a fairly large number of built-in presets: to see them, expand the Lightroom Presets folder in the Presets panel. Swipe the mouse over the list of presets, and you will see how the thumbnail of the image changes on the navigator panel: it shows what effect the selected preset will have on the picture. Click on the option you like, and the image in the workspace will also change. Using presets, you can significantly change the appearance of the original image.
In addition, you can download new presets from the Internet. To use them in Lightroom, you need to copy them to the Develop Presets folder. The easiest way to find this folder is to go to Edit\u003e Preferences, the Presets tab, and click the Show Lightroom Presets Folder button.
Source image
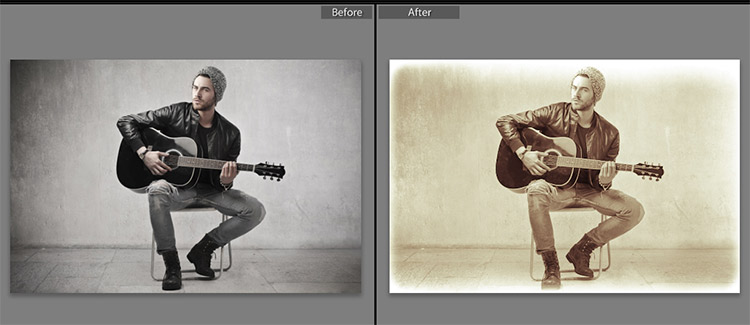
Processing with Selenium Tone Preset
Processing with Aged Photo Preset
After processing the image in the original way, you can save its settings as a preset so that you can quickly apply them to other images later. Moreover, you can save not all the settings, but selectively: for example, only toning.
After you have set the required parameters for one shot, click on the (+) icon to the right of the title bar of the Presets panel. The New Develop Preset dialog opens. In the Preset Name field, the name of the preset is entered, in the Folder line - the folder into which the preset will be placed is indicated. It remains only to set the checkboxes in front of those parameters that should be saved in the preset (similar to synchronizing settings). Practical Guidelines for Using Presets
A rare picture can be brought to the ideal with a single preset, so take them as the starting point of processing, and not as the final chord.
Analyze the processed images: perhaps some parameters may be approximately the same for all images. For example, if you set Blacks +10, Vibrance +15 to all pictures, it makes sense to save this setting as a preset.
Keep creative settings related to color changes, tinting, etc.
If you use frames (decorated with vignettes), you can also save them as presets.
You can also create several presets for suppressing noise in pictures taken at different sensitivity settings.
Using plugins
Plugins - or programs that complement and expand Lightroom's functionality - can provide substantial help in automating work. After installation, plugins, as a rule, go to the menu Photo\u003e Edit In.
When installing the plugin, keep in mind that for Lightroom and Photoshop most often there are different versions of the same plugins.
Please note that using plugins stops non-destructive editing, i.e. Before transferring the picture to the plugin, Lightroom applies all the settings to it and saves it as a file on disk. Therefore, it will be logical to use plugins at the final stages of processing, after all the settings have already been made.
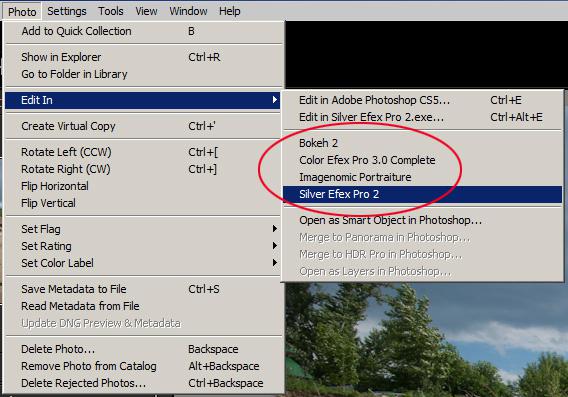
List of plugins that can be used to process a snapshot
After starting the plugin, Lightroom will open a dialog box in which it will offer one of several options for processing the image to choose from. We need to choose the first option - Edit a Copy with Lightroom Adjustments: in this case, you will process a copy of the image in the plugin with all the settings made earlier in Lightroom (however, if you work with RAW, only this option). If you select Edit Original, the settings made in Lightroom will be ignored.
By expanding the Copy File Options section, you can change the parameters of the file that will be transferred from Lightroom to the plugin. In most cases, you can reduce the color depth (Bit Depth parameter) to 8 bits: in this case, the processing speed will be higher and the file size smaller.
Note. In order not to change these settings each time, set them in the Edit\u003e Preferences dialog, the External Editing tab.
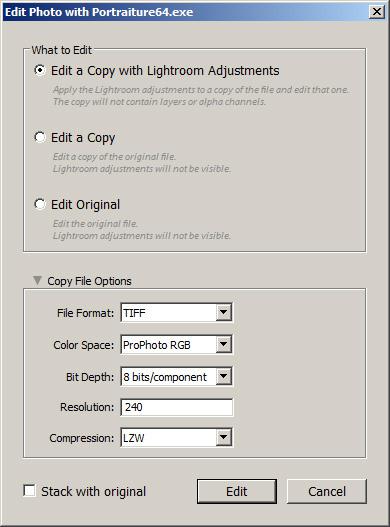
Dialog displayed at plugin startup
Imagenomic portraiture
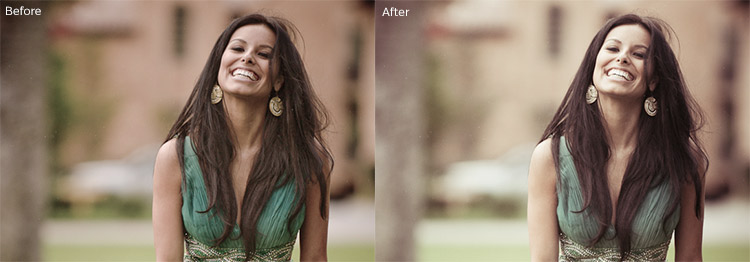
Portraiture is perhaps the most powerful plug-in for portraiture processing today. Its main purpose is to eliminate skin imperfections, preserving its texture, and not to exert influence on other details of the image - eyes, hair, etc. Among the additional features of the plugin are toning, sharpening, and brightness adjustment.
There are many myths associated with Portraiture. Often you hear that Portraiture is blurring the image, or that real pros do not use this plugin. In fact, Portraiture is just a tool, and the result of its use depends entirely on the photographer.
To start, run the command Photo\u003e Edit In\u003e Imagenomic Portraiture. After starting the plugin, you will see something similar on the screen. I recommend immediately switching the image to Split Preview using the buttons above the workspace. So you can simultaneously see the original and processed image, which will simplify the selection of optimal settings. Under the workspace, select the desired image scale, preferably 100% - well, or at least 50.
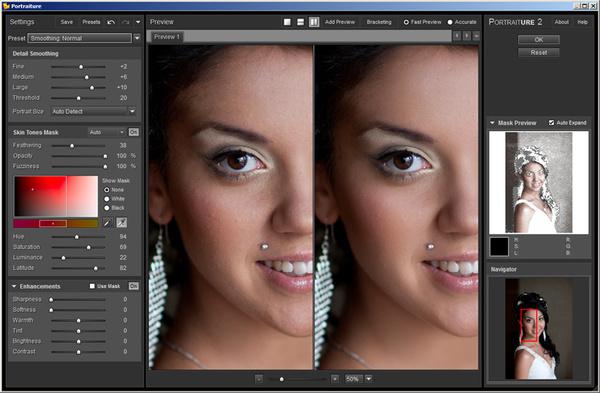
Portraiture Plugin Interface
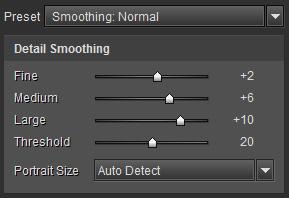
Settings affecting image processing are located on the left. The Detail Smoothing section contains parameters that affect smoothing of the skin. The Fine, Medium, and Large knobs control the smoothing of parts of various sizes. Fine affects the smallest details, such as skin pores. Large affects the alignment of color and tonal transitions on the skin.
It is interesting that the value 0 at the slider does not correspond to the zero effect; to completely disable processing, it is necessary to move the slider to the leftmost position: to the value –20.
The Threshold parameter affects the intensity of the effect: the higher it is, the more details in the image will be smoothed.
Set these parameters so that the skin becomes smooth, but does not resemble a plastic mannequin. As a first approximation, you can use the Smoothing: Normal preset from the list above.
Skin smoothing settings
Note. Before using Portraiture, it makes sense to perform a minimal retouch - to remove the largest and most obvious skin defects. In this case, to achieve positive results, less impact power will be required, and the image will look more natural.
In the next section of the Skin Tones Mask, the settings are concentrated that control the skin color mask - that is, the area affected by the plug-in. The accuracy of the plug-in depends on the accuracy of the mask selection.
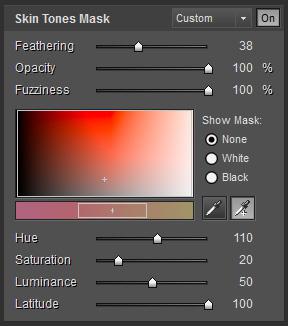
Skin color mask settings
You can start with an automatically created mask (Auto mode in the section header). To set a mask manually, use two droppers. The left - Pick Mask Color - sets the main color of the mask, and the right - Expand Mask Color - expands the borders of the mask when you click on areas of different shades.
The range of shades that form the mask is visible in the box. It can be moved with the mouse or adjusted with the sliders Hue, Saturation, Luminance and Latitude. If the first three parameters are familiar to you from Lightroom, then Latitude determines how wide the tones around the selected value will be captured.
To control the mask, use the Show Mask switch in White and make sure that all skin is included in the mask (i.e. there are no white spots on it).
Finally, in the Enhance section, you can adjust the sharpness of the image, change the color temperature, brightness and contrast. Perhaps some interest here is the Softness parameter, which allows you to create the effect of a diffuse glow, and the remaining settings are successfully performed in Lightroom.
After completing the settings, click OK. After the plug-in completes, you will see the resulting image in Lightroom next to the original.
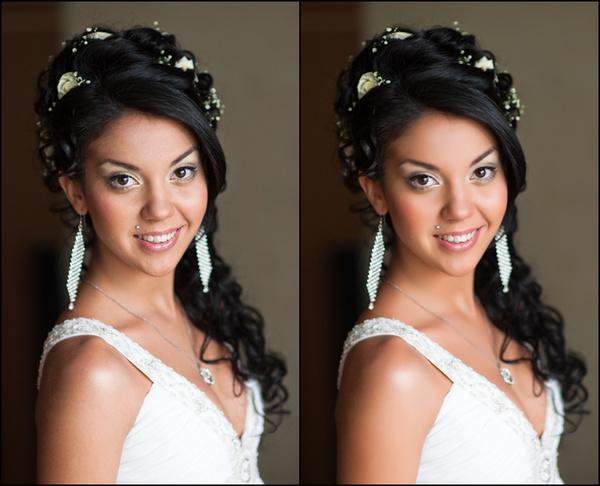
On the left - the original image, on the right - processed by the Portraiture plugin
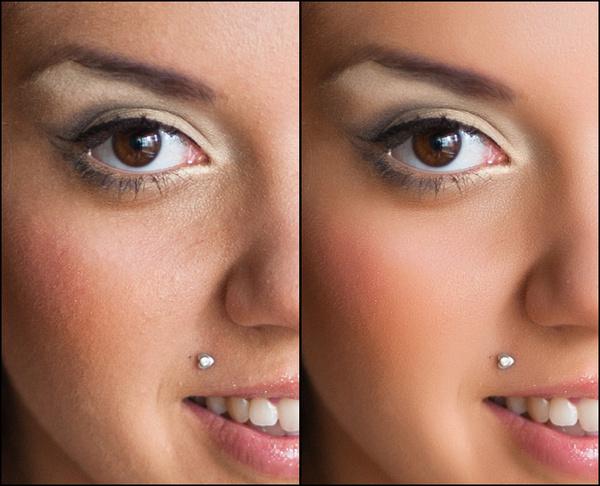
On the left - the original image, on the right - processed by the Portraiture plug-in (100% scale) Nik Silver Efex Pro
The Silver Efex plugin is designed to convert color images to black and white. In addition to manual settings, it has a large number of standard presets for translation, allowing you to get an interesting result in a couple of mouse clicks. Another one interesting feature plug-in - imitation of various photographic films.
The plugin interface you see in the figure.
Silver Efex Pro Plugin Interface
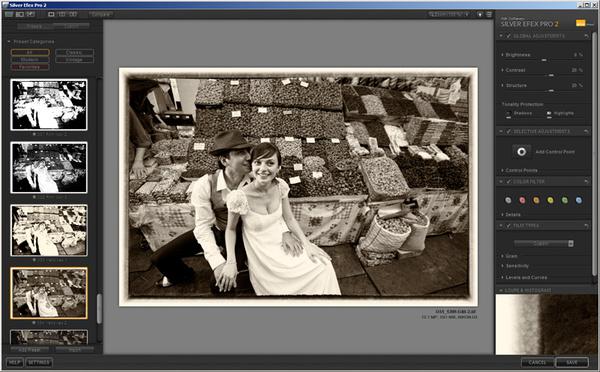
To control the viewing, use the Space key: clicking the mouse while holding the Space key enlarges the image to 100% (or another value selected in the upper corner); also, when the button is pressed, you can move the enlarged image to see another fragment of it.
On the left is a list of presets, divided into categories. By clicking on the thumbnails, you can apply presets to the picture - of course, then you can fine-tune it. If you liked some preset, click on the star next to its name and it will be placed in the Favorites category.
On the right are the settings panels. The general principles are as follows (they are also characteristic of other plug-ins from Nik Software). The checkbox to the left of the panel name includes this group of settings; in other words, if you uncheck the box, the settings of this panel will not be applied to the picture. The arrow to the right of the panel name resets all settings to default values. If you click on the triangle to the left of the setting name, its additional parameters will open.
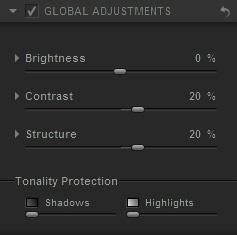
General Image Settings Panel in Efex Pro
The general settings (Global Adjustments panel) include brightness, contrast and structure - a parameter responsible for image detailing.
By expanding the brightness settings, it can be seen that it can be adjusted separately for light, medium and dark portions of the image. For example, you can make the shadows in the image more dense, reducing the brightness of dark areas, while the midtones will remain unchanged.
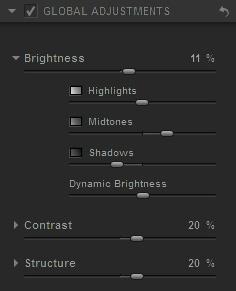
General settings can be expanded additional parameters
The Structure setting controls detail and local contrast. In general, an increase in the value of this parameter enhances the detail of the image, while a decrease, on the contrary, makes it softer. Let's increase this parameter a bit to make the picture clearer.
After basic settings you can fine-tune the image using local corrections - for this, control points are used (again, they can be seen in other Nik Software programs).
By clicking on the Add Control Point button on the Local Adjustments panel, put the point on the area that we want to adjust - for example, on the bride’s face. Near reference point a “tree” of settings will appear. Using the upper slider, change the size of the point's influence area so that it captures only the face. Now you can lighten the skin by adjusting the brightness (first knob) and soften it slightly by reducing the Structure parameter.
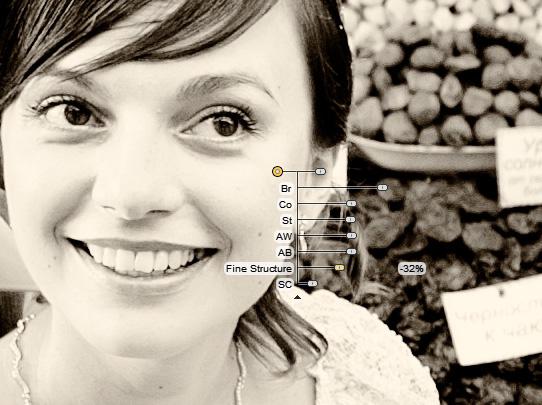
Local image correction using control points
Now you can select the simulation of the film in the Film Types panel, as well as tint the image and add a frame to it in the Finishing Adjustments panel. I suggest that you independently deal with these settings, as they are not difficult.


