For further work with the data obtained in a spreadsheet document from the 1C system of any version, they can be saved in the xls (x) format.
Everything would be fine, but when opened in Excel-e, the user immediately understands that something is wrong with the table, well, yes, there are no book sheet labels. %)
So it was in the 7th version of 1C and migrated to the 8th, yes, there is progress, in 8-ke you can save in the format xlsx, the native format of recent versions of Excel-i.
To solve the problem, there are several simple manipulations, the first thing that comes to mind for any user is to resave the table in a different format, but even here there is no desired result, then we start copy-pasting into a new book Excel.
There is another option, as it were for advanced users, is to go to the settings Excel and in the Advanced section check the box "Show sheet labels". It is correct, but also routine, in light of the frequent processing of data received from 1C in the form of flat tables and further data analysis in the form of pivot tables and other ways of presenting data in Excel.
In the same way, I got tired of running on the checkboxes and solved the problem, rummaging through the Internet, for example, and looking at some other developments, it turned out to implement a simple (for some it's a button accordion, for some it's a crutch, however, they don't argue about tastes) automation mechanism solving the problem with displaying sheet labels.
All you need is to use two properties of the Excel window:
DisplayWorkbookTabs // flag for displaying book sheet tabs TabRatio // ratio of the width of the workbook tab area to the width of the window's horizontal scroll bar (as a number between 0 (zero) and 1, default value 0.6)
TabDocument.Write(FullFileName, FileTypeSpreadDocument.XLS); Excel = New COMObject("Excel.Application"); Excel.WorkBooks.Open(FullFileName); Excel.Visible = 0; Excel.ActiveWindow.DisplayWorkbookTabs = 1; Excel.ActiveWindow.TabRatio = 0.6; FullName = Excel.ActiveWorkbook.FullName; Excel.DisplayAlerts = false; Excel.ActiveWorkbook.SaveAs(FullName, 18); // 18 - xls 97-2003; 51 - xlsx 2007-2013 //Excel.Visible = 1; // if you need to work further with the book
//Excel.Application.Quit() // if we just quit
TabDocument.Write(FullFileName, "XLS"); Excel = CreateObject("Excel.Application"); Excel.WorkBooks.Open(FullFileName); Excel.Visible = 0; Excel.ActiveWindow.DisplayWorkbookTabs = 1; Excel.ActiveWindow.TabRatio = 0.6; FullName = Excel.ActiveWorkbook.FullName; Excel.DisplayAlerts = false; Excel.ActiveWorkbook.SaveAs(FullName, 18); // 18 - xls 97-2003; 51 - xlsx 2007-2013 //Excel.Visible = 1; // if you need to work further with the book
//Excel.Application.Quit() // if we just quit
Very often it is required to get data from 1C 8.3 and save the information to an external file, in other words, to upload from 1C enterprise. The task is almost always feasible without the involvement of 1C programmers.
Consider a number of useful tips with which you can upload data from 1C to an external information system.
In 1C, there are several methods by which you can get information without involving specialists:
- Unloading the entire database from 1C 8.3 - for subsequent download on another computer
- Save reports and printables to Excel, Word or PDF
- Unloading tables from 1C
- Getting Information Using the Query Console
More about them:
How to unload the entire database from 1s 8.3 (to a .dt file)
To do this, you need to enter the configurator mode, then select the item "Administration" - "Upload infobase" in the main menu:
Then you only need to specify the name of the future file and its location on the disk.
For subsequent upload to another database, click on the "Upload infobase" button and select the previously uploaded file.
Unloading reports and printables from 1C to Excel
This method is universal and very simple. To do this, it is enough when you open a printable form or report.
For example, open the TORG 12 printable, press ctrl+S (or in the menu File - Save As) and select the file type and its name:

For the same system operates - the report is unloaded in two clicks:

Get 267 1C video lessons for free:
Saving to the main formats is available - excel, word, pdf, html, txt, etc.
Unloading tables from 1C 8.3
Often there are such banal tasks as “get a list of payments for the current year”, “unload a book of purchases or sales”, or “unload goods from invoice No. 256”. Solving such problems is quite simple.
For example, I need to receive all receipts from the "Vector" counterparty with an amount of more than 1000. Let's open the list form and set the necessary filters in the list:


The system will offer an output option - to a spreadsheet document or a text document, we will select a spreadsheet. The 1C program will display information in such a spreadsheet document, which, like reports, can be saved in the format we need:

Similar actions can be performed for almost any tabular part in 1C 8.2. For example, we needed to upload a list of goods from receipt No. МСК00003, no problem. This is done very simply - open the document, call the context menu and after a couple of clicks we get the desired upload in the desired format:

Uploading a journal of transactions from 1C to Excel:
Getting Information Using the Query Console
However, not all information can be found in a simple tabular part of 1C 8.2. Sometimes you need to collect data from several data sources, connect them by some fields.
This method is suitable for tech-savvy people who know the basics of the query language. It consists in getting the result of the query using and saving it in the format we need.
For example, it is required to receive all contractors-suppliers and their telephone number. To do this, write the following query:

The resulting table can also be uploaded to the desired file format:

You can upload the received data to another 1C database using "". Watch the video instruction on the example of the nomenclature:
It is no secret that Excel and 1C programs are especially popular among office workers, in particular those employed in the settlement and financial sphere. Therefore, quite often it is necessary to exchange data between these applications. But, unfortunately, not all users know how to quickly do this. Let's find out how to upload data from 1C to an Excel document.
If loading data from Excel to 1C is a rather complicated procedure, which can only be automated with the help of third-party solutions, then the reverse process, namely uploading from 1C to Excel, is a relatively simple set of actions. It can be easily done using the built-in tools of the above programs, and this can be done in several ways, depending on what exactly the user needs to transfer. Consider how to do this with specific examples in the 1C version 8.3 .
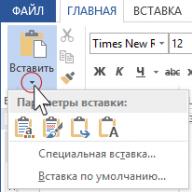
Method 1: Copy Cell Content
One unit of data is contained in cell 1C. It can be transferred to Excel by the usual copying method.

The contents of cell 1C will be pasted into Excel.

Method 2: Paste a List into an Existing Excel Workbook
But the above method is only suitable if you need to transfer data from one cell. When you need to transfer the whole list, you should use another method, because copying one element at a time will take a lot of time.


The list is inserted into the document.

Method 3: Create a new Excel workbook with a list
Also, a list from the 1C program can be immediately output to a new Excel file.


The entire list will be saved as a separate book.
Method 4: copying a range from a 1C list to Excel
There are times when you do not need to transfer the entire list, but only individual rows or a range of data. This option is also quite feasible with the help of built-in tools.


Method 5: Save documents as Excel
In Excel, sometimes you need to save not only lists, but also documents created in 1C (invoices, invoices, etc.). This is because many users find it easier to edit a document in Excel. In addition, in Excel, you can delete the completed data and, after printing the document, use it, if necessary, as a form for manual filling.


The document will be saved in Excel format. This file can now be opened in this program, and further processing can be carried out already in it.
As you can see, uploading information from 1C to Excel format is not difficult. You only need to know the algorithm of actions, since, unfortunately, it is not intuitive for all users. Using the built-in tools of 1C and Excel, you can copy the contents of cells, lists and ranges from the first application to the second, as well as save lists and documents in separate books. There are a lot of saving options and in order for the user to find the right one for his situation, there is absolutely no need to resort to using third-party software or apply complex combinations of actions.
If the "Save" and "Save As" buttons of the "File" menu are inactive when saving the printed form of a document or report, this means that the table protection flag is set. To disable it, disable the checkbox "Prohibit editing tables" (menu "Tools" - "Configuration settings" - tab "Auxiliary"). After that, you need to re-create the printed form of the invoice - saving to a file will be available.
Prohibition of table editing is used in order to exclude the possibility of falsification of data of primary documents by personnel, as it does not allow disabling the "View Only" mode, as well as copying a table or saving it to a file. Therefore, in a typical configuration, only an employee with the rights "Administrator" or "Manager" can remove the prohibition of editing tables.
We are found: how to save reporting in excel in 1 s 8 3, how to configure in the program 1s 8 3 find the button save as how to save an invoice from 1s in excel, 1s is not available to save as, 1s 7 7 is not available to save as, how to save waybills from 1s in excel so that the columns do not go astray, as in 1s 8 2 save documents in excel format, 1s 7 7 does not save report in excel, how to save a consignment note from 1s, to 1s 8 2 printing functions and saving printables are not available printer icon is inactive