In lesson 15, we talked about the reason for the appearance of extra styles. And one of the reasons for the appearance of extra styles is the inability to properly use such a phenomenon as the clipboard and, in particular, such an opportunity as a special paste from the clipboard.
At the end of the lesson, you will be able to:
is a part of the computer's memory where you can store the information that you have copied. As necessary, the copied information can be extracted from the clipboard and pasted to the location of our choice.
1. Clipboard. Clipboard features
Did you open Tutorial_Paste Special?

Move the cursor over the four buttons in the opened Paste Options window.
First button
In this case, we will drag into the new document all the text styles that are only in the old document. Do we need it?
Second button gives the following picture:  Third button gives the following picture:
As you can see, there is a risk of getting an Inline style in the list of styles.
The fourth button gives the following picture: 
As you can see:
- New Styles in the Task Pane Styles did not appear,
- Automatic numbering of lists has turned into plain text.
Choose which Clipboard Paste Special button you want to use.
I prefer button
In my opinion, it is the safest in the sense of "not allowing" styles that I do not need into the new document.
You may object: But what about the automatic numbering turned into text? My favorite team helps me with this phenomenon. Replace. The possibilities of this team are very great and, honestly, I have not fully explored. I doubt that in one lesson I will tell you about the capabilities of the team Replace.
Now you can:
- Describe what a clipboard is
- Apply Paste Special from Clipboard
The practical application of the advantages of the Clipboard tool is best demonstrated with examples.
Using the advanced clipboard features, you can improve the performance of your work in Excel when copying and pasting items. These are some of the most commonly used operations when working with Excel. Therefore, it is worth learning how to use them professionally. Moreover, it is not difficult.
Copy multiple items to clipboard
To begin with, let's demonstrate with an example how you can quickly fill in data in a table using the clipboard. To do this, we will create an initial plate as shown in the figure:
To quickly fill cells using a buffer, you must:


As you can see, you no longer have to copy each time you need to fill cells with duplicate values. It is very convenient and time saving.
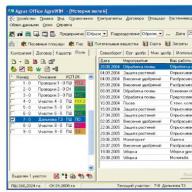
Excel clipboard management
The clipboard can contain up to 24 items. In Excel, it doesn't matter what to copy: a table, a column, a row, the contents of one cell, or just text - all these are separate elements, regardless of their amount of information. When copying the 25th element, the first one is deleted automatically.
You can control the contents of the buffer. If it contains unnecessary elements, remove them. To do this, right-click on the extra element and select the "Delete" option. To completely clear the Excel clipboard, click on the "Clear All" button in the side window.

Information about the number of elements is displayed in the window title. There is also a button to close the side window of the "X" tool.
If the side window of the tool bothers you, but you want to continue filling it with elements, then do this:

It is very convenient to work this way, especially when you need to copy data to other Excel sheets or to other MS Office programs (for example, Word). Each program that is included in the MS Office package has a Clipboard tool. So, in each of these programs, you can call the buffer window for selective insertion of elements. This tool allows you to effectively organize simultaneous work with multiple documents.
Note. Moving data is done in the same way as copying. Only instead of the key combination CTRL + C, you should press CTRL + X, and instead of the “copy” options, you need to select the “cut” option.
The clipboard is a wonderful tool that allows you to share information between completely different applications. My students master it even without my explanations - how can I write essays without it? I tell my pensioners how to use it in the second lesson. There is no need, of course, to tell you here how to use the clipboard. Words copy-past have already become common nouns.
But the Windows clipboard has one drawback - there can only be one object on the clipboard. If you copy a new object, the old one is, of course, deleted.
The solution to this problem was proposed in XP/2003 - there was a special panel that accumulated objects that you copied to the clipboard. And then from this panel it was possible to select the necessary objects and insert them into the document.
Another great feature of the clipboard panel is that you can paste all the content accumulated on it onto the document with one click.
You can, for example, select quotes from somewhere, copy them one by one, and then paste them all into the document with one click of the mouse.
To do this, click the "Insert All" button on the panel.
The clipboard in Office 2007 has several settings that allow you to "customize" the clipboard for yourself.
To access the settings, you need to click the "Options" button at the bottom of the "Clipboard" panel:

So here are the settings.
- Automatic clipboard clipping Office– open the Clipboard panel automatically
- Open clipboard when double-clicking Ctrl+C- open the "Clipboard" panel if the user pressed Ctrl + C twice in a row
- Collect data without displaying the Office clipboard– collect objects from the clipboard to the panel without opening the panel
- Show the Office clipboard icon on the taskbar- display icon in the taskbar
- Show status near taskbar when copying– display a tooltip near the taskbar when copying
These options allow you to customize the clipboard to your liking.
If you don’t need it temporarily, you can simply close the panel and work with the classic clipboard - Ctrl + C - Ctrl + V
When you have finished working with the clipboard, you may notice that data is still being collected on the clipboard.
To stop this, you just need to stop collecting data, for this you need to right-click on the buffer icon on the taskbar and select the command “Stop collecting data”

My blog is found by the following phrases
.
.
.
.
.
.
You may also be interested in information on the following keywords, which are commonly searched on my site
.
.
You can copy and paste multiple objects using the Office Clipboard. For example, you can copy text in a Word document, switch to Excel and copy a graphic, switch to PowerPoint and copy a bulleted list, switch to Access and copy a table, and then switch back to Word and paste all the copied objects at once. Several objects are automatically copied to the Office Clipboard when you do the following:
successive copying or cutting of two different objects in one application;
copying one object, pasting it and copying another object in the same application;
consecutive copying of one object twice.
Using the Clipboard toolbar
Multiple objects can also be copied by calling the toolbar Clipboard(menu View, submenu Toolbars) and pressing the button Copy. If the Office Clipboard toolbar is open in an Office application, it will still be visible even after switching to another Office application. Toolbar Clipboard not available in windows where commands are not available Copy , Cut And Insert .
On the toolbar Clipboard you can press the button Paste All to paste all copied objects, or click individual objects to paste only those objects. Team Insert(menu Edit) allows you to paste only the last copied object. However, after any objects have been pasted from the toolbar Clipboard(individual object or all objects), when executing the command Insert(menu Edit) will paste the last object inserted from the toolbar Clipboard.
Note. Panel Clipboard cannot be changed.
Office Clipboard and Windows Clipboard
The Office Clipboard is different from the Windows Clipboard. When copying multiple objects to the Office Clipboard, the last copied object is always placed on the Windows Clipboard. Clearing the Office Clipboard also clears the Windows Clipboard. When using the command Insert(menu Edit), buttons Insert or keyboard shortcut (CTRL+V) pastes from the Windows clipboard.
Office clipboard features
The Office Clipboard can store up to 12 objects. If an additional object is copied to the Office clipboard when there are 12 objects, you will be prompted to delete the first object or cancel the copy. Copied objects are stored on the Office Clipboard until all Office applications on that computer are closed.
You can access the Office Clipboard panel and paste multiple objects only in Microsoft Excel, Word, Access, and PowerPoint applications. However, if any Office application displays the Clipboard toolbar, it will automatically copy any objects that you copy or cut in other applications.
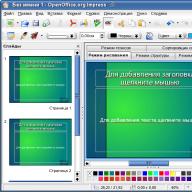
Adding hyperlinks and action buttons to a presentation
Hyperlinks You can add hyperlinks to a presentation and use them to navigate to different places, such as a custom show, a specific slide in a given presentation, a completely different presentation, a Microsoft Word document or Microsoft Excel worksheet, an address on the Internet, a local network, or to edit a message for specific address. A hyperlink can be represented by any object, including text, shapes, tables, graphics, and pictures. To add a hyperlink, click the button Hyperlink. or Insert< Гиперссылка
Control buttons PowerPoint also includes some ready-to-use action buttons (paragraph Control buttons on the menu slide show) that you can add to your presentation by assigning the appropriate hyperlink. Control buttons display icons such as left and right arrows. They serve to create intuitive symbols for moving to the next, previous, first and last slides. You can use these buttons in an automated kiosk presentation or in a presentation that you plan to publish to your company's LAN or the Internet. PowerPoint also has control buttons for playing movies and sounds.
The text representing the hyperlink is underlined and colored according to the color scheme. After selecting a hyperlink and navigating to the item it points to, the color of the hyperlink changes to indicate that it has already been opened. Hyperlinks become active during the slide show (not during editing).
Advice. If you have text in a shape, you can assign separate hyperlinks to the text and the shape.
3.4. Clipboard
When cutting or copying, the contents of the cell are placed on the clipboard and become available not only for working in Word. Similarly, you can paste text or other data copied from another application, from the Internet, pages, etc. into a Word document. Operations related to the clipboard apply not only to text data, but also to graphic objects, hyperlinks, etc.
Attention!
Text moved or copied from one place in the document to another with the mouse is not saved to the clipboard.
The clipboard in Microsoft Word 2007 allows you to store up to 24 objects. If you are working in normal mode, only the most recently copied data is stored in the buffer. In the extended mode, you can work simultaneously with 24 pieces of data.
To activate the extended mode, you need to click on the button for calling the task pane for working with the clipboard in the Clipboard group of the Home tab (Fig. 3.6).
Rice. 3.6. Button to open the Clipboard task pane
The Clipboard task area will appear in the left part of the window (Fig. 3.7), in which you will see the first words of text fragments and thumbnails of graphic objects. To make it easier for the user, there is an icon next to each object showing the type of object (Word document, Excel spreadsheet, etc.).
Rice. 3.7. Task area Clipboard
By default, when you execute the Paste command, Word pastes the object that was last entered into the clipboard, and it pastes it at the place in the document where the cursor is located. The Clipboard task area allows you to select the object to be pasted. To paste an object from the clipboard, just place the cursor in the desired location and click on the desired fragment in the task area.
To disable advanced clipboard mode, do one of the following:
Close the Clipboard task area by clicking the Close button (Fig. 3.8);

Rice. 3.8. Close button in the Clipboard task pane
Right-click on the Clipboard icon located in the notification area and select the Stop data collection command (Fig. 3.9).

Rice. 3.9. Disable advanced clipboard mode
You can make the copied data always appear on the clipboard, regardless of whether the Clipboard task pane is open. To do this, click the Settings button in the Clipboard task pane and select the Collect data without displaying the Office clipboard command in the menu that appears (Fig. 3.10).

Rice. 3.10. Enabling the collection of copied data without displaying the Clipboard task pane
In addition, in this menu, you can enable the ability to open the Clipboard task pane when you double-click the Ctrl + C key combination. To do this, select the menu command of the same name, which appears when you click on the Options button (see Fig. 3.10).