From the author: I greet you. The need to present several blocks on a web page in one line is a very common task faced by layout designers. It occurs when laying out almost every template, so we all need to know and apply the basic ways to change the behavior of blocks anyway.
Before we look at the most common tricks, I would like to recall a little theory. Web page elements are divided into block and inline elements. And the difference between them is very simple - lowercase ones can be located on one line, but block ones cannot. Of course, the differences do not end there, but this is the main difference. Blocks can already have indents at the top and bottom (inline ones don’t), and more properties can be applied to them.
Basic ways to line up blocks in css
We will not complicate anything, there are 3 main ways:
Convert blocks to inline elements. In this case, block properties are lost, so this option is almost never used.
Make the desired elements block-inline. This is a special type in which the element retains its properties, but at the same time allows other blocks to be located nearby.
Make elements float using the float property.
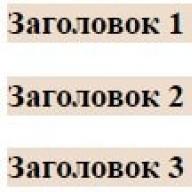
Let's take a look at these options. Flexbox, tabular display and other points will not be considered. So let's say we have 3 subheadings.
Heading 1
Heading 2
Heading 3
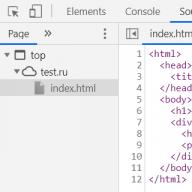
Naturally, all css properties must be written in a separate file (style.css), which must be connected to the html document. In this file, I will write a minimal style so that our subheadings can simply be seen.
h3( background: #EEDDCD; )
h3 ( background : #EEDDCD; |
Here they are on the page:

There they behave like blocks. Each is located on its own line, there are indents between them. If you wish, you can also set any internal indents and generally do anything.
Let's convert to strings and immediately add indents. To do this, the h3 selector needs to add the following properties:
display: inline; padding: 30px

There are 2 main problems that arise when using this technique. The first is the minimum offset. It is formed due to the fact that in the code between the blocks there is one space, which forms this indent. If this issue needs to be addressed, there are 2 main options:
In html, place the code of the necessary blocks in one line without spaces
Put down a negative margin on the right -4 pixels. That's how long one space takes.
The second problem is that with different heights of elements, display problems can occur. In general, floating blocks are the best option. Instead of display: inline-block we write this:
Blocks in a line using the framework
I must say right away that if you are going to use any normal css framework (for example, Bootstrap), then it is still much easier there. All css-code responsible for the arrangement of elements has already been written and you will only have to set the correct classes. To do this, it is enough to learn the grid system, and you will be able to make multi-column responsive templates without much difficulty. At least it will be much easier than writing css from scratch.
Another problem of writing code from scratch arises just when you need a responsive design. Of course, you can implement it yourself by owning media queries, but it will be much more difficult if you have a complex template.
For example, when you need to have 4 columns on large screens, 3 on medium screens, and 2 on mobile phones. Using frameworks like Bootstrap, or rather using its grid, this is literally a matter of a few minutes.
Smoothly transferring the topic to the Bootstrap framework, I will once again note that if you are faced with the task of laying out a complex adaptive template, then it is simply a sin not to use the grid. To do this, it is not even necessary to connect the full version of the framework - you can customize it and stop only what you really need there.
You can learn how to work with the framework using . The theory is explained there, but the most important thing is the practice. You will make up 3 adaptive templates and get a great experience that will allow you to make up websites to order or for yourself. And if you want to get acquainted with the benefits and features of the framework for free, I suggest you check out our series of articles on Bootstrap, as well as on laying out a simple layout. I wish you success in layout and site building in general.
Task
Make a horizontal line on the page.
Solution
Horizontal lines are good for separating one block of text from another. Small text with horizontal lines above and below draws more of the reader's attention than normal text.
With a tag
you can draw a horizontal line, the appearance of which depends on the attributes used, as well as the browser. The tag refers to block elements, so the line always starts on a new line, and after it, all elements are displayed on the next line. With many tag attributes
the line created through this tag is easy to manage. If you also connect the power of styles, then adding a line to a document turns into a simple task.
Default line
displayed in gray and with a volume effect. This type of line does not always fit the design of the site, so the desire of developers to change the color and other parameters of the line through styles is understandable. However, browsers have ambiguous approaches to this issue, because of which you will have to use several style properties at once. In particular, older versions of Internet Explorer use the color property for line color, while other browsers use background-color . But that's not all, be sure to specify the line thickness (height property) other than zero and remove the frame around the line by setting the border property to none. Putting all the properties together for the hr selector, we get a universal solution for popular browsers (example 1).
Example 1. Horizontal line
HTML5 CSS 2.1 IE Cr Op Sa Fx
Text string
The result of this example is shown in Fig. 1.
Rice. 1. Colored horizontal line
Hi all! Today I will tell you how to make a horizontal line using html.
In fact, the need to make a horizontal line arises quite often, for example, when you need to separate one part of the text from another.
horizontal and vertical lines with css
You can do this with css. To do this, I enclose the necessary section of text in a block using the div tag, and then in the style.css file or directly in the html code, we write properties for this block for the top or bottom border using border-top and border-bottom. Here is an example:
In this case, I styled it with css directly from the html code, and made the top border a solid line and the bottom border a dotted line.
Here's how it will look on the page:
Horizontal line with css.
This method has its advantages:
- A wide range of settings that allow you to set almost any type of line;
- You can create both horizontal and vertical lines. In order to make vertical lines, you need to change border-top to border-left and border-bottom to border-right.
The disadvantages include the relative bulkiness of the code.
However, as it turned out, you can insert a horizontal line into the text using html. At the same time, it is not even necessary to climb into css. The tag is used for this.
.
horizontal line with html tag
The first feature of this tag is that it does not have a paired end tag. It can be used anywhere in the html code between tags
And.
This tag has the following attributes:
- Width- defines the length of our horizontal line in pixels or percentages;
- color– defines the color of the line;
- Align– sets the alignment of the line to the right edge - right, to the left edge - left, to the center - center;
- size– line thickness in pixels.
Here is an example html code.
horizontal lines are formed by an unpaired (closing tag is not needed) tag
and can be quite unique design elements. Text layout with horizontal HTML lines will give the page a certain logic of text presentation, as well as make it easier for the reader to highlight blocks of information that need to be studied sequentially. Tag
can form horizontal lines of different colors, thicknesses and lengths. And to do this is quite simple, as shown in the examples below.
By the way, you can also use block style properties A vertical lines are formed in fact in the same blocks Here is an example of a red vertical line on the left. Here is an example of a red vertical line on the right. Here is an example of a red horizontal line at the top. Here is an example of a red horizontal line at the bottom. Here is an example of horizontal and vertical lines. notice the style attribute Circle generated by tag Here is an example of a red vertical line on the left. Here is an example of a red vertical line on the right. Here is an example of a red horizontal line at the bottom. Here is an example of horizontal and vertical lines. And if we analyze these examples, we can make a fairly simple conclusion that vertical lines are best formed using , and intermediate line options can be done with tag Basically, horizontal lines are used to decorate the HTML pages of a site, giving them a more attractive look. But they can also visually delimit the information of neighboring sections, adding convenience to readers when studying it. In general, draw horizontal lines where you need to, that's all. There is a special tag for drawing horizontal lines in HTML. An example of drawing horizontal lines in HTML
Paragraph. Paragraph. Paragraph. Result in browser Paragraph. Paragraph. Paragraph. As you can see, the lines are very thin, nondescript and drawn to the full width available, so now we will learn how to change them to make them look more attractive. In older versions of HTML, the tag A color can be specified by its name in English or by the color's HEX code preceded by a pound sign (#). Well, you already know about it from the lesson on change text and background colors. But let's talk about resizing in more detail. As you remember from tutorial on changing fonts, there are about ten units in CSS, but line width can only be specified in pixels (px) and percentages (%), and thickness generally only in pixels. If you put other units of measure, then this will not be an error, but browsers will simply ignore them. If you specify dimensions in pixels, then the thickness and width of the line will depend on the resolution of the monitor on which your site is viewed (the higher the screen resolution, the thinner and narrower the line). As I said, only the line width can be specified as a percentage. Percentage sizes always depend on and are calculated based on the size of the parent element-container, inside which the tag is located An example of changing the color, thickness and width of horizontal lines.
Result in browser When you change the width of a horizontal line, you can clearly see that browsers always center it. If you want to change its position then just use inside An example of aligning horizontal lines.
Result in browser Look at the very first example of this tutorial. What color do you think these lines are? And here's the wrong one. They are transparent, as are any page elements that do not have a background color specified! Don't believe? Then look at the example where we changed the color of the lines. At the very first one, we did not set the color, but only increased its size, and isn't this line transparent? So that! Now I'll explain. By default, browsers draw around border lines, which create a 3D effect. So, when we do not increase the thickness of horizontal lines, browsers show us only these frames, since the thickness of the line itself is 0px. To remove the border around the line, which often only spoils the appearance, we will apply the style attribute again. And it is written like this:
Homework.
And
at a certain location. True, this option may not always be convenient, for example, coloring sometimes does not always justify itself, but in many cases it is possible to solve problems in this way. For example, inside the line formed tag
do not insert text. And inside the blocks - this is possible and constantly practiced. So you need to choose your option depending on the design requirements.
Vertical lines in HTML.
And
The only inconvenience is that the tag is not available in all browsers.
works the same, but here you need to try
and adjust the page, or use updated browsers.
Formation of horizontal lines:
Tag
inserts a horizontal line into the page and has the following attributes:Tag syntax
:Examples of horizontal lines in HTML:
Examples of vertical lines in HTML:
The syntax for examples of vertical and horizontal lines in HTML is:
border- left(-right): 4px solid #FF0000;:
But it all depends on the imagination and requests. So choose and shape.How to draw a horizontal line?
. And he is block tag, that is, it creates line breaks before and after itself, so the line is always obtained on a separate line. Accordingly, it can only be specified inside tags that can contain block elements, for example or . But himself
cannot have content because it simply does not have a closing tag, i.e. it is empty .
How to change color, thickness and width of horizontal lines?
there were special attributes with which you could change the color, thickness and width of horizontal lines. These are color , size and width , respectively. But in newer versions, they've been deprecated in favor of Cascading Style Sheets (CSS), so, you guessed it, we'll be using our favorite style attribute again. The general syntax is:
style="background:color" >- color of the line (or rather its background).
style="height:size" >- line thickness.
style="width:size" >- line width.
style= "background:color; height:size; width:size">
- and you can specify all the parameters at once, just do not forget about the semicolon (;).
. In this case, the dimensions of the parent are taken as 100%. For example, if we place the tag
style="width:50%"> inside the element , then no matter how we resize the browser window or monitor resolution, the line width will always be half the width of the block
.
Changing the Position of Horizontal Lines
align attribute with the following values:
How to remove the border around the line?