In this tutorial, we'll cover the basics of working with events, attributes, and getElementById in JavaScript.
In the previous lessons, we studied the basic features of the JavaScript language. Starting with this lesson, we will do what JavaScript itself is intended for - we will change the elements of the HTML page and respond to user actions. Our scripts will become more spectacular and useful.
Let's start by teaching our code to respond to the site user's actions. For example, the user clicks somewhere with the mouse, and our code in response will have to process this click and display some information on the screen.
User actions that we can track through JavaScript are called events. Events can be: cry mouse on a page element, guidance mouse on the page element or vice versa - care mouse cursor off the element, and so on. In addition, there are events that do not depend on user actions, for example, an event when an HTML page is loaded into the browser.
There are several ways to work with events in JavaScript. We will start with the simplest of them.
Event basicsThe easiest way to set an element's response to a specific event is to specify it using an attribute on a specific tag. For example, the event "mouse click" matches the onclick attribute, event "mouse hover" is the onmouseover attribute, and the event "cursor leaving element"- the onmouseout attribute.
The value of the event attribute is the JavaScript code . In the following example by clicking on the button the alert function will be executed:
And now by click the func function will be executed on the element:
func() ( alert("!"); )
You can perform not one function, but several:
function func1() ( alert("1"); ) function func2() ( alert("2"); )
Note that if you need double quotes inside an attribute (for example, for a string) and the attribute's outer quotes are also double - onclick="alert("!")"- this code will not work.
You can deal with this in several ways: you can change the outer quotes to single onclick="alert("!")", you can also escape the inner quotes with a backslash onclick="alert(\"!\")" or just transfer the JavaScript code from the attribute to the function, and leave only the name of the function in the attribute onclick="func()".
The same will happen if you set the outer quotes of the attribute to single and also use single quotes for the string: onclick="alert("!")"- here also everything is solved in similar ways.
Attribute table for events Working with getElementByIdNow we will learn how to receive HTML page elements and perform various manipulations with them (we will be able to change, for example, their text and color, and many other useful things).
Let's say we have a tag on the page with the id attribute set to test . Let's write a link to this tag into the elem variable. To do this, we must use the getElementById method, which gets the element by its id .
This recording will happen on a click on the button that we have given the onclick attribute. When this button is clicked, the func function will work, which will find an element on the HTML page with an id equal to test and write link to it to the elem variable:
Now in the elem variable we have a reference to the element with the id attribute set to test . The elem variable itself is object.
This object and the HTML page tag are connected to each other - we can change any properties of the elem object and at the same time we will see the changes on the HTML page that will happen to the element we received.
Let's see how this happens in practice.
Basics of working with HTML attributes through JavaScriptNow we will read and change tag attributes. Let us again have an input with an id equal to test and a button that, when clicked, will launch the func function:
Inside the func function we will get our input by its id and write a reference to it in the elem variable:
function func() ( var elem = document.getElementById("test"); )
Let's now display the contents of our input's attributes. To access, for example, the value attribute, you would write the following: elem.value , where elem is the variable we set the reference to our element with getElementById , and value is the attribute of the tag we are interested in.
We can display the contents of the attribute via alert in this way - alert(elem.value) - or write it to some variable. Let's do this:
function func() ( var elem = document.getElementById("test"); alert(elem.value); //prints "!" )
We can read the values of other attributes in the same way, for example - elem.id - we consider the value of the id attribute, and this way - elem.type - the value of the type attribute. See example:
function func() ( var elem = document.getElementById("test"); alert(elem.value); //prints "!" alert(elem.id); //prints "test" alert(elem.type); //outputs "text" )
You can not only read attribute values, but also change them. To, for example, change the value of the value attribute, you just need to assign it to the elem.value construct:
function func() ( var elem = document.getElementById("test"); elem.value = "www"; //присвоим новое значение атрибуту value } !}
The HTML code will look like this (the value attribute value will become www):
Well, now the most difficult thing is that you can not enter the elem variable, but build a chain of dots in this way:
function func() ( alert(document.getElementById("test").value); //prints "!" )
In the same way (in a chain) you can also overwrite attributes:
function func() ( document.getElementById("test").value = "www"; }!}
However, in most cases, introducing a variable is more convenient. Compare the two examples - now I've entered the elem variable and I can read any number of attributes, while gettingElementById is called just one time:
function func() ( var elem = document.getElementById("test"); elem.value = "www"; elem.type = "submit"; }!}
And now I'm not introducing a new variable, so I have to call getElementById twice:
function func() ( document.getElementById("test").value = "www"; document.getElementById("test").type = "submit"; }!}
In my opinion, this code has become more complicated, although it takes one line less. In addition, if I want to change the id value from test to, for example, www, I have to do this in many places, which is not very convenient.
to the browser. Searching for elements on the page, which the getElementById method does, is a rather slow operation ( and in general, any work with page elements is a slow operation- remember this).In our case, if we use getElementById every time, then the browser will process the HTML page each time and look for the element with the given id several times (it doesn’t matter that the id is the same - the browser will do all the actions several times), performing useless operations that can slow down browser operation.
If we use the elem variable, no page search occurs (the element has already been found and the reference to it lies in the elem variable).
Exceptions: class and for attributesYou have already learned how to work with attributes through JavaScript, and now it's time to tell you that it's not so simple - when working with attributes, there is an exception - this is the class attribute.
This word is special in JavaScript and so we can't just write elem class to read the value of the class attribute. Instead, you should write elem.className.
The following example displays the value of the class attribute:
function func() ( var elem = document.getElementById("test"); alert(elem.className); )
By the way, there are other attributes that are called differently than the property. For example, the for() attribute has a corresponding property called htmlFor .
Working with thisNow we will work with a special object this , which points to the current element (the element in which the event occurred). Moreover, it indicates as if this element has already been received by the getElementById method.
Let's see how to work with this and what is the convenience of this approach.
Let us have the task of clicking on the input to display the contents of its value on the screen.
For now, you only know how to do something like this:
function func() ( var elem = document.getElementById("test"); alert(elem.value); )
In principle, this solution is good, but now imagine that we have many inputs and by clicking on each we need to display its value.
In this case, we will get something like this:
function func1() ( var elem = document.getElementById("test1"); alert(elem.value); ) function func2() ( var elem = document.getElementById("test2"); alert(elem.value); ) function func3() ( var elem = document.getElementById("test3"); alert(elem.value); )
Now the disadvantage of our approach is clearly visible - for each input we have to create our own click processing function, and these functions do almost the same thing.
If we have 10 inputs, then we will have to make 10 functions, which is not convenient.
Let's simplify our task: we will pass the id of the current element as a parameter to the function. And instead of a large number of functions, everything will be reduced to one function:
function func(id) ( var elem = document.getElementById(id); alert(elem.value); )
However, this solution still has a drawback - each element will have to enter a different id, which is also somewhat inconvenient.
So, let's finally consider the solution to the problem through this .
Let's make it so that each input will display its content on click. To do this, pass the this object as a function parameter, like this: func(this) .
Our this is passed as a parameter to the function and ends up in the elem variable. This elem behaves as if it was received like this: var elem = document.getElementById(...), but you don’t need to receive it in this way, everything is already ready and you can use it. For example, elem.value points to the value of our input, and so on.
So, here is the simplest solution to our problem:
function func(elem) ( alert(elem.value); )
CSS BasicsIn JavaScript, working with CSS properties is done by changing the value of the style attribute on an element. For example, to change the color you need to build the following chain - elem.style.color- and assign it the desired color value:
function func() ( var elem = document.getElementById("test"); elem.style.color = "red"; )
It is also possible not to introduce the elem variable, but to build very long chain.
When opening any HTML document, the browser first parses its content and, based on this parsing, creates an object model of the HTML document, or more briefly DOM.
The DOM is made up of hierarchically nested objects called nodes. Each node in the structure represents an HTML element located on the page.
Using the DOM you can interact ( read, modify, delete) with the content of HTML documents from scripts.
Below is the HTML code of the document and the DOM that would be created by the browser based on this code:
HTML DOM HTML DOM.
Hi all.
All the rectangles shown in the picture are objects (or nodes). Knots of different types are marked with different colors in the image.
The Document node is marked in red. Any call to the DOM must begin with a call to this node.
Element nodes are marked in green. For each HTML element on the page, the browser creates a corresponding element node.
The contents of elements are stored in text nodes. The text nodes are marked in blue in our diagram.
An attribute node is created for each HTML element attribute. The attribute node is marked in pink in the diagram.
Note that don't forget that text is always stored in text nodes and is not a property of the element. Those. in order to access the content of an HTML element, you must access the property of its text node.
Relationships between nodesNodes in an object structure are related to each other. There are several special terms to describe relationships between nodes:
parent node ( parent node) - the parent node in relation to the object in question is the node in which the object in question is nested. In our diagram, with respect to the nodes and
is parent. For a node, the parent node is .
Child nodes ( child node) - a descendant node in relation to the considered object is a node that is nested in the considered object. In our scheme, in relation to the node and
They are descendants. For a node, the child is .
Sibling nodes ( sibling node) - nodes that are at the same nesting level with respect to their parent node. In our diagram, the sibling nodes are and ,
The topmost node in the DOM is called the root. In our diagram, the root is (because the document object is not part of the DOM).
In this lesson, we'll look at what the DOM is, why it's needed, and how it's built.
What is DOM?The browser, when requesting a page and receiving its source HTML code in response from the server, must first parse it. In the process of parsing and parsing HTML code, the browser builds a DOM tree based on it.
After performing this action and a number of others, the browser proceeds to render the page. In this process, he is, of course, already using the DOM tree he created, not the original HTML.
DOM is the document object model that the browser creates in the computer's memory based on the HTML code it receives from the server.
To put it simply, HTML code is the text of a page, and DOM is a set of related objects created by the browser when parsing its text.
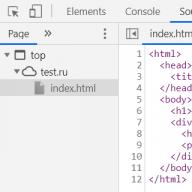
In Chrome, the source code of the page that the browser receives can be viewed in the "Source" tab in the "Web Developer Tools" panel.

In Chrome, there is no tool that can be used to view the DOM tree it has created. But there is a representation of this DOM tree in the form of HTML code, it is available on the "Elements" tab. This DOM representation is, of course, much more convenient for a web developer to work with. Therefore, there is no tool that would represent the DOM in the form of a tree structure.

Objects in this model are formed from almost everything that is in HTML (tags, text content, comments, etc.), including the document itself. Relationships between these objects in the model are formed based on how the HTML elements are located relative to each other in the code.
In this case, the DOM of the document after its formation can be changed. When the DOM changes, the browser redraws the page image almost instantly. As a result, our rendering of the page always conforms to the DOM .
To read and modify the DOM programmatically, the browser provides us with a DOM API or, in other words, a programming interface. In simple terms, the DOM API is a collection of a huge number of different objects, their properties and methods that we can use to read and modify the DOM .
To work with the DOM in most cases, JavaScript is used, because. to date, it is the only programming language in which scripts can be executed in a browser.
Why do we need a DOM API? We need it so that we can use JavaScript to change the page on the fly, i.e. make it dynamic and interactive.
The DOM API provides us (developers) with a huge number of methods with which we can change everything on the page, as well as interact with the user. Those. this programming interface allows us to create complex interfaces, forms, process user actions, add and remove various elements on the page, change their content, properties (attributes), and much more.
Now on the web there are practically no sites in the scripts of which there would be no work with the DOM.
What is the HTML code for a page?Before proceeding to the study of the document object model, you must first remember what the source code of a web page (HTML document) is.
The source code of a web page consists of tags, attributes, comments, and text. Tags are the basic syntax of HTML. Most of them are in pairs. In this case, one of them is the opening one, and the other is the closing one. One such pair of tags forms an HTML element. HTML elements can have additional parameters - attributes.
In a document to create a certain markup, some elements are inside others. As a result, an HTML document can be thought of as a set of nested HTML elements.
As an example, consider the following HTML code:
Page Title Article Title Article Section
Article content
In this code, the root element is html . The head and body elements are nested within it. The head element contains the title , while the body element contains h1 and div . The div element in turn contains h2 and p .
Now let's look at how the browser builds a DOM tree based on the HTML code.
How is the document's DOM tree built?As described above, the browser builds a tree based on HTML elements and other entities in the page's source code. When performing this process, it takes into account the nesting of elements within each other.
As a result, the browser uses the resulting DOM tree not only in its work, but also provides us with an API for convenient work with it through JavaScript.
When building the DOM, the browser creates objects (nodes of the DOM tree) from HTML elements, text, comments, and other entities of this language.
In most cases, web developers are only interested in objects (nodes) formed from HTML elements.
At the same time, the browser does not just create objects from HTML elements, but also connects them with each other with certain connections, depending on how each of them relates to the other in the code.
Elements that are directly in an element are children of it. And he is a parent to each of them. In addition, all these elements in relation to each other are siblings (brothers).
Moreover, in HTML, any element always has one parent (the HTML element in which it is directly located). In HTML, an element cannot have multiple parents. The only exception is the html element. He doesn't have a parent.
To get the DOM tree as the browser builds it, you just need to "arrange" all the elements depending on their relationship to each other.
The creation of the DOM tree is done from top to bottom.
The root of the DOM tree is always the document itself (the document node). Further, the tree is built depending on the structure of the HTML code.
For example, the HTML code we looked at above would have the following DOM tree:

At the very top of this tree is the document node. This node is associated with html , it is its child. The html node is formed by the html(...) element. The head (...) and body (...) nodes have a parent relationship to html . In relation to each other, they are siblings, because have one parent. The head node is related to title (lt;title>...) and is its child. The h1 and div nodes are related to the body , for them it is the parent. The div node is related to h2(...) and p(), they are its children.
The tree starts, as noted above, from the object (node) document . It in turn has one child node formed by the html (...) element. The head(...) and body(...) elements are in html and therefore are its children. Next, the head node is the parent of title (lt;title>...). The h1 and div elements are nested within the body , which means they are its children. The div directly contains the h2(...) and p() elements. This means that the div node for each of them is the parent.
This is how the DOM tree is simply built in the browser based on the HTML code.
Why do you need to know how a DOM tree is built? First, it is an understanding of the environment in which you want to change something. Secondly, most of the actions when working with the DOM come down to finding (selecting) the necessary elements. Without knowing how the DOM tree is arranged and the connections between the nodes, it will be quite difficult to find a specific element in it.
ExerciseBased on the DOM tree shown in the figure, create the HTML code.

The Document Object Model, or "DOM", is a programming interface for accessing elements of web pages. Basically, it's a page API that allows you to read and manipulate the page's content, structure, and styles. Let's see how it works and how it works.
How is a web page built?The process of converting a source HTML document into a renderable, stylized and interactive page is called the "Critical Rendering Path". While this process can be broken down into several steps, as I described in Understanding the Critical Rendering Path, these steps can roughly be grouped into two steps. In the first, the browser parses the document to determine what will eventually be displayed on the page, and in the second, the browser does the rendering.
The result of the first stage is what is called a "render tree". The render tree is a representation of the HTML elements that will be rendered on the page and their associated styles. To build this tree, the browser needs two things:
DOM is an object representation of the original HTML document. It has some differences, as we will see below, but in essence it is an attempt to transform the structure and content of an HTML document into an object model that can be used by various programs.
The structure of DOM objects is represented by what is called a "node tree". It is so named because it can be thought of as a tree with a single parent that branches into multiple child branches, each of which may have leaves. In this case, the parent "element" is the root element, the child "branches" are nested elements, and the "leaves" are the content within the elements.
Let's take this HTML document as an example:
My first web page Hello, world!
How are you?
This document can be represented as the following tree of nodes:
- html
- head
- title
- My first web page
- title
- body
- h1
- Hello world!
- p
- How are you?
- h1
- head
In the example above, it appears that the DOM is a 1:1 mapping of the original HTML document. However, as I said, there are differences. To fully understand what the DOM is, we need to look at what it is not.
DOM is not a copy of the original HTMLAlthough the DOM is created from an HTML document, it is not always exactly the same. There are two cases in which the DOM may differ from the original HTML.
1. When HTML contains markup errorsThe DOM is an interface for accessing the actual (i.e., already rendered) elements of an HTML document. In the process of creating the DOM, the browser itself can fix some errors in the HTML code.
Consider this HTML document as an example:
Hello world!
The document lacks and elements, which is a requirement for HTML. But if we look at the resulting DOM tree, we can see that this has been fixed:
- html
- head
- body
- Hello world!
In addition to being the interface for viewing the contents of an HTML document, the DOM itself can also be modified.
We can, for example, create additional nodes for the DOM using Javascript.
Var newParagraph = document.createElement("p"); var paragraphContent = document.createTextNode("I"m new!"); newParagraph.appendChild(paragraphContent); document.body.appendChild(newParagraph);
This code will change the DOM, but the changes will not be reflected in the HTML document.
The DOM is not what you see in the browser (i.e. the render tree)In the browser's viewport, you see the render tree, which, as I said, is a combination of DOM and CSSOM. What makes the DOM different from a render tree is that the latter only consists of what will eventually be rendered to the screen.
Since the render tree is only concerned with what is displayed, it excludes elements that are visually hidden. For example, elements that have styles with display: none .
Hello world!
DOM will include the element
- html
- head
- body
- h1
- Hello world!
- p
- How are you?
- h1
However, the render tree, and thus what is visible in the viewport, will not be included in this element.
- html
- body
- h1
- Hello world!
- h1
- body
This difference is slightly smaller because the DevTools Element Inspector provides the closest approximation to the DOM we have in a browser. However, the DevTools inspector contains additional information that is not in the DOM.
The best example of this is CSS pseudo-elements. Pseudo-elements created using the ::before and ::after selectors are part of the CSSOM and the render tree, but are not technically part of the DOM. This is because the DOM is only generated from the original HTML document, not including the styles applied to the element.
Even though pseudo-elements are not part of the DOM, they are in our devtools element inspector.
 Summary
 DOM is an interface to an HTML document. It is used by browsers as the first step in determining what to render in the viewport, and by Javascript code to change the content, structure, or style of a page.
Working with the DOM Model
Every Window object has a document property that refers to a Document object. This Document object is not a standalone object. It is the central object of a rich API known as the Document Object Model (DOM), which defines how the content of a document is accessed.
Overview of the DOMThe Document Object Model (DOM) is a fundamental application programming interface that provides the ability to work with the content of HTML and XML documents. The DOM Application Programming Interface (API) is not particularly complex, but there are many architectural features that you should be aware of.
First of all, it should be understood that nested elements of HTML or XML documents are represented as a tree of DOM objects. The tree view of an HTML document contains nodes representing elements or tags such as and
And nodes representing lines of text. An HTML document can also contain nodes representing HTML comments. Consider the following simple HTML document:
Sample document This is an HTML document
Example simple text.
The DOM representation of this document is shown in the following diagram:
For those who are not yet familiar with tree structures in computer programming, it is helpful to know that the terminology to describe them has been borrowed from family trees. The node immediately above the given node is called parental with respect to this node. Nodes that are one level below another node are subsidiaries with respect to this node. Nodes that are at the same level and have the same parent are called sisterly. Nodes located any number of levels below another node are its children. Parent, grandparent and any other nodes above this node are its ancestors.
Each rectangle in this diagram is a document node, which is represented by a Node object. Note that the figure shows three different types of knots. The root of the tree is the Document node, which represents the entire document. The nodes that represent HTML elements are nodes of type Element, and the nodes that represent text are nodes of type Text. Document, Element and Text are subclasses of the Node class. Document and Element are the two most important classes in the DOM.
The Node type and its subtypes form the type hierarchy shown in the diagram below. Note the formal differences between the generic Document and Element types, and the HTMLDocument and HTMLElement types. The Document type represents an HTML and XML document, and the Element class represents an element of that document. The subclasses HTMLDocument and HTMLElement represent specifically an HTML document and its elements:

Also noteworthy in this diagram is the large number of subtypes of the HTMLElement class that represent specific types of HTML elements. Each of these defines JavaScript properties that reflect the HTML attributes of a particular element or group of elements. Some of these specific classes define additional properties or methods that do not reflect the syntax of the HTML markup language.
Selecting Document ElementsThe work of most JavaScript client programs is somehow related to manipulating document elements. During execution, these programs can use the document global variable, which refers to the Document object. However, in order to perform any manipulation on the elements of the document, the program must somehow obtain, or select, the Element objects that refer to those elements of the document. The DOM defines several ways to select elements. You can select an element or elements of a document:
by the value of the id attribute;
by the value of the name attribute;
by tag name;
by the name of the CSS class or classes;
to match a specific CSS selector.
All of these element selection techniques are described in the following subsections.
Selecting elements by id attribute valueAll HTML elements have id attributes. The value of this attribute must be unique within the document - no two elements in the same document must have the same id attribute value. You can select an element by its unique id attribute value using the getElementById() method of the Document object:
Var section1 = document.getElementById("section1");
This is the easiest and most common way to select elements. If the script needs to be able to manipulate a specific set of document elements, assign values to the id attributes of those elements and use the ability to search them by those values.
In versions of Internet Explorer earlier than IE8, the getElementById() method searches for id attribute values in a case-insensitive manner and also returns elements that match the value of the name attribute.
Selecting elements by the value of the name attributeThe HTML name attribute was originally intended for naming form elements, and the value of this attribute was used when the form data was submitted to the server. Like the id attribute, the name attribute assigns a name to an element. However, unlike id, the value of the name attribute does not have to be unique: multiple elements can have the same name at once, which is quite common when used in radio buttons and checkbox forms. Also, unlike id, the name attribute is only allowed on certain HTML elements, including forms, form elements, and elements and .
You can select HTML elements based on the values of their name attributes using the getElementsByName() method of the Document object:
Var radiobuttons = document.getElementsByName("favorite_color");
The getElementsByName() method is not defined by the Document class, but by the HTMLDocument class, so it is only available in HTML documents and not available in XML documents. It returns a NodeList object that behaves like a read-only array of Element objects.
In IE, the getElementsByName() method also returns elements whose id attribute values match the specified value. To ensure cross-browser compatibility, care must be taken in choosing attribute values and not to use the same strings for name and id attribute values.
Selecting elements by typeThe getElementsByTagName() method of the Document object allows you to select all HTML or XML elements of the specified type (or by tag name). For example, to get a read-only array-like object containing the Element objects of all the elements in the document, you can do the following:
var spans = document.getElementsByTagName("span");
Like the getElementsByName() method, getElementsByTagName() returns a NodeList object. Document elements are included in the NodeList array in the same order as they appear in the document, i.e. first element
In a document, you can choose:
Var firstParagraph = document.getElementsByTagName("p");
HTML tag names are case-insensitive, and when getElementsByTagName() is applied to an HTML document, it compares against the tag name in a case-insensitive manner. The spans variable created above, for example, will also include all elements that are written as .
You can get a NodeList containing all the elements in a document by passing the wildcard "*" to the getElementsByTagName() method.
In addition, the Element class also defines the getElementsByTagName() method. It acts exactly like the version of the method in the Document class, but only selects elements that are children of the element on which the method is called. That is, find all elements inside the first element
It is possible as follows:
Var firstParagraph = document.getElementsByTagName("p"); var firstParagraphSpans = firstParagraph.getElementsByTagName("span");
For historical reasons, the HTMLDocument class defines special properties for accessing certain types of nodes. Properties images, forms And links, for example, refer to objects that behave like read-only arrays containing elements , And (but only those tags , which have an href attribute). These properties refer to HTMLCollection objects, which are much like NodeList objects, but can additionally be indexed by the values of the id and name attributes.
The HTMLDocument object also defines embeds and plugins synonymous properties, which are collections of HTMLCollection elements. The anchors property is non-standard, but it can be used to access elements A that has a name attribute but no href attribute. The scripts property is defined by the HTML5 standard and is a collection of HTMLCollection elements.
In addition, the HTMLDocument object defines two properties, each of which refers not to a collection, but to a single element. The document.body property represents an HTML document element, and the document.head property represents the . These properties are always defined in the document: even if there are no and elements in the original document, the browser will implicitly create them. The documentElement property of the Document object refers to the root element of the document. In HTML documents, it always represents the .
Selecting elements by CSS classThe value of the HTML class attribute is a list of zero or more identifiers separated by spaces. It makes it possible to define sets of related document elements: any elements that have the same identifier in the class attribute are part of the same set. The word class is reserved in JavaScript, so client-side JavaScript uses the className property to store the value of the HTML class attribute.
Typically, the class attribute is used in conjunction with CSS cascading style sheets to apply a common display style to all members of a set. However, in addition, the HTML5 standard defines the getElementsByClassName() method, which allows you to select sets of document elements based on the identifiers in their class attributes.
Like the getElementsByTagName() method, the getElementsByClassName() method can be called on both HTML documents and HTML elements, and returns a "live" NodeList object containing all document or element descendants that match the search criteria.
The getElementsByClassName() method takes a single string argument, but the string itself can contain multiple identifiers separated by spaces. All elements whose class attributes contain all of the specified identifiers will be considered matched. The order of the identifiers does not matter. Note that in both the class attribute and the getElementsByClassName() method argument, the class identifiers are separated by spaces, not commas.
The following are some examples of using the getElementsByClassName() method:
// Find all elements with class "warning" var warnings = document.getElementsByClassName("warning"); // Find all descendants of element with id "log" // with classes "error" and "fatal" var log = document.getElementById("log"); var fatal = log.getElementsByClassName("fatal error");
Selecting elements using CSS selectorsCSS Cascading Style Sheets have very powerful syntactic constructs known as selectors that allow you to describe elements or sets of elements in a document. Along with standardizing CSS3 selectors, another W3C standard known as the Selectors API defines JavaScript methods for getting elements that match a given selector.
The key to this API is the querySelectorAll() method of the Document object. It takes a single string argument with a CSS selector and returns a NodeList object representing all elements in the document that match the selector.
In addition to the querySelectorAll() method, the document object also defines a querySelector() method similar to the querySelectorAll() method, except that it returns only the first (in document order) matching element, or null if there are no matching elements.
These two methods are also defined by the Elements class. When they are called on an element, the entire document is searched for a match against the given selector, and then the result is filtered so that only the descendants of the used element remain. This approach may seem counterintuitive, as it means that the selector string can include the ancestors of the element being matched.
Document Structure and Document NavigationAfter selecting a document element, it is sometimes necessary to find structurally related parts of the document (parent, siblings, child element). The Document object can be thought of as a tree of Node objects. The Node type defines properties that allow you to navigate through such a tree. There is another application interface for navigating through the document, as a tree of Element objects.
Documents as Node TreesThe Document object, its Element objects, and the Text objects that represent the text chunks in the document are all Node objects. The Node class defines the following important properties:
parentNodeThe parent node of this node, or null for nodes that have no parent, such as Document.
childNodesA readable array-like object (NodeList) that provides a representation of child nodes.
firstChild, lastChildThe first and last child nodes, or null if the given node has no children.
nextSibling, previousSiblingThe next and previous sibling nodes. Brother nodes are two nodes that have the same parent. Their order corresponds to the order in the document. These properties link nodes in a doubly linked list.
nodeTypeThe type of this node. Nodes of type Document have a value of 9 in this property. Nodes of type Element - value 1. Text nodes of type Text - value 3. Nodes of type Comments - value 8 and nodes of type DocumentFragment - value 11.
nodeValueThe text content of the Text and Comment nodes.
nodeNameThe tag name of an Element in which all characters are converted to uppercase.
With these properties of the Node class, you can refer to the second child node of the first child node of the Document object, as shown below:
Document.childNodes.childNodes == document.firstChild.firstChild.nextSibling
Let's say the document in question looks like this:
Test Hello World!
Then the second child node of the first child node will be the element . It contains the value 1 in the nodeType property and the value "BODY" in the nodeName property.
However, note that this API is extremely sensitive to changes in the text of the document. For example, if you add a single newline between the and tags in this document, that newline character will become the first child node (Text node) of the first child node, and the second child node will be the element, not the .
Documents as Element TreesWhen the document elements themselves are of primary interest, rather than the text within them (and the whitespace between them), it is much more convenient to use an API that allows you to interpret the document as a tree of Element objects, ignoring the Text and Comment nodes that are also part of the document.
The first part of this API is the children property of Element objects. Like the childNodes property, its value is a NodeList object. However, unlike the childNodes property, the children list contains only Element objects.
Note that the Text and Comment nodes do not have child nodes. This means that the Node.parentNode property described above never returns Text or Comment nodes. The value of the parentNode property of any Element object will always be another Element object or the root of the tree, a Document or DocumentFragment object.
The second part of the document element navigation API is the properties of the Element object, similar to the properties of accessing the child and sibling nodes of the Node object:
firstElementChild, lastElementChildSimilar to the firstChild and lastChild properties, but return child elements.
nextElementSibling, previousElementSiblingSimilar to the nextSibling and previousSibling properties, but return sibling elements.
childElementCountThe number of child elements. Returns the same value as the children.length property.
These child and sibling access properties are standardized and implemented in all current browsers except IE.