- this is an alternative Media Nav firmware for the standard Media-Nav and Media-Nav Evolution multimedia recorders of Renault cars, as well as for Dacia cars.
Menaco compatibility can be checked by type of radio(standard head unit) and version number the standard firmware of this ShGU.
OEM head unit Renault
The Menaco software package is designed for two types of Renault head units (Renault navigation): Media-Nav and Media-Nav Evolution. Installation of Menaco on ShGU Media-Nav Evolution differs from installation on ShGU Media-Nav.
Menaco firmware for Renault comes in four trim levels.
Menaco firmware is installed on SHGU Renault Media-Nav with standard versions 4.0.2 – 4.1.0 and below.
- If the version of the standard firmware is 4.0.2-4.1.0, then the installation of the alternative Menaco firmware is performed without additional updates to the standard firmware.
- If the stock firmware version is lower than 4.0.2, you must first update the stock firmware to version 4.0.2 (or 4.0.5-4.0.6). Please note that the provided Menaco Installation Instructions will indicate how to properly update the standard version to the desired one.
Radio Media-Nav Evolution
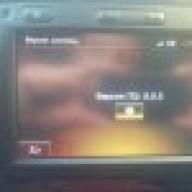
If the displayed version is 5.x.x, 6.x.x, 7.x.x, 8.x.x, 9.x.x, for example, 5.2.7, 5.2.7.A, 6.0.3, 8.0.5, then installed ShGU
And here is an instruction on how to update and expand native navigation maps IS FREE! We also thank for this instruction. msser from drive2.ru1) Prepare a clean USB flash drive of 4 GB or more
2) Download the Igo crack archive from the Yandex disk using the Drueed link
https://yadi.sk/d/UNsgSbiM3CisiE
Thanks to him for RePack (c)
3) Unpack the files from the archive to a clean USB flash drive
Let's say you have a flash drive F:
After unpacking files and folders should turn out on it:
IGO-hack for705
total_misp_wince
Cehack.mscr
MostScript.exe
ULC2_recovery.exe
ULC2_recovery.mscr
mortzip.dll
4) We start the car (It is very desirable, because if the GU turns off during copies, then extra hemorrhoids)
5) Insert the USB flash drive with the prepared files from point 3.
6) Open My Device in the left corner.
7) Open the MD section
8) Open the folder total_misp_wince
9) Open the file cecmd.exe
10) In the left column, open Storage Card4
11) On the right side, open MD
12) Select the NNG folder in the left column
13) After you have the NNG folder highlighted in blue, click File (Top left) and select Copy \ Move there
14) Click OK, by this action you will copy the Original NNG folder to the USB flash drive. And you will have a copy of the original navigation.
15) After copying has passed, open the NNG folder, then Content, then the MAP folder on the left side (!), Select all the files and click File - Delete
16) Be sure to check that the NNG folder appears on the right side !!! This action will completely clear your native navigation maps so that there are no jambs in the future. And the copy will remain on the flash drive in the NNG folder.
In the left (!) Part with an arrow, open the NNG folder (!)
17) On the right side, open the IGO-hack for705 folder, select all the files and press File-Copy \ Move, press the OK button.
A window will pop up confirming the replacement of files, click overwrite all.
18) Everyone finished copying files. Close the help with a cross in the corner after returning to the desktop. We jam the car.
19) We are waiting for 30-40 seconds and start the engine. Checking the navigation.This is one option, and here is the option with a photo. Further text and photo of the author:
I read it, downloaded all the necessary files and started doing it) In principle, all the links and instructions are available at the above link, but it was more convenient for me to do as I used to:
We take a match / stylus / any other device to poke small MediaNav buttons, a USB flash drive with enough free space (2 GB will be enough, I think) and go to the car.
We insert the flash drive and start the car. It will be soooo offensive and annoying if MediaNav turns off at an unnecessary moment)
We go into test mode (how to do it) and enter the commands "0362" and "6971" - exit to the WinCE desktop
Open "My device" in the upper left corner
We leave in "My device" by clicking on the blue arrow back in the top panel (in the photo under number 2).
We go into our USB flash driveClick "Edit" in the top panel and click "Paste".
We are waiting for the entire folder to be copied.
Everyone finished copying files. We close everything with a cross in the corner on the right, returning to the desktop. We jam the car. We go home and sit down at the PC.
Copy the "NNG" folder from the flash drive to your PC to a secluded place and forget about this folder until we decide to return the native navigation to the car.
Next, download the new firmware from the link yadi.sk/d/UNsgSbiM3CisiE
If it doesn't work, try here - yadi.sk/d/5fK1TlHJ3MvTxT
Unpack the files from the archive on your PC to some folder (I'll call it "newNav")
After unpacking, the files and folders should appear in this folder:
IGO-hack for705
total_misp_wince
Cehack.mscr
MostScript.exe
ULC2_recovery.exe
ULC2_recovery.mscr
mortzip.dllNow you need to copy the edited "NNG" folder from the flash drive to the device.
We go into our USB flash drive
Select the "NNG" folder, click "Edit" in the top panel and click "Copy"
We leave in "My device" by clicking on the blue arrow back in the top panel.
Open "Storage Card4"
Click "Edit" in the top panel and click "Paste". We are waiting for the entire folder to be copied.
Everyone finished copying files. We close everything with a cross in the corner on the right, returning to the desktop. We jam the car.
We are waiting for the dashboard to go out.Turn on MediaNav and enjoy the updated maps (+ new ones). It looks like this in the MediaNav menu.
Comments (0)
New first
Old first
The best first
OR LOG IN AS A GUEST
Latest comments on the site
⇒ "It's all in a rush. The driver must have been in a hurry. left the car not on the handbrake. Probably there is a playground with a slope. This caused the car to roll. The steering wheel was turned and it turned out that she went along a curved trajectory. To the driver, everything looked like mysticism. Leave it for a few seconds and do not see your car on the spot, you must agree, it's a shock Probably after such an incident, the driver will be very attentive and will punish the tenth to leave his car in the parking lot on the handbrake. And for the audience, this is certainly a cool video to watch the driver's reaction."
Added - 06/08/2019
⇒ "It was very interesting for me to watch this video, because my dad is also a builder. And since childhood, I went to work with him. He did not work officially, but on orders. I didn't bother him, I just watched carefully. And I don't know why, but I loved it. Everyone even laughed at me that I was like a boy. And I didn't care. When I grew up I wanted to become an architect, but then, somehow, plans in life changed. The man in the video is just fine. I found myself and is doing what I love, like my dad."
Added - 06/08/2019
⇒ "Well, Petya doesn’t want to leave :) You are already showing him the door and hinting at cultures, but he doesn’t care. So he also, as luck would have it, signs some decrees, distributes general ranks, appoints judges. In general, "I won't breathe before my death" - this is not about Pyotr Alekseevich :) It will be difficult for Zelensky to find a common language with the current deputies of the Verkhovna Rada if he fails to dissolve it. Most likely, you will have to cooperate with the opposition and connect Kolomoisky's connections, otherwise the required number of votes will not be found to pass laws ..."
Added - 06/08/2019
⇒ "eu inca nou inteleg cum trebuie de o jucat"
Added - 06/08/2019
⇒ "It feels like the roof was not even secured. Although this would hardly have been allowed. Probably, they did not count on a strong wind. But those who filmed, apparently expected such an outcome. It's not for nothing that the camera was turned on in time. The sight is not pleasant, but it is interesting to watch from the side. But it becomes scary even from the thought that at this time someone could pass by and the roof would simply crush the person. I wonder now what happened next. How was this roof raised? And in general, someone should be responsible for the incident?"
Added - 06/08/2019New for 2018 among Carmedia devices based on stable 8 nuclear processor Allwinner T8 with a frequency of 1.5 GHz, 32 GB built-in memory and 2 GB operational! Made on a new stable platform, installed a new digital radio and a new Bluetooth module, with IPS 9-inch screen 1024x600.
Native head unit RENAULT Kaptur 2016+ on Android 8.1 CARMEDIA KR-9010-T8-at climate control with navigation(GPS, Glonass), a large touch screen and a speakerphone is fully installed in your car! The adapted interface will allow you to comfortably control the car and various multimedia functions of the device. Talk on the phone without leaving the road, use navigation with always fresh maps, watch movies and listen to your favorite music or radio - now any road will be a joy for you! Set up a mobile office in your car with the latest features Android, millions of apps on PlayMarket and Wi-Fi / 3G the internet. Good sound and the ability to connect almost any external device (digital tuner, headrests, camera, car diagnostics, parking sensors, etc.) For advice and detailed information, please contact our managers.
Car radio for Android 8.1 CARMEDIA KR-9010-T8-at is installed on cars:
RENAULT Kaptur 2016+ climate
SYSTEM POSSIBILITIES
Android+ Octa- Core AllWinner T8Cpu
Powerful 8- nuclear CPU and the system Android offers good performance, multitasking, support for most media formats.
Standard installationpin- to- pin
The device connects to the factory connectors of the car without interfering with the wiring. At the same time, all standard functions and warranty for your car are preserved.
Convenient and accurate GPS, Glonass navigation
The ability to use absolutely any navigation program (Navitel, Yandex.Navigator, Progorod, etc.)
Parking cameras
Connect front or rear view cameras to park your car safely.
Music player
Play music from any media (CD / DVD / SD card / USB / Bluetooth / external hard drive (HDD up to 1000 Gb are supported))
Video
Play video of any format, support for video in Full HD quality.
Wireless communication with any phone (speakerphone, sync contacts, listening to music)
Digital Radio
Confident reception, convenient search, the ability to save and rename any radio station.
the Internet
Use the Internet via built-in Wi-Fi or 3G to chat with friends, watch traffic jams, news, social networks, Skype, etc.
Google play
Android application store “Play Market”. Download and install any applications, games, navigation programs and much more.
Optional equipment
Connect sensors for vehicle diagnostics, tire pressure sensors, digital TV, recorders, headrest monitors, etc.
SPECIFICATIONS
Screen
9 "IPS capacitive multitouch eKarn with a resolution of 1024x600
CPU
RAM
2 Gb Ram DDR3
Built-in memory
32 Gb EMMC ROM
GPS and Glonass. The ability to install any navigation software.
Display of traffic jams
Radio
FM Digital NXP 6686 with RDS
Digital DVB-T2 (optional)
DVD drive
Memory card support
Yes. Up to 32Gb FAT, FAT32, NTFS, EXTFAT
yes, 2 ports
WI- FI
Yes (802.11 b / g / n)
Supports. Option
Multichannel BC6 Bluetooth module. Built in. (Hands-free communication via built-in or extension microphone + listening to music)
Audio Inputs
1 linear
Video inputs
1 composite
output power
4 x 50W, TDA 7850
Signal to noise ratio of the amplifier
Audio outputs
4.1 linear
Video outputs
2 x composite
SupportiPod
IR remote support
Working voltage
Steering wheel button support
CANtire
Yes (supports if it is in the car)
Tire pressure sensor support
Reversing camera support
Yes (with automatic activation)
Illumination of buttons
EQUIPMENT
- OEM head unit
- A set of wires for standard connection (power, sound, etc.)
- GPS antenna
- External microphone
- Instructions
- Warranty card
GUARANTEE: 12 months
SpoilerTarget "> Spoiler: Original post
In this thread, I propose to cover the question and answers to the head unit MediaNav.
Question
The instructions include the item Driving Eco2 - I don't have it, although the complete set is maximum. Who has such an item on the main screen?After reading the instructions, I see a lot of inconsistencies - as if a different version.
MediaNav Evolution (MNE)
A standard head unit, nee LG LAN5200WR2.
Performs the following functions:This topic is all about navigating MNE (for the most part) and everything related to it.
- radio reception with RDS text function;
- control of external plug-in audio devices;
- using the phone in a hands-free mode;
- recognition of voice commands; [Calls Siri on iPhone and seems to work with some kind of Androids]
- navigation;
- traffic information (TMC);
- informing about high-risk areas where you need to be especially careful;
- parking assistance (rear view camera);
- programming of remote engine start;
- determining your driving style and providing driving recommendations to optimize fuel consumption.
MediaNav Evoulution Update (MNE)
Consists of two parts - updating the firmware of the MNE itself (the entire system is updated, all programs, including the iGO navigation program) and separately updating the navigation content (maps and everything related to them).
SpoilerTarget "> Spoiler: Firmware upgrade
The firmware exists in the form of an upgrade.lgu file, which must be put on the USB flash drive at the root and insert the USB flash drive into MNE. The firmware can update both the entire system (Windows CE + iGO), and only part of it, for example, only cured iGO.
- Firmware upgrade
Official firmware :
(put only by increasing versions, you can't put on yourself either)Push installation firmware:
Will be installed regardless of the version standing.
To rollback or to put on itself (for example 8.0.5 over 8.0.5).
The difference from the official one is only in the name (it was not repackaged)Firmware with corrected navigation:
- 6.0.4 entirely
- 7.0.5 entirely + corrected sync_files.ini (see "Content Updater")
- 8.0.5 entirely + corrected sync_files.ini (see "Content Updater")
- 9.1.1 whole + corrected sync_files.ini (see "Content Updater")
- 9.1.3 in full + corrected sync_files.ini (see "Content Updater")
SpoilerTarget "> Spoiler: Content update
The update may be official - during the first three months of use or for money - but the cards are almost a year late, and maybe they are issued only once a year, or not official - with cards from the Internet.
- Content update
Official update
You need to go to the site http://renault.naviextras.com download Renault Media Nav Toolbox and install it.
- Take a USB flash drive formatted in FAT32. Go to the car and save the information for synchronization (In Navigation Options (second screen) -> My Updates-> Options-> Update) after inserting the USB flash drive.
- PRACTICAL GUIDE: How to create a fingerprint of your device on a USB storage device.
- Go back to the computer, launch Renault Media Nav Toolbox, insert the USB flash drive and then follow the prompts, instructions and common sense. As a result, all updates will be on the flash drive.
- PRACTICAL GUIDE: How to start using Renault Media Nav Toolbox
- PRACTICAL GUIDE: How to View and Select Map Updates, Apps and Additional Content in Renault Media Nav Toolbox
- PRACTICAL GUIDE: How to Download and Install Map Updates, Apps, and Additional Content to a USB Mass Storage Device
- And the last trip to the car - with updates. We launch MNE and insert the USB flash drive, SyncTool starts and carries out the entire update.
Unofficial update
Attention: It makes sense to update content in an abnormal way only if the navigation is corrected (so that it accepts any licenses, not just its own)
It is possible to do it in several ways:
- Get into Windows and manually update
- Download maps, select the ones you need and put them into folders yourself.
- Download from a and completely replace the NNG folder.
- Make a USB flash drive with a program for updating content from.
- Similar to the official method, but using the program "a. (See below" Program for updating content ")
SpoilerTarget "> Spoiler: TEST MODE (Service menu). Author yosic
So I present to your attention the TEST MODE in MediaNav Evolution.
In order to enter the TEST MODE, in the "System version" window, sequentially click on the places on the screen shown in the picture (circled in red). The sequence of pressing is essential and must be strictly observed.If you pressed everything correctly, then after clicking on the 5th area you will have such a dialog.
In this dialog, you must enter certain codes and press OK to go to any hidden menus.1111 Displays version information for all components in the system.
- List of codes:
1119 Checks and, if not started, launches \ Storage Card \ ULC2_Trigger.exe - there is no such file in the system, I don't know why it was done.
0362 (2383 for 9.1.x) Enhanced Codes Activation (DAC). This code must be entered once while the head is on and press OK. Then you do not need to enter it before each extended code.6971 (9065 for 9.1.x) Exit to the WinCE desktop (launching Explorer "a) In 9.1.x, you need any of the mcmtest * files to run (see below)
- List of extended codes:
3740-3749 Codes that start the MicomManager configuration. Of these, 4 workers:3744 Some kind of test It has a speed reading.
3745 Radio test
3746 Audio Test
3748 Launch of the MicomManager configuration screen (this is where you can change ECO, AHA, etc.)
If you just enter this code, the menu will open with almost all options turned off.
To activate the disabled options, you must insert a flash drive containing one of the following files before entering the code (the content is not important, you can just empty it)mcmtest_activate_4nng.ini - for a safe set of options (there will be ECO activation and everything else), this is what I recommend.
mcmtest_activate.ini (mcmtest_activate_4medianav.ini for 9.1.x) - to activate everything you can. But there will be options that can kill your head, be careful.9999 Enables ActiveSync on the internal (located on the board and not wired) USB port.
4444 Sends something to BlueTooth
4445 Sends something to BlueTooth in the code there is a mention of com.ahamobile.shoutapp.e
4446 Sends something to BlueTooth in the code there is a mention of LL29PAF236
2223 Switches the head skin to the old MediaNav (simple icons, etc.)
2222 Switches skin back to MediaNav EvolutionExample. How to Exit to the WinCE Desktop.
Example. How to enter the radio test and then into the Micom config.
- Enter the code 0362 and click OK
- We press<- и все стираем
- Enter 6971 and click OK
- We are at the desktop.
I did all this purely out of sports interest and a desire to help people.
- We go to TEST MODE by clicking on the areas in the system version dialog.
- Enter the code 0362 and click OK
- We press<- и все стираем
- Enter 3745 and click OK.
- We're in a radio test.
- We leave the radio test (there is a cross like it)
- We go to TEST MODE by clicking on the areas in the system version dialog.
- Enter 3748 and click OK. 0362 does not need to enter a second time until the head is turned off. Re-entering 0362 will disable extended codes.
- We are in Micom config.
All this took me about a week in the evenings.
This all works on absolutely stock firmware without any changes. That is, it should work for everyone. I only tested for 8.0.5. But I think that in other versions it will be the same.
Update Tested on 6.0.4 (though a simple file for editing from 8.0.5 did not fit, only a full one), 8.0.5 and 9.1.1 / 9.1.3I myself have already enabled ECO through this all. It worked without question.
By the way. They have improved the Micom config menu. Now you can activate the same ECO with one click of a button. It says on itself that it is ECO and what its state is. each press toggles on. off Save changes and exit with the poweroff button on the head itself.SpoilerTarget "> Spoiler: How to enable TMC (receiving traffic information via RDS)
Do you have another button with an antenna (or cars) on the screen with the map above the button with the house (lower left corner)? If so, then you already have plugs on. And if there are cars, then they are even accepted - click on it and watch them.
If there is no such button, then you need to enable:
Go to the Service menu (see "TEST MODE (Service menu)") and call (ARC and further 3748) Micom from there (put the file for minor corrections).
Happened? In Micom "do not press Micom Test, and on the next screen look for a button labeled TMC. Press it to have TMC On on it.
After that, press the button for turning off the GU twice and you get back into the window with the version display.
Turn off the car, wait a minute (although if the car is new, then maybe 10 minutes). After turning on, the GU should start loading, i.e. show the logo first.SpoilerTarget "> Spoiler: A program for updating content. Author yosic
This is a specially developed program that can read the data collected on a USB flash drive for the native MediaNav toolbox, can generate a map update that is understandable by MNE (more precisely, the SyncTool.exe program) and which can be installed using standard tools like any other map update downloaded through the native MediaNav toolbox.
- MediaNav toolbox Unleashed
Attention: In order to update any sections that are understandable to navigation, as well as other necessary directories using the standard synctool "a", you must first update the synctool.exe configuration file - sync_files.ini
You can read how to collect data on a USB flash drive and how to install a map update in the instructions for the MediaNav toolbox or in the manual for the machine (And also see above "Content update - Official update").
The program can be downloaded from this link https://drive.google.com/open?id=0B7wEhUc1319RRl9GRzFDSDhQQjA.
Unpack the downloaded archive to any place convenient for you on your computer.
Use MediaNavToolbox.exe to run the program.
Attention: Run the program only by installing the USB flash drive into the computer.
The program has the following functions:In the simplest case, to update the maps, you need to insert the USB flash drive with the collected information into your computer, select the folder where the new maps are located on your computer, go to the Maps tab and click “Update all my maps”.
- Updating, adding and removing maps separately by country - Maps tab.
- Displaying information about the device used by navigation - the Device Info tab.
- Displaying information about installed licenses - Licenses tab.
- Ability to arbitrarily add files to and delete from MNE - Explorer tab.
"Arbitrariness" is limited by the syctool settings "and written in sync_files.ini, which is in the Storage Card4 \ NNG \ synctool folder on the MNE.Several videos that demonstrate the simplest ways to use the program:
- How to choose where to get fresh maps and the easiest way to update the maps of all existing countries at once
- How to roll back your changes if you did something wrong
- How to add / remove / update countries individually
Investments: