Sometimes it happens that you need to resize the image. This can be due to many factors. First, the higher the resolution of the photo, the larger its size, and such files can be problematic to store on the device. Secondly, if you need to upload a photo via the Internet, problems may arise, because some file hosting services have a maximum allowable photo size limit.
That is why in this article we will talk about how to change the resolution of a photo. This can come in handy when working at a computer, so let's get started.
What is permission
First of all, let's figure out what a permission is. And the term is basically simple: resolution is the number of pixels vertically and horizontally in an image.
As you know, the more a photo has those same pixels, the larger its size. However, in our time there are innumerable programs that are able to reduce the image, thereby reducing its size and without losing quality. Now let's talk in more detail about how to change the resolution of a photo.
I would also like to say that with a decrease in the number of pixels relative to the original value, the photo will not lose quality, but if the same value is increased, the difference will become noticeable.
Method number 1. Paint
Everyone is probably familiar with the Paint program. But despite its small number of functions, it is able to help in changing the resolution of a photo.
So, let's say you have a photograph with a resolution of 3,000 by 4,000, and you want to halve that number. To do this, Paint opens. You can use the search by calling it using the Win + Q keys. There, immediately click on "File" and select "Open". In the explorer that appears, indicate the path to the required photo and click "Open".
Your photo is now in front of you. To change its resolution, click "Resize". This button is located on the top bar next to Select.
Now a small window has opened, in which, first of all, you need to choose in what values the size will be changed. There are two options to choose from: pixels and percentages. We choose the first one. Now you need to check the "Maintain proportions" checkbox, this will prevent the case when the photo is narrowed or squished.
Now you can start resizing. Since we initially wanted to reduce the photo by half, we enter the value 2,000 in the "Horizontal" field. You may have noticed that the "Vertical" field has filled in by itself, this is due to the fact that the "Maintain aspect ratio" checkbox is checked ".

Now click OK and we can safely save the photo in a new size: "File - Save".
This was the first way to change the resolution of a photo - in Paint, now let's move on to the second.
Method number 2. Adobe PhotoShop
Now let's move from small to large, more precisely from Paint to PhotoShop. Of course, these are two, but they are not alike in any way, but this approach will not be radically different from the previous one.
So, we begin to figure out how to change the resolution of a photo in the PhotoShop program. First you need to open it. Immediately after that click "File" and then "Open" and navigate the path to your photo.
Now click on the "Image" item on the same toolbar. In the list, select the line "Image size ...". Or you can just press the Alt + Ctrl + I keyboard shortcut.
In the window that appears, immediately check the box next to "Maintain aspect ratio". And in the "Dimension" column, select "Pixels" from the drop-down list. Now feel free to resize the photo.

Now you know how to change the resolution of a photo without losing quality using the PhotoShop program.
Output
As you may have noticed, you don't need to know a lot to change a photo. Anyone can perform the above manipulations, and in the end you will get what you want: the photo will change, but the quality will remain the same, while the file size will noticeably decrease. We hope this article has given you an answer to your question on how to change the resolution of a photo.
Size
images in Paint
Working in the Paint program with images, you can change the size of the entire image, an individual object or a fragment in the image.
You can also tilt a subject in an image so that it appears at a different angle.
How to resize an image in Paint
How to resize an image in Paint
You need to resize the image in the Paint program in the block
"Images" on the panel by clicking on the button.
After clicking on the "Resize" button,
the Resize and Skew tab appears.

Initially, the program parameters are set to resize
images as a percentage. The screenshot of the "Resize
and Tilt ”, the horizontal and vertical parameters are shown - 100%.
And there is an option to switch to resize in pixels.
Initially, the checkbox in the "Constrain aspect ratio" button is also checked,
to maintain the aspect ratio of the resized image.
About resizing the image in pixels - described.
Open the desired image in Paint and to resize
image, click on the button on the panel.
The tab will open. If you want to reduce the size of the image in% - you need
decrease the indicator 100% in one of the parameters (horizontally or vertically)
downward. If you set 90% in one parameter, then 90% will be automatically set in the other parameter.

After decreasing the interest, you must confirm
resizing by clicking the "OK" button at the bottom of the tab.

And the image will become smaller by 10 percent.
At the bottom of the open Paint window, there will be dimensions
this image is in pixels and on the right is the size in KB.
Resize a section of an image in Paint
For example, with resizing a piece of an image -
I will again use the image of a funny dragon
and I will change the size of the pom-pom on the cap.

As you can see, this image has a fairly large pompom.
I will shrink the pompom and comment on how it shrinks.
On the Paint toolbar, click the Selection tool. Select "Freehand" in the lower triangle, and then drag the pointer towards the pompom and select it.
Then in the "Image" block, click
on the "Resize" button.
On the Resize and Skew tab, select the Constrain Proportions check box to keep the portion you want to resize in its original proportions.
In the Resize area, switch to Pixels, and then specify a new width in the Horizontal box, or a new height in the Vertical box. Click the OK button.
For example, if the selection is 65 x 75 pixels and you want to reduce it while maintaining the proportions, in the Resize area with the Constrain Proportions check box checked, enter the value in the Horizontal field to which you want to reduce the fragment in image.
I reduced the Horizontal parameter to 30 pixels. The Vertical option was automatically changed to 35 pixels. As a result, after I clicked "OK" in the "Resize and Slope" tab, the pompom decreased and I just had to drag it to the desired place.

Sometimes you need to reduce the size of photos for sending to email or uploading to a dating site, or to your favorite social network.
The fact is that modern cameras take photos in high resolution, which is of course very cool, but at the same time such photos have an impressive size. Up to several tens of megabytes.
Of course, on sites such a large photo will take a very long time to open, and those with a slow Internet connection may not wait at all until it is fully loaded.
What then is to be done? It's simple, we can reduce the photo or shrink it. At the same time, this will not be noticeable on the site - the photo will still be as natural.
There are many programs for reducing the size of pictures and photos, and there are sites that allow you to do this online.
In this article, we let's look at a few programs first and then provide a link to a site that will reduce the image online.
We use the standard Paint program
Paint is included by default in Windows 7 and other versions. In order not to look for it for a long time, you just need to click on the "Start" icon and enter "Paint" into the search bar:
The list of found budens contains the program of interest to us. We launch it.

On the left there will be a document-shaped icon.

When you click on it, a menu drops out from which we select "Open".

We find the photo on the computer, which we will reduce.

Then in the program menu, click on the inscription "Image" and "Resize"

Switch the button to "Pixels" and enter the number you need. Please note that if the "Maintain proportions" checkbox is checked, then when entering a value horizontally, the vertical value will also automatically change.
If you want your value both there and there, then uncheck the box, but then the image will be distorted: stretched or compressed (if it is not proportional).


Disadvantages of Paint is that we cannot influence the force of compression. Therefore, we will look at a very similar program Paint.NET.
Resize and compress the image with Paint.NET
Paint.NET provides us with the ability to influence the force of compression and the size of the output photo. Therefore, we recommend using it.
This program is also usually already installed on the computer. Try again to press start and enter Paint.NET already.
If you find it, run it, if not, then follow this link http://paintnet.ru/download/ you can download it. The program is free. Install it and run it.
As well as in the program described above, open the file on the computer, and then in the menu "Image"> "Resize", or the keyboard shortcut Ctrl + R.

We also set the parameters we need.


Free SmallFoto Batch Image Processing Software
This program is very easy to use, with a free license, and allows you not only to reduce and compress images, but also overlay a watermark, process and rename several images at once, i.e. batch processing is supported - whole folders.
SmallFoto program appearance:

Selecting "Source"- a folder on your computer with your original images (the folder can contain any number of images or photos);
Also select "recipient folder" where the reduced copies will be saved. You can create it in advance.
Select the size, format and quality you need by clicking on the appropriate buttons and pressing "Start". That is, everything is very simple. The same photos will appear in your "Destination Folder", only with the new size that you wanted.
Reducing the size of photos online
Nowadays, there are many sites that you can go to, upload a photo and get a thumbnail copy of it.
This means that you do not even need to launch any programs to resize the photo. Of course, on sites online, there are much fewer opportunities than programs provide, but if it is important for you to quickly reduce something in width and length, then why not use them.
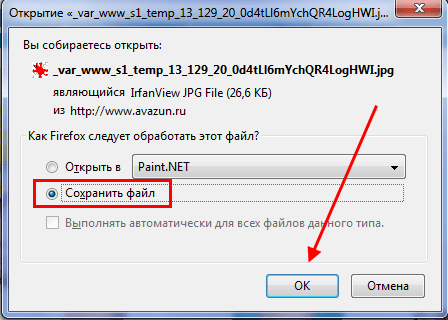
Such an opportunity will not be provided by the website www.avazun.ru, but the exact link of the tool http://www.avazun.ru/tools/razmer/

Click, select a photo on your computer. After downloading, a window will appear with the ability to set the dimensions, and the download button.
Download the resulting image to your computer.
Good day! If you have hundreds of megabytes in a small folder with pictures? Or are pictures sent by mail for more than 10 minutes, even with a decent internet speed? Or like this, it takes half an hour to send an archive of photos to a USB flash drive? Welcome to the right place, in this article I will tell you which program and how to reduce the size of a JPG file without losing quality.
Compressing an image is a simple science. You can reduce all the pictures in one folder in bulk, at one time, this is called batch processing. Or process each image separately. Let's talk about these methods.
How to reduce the size of a Jpg file - a little theory needed
Regarding the JPG format (and its kind of JPEG), there are 3 ways to resize files. The size of PNG, BMP, GIF and other graphic formats can be adjusted only by the first method.
- Reducing the picture resolution (number of pixels) without losing quality;
- Reducing quality without reducing resolution;
- Reducing both resolution and quality at the same time.
Any photo is a set of pixels. In modern cameras, their number exceeds 2-4 thousand horizontally and vertically. This is a lot, from such a resolution megabytes "grow". Does this improve image quality? Practically none, especially for non-professional photographers in everyday photography. Since changing the resolution of a photo can be almost painless for quality, many use this method in order to reduce the image.
I will definitely tell you about the most convenient methods in a note, you just have to choose the one that suits you.

By compressing the image by 2 times (by 50%, in terms of graphic editors), we will reduce its area (and volume!) By 4 times, school geometry in practice.
It is logical to reduce the number of dots to reduce the size of the photo - and not notice any changes in quality.
An alternative option for JPG files is to keep the image resolution as it was, but let the computer lower the quality. Some blurring, anti-aliasing or blurring is fine. We can assume that the quality of compression in graphic editors is something like this:
- 100% - there is no compression of the picture;
- 90% - the default setting in many programs is minimal compression;
- 80% - a deeper degree: files are compressed quite a lot;
- 70% - still acceptable loss of quality, but within reason;
- 50% and below- a dramatic reduction in the appearance of the drawing, visible to the naked eye.
How to compress an image: a practice in graphic editors
We will experiment with this "still life": an ordinary telephone photo that does not pretend to be artistic, but rather a "scary to show" class, but suitable for a family archive.
Technical details: JPG format, resolution 2560 by 1920 pixels, the weight of the source file is unacceptable 2.44 MB. Before compressing a photo, we recommend copying it to a separate folder so as not to lose the picture during the compression process.

Original file: 2.44 MB, with an extension of 2560 × 1920 pixels
Compressing an Image in Paint
In vain this standard graphics editor from the Windows package is considered a frivolous tool. Firstly, it is very interesting and useful to teach "dummies" the basics of PC literacy, and secondly, it is everywhere and always - and when a more powerful program for working with graphics is not installed on a computer, its capabilities will help out more than once.

Open source in Paint: the number of dots is amazing, but their number does not mean beauty or quality at all. Scale: 100%.
To open an image in Paint, you need to right-click on the file and select "Edit".
This editor does not allow you to manually adjust the JPG compression level, but it feels like setting it to around 80%. It is enough to resave the file to get 1.83 MB instead of the original 2.44 MB. By eye, the level of quality has remained almost the same.
The image was compressed to 1.83 MB after resaving in Paint in 2-3 clicks and 10 seconds.
In the arsenal of Paint, there is a way to reduce the size of the picture in pixels. This is a button Resize... When you click it, a dialog box appears, where it is proposed to enter new horizontal / vertical dimensions as a percentage of the original number of points.
Let's choose 50 to 50: 2 times less than the length and width means an area that is 4 times less. By the way, the resolution must be changed in the same way in both dimensions, otherwise the picture will be deformed.

Change picture resolution function standard in most graphic editors, from primitive Paint to monstrous Photoshop.
The result is 616 kilobytes. Not enough for a family archive, but excellent for publishing on websites. Without a magnifying glass, the difference with the source is barely noticeable.
616 kilobytes at a resolution of 1290 × 960 px.
Note that 0.6 megabytes was obtained not only as a result of changing the resolution, but using the "combined" method - the size of the image in Paint is also corrected by reducing the JPG quality by about 85%. It is not possible to change the value of the compress parameter in the required direction. Paint does it automatically.
Reducing the size of an image in Photoshop
This powerful editor can be used for the described tasks. But this is how to transport a package of groceries not in a car, but to call Kamaz. Photoshop is an overly powerful application for such a simple purpose as reducing the weight of a photo.
Opening this program and saving the file in it will take significantly longer than the compression itself. Nevertheless, in order for our instruction to be complete, we will also describe how to compress a picture in Photoshop.
Opening the file in Photoshop, you should select the "Image" section, in it click to the item "Image size"... As shown in the picture below.

A dialog box will open where you can manually set the height and width of the picture. OK button - save the file. The same dialog is called hot keys "Ctrl + Alt + I", fast saving of the result, keyboard shortcut - "Ctrl + S".

Second way to reduce file size pictures or photos, this is to apply the quality when saving. Whichever suits you best. Let me show you how to do this with an example.

You should open a window with settings for saving the image, in the desired quality and format. I will continue to torture my doggy photo. Let me remind you that the file size is exactly 2.44 MB, let's see what you can squeeze out of it.
Choose from above - 4 options. Look at the quality changes during compression, you can move the image by previewing it.
Pay attention, on the left from the top - the Source, then they go with compression.
If you look at the second option, the quality has not changed, and the image weight has decreased to 1.6 mb, when the quality is 72. It is quite suitable for storing or sending by mail.
Before saving, you can also set the size of the image. Which you need. And press save, choose a path for recording and you're done.

The best compression software. Batch processing
Paint is always at hand, but too primitive. Photoshop is excessively cumbersome and unwieldy. Which programs are the best for compressing JPGs? Good viewers, they are image managers! Their advantage is support for batch compression: simultaneous processing of all or several selected files in any folder instead of manually changing the pictures one at a time.
ACDSee, XnView and IrfanView: just a trio of numerous programs for compressing images in bulk. Even the thoroughly commercial ACC has a free, but fully functional version. If the program is not Russified, you should remember the word Compress - "Compression". Let's analyze the technology of batch compression using the example of the graphical browser XnView.
Once you open one of the files in the target folder, double-click on it. A filer window with thumbnails of all images will open.

The XnView viewer and editor says that 9 files take up almost 20MB. Disorder!

In the arsenal of viewers there is also the function "Compress JPEG" without reducing the resolution.
Image compression in online services
Although it is convenient and correct to have a program to change the size of a graphic file at hand, you can use numerous online services for this task.
The principle of operation is completely similar to the work of classic PC applications: either compression, or resizing, or - both actions at once. All parameters are customizable.
The disadvantage of the online method is the need to send an initially large file: this process takes some time. Compression web services are usually free, but you also need to download the result back to your PC.
A waste of time is justified if the number of files being reduced does not exceed a few files per month. Specific recommendations? Please, those online services that I use myself.
TinyJPG.com - Foreign service
Quite good foreign service, without unnecessary settings. The service will do everything for you, just specify the location on your PC for downloading pictures, after which the compression process will start automatically.

I will warn you right away that the site for unregistered users has compression restrictions - 20 images with a maximum size of 5 MB.
Upon completion of the process, it is possible to download all the files in one archive or one at a time, as it suits you.
IMGonline.com.ua - convenient and understandable
If you use this service, then on it you can change the size of the image itself, as well as compress the file itself with setting the desired quality. About what quality is acceptable, I wrote at the beginning of the article.

One of the free online services.
Both services allow you not only to play with sizes and quality, but also to edit pictures. There is a detailed help system. Which I advise you to familiarize yourself with before using.
In other operating systems, including mobile ones, the principles and settings of compress technologies are the same.
Picture Handling in Mac OS
Let's take a look at the process of working with images on a Mac, for example, the standard "Viewer" application compresses pictures perfectly: installing additional software is unnecessary, even for batch processing. Viewer on Mac knows how to resize multiple photos at once.
Select one or several images, open them in the preview, then select Tools> Customize Size, and fill in the required values. And you save.

Conclusion
We recommend that you experiment with compressing pictures yourself - at the same time, having previously copied them into a test folder, so as not to lose important photos. After 3-4 attempts, you will practically understand how to reduce the image size in the optimal way, with the most appropriate compression, width and height parameters.
- Install and use any high-quality graphic file manager on a daily basis.
- Forget Photoshop: this is too powerful and clumsy editor for such simple tasks.
- Use online services only when there are no other ways at hand - and use Paint for single files.
Disclaimer: Not a single dog was harmed during art and programming experiments. :)
04/12/16 59KDon't know how to increase the size of a picture? This is a very easy task as everything you need is already installed on your computer. Read this guide to learn how to resize a photo with 5 simple tools.
Method 1. How to resize an image in Microsoft Paint
- Find and run MS Paint. It is preinstalled on all versions of the operating system Windows. Start> All Programs> Accessories> Paint:
- Drag the image into the Paint window or use Menu> Open (Ctrl + O).
- In the main menu of the program, find the item "Resize" and select it:
- The panel for resizing and proportioning the image will open. You can specify the value in pixels. Don't forget to check the box “ Maintain proportions". Otherwise, the image will be deformed:
- To increase the size of the picture, press the "OK" button and save the photo.
Advice:
- If you can't resize your photo without stretching it, you can use the Crop tool to remove unnecessary edges. How to do this is described in point 3;
- To open a photo faster, right-click on it and select “ Open with Paint»;
- It is best to save the image in the same format as the original.
Method 2. How to resize images in MS Photo Gallery
- If Microsoft Photo Gallery is not installed on your computer ( Start> Photo Gallery), you need to download and install it as part of Windows Essentials 2012;
- Launch MS Photo Gallery and find your graphic file;
- Right-click on it and select "Resize ...":
- Select a ready-made preset: " Small 640 pixels"," Medium 1024 "," Large 1280 ", etc.
- Click " Resize and save". After you increase the size of the picture, the image will be placed in the same folder, and the original will also remain in it.
Advice:
- If you need to set the exact size of the image, in the drop-down menu, select " Custom»And set the size for the larger side of the photo;
- To resize multiple photos at once, select them while holding down the Ctrl key.
Method 3. How to resize images in Photoscape
You can increase the size of the picture in Photoshop. Or use Photoscape for this.
- Download Photoscape and install it. Run the program;
- Go to the Editor tab and find the photo you want to edit:
- At the bottom of the image there is a button "Resize", click on it.
- Set a new photo size. Make sure the option “ Maintain aspect ratio"Is enabled and click" OK ":
- Save the edited image.
Advice:
- If you need to resize multiple images, use the " Batch editor". Add a folder and resize all photos in it;
- If you do not know the exact size, you can set a "Percentage" of the original size.
Method 4. How to resize images in IrfanView
- Install IrfanView - a great tool for viewing and enlarging images;
- Add a photo by dragging it into the program window, or by clicking the first button in the toolbar:
- Go to the "Image" tab, select " Resize / Aspect» ( Ctrl + R);
- Set the new size in pixels, centimeters, inches, or as a percentage of the original image:
- Save the image.
Advice:
- You can use standard sizes: 640 by 480 pixels, 800 by 600 pixels, 1024 by 768 pixels, etc .;
- To maintain high quality photos, make sure the DPI is set to at least 300.
Method 5. How to resize images online
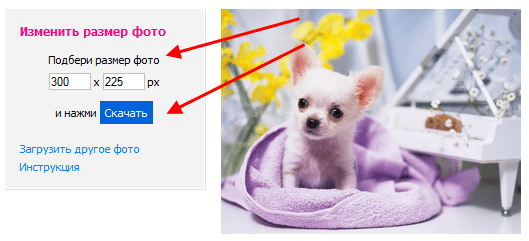
- To enlarge the image online, go to the PicResize website.
- Click the " Browse»To select a photo. Click " Continue»:
- Choose a percentage of the original image, for example 50% smaller. The tool will display the size of the output image. Alternatively, you can enter the exact size by selecting “ Custom Size»: