Every Apple owner may encounter a situation where the flash on the iPhone does not work. It is not always necessary to take your smartphone in for repair - a software glitch or an error in the settings of this function can interfere with the operation of the flash. You must first accurately determine the cause of the breakdown and then make the right decision.
Possible causes of malfunction
The flash on your iPhone may stop working due to various reasons. You may have updated your iOS operating system or installed unlicensed software. Then the cause of the breakdown is a software failure, and you need to reboot the device. If the flash fires spontaneously and the quality of the photos has deteriorated, most likely the problem is in the settings.
The cause of the malfunction is obvious in the case of mechanical damage to the main camera and moisture ingress. If the flash does not turn on as a result of an impact, a fall, or a liquid spill, there is no need to try to update the software or configure this function. It is important to contact a specialist in time, as moisture inside the iPhone causes corrosion. Destruction of contacts, tracks and microcircuits leads to the fact that the phone will stop working altogether.
Also, the problem with the flash can be caused by overheating of the iPhone.
Symptoms of iPhone malfunction
A broken flash does not prevent you from using your smartphone, but it does significantly limit its functionality. If you want to take bright photos and clear videos, start addressing the problem when you notice the following symptoms:
- flash constantly on
- Flashlight won't turn on
- Flicker mode doesn't work
- The flashlight is on, but the flash on the iPhone does not work
Check the flash operation only when the iPhone has cooled down after prolonged photo or video shooting. Wait until the temperature returns to normal.
How to restore performance on your own
First of all, remove the film, as it may interfere with the normal operation of the lighting. Test how the flash works using the Camera and Flashlight apps. If the flashlight is on, but the flash cannot be turned on, the problem is in the standard Camera program. It needs to be updated or use an analogue.
Next, explore your iPhone settings. Go to “Do not disturb”, activate the “Manual” option and disable it again. Check if the application that controls the flash and enables photo and video shooting is allowed.
Software failures can be easily resolved by rebooting - press the Power button, wait for the slider to appear and move the pointer to the right. Also install updates:
- connect iPhone to charger
- enable internet access
- run the software update in the main settings
If the flash fires but unpredictably, try adjusting it. Click on the lightning icon in the upper left corner of the screen and change the settings.
It was not possible to turn on the flash again - you will have to contact a specialist. If you haven't flooded or dropped your phone, visit an Apple representative and request a free repair. Otherwise, the best way to fix your iPhone flash is to call YouDo artists to your home.
How experts can solve the problem
Use the functionality of the YouDo service if you do not want to waste time traveling. Professionals registered with Yuda come to your home and office with all spare parts and tools. They set minimum prices and accept orders around the clock.
The LED responsible for the bright flash cannot be replaced separately. Experts completely change camera modules in several stages:
- unscrew the bottom screws and lift the screen 90 degrees using a suction cup and spatula
- remove the cover of the FPC connector and the protective plate, disconnect the cables and the display module
- remove the battery cable together with the holder, remove the battery, disconnect the antenna cable
- remove the flash bracket, disconnect the motherboard from the top cable and button wires
- remove the bottom cable connector and SIM tray; remove the motherboard, having first disconnected the Wi-Fi cable
- disconnect the bracket and cable of the main camera
- remove the old part, connect a new camera, assemble the phone in reverse order
Yudu performers provide guarantees of up to 1 year, work efficiently and quickly. Order
Mobile devices from Apple models 4, 4S5, 5S, 5C, 6, 6 Plus are used not only for conversations. They are multifunctional and allow the user to take videos and photographs. The small size of iPhone allows you to step into the world of photography, capturing moments of nature or family that might be missed if you don't have a camera.
It is very unpleasant when a favorite thing or certain of its functions fails, especially if you use them quite often. And when the iPhone flash does not work or is constantly on, the owner immediately wonders what to do to fix this problem. Most often this happens due to moisture penetration into the device. And we recommend that anyone who encounters a breakdown immediately contact our APPLE-SAPPHIRE service center for free diagnostics and high-quality repair of the device. The longer you delay, the more difficult it will be to repair your smartphone (and the cost of repair will increase significantly).
Do you often use your iPhone to capture unexpected moments? And suddenly your flash stopped working? Have you tried various manipulations (deleting folders, resetting factory settings), but nothing helped?
Is it possible to make a flash on an iPhone yourself?
You can check the operation of the camera by replacing it with another one. And if this does not help, then most likely the problem lies in its control circuits. Eliminating it is somewhat more difficult and cannot be done without the help of a professional. Moreover, replacing the camera requires the necessary knowledge. But still, you can perform some actions on your own.
As noted above, the main reasons for the failure of the flash on a smartphone are related to mechanical impact: moisture or shock. But the breakdown may be caused by errors in the firmware or a software glitch. Depending on this, the problem is solved in different ways.
How to determine why the iPhone flash does not work and what to do?
First of all, you should check the operation of the system. If the flash on your iPhone does not work and the cause is software errors, then you will not need complex repairs. To do this, just restart the device by holding down the Home and Power keys. Even if the flash does not start working after a reboot, do not worry, because you can try flashing it by returning the old one or restoring a new operating system.
But do not forget that changing the firmware has one significant drawback. This is often accompanied by the loss of all data and does not guarantee that the problem with the flash will be resolved. If you cannot afford to risk information, we recommend that you conduct a free diagnosis in our company APPLE-SAPPHIRE. The experts will pinpoint the reason why the iPhone flash does not work, as well as effective solutions.
After checking the gadget and identifying the causes of the breakdown, the technicians will estimate the cost and timing of repairs. Depending on the scale and complexity of the problem, repairs can take from 30 minutes to 3 days.
APPLE-SAPPHIRE offers favorable prices for repairs, using only original spare parts from the manufacturer. By looking at our price list published on the website, you will dispel all doubts.

Conclusions:
If you want to count on timely and high-quality assistance, contact our specialists. They guarantee the performance of services at the highest level. Because:
- Diagnostics are performed absolutely free.
- We carry out repairs with a guarantee.
- Only professional equipment is used.
- Highly qualified specialists will provide advice on any questions regarding your Athos model.
- An individual approach guarantees high-quality repairs.
By contacting APPLE-SAPPHIRE, you will never regret your choice!
I have already been asked why the flash does not work on Honor 10, Honor 9 Light, Honor 7a, Samsung A5, Meizu M5, Huawei P20, Xiaomi, Xiaomi, Redmi 4 phones, and in many cases it turned out that it was simply not turned on.
Therefore, first I will describe why the flash does not work in the camera when taking photos on an Android phone, and then how to turn it on when taking photographs.
A flash is the same as a flashlight - if the flashlight works, then, as a rule, the flash should work.
If it doesn’t work, then it’s either a firmware failure or a component failure - the first reason is usually solved quickly and independently.
On an Android phone the flash does not work when taking photos due to a software glitch

Not everyone knows that you can connect an external flash to an Android phone, and it’s unlikely that many will want to bother with it.
But those who really often use flash when taking photographs will not regret it.
Why? Because the external one is many times more effective than the standard one - the photos there are much better, and the shooting range is much greater.
However, I got a little carried away, let’s get back to the point and launch safe mode to check the flash’s functionality.
How to launch it If the Android phone is in safe mode and the flash is working, then the malfunction may be caused by third-party applications.
Another way to bring the flash back to life is to restore the default settings in the camera program itself.
The simplest solution if the flash on your Android phone does not work when taking photographs
Such a non-working software state of the flash during photography can be cured instantly. Open “Settings” and look for the reset function.
Where is it? It depends little on the phone model - more on the version of Android. Right now I have a Samsung phone with Android 7.0 in my hands.
You don’t need to search for long in it: “Settings”, “General settings” and you find yourself in the reset section (at the very bottom).

Just no need to be naughty. First, save the data that is important to you - it will be deleted. A full backup will not work here - then the old firmware will be restored and the flash will not work again
If you have synchronization enabled, then all data should be restored. If you choose this option, then before resetting, I recommend making sure that Google really synchronized everything.
To do this, you need to visit the Google website (or the phone developer - many also offer their own synchronization) and see if everything is in place.
There are also computer programs that can quickly transfer your files to your computer or laptop.
How to turn on the flash on an Android phone
Turning on the flash on an Android phone is quite simple and there is almost no difference between which phone and which Android.
The camera is turned on directly in the program - most often at the very top, but it can also be at the bottom.

There are three icon positions at the top of the screen. Yellow lightning bolt, crossed out icon and just white - choose the latter option.
However, everything is accompanied by text notifications for two or three seconds, so it’s almost impossible to make a mistake.
A few years ago, a phone camera equipped with a flash was the object of desire for every mobile photography enthusiast.
Now it is on almost all phones, but it doesn’t have much effect. This is a diode that supports autofocus.
Only manufacturers are trying to improve the lighting conditions of the frame, and LEDs cannot be compared to traditional flash.
The downside is the need for a large capacitor, which simply doesn't exist in thin smartphones.
Thanks to the latest invention by Professor Lee Pui-Zee, it can now become many times more effective.

She succeeded in creating a flat capacitor made of polymers that stores the charge needed to illuminate a gas just 1 mm thick.
Manufacturers now have one final challenge: implementing a new solution for mass production.
According to Jack Tuyen, CEO of Xenon Technologies, such subtle elements could appear on smartphones as early as next year.
It is very likely that the new development will arouse interest among leading manufacturers, and in the future this type of solution will appear in new models. Good luck.
Android smartphones do not have a flashlight, in the usual sense. At the same time, mobile devices are equipped with LED flashes, and some models contain two, three or more LEDs. Such equipment is perfect for illumination in conditions where there is no light. You will learn how to use a flash as a flashlight in this article.
Method 1: Button in the Quick Launch menu
Many manufacturers integrate the flashlight function directly into the system. To do this, open the notification bar and find the corresponding button on the Quick Launch panel. If the button is missing, use other methods.

Method 2: Widget
Some applications, such as HD Widgets, allow you to customize a panel with a flashlight activation button.

Method 3: Gesture
Most Motorola smartphones support the Chopping Gesture feature. A double swipe allows you to activate or deactivate the flashlight.
If your device supports gesture control by drawing a gesture on the screen, visit the settings and check whether the flashlight can be activated.

Method 4: Application
If the above methods do not work or are not suitable, then use the flashlight application. The option with an installed program is interesting because of its prostate or additional functionality, for example, two modes with the intensity of the glow or several variations of blinking. To download, open and select your preferred program.
Conclusion
To turn on the flashlight on your Android phone, use any of the 4 methods described. Although the use of LED flashes will not replace a full-fledged flashlight, since the LED backlight is not designed for long-term operation, it is enough for many tasks. Remember that during operation the flash becomes noticeably warm, and if it overheats, it turns off temporarily. Flash in flashlight mode is useful when you need to briefly illuminate the road or illuminate a room.
Do you use a flash as a flashlight? Write in the comments below which method you like best.
Was the article useful to you?
Rate it and support the project!
The flash on Android smartphones is most often used not for its intended purpose, but as a flashlight. This flashlight does not shine too brightly, but it is more than enough to read or find something in the dark. In this short article we will talk about how to turn on the flashlight on Android 4.4 and Android 5.0.
Turn on the flashlight on your Android smartphone using applications
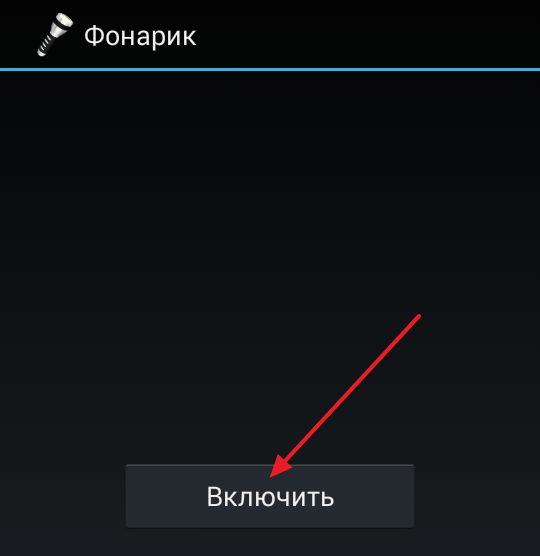
If your smartphone has an Android version lower than 5.0 (that is, Android 4.4 and older versions), then in order to turn on the flashlight you need to use a special application. To find such an application, open the store and enter the word “Flashlight” into the search.
After this, you will see a list of Flashlight applications that are available in the Play Market. Open one of these applications.

After that, install the selected flashlight on your Android smartphone.

Now the flashlight can be launched using a shortcut on the desktop. Launch the flashlight app and turn it on.
If you have Android 5.0 or a newer version of this operating system, then in order to turn on the flashlight you do not need to install special applications. Here, to turn on the flashlight, just open the top curtain and click on the flashlight icon. Turning off the flashlight is done in the same way.

Also in Android 5.0, you can turn on the flashlight using the Google Now voice assistant, the setup of which was discussed on our website. To turn on the flashlight using Google Now, you just need to say “Turn on flashlight.”

To turn off the flashlight, use the phrase “Turn off the flashlight.” In Android 5.0, you can turn Wi-Fi and Bluetooth on and off in the same way.