The repeater mode on the router allows you to expand the range of the wireless network: one router receives a Wi-Fi signal from another and distributes it under the same name and with the same parameters (encryption type, password) for connection. This can be convenient for a large apartment, office or private home. Most Asus routers, such as RT-N10, RT-n11p, RT-N12, RT-N13u, RT-N16 and others support operation in repeater mode.
This instruction provides details on how to configure an Asus router in repeater mode to expand the Wi-Fi network coverage of your premises. By the way, did you know that you can?
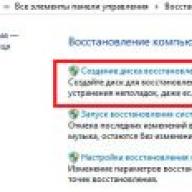
Before you start setting up
- Connect the router, which is being configured in repeater mode, with a cable to the computer from which the configuration is being made. This is not necessary, but it is better to do it, since when setting up via Wi-Fi, the initial connection parameters on the router will change and you will be kicked out of the admin panel (outwardly it may look like it is frozen).
- If the original Wi-Fi router, the signal of which we will expand, has the same LAN address as the one being configured, change the address on the second of them, so that after setting up in repeater mode we can separately go into the settings of each of them (this can also contribute to the absence of conflicts in the network). For example, two Asus routers are used, each with an address of 192.168.1.1. In the repeater mode being configured, go to the “Local Network” settings section and change the address, for example, to 192.168.2.1 (do not forget that after saving the settings you will need to log into the web interface again, at the new address).
Setting up an Asus router in repeater mode
Routers from ASUS have two options for the settings interface - an older one, in blue tones, and a newer one, dark. First, about the settings in the older version.

Basically, everything is ready, now your Asus is working in repeater mode.
In the new Asus router settings interface, everything is done almost exactly the same:

I hope the instructions helped. I would be grateful if you could share it using the buttons below.
Asus is a manufacturer of high-quality electronics, including routers for Internet access.
The Asus modem RT-G32 is recognized as a classic budget model.
This device is sold at any electronics store. It is inexpensive, which is why it is one of the best-selling modems. For a professional, setting up an Asus RT router takes about 10 minutes. For beginners, convenient instructions have been compiled, thanks to which Asus can easily and quickly prepare itself for work.
Technical characteristics of the Asus RT wireless router:
- Type – WiFi access point.
- The communication standard is 802.11n, the access point is on the usual frequency of 2.4 GHz.
- Connection speed 150 Mbit/s.
- Encrypted with WEP, WPA and WPA2.
- Power 18 dBm.
Appearance Asus
 The G32 has a sleek, modern look and can be mounted on a wall or flat surface. RT-G32 is available only in white. On the front of the Asus there are power indicator lights, as well as wireless and global network lights. On the back panel of the G32 there are reset buttons, starting a WiFi connection, connectors for connecting network devices, and a power supply. The RT-G32 router is equipped with one external non-removable antenna. The dimensions of the Asus device are 110 x 33 x 167 mm.
Connection and preparation for work
The G32 modem comes with all the necessary elements for connection: a network cable for connecting to a computer, a power supply, the router itself, connection instructions and an installation disk. 
To install the RT-G32 router, you need to complete several steps:
- Connect Asus to the power supply and plug it into the network.
- Connect the Ethernet cable to the WAN connector.
- Connect the network card to the LAN1 port on the modem using an Ethernet cable.
- Perform a factory reset by clicking Reset.
Using these points, the path is implemented: “Internet - Asus Router - Computer”.
Settings
To work with the Asus modem, you need to configure the computer card. For this:

Automatic setup
The G32 is configured via a Russian-language web interface. First of all, enter the IP address in the browser: 192.168.1.1, then press Enter. The windows that appear require you to specify a username and password. By default, in both cases, the word admin is entered for Asus devices if the login/password has not been changed. In the latter case, the changed data is indicated. 
A window will appear on the monitor where the interface language is set at the top of the page.
Connecting to the Internet manually using the example of some providers
 The Internet connection is the main part that allows the modem to receive and send traffic. For correct adjustment, you need to carefully read the general information. Each of the existing providers uses one of several types of connection:
- PPPoE.
- L2TP.
- DHCP.
This data is indicated in WAN (first menu item). After authorization, the next steps are identical. General operating algorithm – WAN; Internet connection (here you must indicate the type of connection). Next you need to follow the instructions. If any information to fill out is unknown, you should call the provider.
 "Dom.Ru", "Rostelecom"
To configure these providers in the WAN, you need to specify the following parameters:
- Select PPPoE connection type.
- Set up automatic acquisition of an IP address and automatic connection to DNS.
- Specify the login and password issued by the provider.
- In the “Hostname” field, specify rostelecom.
- Click "Apply".
 "Beeline"
The Beeline provider uses an L2TP Internet connection. To connect G32, fill in the following items:
- Automatic IP acquisition.
- Enter the login and password issued by Beeline.
- In the “Service Provider” line, indicate tp.internet.beeline.ru, duplicate it in the “Host Name” (these items must be specified).
- Click the “Apply” button.
NetByNet
The Asus router model RT-G32 is connected to NetByNet via PPTP (VPN). There are two connection options: with automatic local IP and with static local IP.
 For automatic IP:
- Automatic IP acquisition.
- Automatic connection to DNS.
- Login and password from the provider.
- The “Server” field for the service provider is filled in.
 With static IP:
- The communication technology is indicated: WAN, Internet settings, connection type.
- "No" for automatic IP.
- The required IP address is indicated.
- Subnet mask.
- Gateway.
- Servers 1 and 2 DNS.
- Login and password.
- Fill in the “Server” HeaRT-Beat or PPTP/L2TP(VPN) items.
 To configure WiFi, you need to open the “Wireless Network” tab and set the following arguments in it:
- Enter the Wi-Fi network name in the SSID field.
- To protect access to the “grid”, enable “Hide SSID”, in which case the name of the access point will be known only to those in the know.
- Select WPA Personal from the Authentication Method menu. In the “Encryption” line, select TKIP. These methods of protection are currently the most modern, reliable and widespread.
- In the “Pre-shared key” line, specify the password for authorization on the network. The combination must contain at least 8 characters using any symbols. It is recommended to set a password that is difficult for third parties to guess. In this case, there will be maximum protection against hacking for fans of free Wi-Fi. At this point you can change your password in the future.
- Click "Apply".
When the adjustment is completed, you need to reboot Asus and check the router's connection to the network.
Setting up Asus RT in repeater (repeater) mode
A repeater is a device required to increase the range of a network. Many modern modems are capable of operating in repeater mode. You can configure it for Asus by following the algorithm:
It is important to note that in repeater mode it is impossible to change the values at address 192.168.1.1. This is due to the fact that the G32 router assigns a certain IP address to the repeater. There are three ways to access the Asus control panel:
To return the repeater to normal operation, you need to go to the “Administration” tab, select “Wireless Router” and click “Save”. The window indicates the new network name and password, after which the Asus RT-G32 will reboot.
IPTV
In the additional settings of the G32, access to IP television is established. In the WAN menu, select the port to which the TV is connected, set a dynamic IP address. These changes must be saved by clicking the "Apply" button. 
Then turn on the TV and check its functionality. If the image is not visible, it means:
- The provider does not provide such a service.
- The Asus G32 modem settings do not match the TV settings.
- A special connection type is required.
DHCP
This technology does not require any additional data; the only point is to indicate the connection. To do this, go to the WAN and select the “Dynamic IP” connection type. 
Security Settings
The Asus RT router has additional security features:

This data allows you to work safely on the Internet and implement parental controls.
Setting up the printer
There is no direct connection to the printer for the G32; connection is only allowed through network printers with IP.
Setting up DLNA on the router
DLNA provides access to audio, video and photo files for a TV that supports this server. If the model has a USB connector, then you need to connect a storage device to the USB connector, which will be accessed from the TV. Then you need to go to the settings of the Asus G32 router at 192.168.1.1, specify the username and login. In the “General” menu, select “USB Application” and then “File/Media Server”. 
In the “Media Server” item, set the On switch next to the Enable DLNA Media Server item. After that, click the “Apply” button. 
To enable access from a computer, smartphone or other device, go to the “Network Neighborhood” tab, set On next to “Allow shared access to the resource”. After these steps, the drive connected to the Asus G32 will appear in the “Network” window in Explorer.
Basic mistakes when setting up the RT-G32 router
If the RT-G32 does not work after setting the settings, the following problems may be the cause:

If the problem cannot be solved by these methods, you should contact the technical support of your Internet service provider.
Firmware update via web interface
Firmware is a program downloaded from the official website that is responsible for the functionality of the device. Older Asus routers do not comply with the latest version of the program, this should be taken into account when downloading.
To flash an Asus device, you need to download the file with the program, install and run it. Then go to the router menu in “Administration” - “Firmware update”. In the field that appears, the address with the downloaded firmware is indicated. Then click the “Submit” button and the device will begin flashing. The Asus router will update itself and reboot. If the Asus RT does not reboot, you should do it yourself. Setting up the G32 after the update will require repeat steps. 
When purchasing a new G32 router or experiencing problems, it is recommended to reset the settings to factory settings. To do this, the Asus router has a “recessed” Reset button, which must be pressed with a pin or wire and held for 10 seconds. 
You can also reset the settings through the Control Panel. To do this, enter: 192.168.1.1 in the address bar of the browser, go to the “Administration” tab - “Manage settings”, click the “Restore” button and Ok. The factory reset will begin, you need to wait until the recovery process is complete. 
Sometimes the installed settings may fail. This happens accidentally or due to a bug in the G32 router firmware. In order not to re-enter the configuration data, you must use the recovery function. To do this you need:

Conclusion
"Asus" is a simple and inexpensive device for connecting to the Internet. Setting up the Asus RT-G32 router according to the instructions and connecting to the “global network” is quite simple. The web interface is made in Russian and has an easy, intuitive menu. Asus RT is a good option for home use with average Internet speeds. For high speeds, it is better to choose a more professional device. Compatible with many existing Internet providers.
Pros of Asus RT
The G32 device has the following advantages:
- Easy to use.
- Low cost.
- Availability of security settings, including protection against Internet attacks.
- Friendly interface.
- Internet TV support.
- Sold in any store, since RT-G32 is a common modem.
Cons of RT-G32
The main disadvantages of the RT-G32:
- Not suitable for high speed connections.
- Small coverage area, which leads to low Wi-Fi power.
- No power button.
- The device may overheat.
Introduction
Today we bring to your attention a review of two wireless routers ASUS RT-N10 rev.B1 and ASUS RT-G32 rev.C1, which are in many ways similar to the RT-N10U model, but have distinctive features. ASUS RT-N10 B1 and ASUS RT-G32 C1 are inexpensive devices that support multiple wireless networks simultaneously, with similar technical characteristics, so they are reviewed together.
Appearance and hardware platform
The RT-N10 rev.B1 wireless router is made in a black plastic case, and the RT-G32 rev.C1 is in white, but otherwise the appearance of the devices is identical.


ASUS also releases revision C1 for the RT-N10 model, which differs only in body from revision B1, but since we did not have it at our disposal, we will not describe it in detail in our review.

The overall dimensions of the case are 173x130x26 mm excluding the antenna. On the top panel there is a ventilation grille, as well as a three-dimensional name of the manufacturer.

There are four rubber feet on the bottom of the devices, allowing you to conveniently place the wireless router on the table. In addition, there are two T-shaped technological holes for wall mounting of the device. The information sticker will tell you the parameters of the required power supply (12 V and 0.5 A), the device model, its MAC address, PIN code, serial number, default IP address and more. Ventilation grilles occupy most of the bottom.

The side walls also contain holes for ventilation, along with a decorative gray stripe running through the front panel of the router, on which, in addition to information about the manufacturer and model, the following indicator lights are located: Power, WLAN, WPS, WAN, LAN1-4. The purpose of all indicators is standard, but it is worth noting that the blinking WPS LED informs the user about the operation of the process of the same name (Wi-Fi Protected Setup), which allows you to connect wireless clients in a semi-automatic mode.


On the back side there are Fast Ethernet network ports (WAN, LAN1, LAN2, LAN3 and LAN4), WPS and Reset buttons, and a power connector. A non-removable antenna is also attached here.

The functions of the central processor are performed by the Ralink RT3050F SoC chip. RAM is represented by an EtronTech EM63A165TS-6G module, operating at a frequency of 166 MHz and having a capacity of 32 MB.

The block diagram of the RAM module is shown below.

For flash memory, we used a Spansion S29GL032N chip with a capacity of 4 MB, the block diagram of which we also provide for our readers.

The strengths of the tested devices are listed below.
- Supports up to four wireless networks simultaneously.
- Intuitive interface.
- Good data transfer rates in the wireless segment.
- Possibility of bandwidth control.
- Supports authentication using 802.1X MD5.
- Acceptable price.
Unfortunately, we cannot help but point out the shortcomings of the models under consideration.
- Low data transfer rates when using NAT/PAT.
- Incorrect time zones for Moscow and some other Russian cities.
- Impossibility of specifying NTP and VPN servers with a Cyrillic name.
- Inability to disable telnet access to the device.
- Lack of utilities for the RT-G32 rev model. C1 on the manufacturer's website.
At the time of writing, the average price for the ASUS RT-G32 rev.C1 and RT-N10 rev.B1 models in Moscow online stores was 1,250 rubles.
A router in repeater mode is a quite useful device, the purpose of which is to expand i.
You can find quite a lot of articles on the Internet about how such a device works and where you can get it.
But most of these do not really answer the question, but only confuse users even more. We, in turn, will try to explain complex things in the simplest possible language.
A simple everyday situation, when there is no Internet connection in the bedroom or kitchen, can be easily solved with the help of a repeater or a second router that can be used as a repeater.
Now it makes sense to talk about how to configure the second router so that it can.
But before that, it’s worth clarifying a few points regarding in what cases you can use a router as a repeater.
In what cases is a router suitable for use as a repeater?
Experts agree that using it in this way only makes sense when you have an unnecessary one.
In other cases, it is better to purchase a full-fledged repeater. And there are several reasons for this, specifically:
- It is not always possible to provide a signal of the same quality as that coming from the main router;
- Signal stability can also often suffer;
- It is also not always possible to successfully complete all the manipulations to set up such a connection the first time.
The problem is that each router is configured in a completely special way, although there is a certain general algorithm for performing such actions.
Tip: Use two routers from the same manufacturer. Then both will work much better.
In it, click on the “Disable WPS” button. We won't go into detail about what it is.
4. Reboot the second router, that is, unplug it and plug it in again. The same can be done by clicking on the inscription “click here”, which will appear after completing the previous step.
5. After that, go to the “Network” menu and the “LAN” submenu. In the IP Address field, enter a new IP address. It should be greater than the one it was by one.
That is, initially it was 192.168.0.1, and now you need to enter 192.168.0.2, as shown in Figure 6. Click the “Save” button to save the settings.
6. Now enter the address that was specified in the previous step in the address bar.

Rice. 6. The first stages of setting up a router in repeater mode
7. The previous step will allow you to go back to the settings of the second router. Go again to the “Wireless” section and to the “Wireless Settings” subsection.
There we will be interested in the following parameters:
- “Wireless Network Name” - the name of the network that the second router will distribute;
- “Region” - region (the country in which you live);
- “Channel” - channel (we said above that for example we’ll take its value 6);
- “Enable WDS Bridging” - just check the box, this is the item that enables WDS.
8. Click on the “Survey” button to continue working.

Rice. 7. Setting up a second router and connecting to the first
10. After this, all that remains is to enter the password for the network to which we are trying to connect. To do this, enter the encryption type used in the first router (this is done in the “Key type” field).

Rice. 8. Completing the connection of the second router to the first
That's all! The network should now work fine.
Hint: WDS is a repeater mode.
Hard enough.
But from the entire procedure described above, you can extract the same algorithm that is suitable for connecting any two routers and using the second one as a repeater.
It looks like this:
- On the first one we enable the possibility of using its signal by the repeater;
- set the same channel on both (although this is not always necessary, but if there is a corresponding item in the settings, indicate its value);
- connect the second to the first in repeater mode;
- we use it.
The procedure outlined above is shown using routers as an example.
In some cases, there is an item called “Repeater” (not “WDS”) if the device settings have a Russian interface.
It can be in many different sections, so you will have to look for it. But be that as it may, if this item is there, you will definitely be able to find it.
What if nothing works out for me?
If something doesn't work out for you, there are several options:
- Try performing all the above procedures again, from the very beginning.
- Write in the comments under this article at what stage you are having problems, we will definitely help you.
- Contact the manufacturer of the devices (at least one of the two) you are using for assistance.
- Call a specialist from your provider to your home. These people should help their clients use the Internet in a way that suits them.
But there are not as many manipulations there as it might seem at first glance, so even a novice user can perform them all.
The main thing is to follow the algorithm described above and adhere (at least approximately) to the procedure that we also talked about earlier. Good luck with the setup!