Comfortable in all respects, a portable device - a laptop - still has a number of disadvantages. A kind of Achilles heel of compact computers is considered to be a cooling system that is far from perfect, the efficiency of which over time is limited by another unfavorable factor - the impact of the external environment. In particular, the grilles and filters of the laptop's air intakes are inevitably clogged with dust particles, which, in turn, negatively affects the favorable heat removal. Replacing thermal paste in a laptop is inevitable, due only to the time frame and quality of the substance used. However, let's take a closer look at such an important and responsible service process, as well as understand the main operational issues.
The art of foreseeing, or When is it necessary to replace thermal paste in a laptop?
Yes, it is precisely in time that a deviation from the norm is noticed (meaning the general moment of using the laptop) and the steps taken immediately to resolve the problem situation will help you avoid all sorts of computer troubles. You don't have to be a specialist to understand that a laptop needs maintenance. However, the main symptoms of a malfunction should be known, so to speak, "in person."
Diagnostics and monitoring: your helpers
Even those users who know how to change the thermal grease in a laptop will not rush to disassemble without thorough analysis. Unfortunately, the Windows operating system in all its editions does not have integrated tools for high-quality monitoring of the temperature indicators of the system. The only solution can be considered to view the current degrees generated by some system components through the BIOS.
- The CPU temperature is considered normal if the temperature is between 30-45 ° C when idle. Work under load - 50-65 ° С.
- Graphics processor in passive mode - 50-55 ° С, in active state - up to 85 ° С.
Install the free PC Wizard software, and you can always monitor the temperature readings of "hot" system components.
Alarm list
So, to your attention the price list of unpleasant surprises that most users encounter so often and which are rarely corrected. It is likely that you have already encountered something similar in practice. Nevertheless, for a beginner, this is invaluable information, familiarization with which may lead him to the question of how to replace thermal paste in a laptop.

- The accumulation of dust in the ventilation holes of the device prevents the passage of air in both directions.
- A clear noise from a cooling fan, as well as an incessant cycle of high rotation in any operating mode of the laptop.
- Some of the body parts of the device get very hot even after short-term use.
- Spontaneous shutdown.
Of course, this list can be significantly expanded. However, the last of the danger signals requires your immediate involvement.
How to change thermal paste in a laptop: an immediate process
Before proceeding with practical actions, you need to prepare a simple tool: a thin Phillips and flat screwdrivers, an unnecessary bank card, an ordinary paint brush, alcohol and a small piece of cloth. Get some thermal paste for sure. Yes, and remember: don't skimp on quality.
Planned retreat

It doesn't really matter which modification your laptop is. The only thing that you should pay attention to during the dismantling process is the structural features of the product. In other words, be careful when disassembling, as the mounting screws and various latches may differ slightly in their location from the models that will be discussed below. In order for the replacement of thermal paste in a laptop to pass without negative consequences, it is worthwhile to study in more detail the issue of the features of your device.
Step # 1. Removing the battery
As a rule, the battery in laptops is attached using special latches, which open with a little effort on the locking element: pressing or shifting to the side. There are usually two locks present.
Step # 2. Dismantling the casing segments
To get to the laptop cooling system, it is often required to disassemble almost the entire device, as they say, to the last screw. However, replacing thermal paste in a Lenovo laptop can be done in a completely different scenario. It is enough to unscrew only one protective cover, and access to the radiator is open. It is worth noting that most modifications of portable computers hide the cooling system deep enough in their body depths, so a universal plan of action will look like this:
- The back of the laptop has several compartments that are covered with plastic or metal covers.
- Unscrew the screws carefully, as there is a risk of stripping the thread.
- In some cases, the optical drive can be easily removed with just one bolt. By the way, replacement of thermal paste in MSI laptop is done without removing the DVD / CD recorder.
- Ultimately, you need to remove all attachments to the system: RAM, hard drive, wireless modules.
- The final step is to unscrew all screws. Be careful, as the missing bolt can secure the removable laptop component, which will be discussed in the next paragraph.
Step # 3: detaching the keyboard

At this stage, you should be more than careful, since the button module is connected to the laptop motherboard using a ribbon cable. The risk of damaging this connector is incredibly high if not careful.
Typically, the keyboard unit is secured with latches located around the perimeter of the module. However, the location of the clips for each modification is individual. Gently "sinking" the screwdriver in the area of \u200b\u200bthe upper edge of the keyboard, at the same time pry it up until it comes out.
Step # 4. Disconnecting internal device connectors
When you need to replace the thermal paste in an Acer laptop, you need to completely disassemble the laptop. Therefore, after dismantling the keyboard in the area that opens, disconnect all contact loops and unscrew the fixing screws.
Step # 5. Separating the main body parts

When all the bolts are unscrewed, you need to carefully (prying with a credit card) to separate the upper part of the plastic frame from the lower one. Next, you need to dismantle the motherboard for the next steps.
Step 6. Dismantling the cooler and radiator from the motherboard
Replacing thermal paste in an HP notebook is only possible if the cooling block is completely removed from the system board. However, this condition is relevant for the vast majority of laptop modifications.
- Removing the heatsink and heat pipes from the motherboard usually requires removing four screws in the CPU area and two in the graphics chip area. Depending on the manufacturer and model of the laptop, the fixing pattern may be completely different.
- At the same time, there is a certain mandatory algorithm for screwing and tightening the bolts, with the help of which the cooling system is fixed. The manufacturer marks the removable part with numbers that indicate the sequence and order of unscrewing.
Step 7. Cleaning and lubricating the fan
Use a brush to free the part from dust deposits. A drop of engine oil into the inside of the rotating element will soften the fan blades and save you from extraneous noise later on.
Step 8. Blowing off the radiator and removing residual traces of thermal paste

Remove the tape from the side fins of the cooling segment and use a vacuum cleaner to clean the inner compartments of the "refrigerator". The contact areas of the heat sink with the CPU and GPU must be thoroughly wiped with alcohol, then with a dry cloth. Replacement of thermal paste in a Samsung laptop can then be considered high-quality when the silicon surface of the component reflects mirror cleanliness.
Step 9. Correct layer and installation of the radiator in place
Don't think that the more "binder" you put on the parts, the better. This is a delusion, moreover, dangerous (in the sense of implementation)! Squeeze some thermal paste onto the plane of the cleaned part and use a credit card to stretch it in a thin layer over the entire surface.
Secure the cooling system segments to the motherboard according to the labeled script. Do not neglect this recommendation, as if you are skewed (fixing two bolts on one side, and then on the other), there is a high risk of damaging the silicon surface of the processor. And the paste will lie unevenly. As a result - inevitable overheating.
Step 10. Reverse process - assembly

Replacing thermal paste in an Asus laptop is done in the same way - according to the above instructions. Nevertheless, this brand of laptops is incredibly demanding at the time of assembly. Therefore, before disassembling a portable device, do not be too lazy to sketch a schematic drawing of your laptop (the screws are placed in the corresponding graphically displayed place as you disassemble). This is necessary so that the reverse assembly process does not cause any difficulties, since often during installation the screws do not correspond to the screw-in place. By the way, some manufacturers put markings on the fixation points that identify the type of fastener.
As you can see, replacing thermal paste in a laptop is, in general, not a complicated maintenance process, nevertheless, it is incredibly responsible and requires a lot of attention from the user.
How much easier it would be if the owners of portable computing equipment followed a few simple rules:
- Do not use your laptop in a damp room.
- Cold environments or hot weather can also be detrimental to a laptop, especially with prolonged exposure.
- During the operation of the compact device, make sure that the air intake openings are not blocked by foreign objects.
- Perform preventive maintenance on your laptop in a timely manner.
Depending on the intensity of use of the laptop, the thermal paste may have to be replaced after a year. However, now you know exactly when to resort to such a radical service method. All the best!
- Prices are 15% lower than purchase prices due to the purchase of components directly from manufacturers
- Express diagnostics of MSI laptops within 15 minutes - 0 rubles.
- Urgent laptop repair - from 30 minutes
- Official laptop repair warranty - up to 6 months
If your MSI laptop starts to slow down or shuts down spontaneously, it may be due to overheating of the device. Several methods are used to effectively troubleshoot problems:
- Clean the device. This is a good method and is most effective for newly acquired equipment.
- Purchase of a special cooling pad.
- Replace thermal grease. This method helps to reduce the temperature of the video card and processor to 10 degrees. It is usually used when cleaning did not give the expected result.
When it becomes necessary to replace the thermal paste, the owner considers two options for resolving the issue. One of them is self-replacement. Such a procedure without the necessary knowledge and experience imposes risks on the performance of the equipment. The intelligent user will not risk their laptop and will trust the experts.
MSI Laptop Repair Service Prices
Experienced technicians from our service center will quickly replace the thermal paste in your MSI laptop. This professional procedure will relieve you of the problems arising from overheating of the device for a long time. After the procedure, high-precision equipment will test the device and determine its current performance. After the successful completion of services, you will receive a warranty document for up to 6 months.
Over time, factory thermal grease in notebooks (netbooks) dries up and hardens to a terrible state. The more the thermal paste has dried, the harder it will be to remove. Dried thermal paste becomes absolutely non-conductive, heat is not removed from the elements, which leads to constant overheating of the processor and video card and can cause their breakdown.
Therefore, if you notice that your laptop or netbook has become much hotter, try not to delay cleaning the cooling system and replacing the thermal paste with a new one.
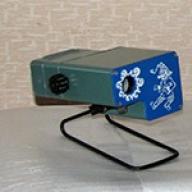
In this article, I will talk about parsing and replacing the thermal paste of the MSI U210 netbook.
MSI U210 netbook symptoms: strong heating of the case, noise of the fan, charging every other time (you need to move the plug) and slow operation of the system.


We unscrew all the bolts from the bottom.


After all the bolts are unscrewed, remove the top cover and turn off the hard drive.


Now you need to remove the keyboard. To do this, turn the netbook over and open the top cover. The keyboard, in addition to the unscrewed bolts, is held by small latches. Carefully push them aside with a screwdriver and lift the keyboard.


We can proceed with removing the bottom of the netbook case and removing the cooling system. We turn over the netbook and remove the lower part of the case. After that, we unscrew and remove the cooling system.


We remove the old thermal grease from the trumpet tubes and from the processor. Since it is impossible to simply erase the thermal paste, due to the fact that it is very dry, it is necessary to soak it several times in alcohol. After each soaking, gently wipe the processor with a cloth until it is completely cleaned of the old thermal paste.


As usual, I use KPT-8 paste. Someone may be against it, but the paste has worked well, does not dry out over time, and you can buy it in almost any radio store.


About charging.
The owner of the netbook with great diligence inserted the charger and several times caught on the wire. As a result, the plastic connector crumbled and the soldering on the back of the connector fell off. The connector was successfully soldered, and the plastic part was glued.
We assemble the netbook and return it to the owner.
After replacing the thermal paste, the netbook became much less hot and stopped slowing down.